Deer are distinguished by their strength and grace. They often inspire artists to create works of art. However, it does not always work out draw this animal, looking at a photograph or image made by a master. Beginning artists and children will have the most difficulties. Step-by-step following of the instructions is a good help.
Drawing tools
First of all, you need to prepare the canvas and tools that will be used to create the drawing. If the artist is a child, the canvas will be paper. You can take a regular sheet from a school drawing album or use Whatman paper.
When choosing paper, remember: it is divided into 3 types depending on graininess. Also, different types of paper have different density.
The main tool for drawing will be a simple pencil. It will be used to create contours at the initial stages. An eraser will be needed to remove unnecessary lines.
Once the outlines are ready, you can move on to adding color to the resulting drawing. You can use pencils, markers or paints for coloring.
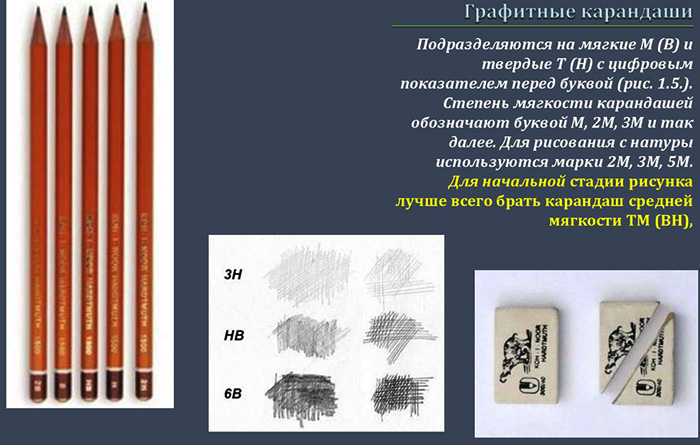
The following pencil options are available on the market:
- graphite. A common type that allows for precise and smooth strokes;
- coal. A versatile tool that expands the variability of strokes and various effects;
- pastel. It is an excellent medium for drawing without water, palette and brush;
- watercolor. They can be used separately or together with watercolor paints.
Also available for artists are inks and drawing pens.
If you plan to work with paints, you won't need many different colors. It's enough to take 3 colors - red, yellow and blue. Other colors are obtained from them by mixing.
For example, if you mix red and blue, you get purple. By changing the proportions of the mixed paints, you can achieve different shades. This will give the young artist a wide scope for imagination and experimentation.
For the youngest children, you can use a stencil created by tracing the silhouette of a deer.
Master classes
A deer (it is recommended to start drawing for children when everything is ready) can be depicted in various ways. Their number is constantly increasing, because each professional artist has his own techniques.
Below are some examples of drawing a deer. They will be arranged in order of increasing difficulty.
Simple drawing
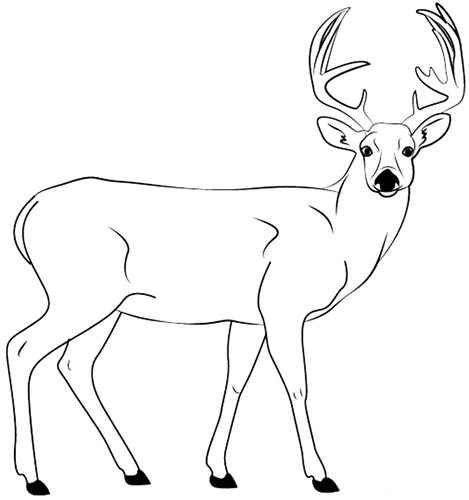
A simple example of drawing a deer will be concluded in the following steps:
- Draw 2 ovals: 1 of them will play the role of the head, and the 2nd will become the body. Therefore, 1 oval should be located higher than the other. Also, these 2 geometric figures should differ in area. The oval of the head should be several times smaller than the oval of the body.
- Draw the deer's limbs. As befits all mammals, this animal walks on 4 legs. Each of them should be depicted by 1 line. A total of 4 lines should be drawn, each of which departs from the body. Also, each of the lines should end with a small triangle. These will be the deer's hooves.
- Start drawing the deer's muzzle. To do this, you need to draw a long nose and ears in the head area.
- Draw 1 of the horns. At the same time, create the outline of the 2nd deer antler.
- Connect the head and body by drawing a pair between the 2 ovals. This will be the animal's wide neck.
- Make the torso more curved.
- Outline each of the 4 limbs with 2 lines. This will give the deer legs volume.
- Draw a small tail of the deer.
- Add a beautiful detail. This could be, for example, a scarf. Then the person looking at this picture will immediately understand that it is winter outside.
- Color the resulting image with colored pencils or paints.
Drawing of a little baby deer
Children can try to draw a small deer.
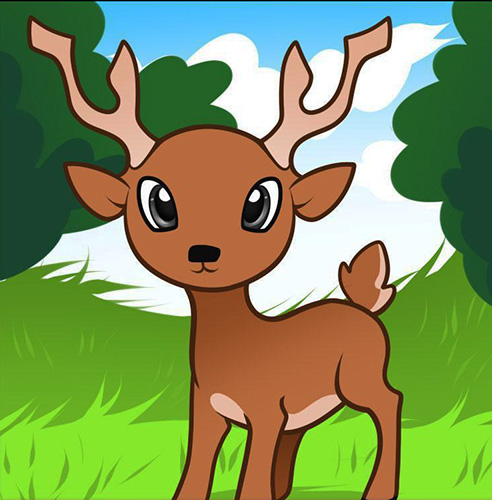
This creative process will take place in 4 stages:
| No. | Stage | Description |
| 1 | Image of an animal's face | To do this, draw a circle in the center of the canvas, and an oval slightly below. The circle will become the head, and the oval will become the body. To make it more convenient, it is better to draw 2 intersecting lines and then connect them |
| 2 | Working with elements above and on the head | The sequence of actions is as follows:
1. Draw 2 small ovals at the top of the head. After tracing them, the deer ears are formed. 2. Draw small horns that have a rectangular shape. 3. Draw the eye. It will be 1, since the fawn in this case is shown in profile. The eye can be an oval, inside which there is a small circle, playing the role of the pupil. 4. Finish drawing the nose and mouth |
| 3 | Drawing the torso and limbs | When drawing legs, it is important to keep in mind the hooves. Another important detail of the drawing is the small tail. |
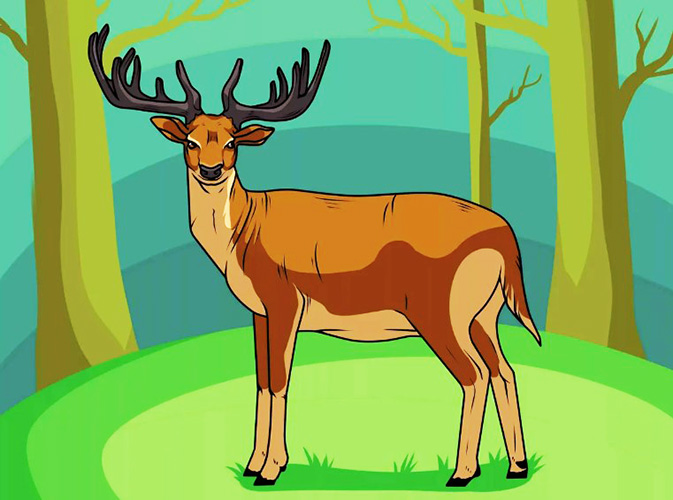
| 4 | Complementing the drawing | To liven up the drawing, you can add a beautiful landscape in the background. For example, it could be trees, flowers or a blue sky. |
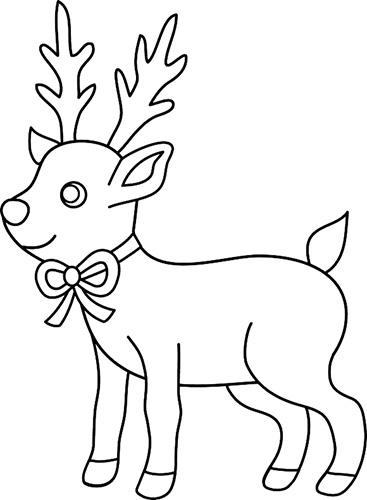
Reindeer
The deer (the drawing for children can be made more complicated after getting acquainted with the simple version) can be northern.
The process of drawing it goes through the following stages:
- Create a sketch in the central part of the paper. There should be 2 ovals here: 1 is the body, and the 2nd is the head. The body should be located slightly lower, be larger and more elongated. At the same time, the line in the back area should be slightly curved.
- Connect both ovals with a pair of lines. The result will be a voluminous deer neck.
- Draw the outlines of the limbs.
- Proceed to detailing the deer head. There should be ears, eyes, nose, mouth.
- Pay special attention to the main distinguishing feature of the deer – its branched antlers.
- Draw the limbs, not forgetting to highlight the hooves and thickenings in the main joints.
- Take an eraser and start removing all unnecessary lines that were used as auxiliary components of the drawing.
- To give the reindeer's fur thickness, since it lives in cold regions, you need to make the line of the chest and limbs zigzag.
- Highlight the stomach, chest and eye areas.
- After drawing a small tail, add some details, such as a harness and trees in the background. In this case, the picture will be more lively and interesting.
Drawing of a deer with colored pencils
Deer (a drawing for children can be done with just a simple pencil, or together with colored pencils) in the colored version will require the preparation of a simple HB pencil and a set of colored pencils.
If a small child is going to draw, it is better to use 3-sided pencils. They are well suited for a child's hand.
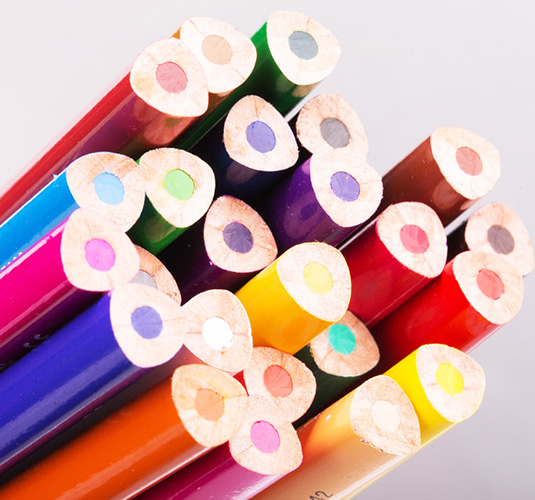
A young artist will be able to work with such tools for a long time without complaining of fatigue. It is also better to use pencils that have a thick lead, which means they cover a larger area when painting. Thanks to this, muscle tension will be reduced.
When everything is ready to work, you can start drawing:
- Draw a large oval in the center of the paper. This will be the animal's body.
- Slightly to the left and above the oval, draw a small circle – the deer’s head.
- Connect both figures (the large oval and the small circle) with a short straight line. This is where the deer's neck will be located.
- On the right side of the large oval, draw another small circle. It should be slightly larger than the head. This will be the back of the body.
- Proceed to drawing the details of the head - to the left upper part of the drawing. Here draw an oval ear with a slight point and a rectangular muzzle.
- Between the head and the body, draw a couple of lines to indicate the deer's neck.
- Draw the limbs. There should be 4 lines under the body, each of which will represent 1 leg. The lines should end in small quadrangles, representing the hooves.
- Draw the horns. They should be represented by a steep arc line with branches.
- Mark the position of the tail.
- In the head area add an eye and a nose.
- Draw the ear and the curve of the "bib" located on the front side of the neck.
- Using an eraser, remove the extra lines, leaving only the basic outlines of the deer's body.
- Draw a few more lines under the body to add thickness to all 4 limbs.
- Go over the drawing again with an eraser to remove all auxiliary lines.
- Draw the abdomen on the body between the pair of front and back legs.
- Draw a small tail at the back of the body.
Coloring the deer silhouette with colored pencils is done as follows:
- Using an orange pencil, shade the area of the body, limbs and tail.
- Strengthen the tone at the edges using a light brown pencil. The strokes should be very short.
- Draw the fur. To make it more realistic, the artist can imagine that he is combing the animal, and the role of the comb is played by a colored pencil. The pencil should be moved on the paper in the same way as you would move a comb when combing the fur. The strokes applied to the surface of the body should start from the head and go to the tail.
- Leave small areas unpainted. This will create small white spots, which will make the deer look beautiful and realistic.
- Leave the area under the belly and under the tail, as well as the front of the neck, white.
- Identify the volume of the body and the density of the shading towards the edge, as well as under the abdomen.
- Take a grey pencil and start colouring the horns. Each hoof should be the same colour.
- Use dark brown color to draw the head.
- Work with a black pencil. It should be used to color the pupil and nose, and also apply this color to the hooves.
- Take an eraser and use it to lighten a little the areas near the eyes and nose, the “bib” and other parts that should be light.
- Draw along the contour lines with an ocher pencil.
Running deer
The deer (the drawing for children can be either static or dynamic) can run on the ground.
Its limbs do not touch the ground while running. They bend, so it is important for the artist to know the location of the joints on the deer's legs.

The work is carried out in the following stages:
- Draw the main lines for the animal's body.
- Create basic lines for the neck, head and ears.
- Draw the lines of the body and limbs.
- Draw the hips and add volume to the neck.
- Depict the deer's main pride - its antlers. They should be long and branched.
- Draw a small eye at the top of the head. It will be visible 1, since this running deer is shown in profile.
- Detail the ears and nose.
- Add missing limbs.
- Detail the limbs by adding hooves to each one.
- Show that the reindeer's body is covered with thick fur, which reliably protects it from the northern cold. The fur should run all over the body and head.
- Color the deer. Use colored pencils or paints for this. The child can give his deer any colors. You can also add a beautiful background, such as green vegetation.
Canadian forest deer
The process of drawing a Canadian forest deer is carried out as follows:
- Draw the body, which for now can be represented by an oval-shaped figure.
- Start creating the contours of the body and neck.
- Finish drawing the muscles on the body.
- Draw part of the forelimb and the shape for the ear and muzzle.
- Finish drawing the muscles on the hind limbs.
- Draw some parts of the face and start drawing the horns.
- Finish drawing the limbs and start sketching the outline of the horns.
- Having finished drawing all 4 legs, apply a shadow to the animal's body using the hatching method. At this stage, finish drawing all the details of the head and horns.
- Add fur and shadows to the deer's body.
This completes the work on creating a drawing of a Canadian forest deer. Since only a simple pencil was used for drawing, the drawing is black and white. However, it can be colored with colored pencils or paints.
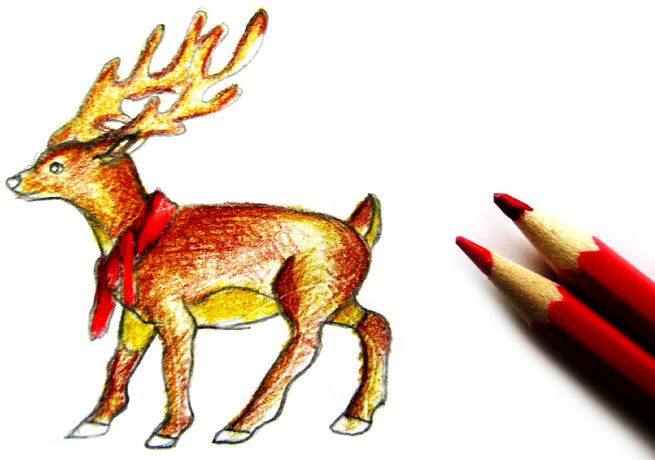
Fairytale deer in gouache
For this art work you will need:
- Whatman paper, A3 format;
- gouache (3 colors: white, blue, purple);
- several brushes;
- palette;
- foam sponge.
Having prepared the necessary materials and tools, you can begin the creative process.
To do this:
- Create a background that should be mixed. The best tool for creating a background is a foam sponge. You need to apply a number of shades of blue gouache to it, and then, making movements from left to right and, conversely, from right to left, distribute it over the pre-moistened surface of the Whatman paper.
- When the canvas dries, draw along its edges with a brush dipped in blue and purple paint.
- Using a brush and purple gouache, outline the contours of the deer. At the initial stage, they will be 2 figures - a large oval in the center of the sheet and a small oval located slightly above and to the left. The figures should be connected by a pair of lines.
- In this case, the deer is looking to the left, so leave some space on the drawing paper for its tall, sweeping antlers.
- Paint the resulting outline with the same color and brush.
- Proceed to drawing the limbs of the fabulous purple animal. The legs should be slender: first draw 2 of them - those that are located closer to the viewer: both left legs.
- Finish drawing the right limbs. The deer is standing still, so the position of its limbs should be calm.
- Start drawing the deer's antlers. They have an unusual shape - they stretch out far and twist into a spiral. You should immediately set their size. The back of the antlers will be much longer than the front. They bend in different directions and should have many fabulous curls.
- When the magic horns are drawn, finish drawing the ear on the head, a small tail at the back and 4 hooves - 1 on each leg.
- Draw the background. There will be several bushes here. They can be drawn using curls. They are also used to draw snowdrifts.
- Add a wavy line frame to the drawing.
- Add some patterns using white paint.
A deer is a large and graceful mammal, the main distinguishing feature of which is its beautiful branched antlers. It is not difficult to draw this animal, especially if you practice.
Beginner painters and children should be prepared that at first the drawings may not be very beautiful. However, with each new attempt the drawn deer will look better and better.
Video about deer drawing
Master class on drawing a New Year's deer: