Crafts for school and kindergarten every parent has done it at least once. This creative season begins with the onset of autumn. The season is rich in harvest, bright atmospheric colors, so materials for crafts can be borrowed from Mother Nature. Tree, leaves and other gifts of autumn can act as the central element in the composition, or complement it.
Autumn crafts from natural materials
All creative compositions made with your own hands can be divided into several groups:
- wooden crafts made from natural logs or processed wood;
- ikebana using various natural materials – leaves, dried flowers, etc.;
- still lifes created from paper;
- plasticine figures with tree fruits.
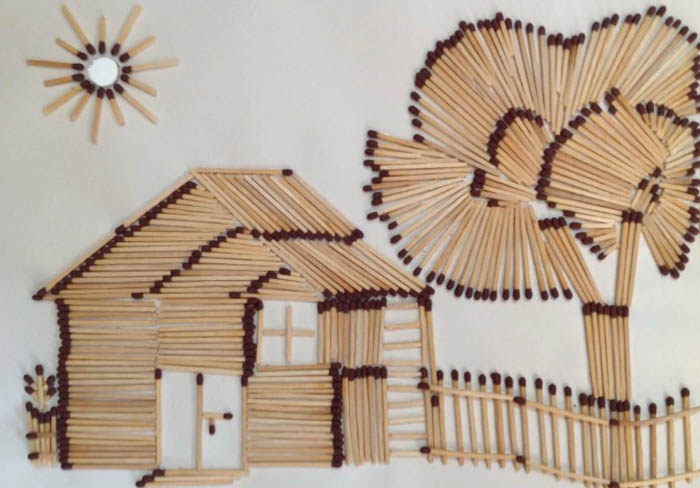
Autumn crafts can also be made from scrap materials using office and art supplies. Decorative elements such as branches, acorns, chestnuts and more will help add natural beauty to them.
Children will be interested in working with “live” material, observing how they can play with a detail and be inspired by it to create an entire composition.
Wooden house
When working with natural materials, it is important to be careful when in contact with them. Some crafts break and crumble due to dry wood. You can also additionally treat wooden elements with varnish, if necessary.
Crafts for the garden or school are almost always made from freshly collected elements.
To create a wooden house you will need:
- thin tree branches (not dry);
- dense thick bark (dry);
- buckwheat;
- medium-thick branches;
- green plants (weeds);
- rosemary or sprouts of the beautiful herb;
- PVA glue;
- pencil;
- stationery knife (use with caution);
- cardboard;
- cotton wool;
- hot glue and glue gun (for parents);
- sand or dry crushed clay;
- art or office glue.
This work does not require paints, as the applique will be created exclusively from natural materials. Different types of glue will be used for gluing.
It is acceptable to color some areas of the cardboard, but this is not strictly necessary.
- A diagram of the house's location must be applied to the cardboard backing.
- Leave the perimeter untouched, and cover the rest of the surface with a thin layer of office glue.
- Let the glue soak in a little. You will need to sprinkle sand or dry clay on top of it.
- When the sand mixture dries, add PVA in the amount of ½ part of the office glue.
- Sprinkle buckwheat groats onto the fresh adhesive layer.
- When the workpiece is completely dry, you can start decorating the house, but first you need to make it.
- Cut a square with equal sides out of cardboard. The length of the side should match the length of the base prepared for the house.
- Next, cut out 2 triangles with a base length equal to the length of the square.
- The triangles need to be glued with art glue or PVA to the front and back of the house.
- Make the lid from a rectangle so that its side parts slightly cover the edges of the squares.
- Place thin branches on the roof. You can use hot glue for this.
- Place a medium-thick branch on the roof itself, where the branches join.
- Cut 4 small squares from the bark pieces to imitate the chimney. If the child cannot work with a knife, parents do this step for him. It is also acceptable to break off excess parts of the bark with your fingers to obtain the appropriate shape.
- Glue the chimney with hot glue on top of the thin branches.
- A piece of cotton wool will imitate smoke. It should be glued with PVA glue.
- Cross two oblong pieces of tree bark together and install them on the end of the house, imitating beams.
- Under the beams there will be a canopy made from a thin piece of bark.
- The door can be made of cardboard. If desired, it can be painted black.
- All greenery should be arranged so that the stems rest on the house. Pour a few drops of hot glue into the base.
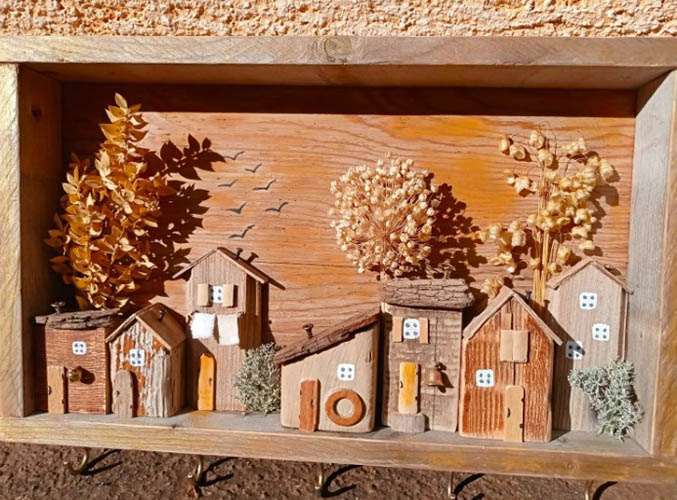
Since natural materials cannot be glued with stationery glue due to its plasticity, you will have to work with hot glue. Parents should follow all steps where hot glue and a stationery knife will be used.
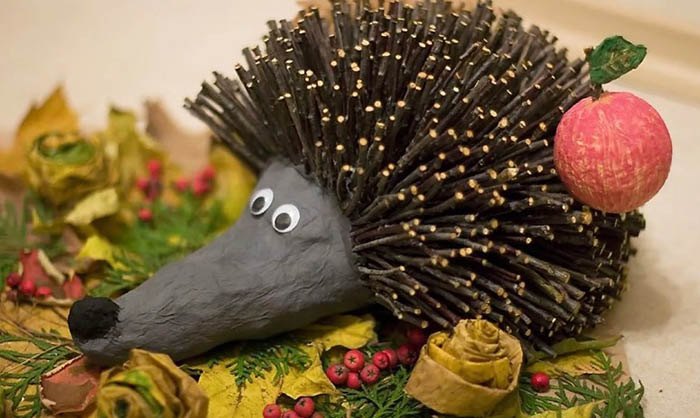
Hedgehog in dried flowers
Autumn crafts in the form of a combination of natural gifts of nature with unusual decorative elements give individuality to each masterpiece. This type of art is popular among those who like to dry and collect flowers.
Buds, dried flowers, tree branches – all this makes up the future composition. If you add a beautiful design in the form of a box, decorate with a hedgehog made with your own hands, you will get a small forest glade that will surprise even classmates.
For this master class you will need:
- the box is not high and small in size (approximately 20*15 cm);
- dried flowers, leaves, moss;
- seeds;
- plasticine;
- dry tree branches;
- PVA glue;
- hot glue and gun;
- stationery knife.
The work will involve objects that children may not yet own.
Therefore, hot glue can be replaced with stationery or PVA glue, and the knife with scissors.
- From a cardboard box (without a lid), cut out two parts of the sides that connect to the corner. To do this, you need to make vertical slits, stepping back from the corner about 5 cm on each side.
- Next, cut both parts from the base, creating an "opening" without walls. Round off the corners.
- You can add herbs and dried flowers to the resulting box. It is advisable to fix them with PVA glue.
- Glue the remaining dried flowers and branches in a random order to the back wall of the box in a vertical position. It is advisable to fix them with hot glue.
- Place a hedgehog in the center of the composition, which can be molded from plasticine.
- If the plasticine does not hold its shape well enough, you can replace it with self-hardening clay. It dries slower, but can be painted.
- The molded hedgehog also needs decoration. You can plant seeds on its back. These will be its needles.
- It is enough to place the hedgehog on dried flowers, so it is worth doing without gluing
An autumn composition can be presented at a school competition, provided as a decoration for a class or group. Similar crafts can be made from leaves, choosing a thematic sketch of the background and the main element. The finished box can be painted or covered with festive paper.
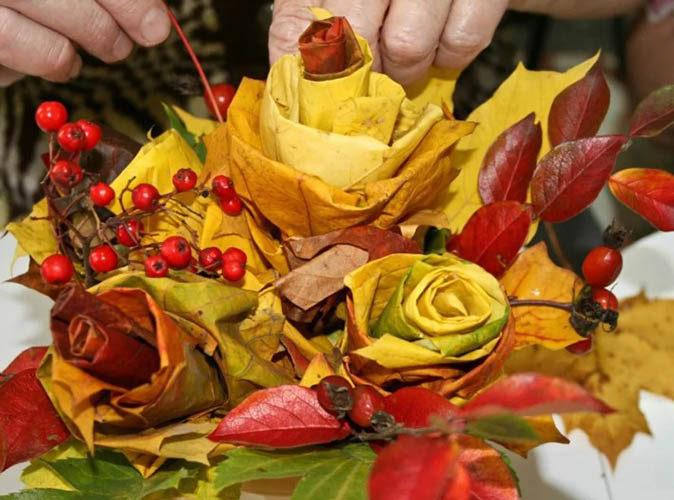
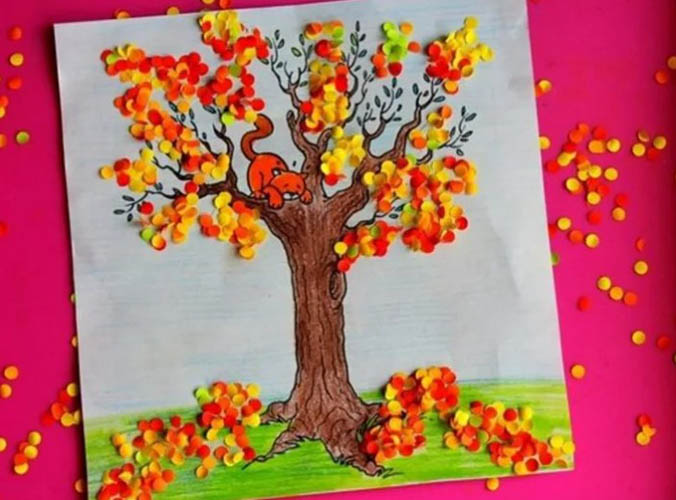
Bouquet of leaves
Most often, parents and children prepare such applications for autumn holidays at school and kindergarten. Children actively collect materials for creativity, and parents think over an unusual composition. Bright and beautiful results are always obtained - still lifes, interesting landscapes and even postcards. This master class will describe step by step the process of creating a bouquet of leaves.
To do this you will need:
- about 20-30 large maple leaves of any color;
- rose hips or other berries;
- willow leaves and branches;
- scissors;
- a stable vase, possibly made of clay;
- threads.
In the process of creating a bouquet, you need to make rosebuds separately, one by one.
The process is interesting, but requires accuracy and perseverance.
- Fold the sheet in half horizontally so that the front side is on the outside.
- Make a tube from one edge, rolling the sheet towards the center.
| Type of paper | Characteristics |
| Normal | Office or stationery paper that does not have specialized signs. Suitable for creating applications, can be used on both sides. |
| Velvet | The paper is used to create postcards and memorable greetings in the form of cards. The surface gives volume to the compositions. |
| Holographic | The paper is shiny and shimmers, but is used to decorate some elements. The sheets are foiled, there is a backing of dense texture. It can also be used for applications where glue is required. |
| Crepe | Crepe paper, unlike corrugated paper, does not have the required volume when stretched. It is needed to emphasize the relief and texture of the applique. Corrugated paper is used to create large flowers, where you need to stretch its individual parts to form unusual 3D elements. |
| Self-adhesive | The base layer consists of paper and glue, which is convenient for creating central applications in the composition. Complex decor can be made using plain, transparent or colored paper. |
| Origami paper | Origami can be made from any thin and thick sheets, but there is special origami paper that is highly dense. The specialized type of material is flexible, so it can be easily folded without creases or cracks. |
| Craft | Thick sheets of kraft paper are used for packaging, while thinner ones are used to decorate crafts. It comes in different tones, often with drawings and prints in black and white or color. |
| For scrapbooking | Craft paper is initially textured and patterned. It is most often used for gluing the top to imitate the texture. Glowing fluorescent varieties of this paper can be used to decorate calendars, books and other paper crafts. |
- Hold the created bud with one hand, and do the same with the other - roll up the leaf. However, in this row the leaf should wrap the resulting bud, so you should try to place the free edge of the first bud to the second leaf, and pinch the joint with your fingers.
- The formed second tier needs to be twisted towards the center, so first you should tuck the right part and twist the left part at an angle so that the top edge goes down below the previous one.
- Fold the free edge of the second sheet outward, forming a rose petal.
- The third sheet, previously folded in half, is also applied to the bud, but the edges are slightly folded towards the center, without tightening or pressing the sheet tightly to the “back” of the bud.
- The buds can be secured with a thread by tying it at the base of the flower.
- Form the remaining roses using the same principle.
- Once the flowers are prepared for the bouquet, you can begin assembling it.
- Place all the buds in a vase, immediately arranging them beautifully so that they look the same in the bouquet. You won't be able to fix anything later.
- Decor from branches and leaves of willow, rose hips or other fruits can be beautifully distributed in the composition.
- Bend willow branches or twigs and secure them at the base of the bouquet with thread.
Autumn crafts in the form of bouquets can be created from any large leaves. Birch (there are more than 8 varieties), poplar or elm leaves will do. The more buds there are, the larger the leaves should be. Consequently, the finished bouquet will be much larger. It is important to choose decor to fill all the voids formed between the flowers.
From paper
Alternative materials for creating autumn compositions are paper. There are many varieties of this material that are suitable for different types of creativity:
This tutorial will use heavy duty craft paper to create the tree.
You will also need:
- wood or metal base;
- wire with a diameter from 1 mm to 5 m;
- PVA glue;
- thick, single-color kraft paper;
- superglue;
- acorns;
- scissors.
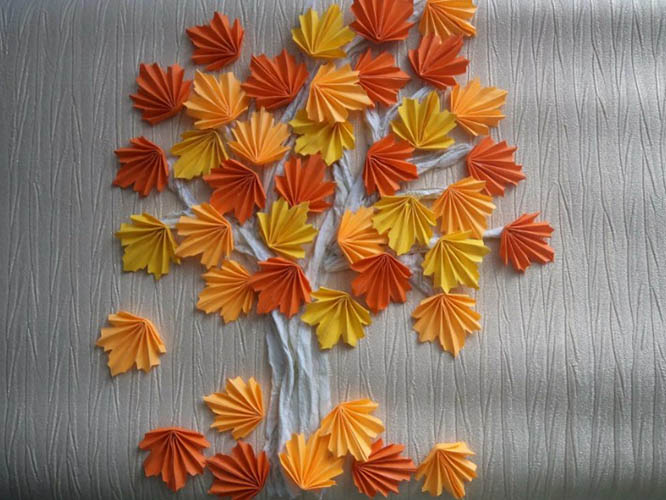
In the process of creating such a craft, it is important to record the intermediate result of the design of the tree branches:
- First, you need to install the base on a flat surface. This should be a stable material made of dense wood or metal.
- A soft layer of foam plastic or polystyrene foam, 2-3 cm thick, must be glued to the base.
- The base needs to be wrapped in sand-colored craft paper.
- Next, insert pieces of wire vertically into the soft layer of the base, forming the basis for the future tree.
- The next step is to form the tree branches – cut out 20*10 cm sheets from craft paper.
- Each sheet should be wrapped loosely around all the wires, while simultaneously twisting the paper in one direction.
- The formed bends and creases will imitate tree bark.
- The decoration will be an acorn. You need to place several at the base of the tree, securing them with superglue.
Autumn crafts on this theme can be made from other types of paper. Foil materials will look beautiful in a forest pine forest, origami paper can be used to make leaves and inflorescences, and crepe paper will produce amazing buds, flowering buds and foliage.
If desired, you can combine several types of paper to add variety to the craft.
From plasticine
You can make the most complex compositions from this material. But it is most interesting to combine it with other materials, even natural ones. This master class will describe the process of creating a snail. Such a craft is suitable for a kindergarten, and the child will be able to create such an applique himself.
To work you will need:
- a few chestnuts;
- plasticine of yellow and brown colors;
- a stack for cutting plasticine;
- beads or beads with a diameter of 2-3 mm.
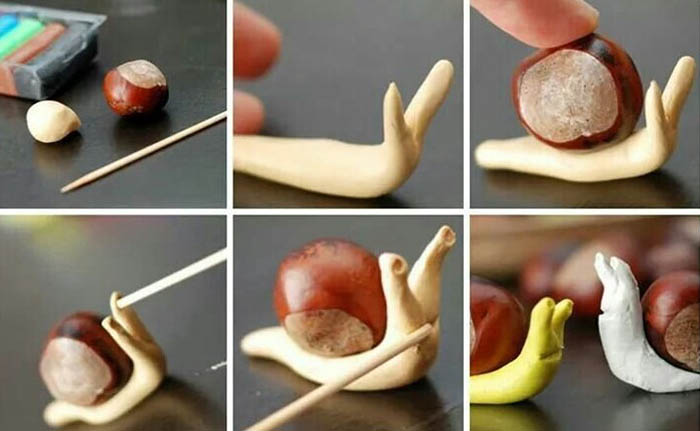
In the process of creating snails, the plasticine needs to be warmed up and kneaded well:
- Form long “sausages” from yellow plasticine to create the body.
- Each piece is a separate blank. Bend the formed parts of plasticine to form the body of the snail.
- Place a chestnut on the snail's "back". This will be its "house".
- The joint between the snail's body and the chestnut can be masked with a thin layer of yellow plasticine.
- You can make the head and eyes from brown plasticine.
- Glue all the pieces of plasticine onto the base to form the craft.
There can be many snails. They will look beautiful on their own or in combination with other elements of the composition. If desired, you can decorate the chestnut with other decor, glue it with glitter or paint it with artistic paints. Each element should be varied so that the overall appearance of the craft looks more interesting and dynamic.
Autumn children's crafts always turn out bright, unusual; causing admiration and genuine interest in the process of creation. Natural material is distinguished by its static nature. It is beautiful in volumetric work, where it is necessary to arrange various gifts of nature, leaves, flowers and more.
As accent elements in the overall work, such materials attract attention and please the eye. Each dried flower or tree branch can become the central decor in a paper applique or a creative plasticine masterpiece.
Video about autumn crafts