When processing fabric during sewing, to avoid fraying of the edges, an overcast stitch is used. It can be done in any way, even by hand. How to do it correctly by hand or by machine is described step by step further in the article.
Methods of sewing overcasting of edges of products
The appearance of the product depends on the quality of the processing. Thanks to modern techniques and equipment for overcasting products, the appearance of terry is prevented. Overcasting stitch is the final stage of fabric processing during sewing. It can be used to fasten different fabrics, obtaining a neat cut.
Sewing overcasting of the material edge is done in several ways:
- Manually. The method seems simple, but requires a certain amount of skill and training. This method is good for processing thin materials or performing decorative finishing on thick fabrics. If necessary, any product can be processed manually.
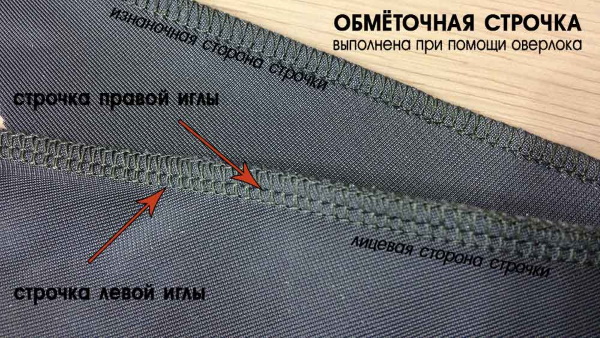
- Overlock. The device is designed for professional processing of the edges of the product, it can cut off excess fabric, protruding threads and the result will be a perfect overcast cut.
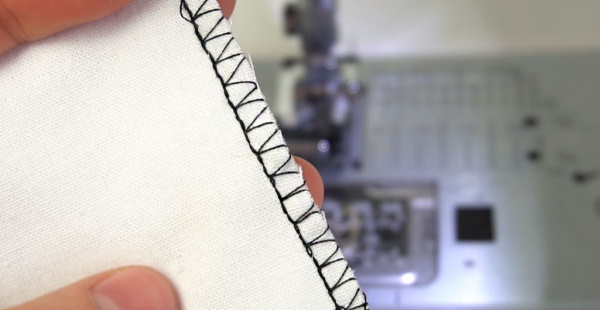
- Sewing machine. One of the functions of the device is to process the edge of the product. For overcasting, a certain type of stitch is selected, which performs an overcast seam. The processing is somewhat different from overlock.
- Without processing. Some types of non-woven fabrics do not require overcasting, they do not fray. These include: leather, suede, neoprene and others.
- Burning. This method involves treating the cut with fire, as a result of which it melts. The method is suitable for fabrics with synthetic fibers. The disadvantage is the resulting hard edge of the product, which can interfere with wearing.
- Special means, which are used to trim the edges and glue them together with a special composition that has no color. After drying, the fibers will be glued together.
- Zigzag scissors. Before cutting, the fabric is ironed and a machine stitch is made at a distance of 0.5 cm from the seam. It is better to process edges in this way on fabrics with a tight weave.
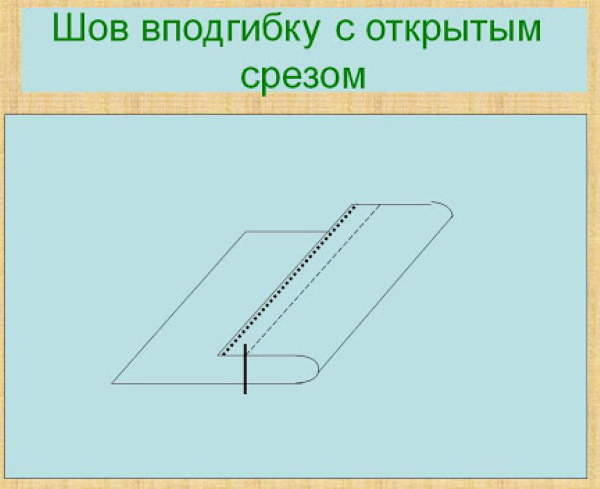
- Open-cut hem. More fabric should be left for seam allowances, up to 3 cm. The ironed edges are folded over and stitched.
- Double seam. It can be reverse, French, or lapped. This way the cuts are connected and fraying is prevented.
- Edging. The method of processing the product is suitable for outerwear made of thick, crumbling fabrics. It looks neat on the reverse side.
Practical application of overcast stitches
Overcast stitch is a hand stitch made by wrapping the thread around the fabric, seam. The processing method has become widespread.
Hand quilting stitches are used:
- in the absence of an overlock or when the sewing machine does not have an overcasting function;
- to repair frayed edges;
- for decorative processing;
- the machine does not accept the fabric used;
- when it is necessary to overcast buttonholes;
- to connect the edges of the product.
Using the overlock stitch you can achieve:
- strengthening the edges;
- finished, beautiful appearance of the product;
- finished outline, no fraying.
Materials and tools
To do hand stitching, skill alone is not enough; a certain set of tools is required:
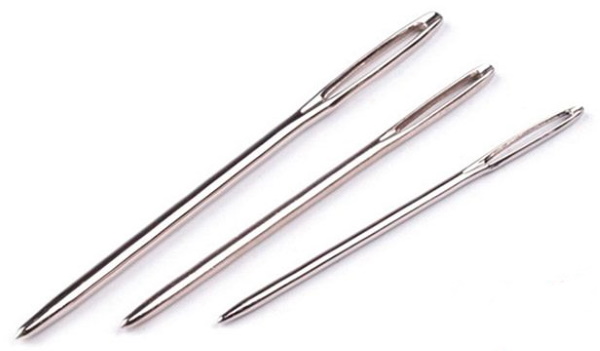
- needles there are different ones, they are selected depending on the length, thickness. It is better to take high-quality sewing needles right away. To maintain the integrity of the fabric, it is important that the tool is sharp, without rust, bends;
- threads. They have their own markings, depending on the thickness. The color range is very diverse, selected individually for the material;
- thimble protects the finger from being pricked while sewing, helps push the sewing needle into the material. It should fit the finger well and not slip off;
- scissors are used either with straight edges or specially curved for embroidery;
- chalk (marker). Draws a line on the material. The marker is sold water-soluble, does not leave marks on the fabric.
How to do an overlock stitch by hand?
You can do the overlock stitch manually step by step, despite the lack of an overlock machine at home, the edge processing on which always turns out high-quality and neat.
Without this device, making manual stitches will not be difficult. It will take more time, but the result will look decent.
Tips before you start
Before you start working, you need to assess your capabilities and make sure you have the tools.
Preparation for work:
- Selecting a needle. It is taken depending on the required length and eye opening. The needle should be of high quality with a special coating for better threading and smooth sliding through the material. The thicker the needle is selected, the thicker the thread should be.
- Prepare a thimble to protect your fingers and nails from damage.
- Before starting, it is advisable to test the type of overcasting on a piece of fabric, then perform it on the work piece.
- The working surface of the table should be smooth and well lit.
- It is recommended to start stitching from the back side of the material. This way the knot will not be visible, it will be on the back side.

Do not use:
- blunt, bent, rusty needles;
- embroidery needle because it has a blunt tip.
Types of manual overcasting of products, step-by-step description
Well-made overcast stitches will prevent threads from falling out from the edges of the material.
Hand overcasting is performed for:
- joining the edges of the product;
- decorative stitching;
- decorations.
You can do an overcast stitch manually step by step using different techniques, which depend on how thick the material is and what part of the product needs to be processed.
Manual overcasting of products can be of the following types:
| Type of overcasting | Direction of stitches | Information and brief reference | Execution |
| Bias (overlock) | From right to left | It is used more often than other methods. It is used for overcasting and hemming products. The stitch length reaches 5 mm. They are not pulled too tight. | The needle is inserted into the fabric from below and pulled out from above. There are 4 stitches per 1 cm of seam. |
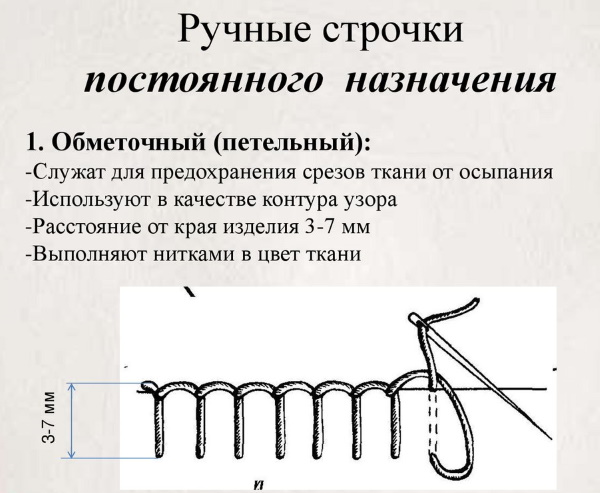
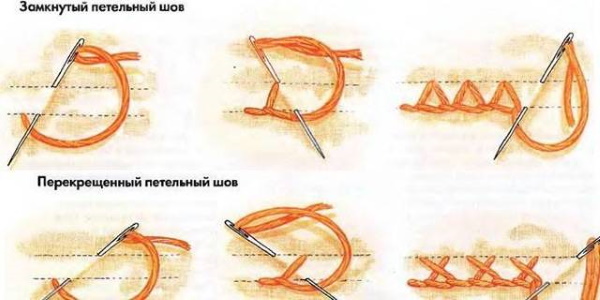
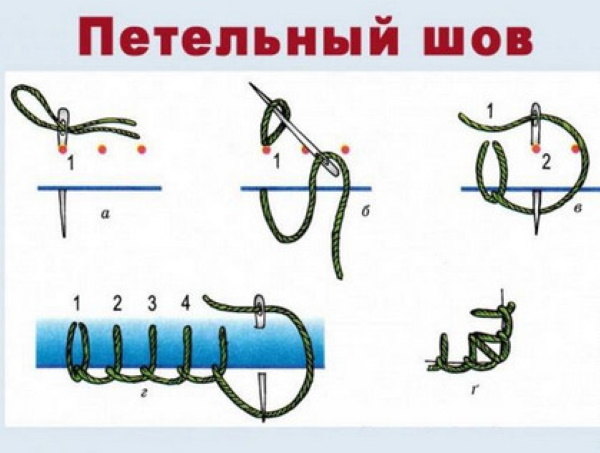
| Loopy | From left to right | The type of overcasting is suitable for fabrics with increased fraying along the open edge. It is performed with a double or single thread. The method is similar to the bias overcasting method, the difference is in threading the needle into the loop before tightening. The stitch is performed up to 6 mm long. There are 3 quilting seams per 10 mm of fabric. | 1. It is necessary to make a loop through which the thread is pulled and tightened. The beginning of the thread is adjusted to the edge of the cut. 2. If the thread runs out, the remaining end of the old and new thread is pulled through the loop made for the next stitch. The ends of the threads should lie along the cut. 3. Stitches are made, the ends of the threads are slightly pulled up and trimmed. 4. The last quilting stitch is done several times in one place. The material is turned inside out. The needle is inserted under the last stitches, the threads are pulled up and cut. |
| Hemmed (in twist) | From right to left | This method is used to process open edges of transparent, slippery, shaggy items. The edge is rolled up and stitched with a frequent oblique quilting stitch. The sewing needle goes from the bottom up. The distance between the hand stitches and the length should be the same. The frequency of the stitches is selected based on the degree of thread loss in the fabric. | 1. A small roller is rolled from the material, placed on the finger of the left hand, and held by adjacent fingers.
2. Take a thin needle and stitch in a circle with frequent stitches located close to each other. The needle moves "towards you". |
| Edge | From right to left | The method performs two functions at once: it eliminates fraying and hem the product. | The technique is the same as the bias stitch, with the difference being the additional capture of several threads of the material to which it is being sewn. |
| Cross-shaped | From left to right | It is done both in a decorative way and by sewing. | The fabric is stitched from the bottom up. To make the stitching beautiful, it is important to make the punctures at equal intervals. |
| Hidden hem | From right to left | This is how a hidden hemmed cut of fabric is obtained. Products are hemmed by piercing the fabric inside the closed cut of the hem, without pulling it too tightly to avoid deformation of the material. The quilting seam is invisible from any side of the product. | 1. The thread is selected according to the color of the fabric.
2. The edges are folded inside out and pinned. 3. To hide the knot, start the first seam from the wrong side. 4. The quilting stitch goes into the hem edge and comes out in the same way, capturing the loops of the second piece. 5. When finished, the thread is secured and tightened, and the needle is threaded through the loop. |
How to finish the seam and what should it look like?
The overcast stitch is done manually step by step; it can be finished neatly and securely by performing a fastening.
It is done in several ways:
- crosswise. The thread is fixed with 2 small stitches in the form of a cross;
- The thread is secured with a knot.
To make a quality knot that won't come undone, you need:
- pinch the end of the thread with your finger and wrap the thread around it, forming a loop;
- the crossed threads are twisted, moving towards the beginning of the finger on which the loop is;
- The twisted loop is clamped and pulled into a knot.
Any craftswoman can perform manual overcasting of a fabric edge step by step, using the secrets and tips described in the article. The result will be no worse than overcasting performed on a special device.
How to make an overlock stitch by hand?
You can do the overlock stitch manually step by step, just like the overlock stitch. This is a labor-intensive and long process. It is better to process dense materials that do not fray much. Before starting work on the cut, carefully trim the seam allowance, cut off excess fabric or do this during the processing, to avoid unnecessary thread fraying.
Stages of implementation:
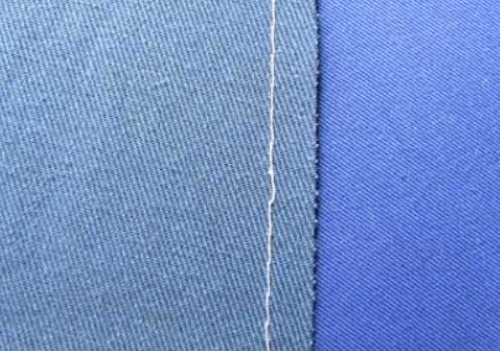
- A border is sewn on a sewing machine at a distance equal to the width of the future hand stitch, and is not crossed when laying stitches.
- The material is held with the cut away from you, the quilting stitch is done from left to right.
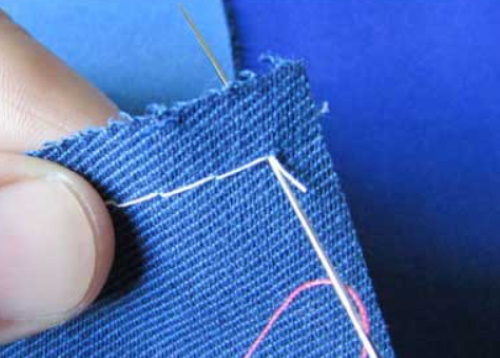
- The process of piercing the fabric with a needle begins on the right side. After that, the thread is pulled out and fixed with a knot.
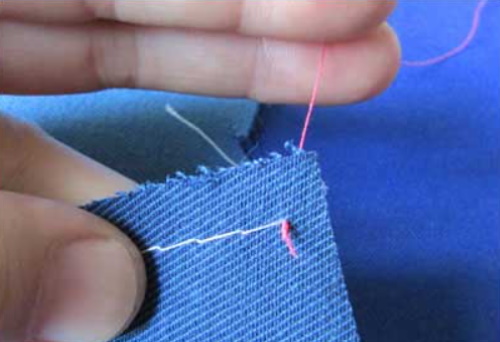
- The needle is inserted into the same hole again and pulled out. The thread coming out of the material is picked up and tightened. This results in a quilting stitch over the edge.
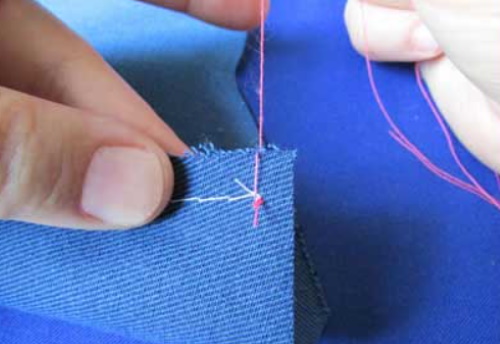
- A loop is formed from the thread, the needle is inserted into the new hole through the loop, pulled tight. The resulting stitch should lie diagonally to the right.
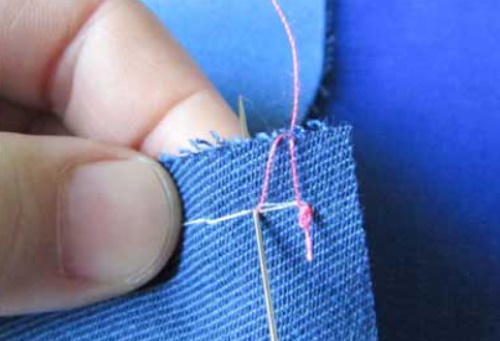
- The next loop is formed, the needle is inserted into the last hole again and the process is repeated: the needle and thread are pulled through the loop and tightened. The end of the quilting seam should be on the side line of the cut.
- The required number of stitches is performed.

- The machine stitch laid in advance is removed.
- After finishing the slanted quilting seams, you need to sew another line in the opposite direction.
- The tops of the finished slanted stitches are connected with straight stitches.
- Having reached the end of the line, another straight line is laid in the opposite direction, filling the empty spaces between the finished tracks.
When the hand-made overlock stitch is finished, it looks like the original stitch on both sides and is excellent at preventing thread fraying.
How to Make an Overlock Stitch on a Sewing Machine
Some people believe that overlocking can be done without having a serger, using only a sewing machine.
This judgment is incorrect, due to the distinctive features of these devices:
- the stitching is done differently;
- complex seam structure on an overlock compared to a sewing machine;
- trimming the product during overlocking. In an overlock, the component mechanism is a knife that removes excess material;
- It is not possible to overcast several layers of fabric on a sewing machine without first basting.
If you attach a special foot to your sewing tool, you can perform any overlock stitch except for the overlock stitch.
The machine performs:
- zigzag;
- overcast stitch;
- processing the edge using an overlock foot.
Sometimes the sewing machine is equipped with a false overlock function. This technique of stitching is suitable only for fabrics with a small stretch, otherwise the edge will be pulled together, losing the knitted properties.
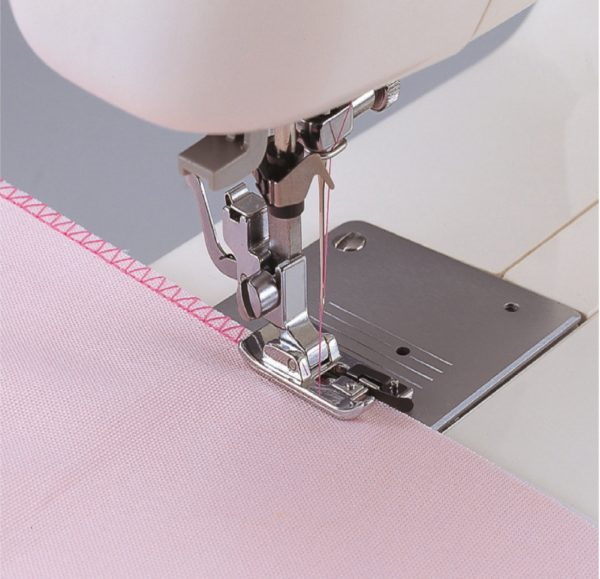
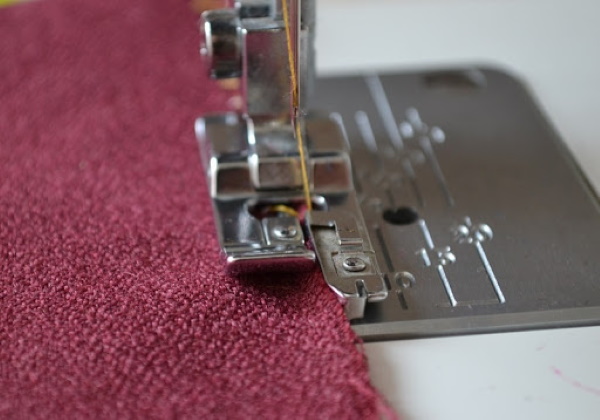
Using an overlock foot
An overlock foot is a device that guides the movement of the fabric to obtain an even stitch. Externally, it consists of a small brush that regulates the material and does not allow it to go beyond the working surface. It is important to control the edge of the material so that it is near the limiter.
Advantages:
- guiding the fabric using a metal plate;
- preventing twisting of cuts;
- the line is laid strictly along the edge of the product;
- carefully processes the cut;
- Suitable for fabrics that require special handling during processing, especially knitwear.
Stages of work:
- the regular foot is removed and an overlock foot is installed;
- the sewing machine is adjusted according to the parameters of thread tension and stitch width;
- a continuous zigzag stitch is selected and its length is set;
- a test line is laid;
- the product is being processed.
Using an overlock foot, you can use different stitches on your sewing machine.
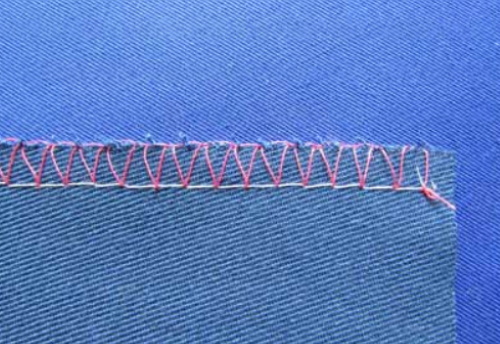
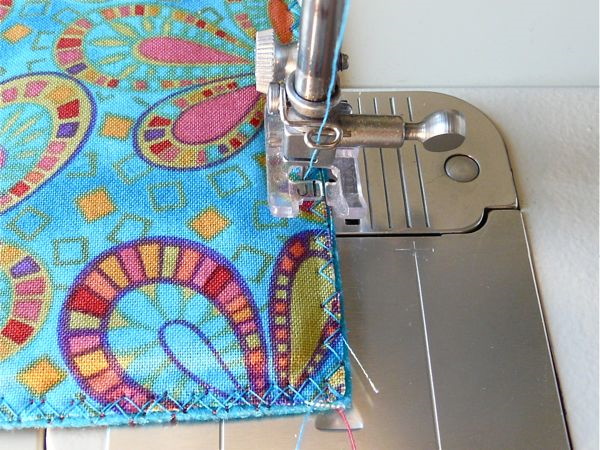
Using a zigzag stitch
For overcasting fabric, a classic stitch called zigzag is suitable. This type of fabric processing is inherent in modern and Soviet sewing machines. Regular straight stitches are performed, due to the movement of the needle to the right and left, a zigzag is obtained.
Stages of implementation:
- The stitch position switches to zigzag.
- The appropriate stitch length and width are selected. It is recommended to select the largest stitch length for an open cut with a normal stitch width.
- A line of the required length is made.
The result is an even zigzag and a processed cut.
Important! For each type of fabric, select the appropriate needle and thread. Performing an overcast stitch on sewing machines
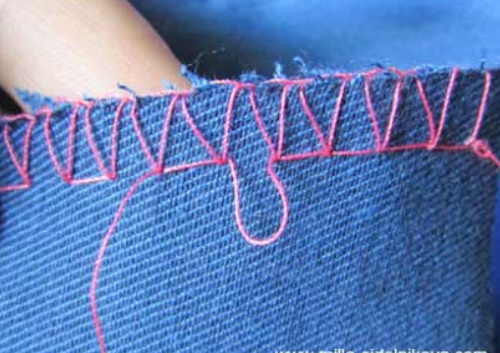
If there is no overlock foot, an overcast stitch is made with a regular foot. In this version, after processing the material, you need to trim the edge. Such a seam retains its elasticity.
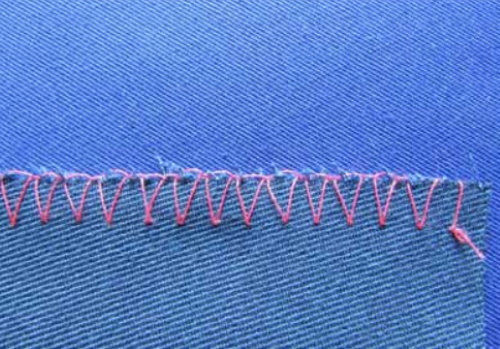
In addition to a simple zigzag, it is possible to overcast the edge:
- dotted zigzag. In each part of the zigzag there are 3 stitches. The line is laid, retreating from the edge at a distance of up to 10 mm;
- elastic stitching. The method requires cutting the material to the level of the overcasting. The material with such treatment is well stretchable, but protects against fraying worse. It is better suited for decorative finishing.
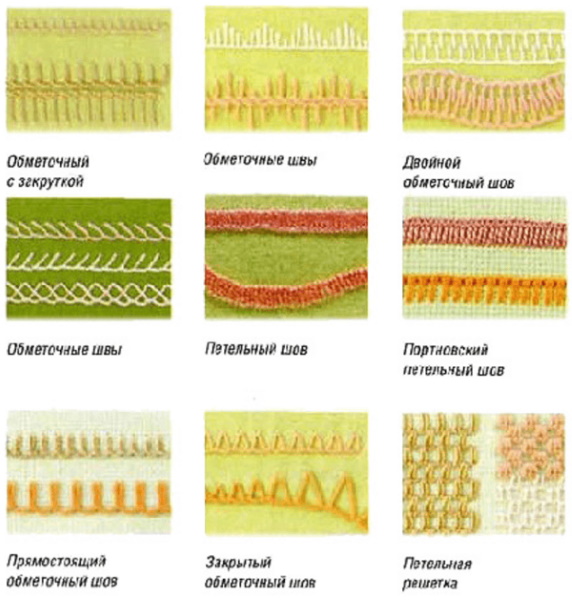
Sewing machines have several different stitch patterns and edge protection options. They all look like variations of the regular zigzag stitch. The difference is in the stitch pattern, its stretch, and how well it protects against thread loss.
The ability to make overcast seams will come in handy for hand sewing clothes. The main task is to choose the necessary technique, because they are all different, and then master the technique of step-by-step execution. Then processing the material will not be difficult even without special expensive equipment.
Video on how to make an overlock stitch by hand, on a machine
How to make an overcast stitch: