Drawings intended for children to copy, should be selected by parents or a teacher in accordance with the interests of a specific group of students. The easiest images for young artists to create are notes and a treble clef.
Such pictures are considered universal, since copying them independently on a separate sheet of paper will be interesting for children of any age, regardless of whether they study music or not.
What do you need to draw with a pencil?
Notes (it is recommended to create a drawing for children using a simple pencil) for copying will require the use of:
- a set of simple pencils of different hardness. The minimum set of pencils includes stationery of 3 main types. H - hard, used for drawing a thin outline of individual details of the image. B - soft, used for shading the inner plane of the drawing, as well as applying shadows and half-shadows; HB - hard-soft, the most frequently used pencil, which is suitable for creating a general outline and drawing the boundaries of individual details of the image;
- sheets of thick paper (a poor-quality working surface can not only negatively affect the overall appearance of the final drawing, but also create the need to repeat the work due to damage that can occur when erasing erroneously drawn details with an eraser);
- an eraser made of high-quality rubber. It should be large so that the child can use it comfortably. Otherwise, the pressure on the eraser will be calculated incorrectly, which can lead to holes in the working surface;
- templates (relevant if the notes are drawn by a child under 7-8 years old, who is unable to independently reproduce smooth lines and transitions).
How can a child make easy drawings of notes and a treble clef step by step using cells?
Notes (a drawing for children should consist of a minimum number of details), like a treble clef, are recommended to be learned to draw by cells at first.
Black and white image of a treble clef
A black and white version of the image of a treble clef can be drawn in cells like this: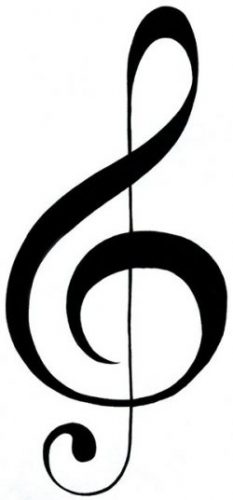
- Find the starting point, placing it at the top edge of the paper in the center. To create such an image, you need to use a working plane of at least A4 format.
- Draw a treble clef using the following pattern: 2 keys down, 1 key left, 1 key down, 1 key left, 4 keys down, 1 key right, 1 key down, repeat the combination "1 key left and 1 key down" 3 times, 1 key left, 6 keys down, 1 key right, 1 key down, 1 key right, 1 key down, 2 keys right, 1 key down, 1 key right, 2 keys down, 1 key left, 1 key up, 2 keys left, 2 keys down, 1 key right, 1 key down, 2 keys right, 1 key up, 1 key right, 3 keys up, 1 key right, 1 key up, 2 keys to the right, 1 key up, 1 key to the right, 4 keys up, 1 key to the left, 1 key up, 2 keys to the left, 1 key up, 1 key to the left, 3 keys up, 2 keys to the right, 1 key up, 1 key to the right, 6 keys up, 1 key to the left, 2 keys up, 3 keys to the left.
- Duplicate the outline of the main figure, and then fill in the space between the borders with a marker or apply shading with a simple pencil.
- Trace the area around the outline of the treble clef with a marker or colored pencil in a contrasting shade.
Colored image of a treble clef
You can draw a treble clef in color by cells using the above instructions or by following another version of the working algorithm: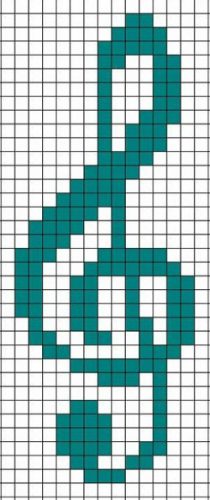
- Determine the middle of the working plane, and then, stepping back 5-6 cells upward, find the starting point.
- Create an image according to the instructions: 1 key down, 1 key left, 5 keys down, 1 key right, 1 key down, 2 keys left, repeat the combination "1 key down and 1 key left" 3 times; 5 keys down, 1 key right, 1 key down, 2 keys right, 1 key down, 3 keys right, 4 keys down, 3 keys left, 1 key up, 1 key right, 2 keys up, 2 keys right, 3 keys down, 1 key right, 1 key down, 3 keys right, 1 key up, 1 key right, 5 keys up, 2 keys right, 1 key up, 1 key right, 4 keys up, 1 key. left, 1 key up, 1 key left, 1 key up, 2 keys left, 3 keys up, 1 key right, 1 key up, 1 key right, 4 keys up, 1 key left, 1 key up, 2 keys left.
- Duplicate the outline of the treble clef, stepping back from the main border by 1 cl.
- Paint the space between the two borders, evenly distributing the shades of the paints or markers used in a “rainbow” order (red, orange, yellow, green, blue, blue, purple) from top to bottom.
To
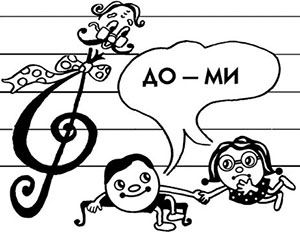
The notes (the drawing for children should be accompanied by comments from the teacher or parents) depicted on the staff can be drawn in several ways.
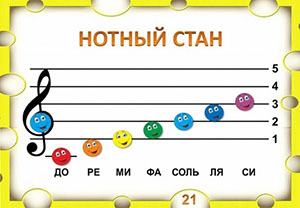
For example, the note “C” can be most easily represented in cells like this:
- Draw a musical staff by drawing 2 parallel horizontal lines located at the same distance from each other (no more than 2-3 cells).
- On the left, draw a treble clef in any convenient way.
- Step back 3 cells to the right from the treble clef and find the starting point on the second horizontal line from the bottom.
- Draw the note "C" according to the instructions: 1 key up, 1 key to the right, 1 key up, 1 key to the right, 2 keys up, 1 key to the left, 2 keys up, 1 key to the left, 4 keys up, 1 key to the left, 12 keys down, 1 key to the right.
- Color the space inside the outline of the note with a colored pencil or marker. If you don't have any additional stationery, the space between the main outlines can be filled with hatching or shaded.
Re
The note "D" located on the staff is most easily represented as follows:
- Draw a musical staff by drawing 2 parallel horizontal lines located at the same distance from each other (no more than 2-3 cells).
- On the left, draw a treble clef in any convenient way.
- Step back 3 cells to the right from the treble clef and draw the note “C”.
- Stepping back from the note “C” 3-5 keys to the right, find the starting point 3 keys below the horizontal.
- Draw the note "D" according to the instructions: 12 keys down, 1 key to the right, 9 keys up, 3 keys to the right, 1 key up, 1 key to the right, 2 keys up, 4 keys to the left, 1 key down, 1 key to the left.
Drawings of notes for children - Color the space inside the outline of the note with a colored pencil or marker. If you don't have any additional stationery, the space between the main outlines can be filled with hatching or shaded.
We
The easiest way to draw the note "E" on the staff is:
- Draw a musical staff by drawing 2 parallel horizontal lines located at the same distance from each other (no more than 2-3 cells).
- On the left, draw a treble clef in any convenient way.
- Step back 3 cells to the right from the treble clef and draw the note “C”.
- Stepping back from the note “do” 3-5 keys to the right, draw the note “re”.
- Stepping back from the note “D” 2-4 keys to the right, find the starting point on the second horizontal from the bottom.
- Draw the note "E" according to the instructions: 1 key up, 1 key to the right, 2 keys up, 3 keys to the right, 11 keys up, 3 keys to the right, 1 key down, 3 keys to the right, 1 key down, 5 keys to the left, 13 keys down, 1 key to the left, 1 key down, 4 keys to the left.
- Color the space inside the outline of the note with a colored pencil or marker. If you don't have any additional stationery, the space between the main outlines can be filled with hatching or shaded.
F
The easiest way to draw the note "F" depicted among other notes on the staff is as follows:
- Draw a musical staff by drawing 2 parallel horizontal lines located at the same distance from each other (no more than 2-3 cells).
- On the left, draw a treble clef in any convenient way.
- Step back 3 cells to the right from the treble clef and draw the note “C”.
- Stepping back from the note “do” 3-5 keys to the right, draw the note “re”.
- Stepping back from the note “D” 3-5 keys to the right, depict the note “E”.
- Stepping back from the note “E” 3-5 keys to the right, find the starting point on the first horizontal line from the bottom.
- Draw the note "F" according to the instructions: 1 key up, 1 key to the right, 2 keys up, 3 keys to the right, 8 keys up, 1 key to the left, 2 keys up, 3 keys to the left, 1 key up, 3 keys to the left, 1 key up, 5 keys to the right, 13 keys down, 1 key to the left, 1 key down, 4 keys to the left.
- Color the space inside the outline of the note with a colored pencil or marker. If you don't have any additional stationery, the space between the main outlines can be filled with hatching or shaded.
Salt
The easiest way to depict the note "G" on the staff among other notes is as follows:
- Draw a musical staff by drawing 2 parallel horizontal lines located at the same distance from each other (no more than 2-3 cells).
- On the left, draw a treble clef in any convenient way.
- Step back 3 cells to the right from the treble clef and draw the note “C”.
- Stepping back from the note “do” 3-5 keys to the right, draw the note “re”.
- Stepping back from the note “D” 3-5 keys to the right, depict the note “E”.
- Stepping back from the note “E” 3-5 keys to the right, depict the note “F”.
- Stepping back from the note “F” 3-5 keys to the right, find the starting point on the second horizontal from the bottom.
- Draw the note "G" according to the instructions: 1 key up, 3 keys to the right, 9 keys up, 1 key to the right, 11 keys down, 1 key to the left, 1 key down, 4 keys to the left, 1 key up.
- Color the space inside the outline of the note with a colored pencil or marker. If you don't have any additional stationery, the space between the main outlines can be filled with hatching or shaded.
La
A child can draw the note “A” on the staff among other notes like this: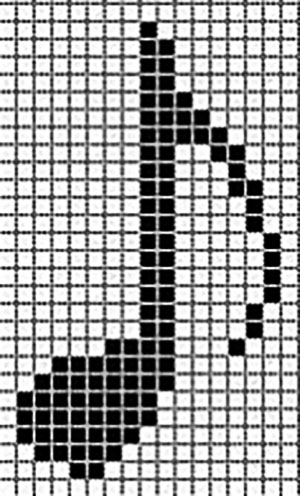
- Draw a musical staff by drawing 2 parallel horizontal lines located at the same distance from each other (no more than 2-3 cells).
- On the left, draw a treble clef in any convenient way.
- Step back 3 cells to the right from the treble clef and draw the note “C”.
- Stepping back from the note “do” 3-5 keys to the right, draw the note “re”.
- Stepping back from the note “D” 3-5 keys to the right, depict the note “E”.
- Stepping back from the note “E” 3-5 keys to the right, depict the note “F”.
- Step back from the note “F” 3-5 keys to the right and draw the note “G”.
- Stepping back from the note “G” 3-5 keys to the right, determine the starting point on the second horizontal from the bottom.
- Draw the note "A" according to the instructions: 1 key up, 1 key left, 1 key up, 1 key left, 4 keys up, 1 key right, 2 keys up, 1 key right, 1 key up, 2 keys right, 1 key up, 3 keys right, 11 keys up, 2 keys right, 2 keys down, 1 key right, 2 keys down, 1 key right, 2 keys down, 1 key right, 2 keys down, 1 key right, repeat the combination "1 key down and 1 key right" 3 times, 5 keys down, 1 key left, 1 key down, 1 key left, 1 key down, 1 key left, 2 keys up, 1 key right, 1 key up, 1 key to the right, 3 keys up, 1 key to the left, 1 key up, 1 key to the left, 1 key up, 1 key to the left, 1 key up, 1 key to the left, 1 key up, 2 keys to the left, 14 keys down, 1 key to the left, 1 key down, 1 key to the left, 1 key down, 4 keys to the left.
- Color the space inside the outline of the note with a colored pencil or marker. If you don't have any additional stationery, the space between the main outlines can be filled with hatching or shaded.
Si
The easiest way to draw the note "B" on the staff is:
- Draw a musical staff by drawing 2 parallel horizontal lines located at the same distance from each other (no more than 2-3 cells).
- On the left, draw a treble clef in any convenient way.
- Step back 3 cells to the right from the treble clef and draw the note “C”.
- Stepping back from the note “do” 3-5 keys to the right, draw the note “re”.
- Stepping back from the note “D” 3-5 keys to the right, depict the note “E”.
- Stepping back from the note “E” 3-5 keys to the right, depict the note “F”.
- Step back from the note “F” 3-5 keys to the right and draw the note “G”.
- Stepping back from the note “G” 3-5 keys to the right, draw the note “A”.
- Stepping back from the note “A” 3-5 keys to the right, mark the starting point on the third line from the bottom of the staff.
- Draw the note "B" according to the instructions: 1 key up, 1 key left, 1 key up, 1 key right, 1 key up, 1 key right, 4 keys up, 6 keys right, 6 keys down, 1 key left, 1 key down, 1 key left, 1 key up, 1 key left, 1 key up, 1 key left, 1 key up, 1 key right, 1 key up, 1 key right, 3 keys up, 4 keys left, 5 keys down, 1 key left, 1 key down, 1 key left.
- Color the space inside the outline of the note with a colored pencil or marker. If you don't have any additional stationery, the space between the main outlines can be filled with hatching or shaded.
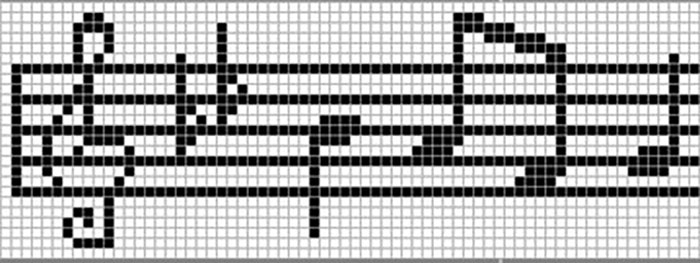
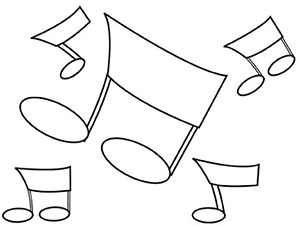
Drawings on a sheet of paper with a pencil for beginners
For children over 7-8 years old, working on creating a drawing of notes will be more interesting if the image is multi-component, stylized or made in a cartoon style.
Musical staff with cheerful notes
You can draw a musical staff with cheerful notes like this:
| Image variant | Algorithm for its creation |
 | 1. Draw 5 horizontal parallel lines on the working plane, placing them at a distance of 1-3 cm from each other. 2. On the left side of the image, draw a treble clef. To do this, draw a small hook pointing to the left under the lower parallel. Next, draw a straight line upwards, and then, having reached the fourth parallel, draw a loop, directing the diagonal to the left border of the sheet of paper used. At the level of the second parallel from the bottom, draw another loop intersecting the main vertical. Draw a circle inside the lower loop, color it in a bright color, and then draw the eyes, nose, and smiling mouth. 3. Draw small circles of the same size (notes) diagonally towards the upper right corner, starting from the first horizontal line from the bottom. The outermost circle should be located on the third line from the bottom. 4. Color the circles in the colors of the rainbow (in the standard order - red, orange, yellow, green, blue, blue, purple), and then schematically depict eyes, a nose and a smiling mouth inside the circles. 5. If desired, sign the name of each note under the depicted staff. |
Coloring Sheets
The easiest way to draw coloring notes is like this:
| Image variant | Algorithm for its creation |
 | 1. In the center of the working plane, draw 2 parallel diagonals, directing their ends to the upper left and lower right corners. 2. Connect the extreme points of the lines. 3. From the side faces of the depicted geometric figure, derive 2 parallel verticals located at a minimum distance from each other. 4. At the bottom of the side lines, draw one large oval, directing it towards the left border. 5. In the area of the upper left corner, draw 2 vertical lines, placing them at a distance of 1 cm from each other. 6. At the lower ends of the vertical lines, draw an oval, directing it to the lower left corner. 7. From the upper edges, draw a rectangle directed towards the upper edge of the working plane. 8. Repeat the steps described in points 5–7, drawing a similar note in the area of the lower right corner of the sheet of paper used. 9. In the area of the lower left corner, draw 2 horizontal lines, placing them at a distance of 3-4 cm from each other. Connect the extreme points, thus creating a rectangle. 10. From the side borders of the geometric figure, draw one vertical line on each side, at the ends of which you need to draw an oval. 11. Repeat the steps described in points 9–10, thus depicting a similar figure in the area of the upper right corner of the working plane. |
Treble clef with eyes
A treble clef with eyes can be drawn like this:
| Image variant | Algorithm for its creation |
 | 1. Draw 5 horizontal parallels on the working plane, placing them at a distance of 3-5 cm from each other. 2. At the left edge, draw a treble clef in any convenient way. 3. Draw 2 small ovals of the same size (eyes) inside the upper part of the treble clef. Draw one black semicircle (pupils) inside the ovals. 4. Draw 2 lines above the eyes, slightly curved upwards (eyebrows). 5. At the bottom of the circle, draw a smiling mouth (a semicircle curved downwards). 6. Add detail to the image by drawing hair and small details (such as wrinkles, freckles, a mustache or tongue) of the animated treble clef's appearance. 7. If desired, draw notes next to the treble clef, also depicting them with human faces. |
Stylized musical symbols
The easiest way to draw stylized musical symbols is like this:
| Image variant | Algorithm for its creation |
 | 1. Draw five horizontal parallels on the working plane, placing them at a distance of 3-4 cm from each other. 2. Between the first and second horizontal lines from the bottom, draw 2 parallel diagonals, placing them at a distance of 2 cm from each other. 3. The lower points of the main lines should be connected with a rounded oval, directed towards the right border of the working plane. 4. Connect the upper points of the lines with a deformed elongated semicircle, directing it towards the lower boundary of the working plane. 5. In the area of the upper corner, draw 2 ovals, placing them close to each other (eyes). Inside the eyes, draw small black circles (pupils). 6. Between the third and fourth straight lines from the bottom, draw 2 horizontal lines. From the side points of the straight lines, draw 2 parallels down on each side (the distance between the straight lines should be no more than 1 cm), at the ends of which draw rounded semicircles. 7. In the center of the resulting rectangle, draw 2 ovals, placing them vertically close to each other (eyes). Under the eyes, draw a semicircle curved downwards (smiling mouth). 8. Between the second and third straight lines from the bottom, draw two diagonal lines, placing them at a distance of 3-5 cm from each other. 9. Connect the extreme points of the lines, and then draw 2 vertical lines from the bottom diagonal in three places so that the distance between them is no more than 0.5 cm, and between the groups – 1-2 cm. 10. In the center of the rectangle, draw 2 ovals, placing them close to each other (eyes). Above the eyes, draw eyebrows (2 semicircles) and a smiling mouth (a semicircle curved downwards). |
Music notes can be drawn in different ways depending on who the art lesson is being organized for. Children will be more interested in working on creating drawings if the style of depicting the main objects of the composition corresponds to the interests of a particular young artist.
Video about drawing notes
How to draw a treble clef using cells:
Very good