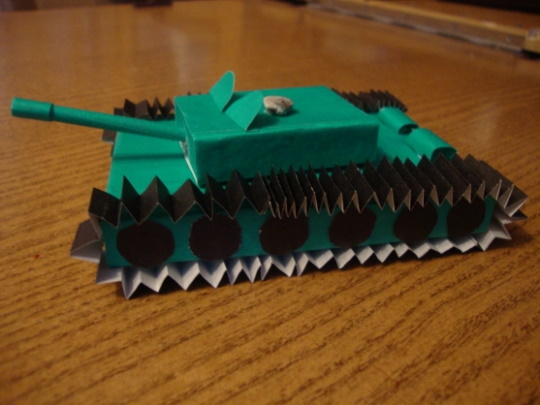
A cardboard tank is a craft that can appeal to both preschool and school-age boys. You can make it yourself using patterns that can easily be found on the Internet. Such crafts are usually made from cardboard or paper.
Selection and preparation of materials
Before you start making a cardboard tank, you need to prepare the following materials and tools:
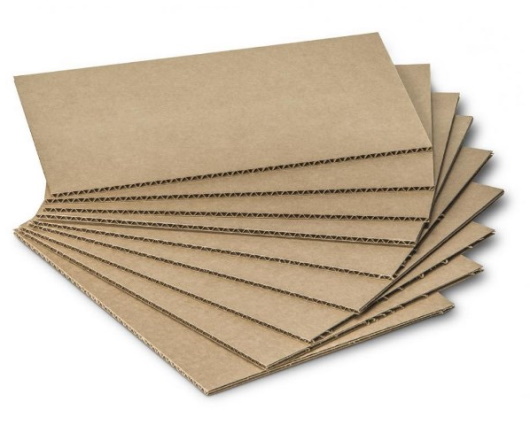
- Cardboard (regular, corrugated, strong);
- Paper (colored, white, with images of tanks);
- Scissors;
- Ruler;
- Glue (liquid, solid, double-sided tape);
- Pencil;
- Tank template or diagram.
The choice of cardboard is an important aspect in creating a tank. Regular cardboard can be strong enough, but corrugated cardboard provides additional rigidity and stability. You need to choose the thickness of the cardboard depending on the size of the model you plan to create.
There are different types of cardboard, which can be found in the following table:
| Cardboard type | Application | Structure |
| Packaging cardboard | Packaging or container | The outer layers are made from high-quality materials (waste paper, cellulose, etc. |
| Printing cardboard | Various printed products | Consists of one or more coated layers of high quality cardboard |
| Designer cardboard | Presentation products | Consists of several layers |
You can make a tank with your own hands using different types of cardboard, indicated in the diagrams for their manufacture.
Paper can be used for decorative elements of the tank, such as the number plate, camouflage and other details. It is necessary to choose paper that matches the colors and style of the tank being created.
The scissors should be sharp enough to avoid any problems when cutting out the tank parts from cardboard. The ruler will help you create straight lines and accurately measure the dimensions of your workpieces.
Glue and tape are equally important materials needed in the process of creating a tank. Liquid glue is best used for gluing parts, solid glue for strengthening corners and joints, and double-sided tape for attaching decorative elements.
How to make a volumetric tank from cardboard
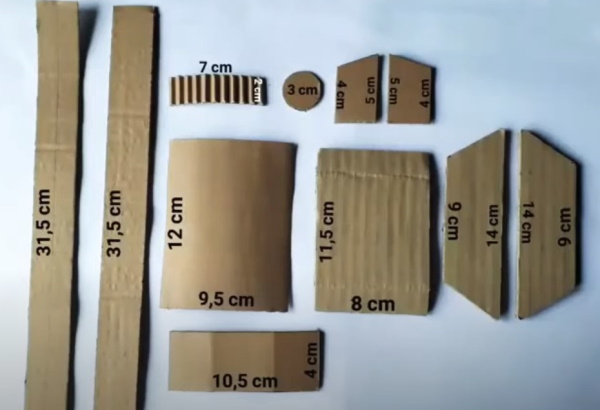
A DIY cardboard tank, the schemes of which can be found on the Internet, can be made from ordinary cardboard. To create a volumetric tank, you will need cardboard with a medium density, glue and scissors. The creation of the craft consists of several stages.
Wheels and tracks:
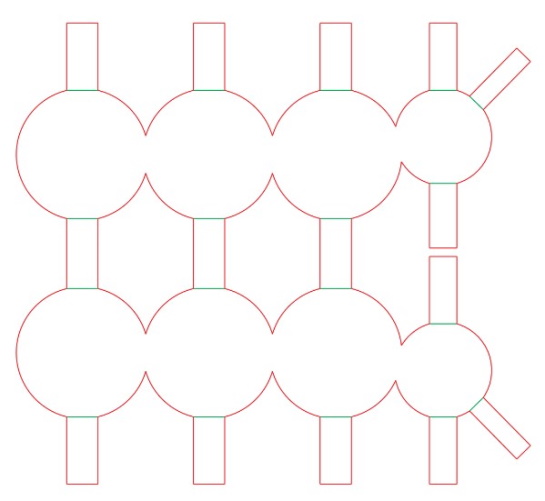
- Draw wheels for the left tank track on cardboard, then carefully cut them out with scissors. Then you need to spread glue on the outer circles of the two cut out parts and glue them together.
- Bend the resulting product on the left and right along the edges of the middle rectangles, and then glue the outer rectangles together. As a result, you will get the left caterpillar.
- Draw wheels for the right tank track on cardboard according to Fig. 1 and Fig. 2, and then carefully cut them out with scissors. Then you need to spread glue on the outer circles of the two cut out parts and glue them together.
- Bend the resulting product on the left and right along the edges of the middle rectangles, and then glue the outer rectangles together. As a result, you will get the right caterpillar.
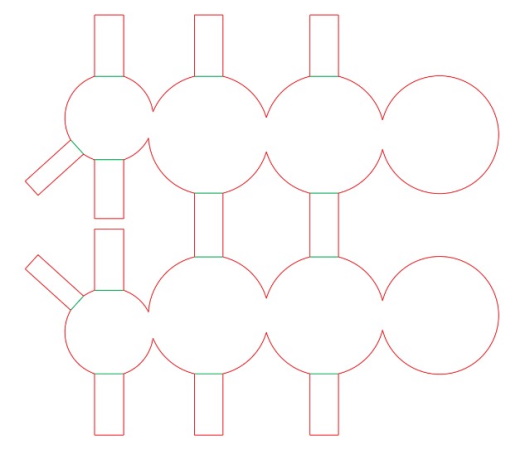
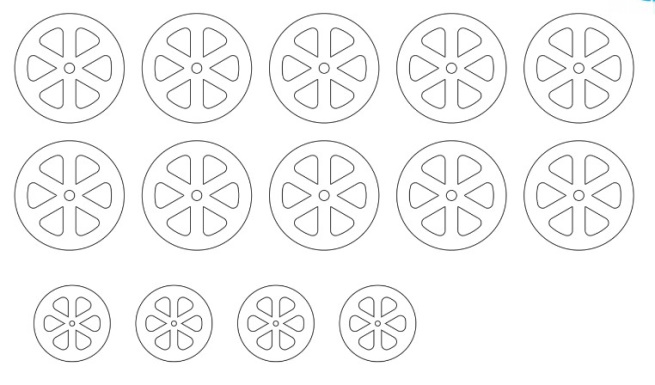
- Draw the disks for the wheels of the left track on cardboard according to Fig. 3 and cut them out with scissors. After that, you need to glue these disks to the wheels of the left track.
- Draw the disks for the wheels of the right track on cardboard according to Fig. 3 and cut them out with scissors. After that, you need to glue these disks to the wheels of the right track.
- Cut 2 long strips of paper, the width of which should be equal to the width of the tracks, and then glue them along the entire perimeter of the wheels.
- Cut out 2 rectangles, the length of which should be equal to the length of the tracks, and the width should be 1 cm greater than the width of the tracks. Then you need to bend the outer parts of these rectangles and glue them on top of the tracks.
- After this, you need to cut out 2 more small rectangles 3 cm wide and 2 cm long, and then glue them to the edges of the tracks, then bend these rectangles on the sides. The result will be a protective frame for the tracks.


Tank hull:
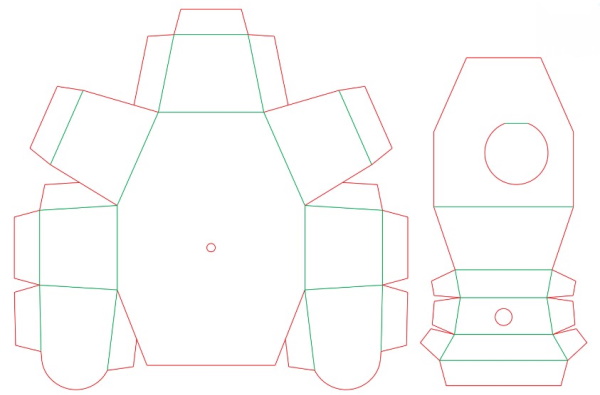
- Draw the upper part of the tank body on cardboard according to Fig. 4 and cut it out with scissors. Then you need to draw 2 identical parts of the base (front and back) according to Fig. 5 and cut them out.
- Bend the front and back parts of the tank base along the drawn lines and then glue them to the top of the tank base, which should also be pre-bent in the appropriate places.
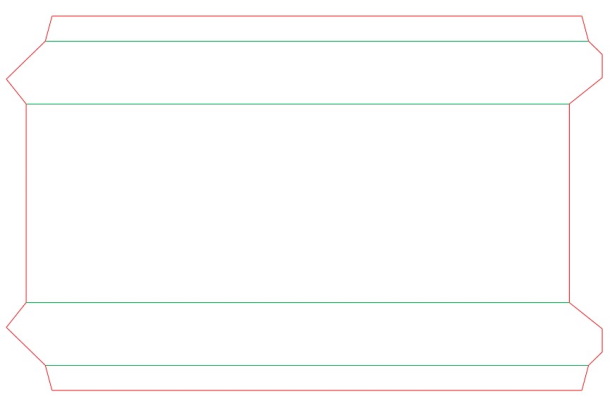
- Draw the lower part of the tank base on cardboard according to Fig. 6, then fold it along the lines of the drawing and glue it to the upper part of the base of the product.
- Glue the tracks to the tank body.
Tank turret:
- Draw the outline of the tank turret on cardboard according to Fig. 7, then cut it out and bend it along the lines. Then cut 2 holes in the hull (for the gun and the entrance to the tank).
- Cut a rectangle 5 cm long and 3 cm wide out of cardboard. Then roll it into a tube and fix its shape with glue. Then insert the resulting cannon into the corresponding hole in the tank turret and glue it to the hull from the inside.
- Glue the tank turret to the top of the hull.
- Cut out 5 circles of 1.5 cm diameter from cardboard and glue them together. The resulting cover for the upper part of the tank turret must be glued to it using a small piece of paper.
- Cut a star out of red construction paper and glue it to the side of the tank's turret.
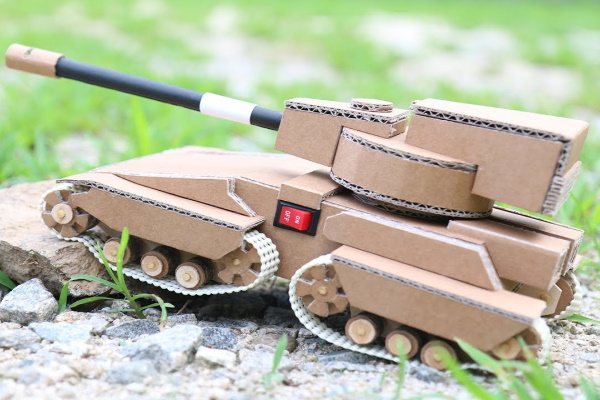
Made of corrugated cardboard
A DIY cardboard tank, the schemes of which can be quite complex, is easiest to make from corrugated cardboard. To make such a tank, you will need corrugated cardboard, scissors and PVA glue.
To create a tank from corrugated cardboard, you need to do the following steps:
- Draw the tank details on cardboard and then cut them out with scissors.
- Separate the thin part of the paper from one long strip.
- Apply glue to the trapezoidal part, and then glue a long strip around its perimeter (perpendicular to the plane of the strip) so that the wavy part of the cardboard is directed outward. As a result, you will get the left caterpillar of the tank.
- Separate the thin part of the paper from the second long strip.
- Apply glue to the second trapezoidal part, and then glue this long strip around its perimeter (perpendicular to the plane of the strip). As a result, you will get the right tank track.
- Bend the rectangular piece along the edges and glue the tank tracks to it on the left and right. The result will be a tank hull with tracks.
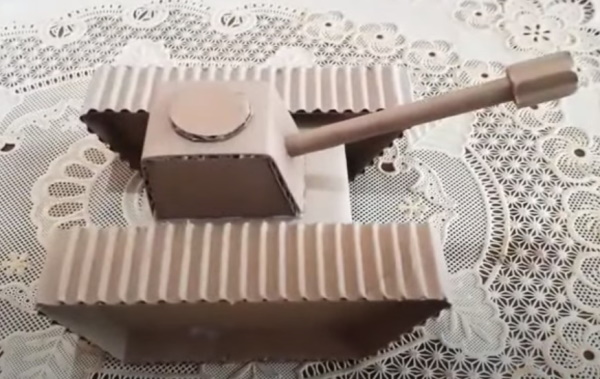
- Apply glue to the edges of two trapezoid parts, bend the second rectangular part along the perimeter of these trapezoid parts and glue them to the edge of this rectangular part. The result will be a tank turret.
- Glue the tank turret to the hull, then glue the round piece (tank cover) to the top of the turret.
- Cut a 5x5 cm rectangle out of thin cardboard. Then roll it into a tube and secure the shape with glue. To prevent the tube from unraveling, wrap it with thread and let the glue dry.
After a few minutes, you can remove the threads. The result will be a gun barrel.
- Separate the thin part of the paper from a small long strip, then coat its smooth part with glue and wrap this strip around the end of the gun barrel. This will result in the tip of the gun.
- Use scissors to make a hole in the front part of the tank turret, and then insert the narrow part of the gun barrel into it, having first coated it with glue.
Made of cardboard and paper
A DIY cardboard tank, the schemes of which can consist of a fairly large number of parts, can be made from various improvised means.
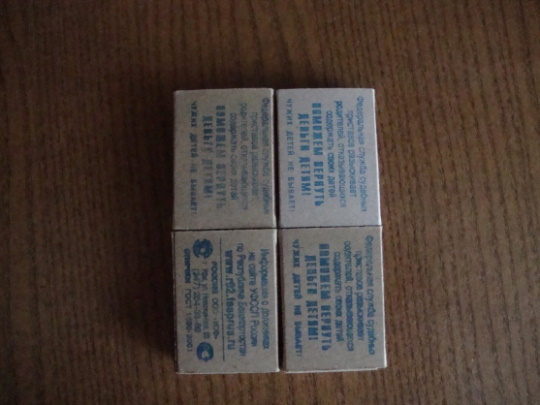
Even a toddler can make a small tank out of paper and cardboard. For this tank model, you will need a sheet of green colored paper, a small piece of cardboard, a plastic lid from an eggplant, a matchbox, and a plastic stick from a lollipop.
The assembly sequence for such a tank is as follows:
- Draw the outline of the matchbox wrapper on paper, for which you can use this box, successively applying it to the paper and drawing its outline with a pencil.
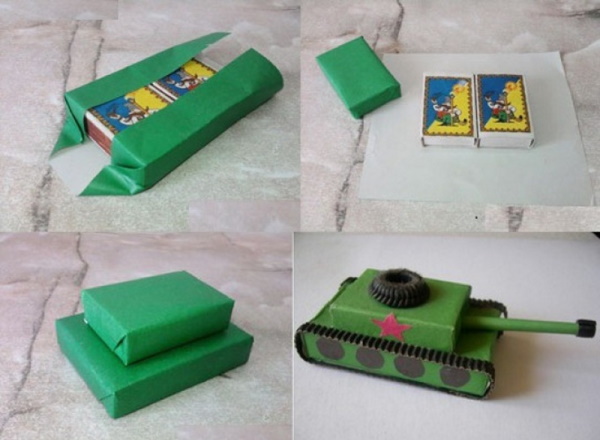
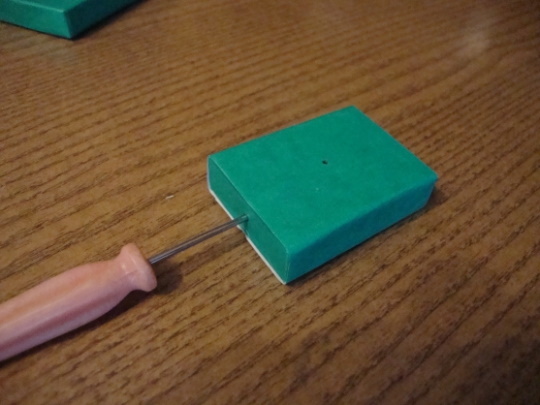
- Cut out the wrapper for the box, spread glue on the inside and glue it to the box. The result will be a tank turret.
- Glue the remaining green paper to the cardboard, then draw the outline of the tank hull on it. The outline should be the same structure and shape as the outline of the tank turret, only its dimensions should be 1.5 times larger.
- Cut out the outline of the tank base and glue it together.
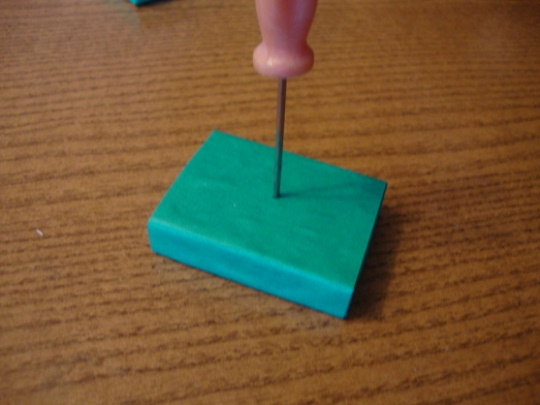
- Use scissors to make a hole in the plastic lid and insert a lollipop stick into it, then glue the lid to the tank turret.
- Glue the tank turret to its hull.
- Draw 2 elongated ovals on the cardboard, the length of which should be slightly longer than the length of the tank hull. Then you need to cut them out with scissors.
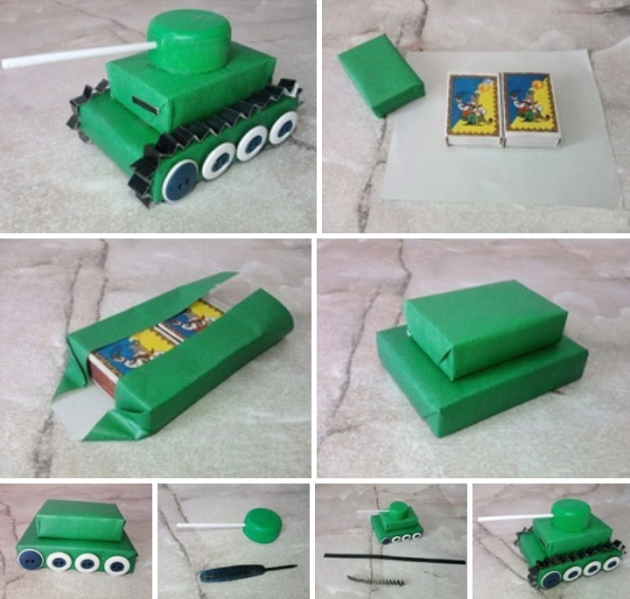
- Draw 8 circles on black paper, the diameter of which should be equal to the width of the previously cut ovals. Then you need to glue 4 circles to each oval. The result will be tank tracks.
- Glue the tracks to the left and right sides of the tank.
- Draw a star on red paper, cut it out and glue it to the tank's turret.
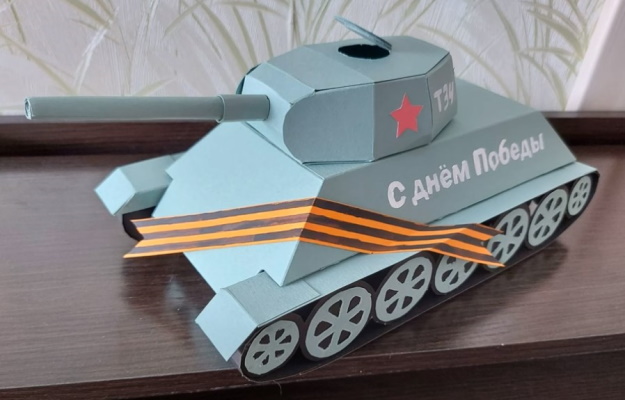
Tank with a rotating turret
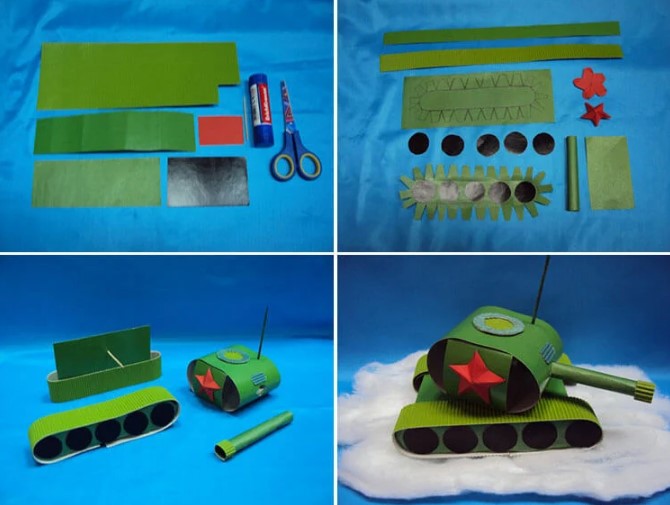
A DIY cardboard tank, the schemes of which can be of varying degrees of complexity, can be made not only from cardboard, but also from ordinary colored paper. This tank can be made from thick colored paper.
The sequence of actions is as follows:
- Cut out a rectangle measuring 18×10.
- Along the edges of the rectangle (from its long sides), draw 2 lines at a distance of 1.5 cm from the edge.
- Along the edges of the rectangle (from its short sides), draw 2 lines at a distance of 2 cm from the edge.
- Make cuts along the horizontal intersections of the drawn lines, then bend the edges of the rectangle along the lines and glue them at the corners. The result will be a tank hull.
- Cut a strip measuring 37×3 cm, and then make perpendicular cuts along one of its sides, with a distance of 0.5 cm between them.
- Bend the rectangles that resulted from the cuts, then round the strip and glue it into a ring shape. Then stretch it so that the strip takes the shape of a tank track.

- Cut out a strip with rounded ends, the dimensions of which should be equal to the size of the tank track. Then you need to spread glue on the rectangles of the track and glue the strip to them.
- Cut 4 strips of the same width as the caterpillar, then make wheels out of them in the form of rings, and then insert them into the caterpillar.
- Make the right caterpillar in the same way.
- Glue the tracks to the bottom of the tank body.
- Cut a rectangle of paper measuring 29×6 cm, and then draw 8 lines (0.5 cm in size) perpendicular to its long side at the same distance from each other.
After this, you need to draw 2 more lines perpendicular to the previously drawn lines. These 2 lines should be located at a distance of 2 cm from the outer lines of the rectangle contour.
Then you need to bend this rectangle along the drawn lines and glue the ends. The result will be a tank turret.
- Cut an octagon out of paper and glue it on top of the tank's turret.
- Cut a 10 cm long rectangle out of paper and twist it into a tube, then fix its shape with tape or glue. The result will be a gun barrel.
- Cut a strip of paper 1 cm wide and 5 cm long, then coat one side with glue and then wind it onto the right end of the gun barrel.
- Make several cuts on the left side of the gun barrel, and also make a hole in the tank turret. Then insert the barrel into this hole with its left side, stretch the petals (formed as a result of the cuts) to the sides and glue them to the inside of the turret.
- Glue the turret to the tank hull.
- Cut out 3 circles of 4 cm in diameter from paper, put them one on top of the other, then cut out a hole of 1 cm in diameter in the center of all the circles. Then you need to trim the edges of the two outer circles so that the central circle protrudes beyond them by 1 cm.
- Cut 4 strips 0.5 cm wide and 2 cm long.
- Push 1 strip through the hole in the center of the folded circles and glue it to the outer circles. Then glue the other 3 strips in the same way so that they are distributed around the entire perimeter of the central hole of the circles.
- Glue the top circle to the tank turret, and glue the bottom circle to the tank hull. This design will allow the turret to rotate in a circle.
Origami tank
The tank can be made from a double sheet of regular notebook paper.
The process of creating an origami tank consists of the following steps:
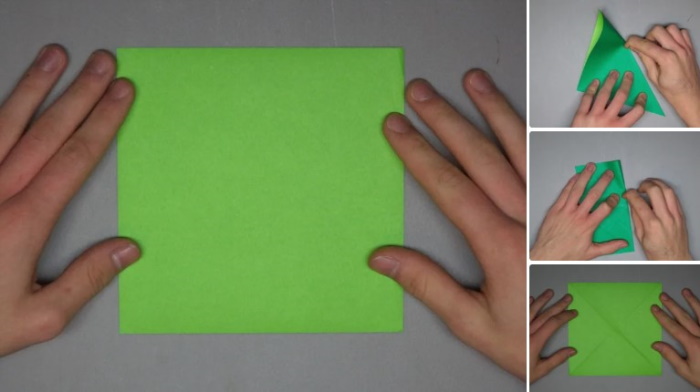
- Fold the double sheet first horizontally and then vertically.
- Unfold the sheet and cut it into two equal parts along the horizontal line in the center.
- Take the top part of the sheet and unfold it.
- Fold the right side of the sheet into an angle, first upwards and then downwards, then form a three-dimensional triangle from the right side of the sheet by pulling the upper and lower folded parts of the sheet inward.
- Fold the bottom right corner to the right, and then fold the top right corner as well.
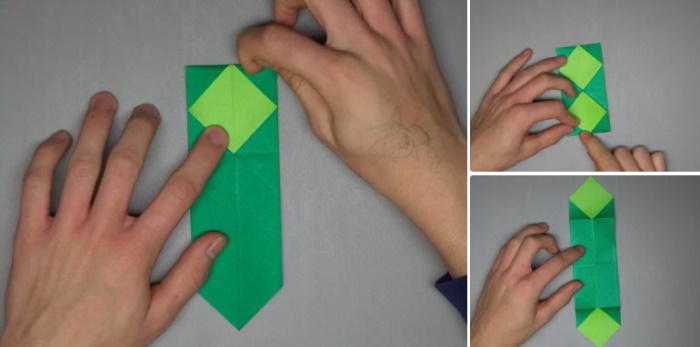
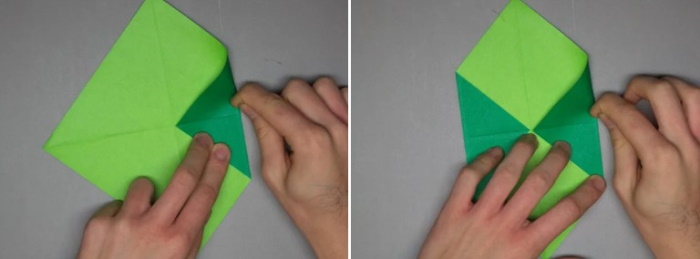
- Fold the top corner towards the center of the resulting square, and then fold the bottom corner towards the center in the same way.
- Fold the top right side corner inside the pocket that was formed by folding the top corner of the square.
- Fold the lower right side corner inside the pocket that was formed by folding the lower corner of the square.
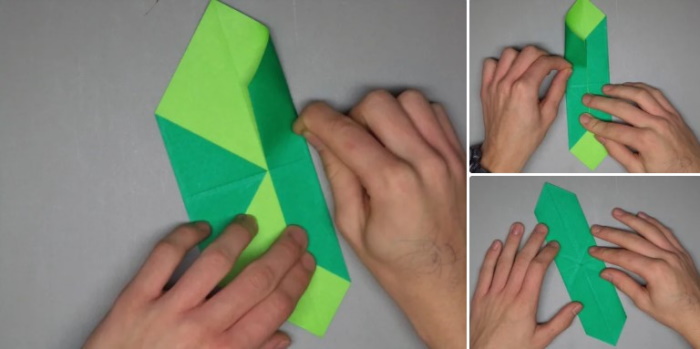
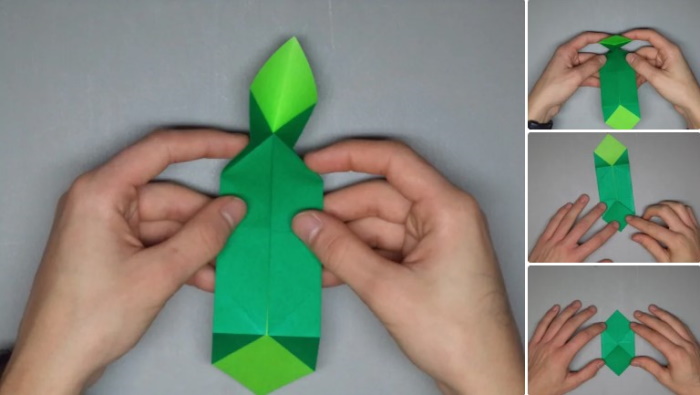
- Fold the left part of the sheet into an angle, first upwards and then downwards, then form a three-dimensional triangle from the left part of the sheet, pulling the upper and lower folded parts of the sheet inward.
- Fold the bottom left corner to the left, then fold the top left corner to the left. The result is a square on the left.
- Fold the top of the sheet horizontally downwards so that the fold line starts from the upper left vertex of the left square and ends at the upper vertex of the right square.

- Turn the product over to the other side.
- Fold the product horizontally and insert the sharp corners of the left square into the pockets of the right square.
- Turn the product over again to the other side.
- Fold the lower left corner to the right, then fold the lower right corner to the left. Then unfold it back, then fold the top layer of the lower part of the product up, and fold the remaining second layer of the product up horizontally in half.
- Fold the top left corner to the right, then fold the top right corner to the left. Then unfold it back, then fold the top layer of the top part of the product down, and fold the remaining second layer of the product down horizontally in half. The result will be a tank hull.
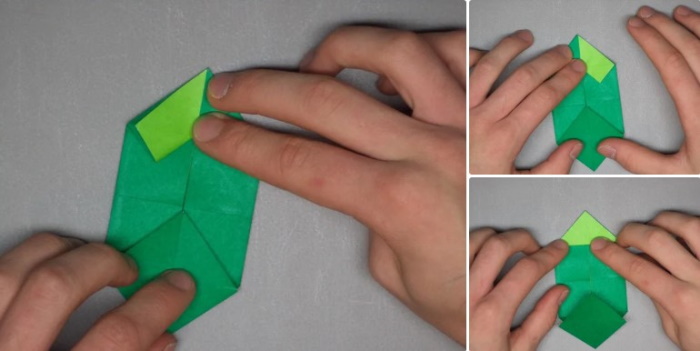
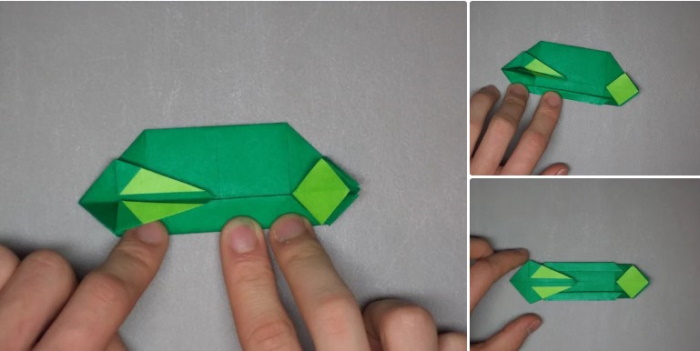
- Take the second half of the sheet and fold its top and bottom parts horizontally towards the center of the sheet.
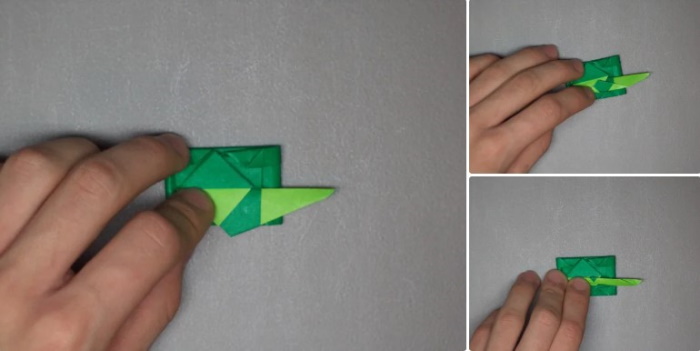
- Fold the right side of the sheet into an angle, first upwards and then downwards, then form a three-dimensional triangle from the right side of the sheet by pulling the upper and lower folded parts of the sheet inward.
- Fold the top corner to the left, and then fold the bottom corner to the left as well.
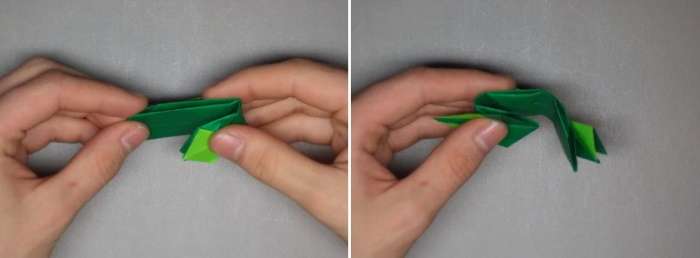
- Fold the left part of the sheet into an angle, first upwards and then downwards, then form a three-dimensional triangle from the left part of the sheet, pulling the upper and lower folded parts of the sheet inward.
- Fold the bottom part of the product horizontally to the central horizontal line, while the left triangle should remain unbent and be located on top of the lower curved part.
- Fold the top part of the product horizontally to the central horizontal line, while the left triangle should remain unbent and be located on top of the upper curved part.

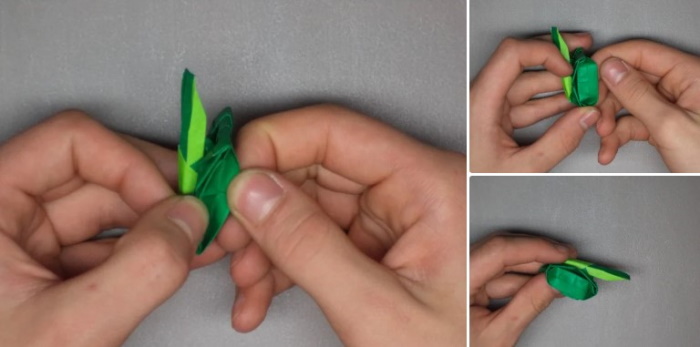
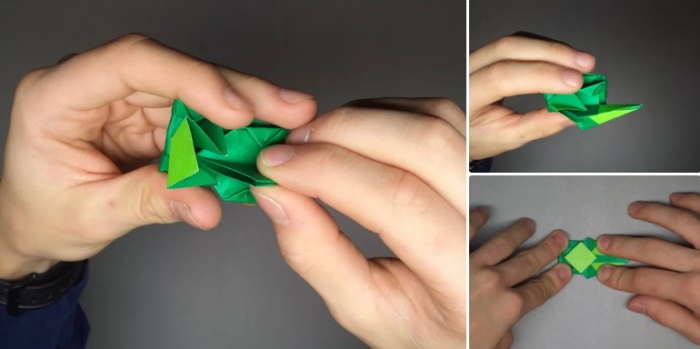
- Fold the product horizontally (in half) and insert the corners of the left side of the product into the pockets of the right side of the product.
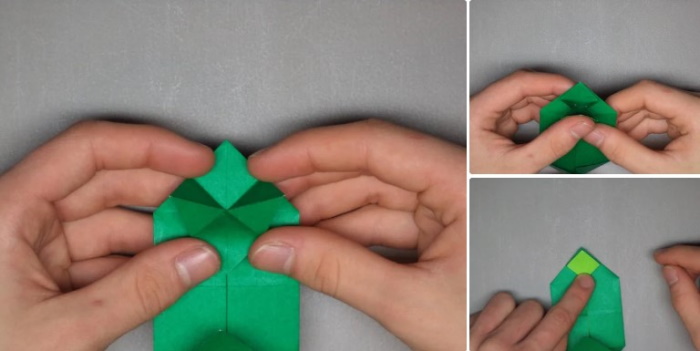
- Fold up the resulting corners at the top and right of the product.
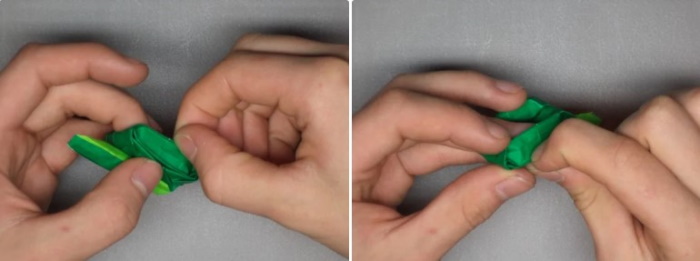
- Bend the left part of the product at a distance of 0.5 cm from the edge. The result will be a tank turret.
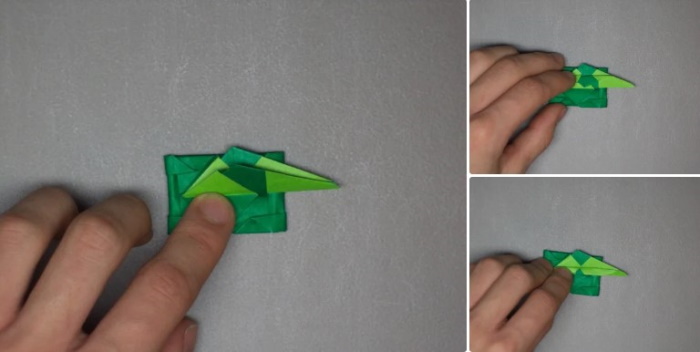
- Bend back the central strips of the tank hull and insert them into the lower central hole of the tank turret.
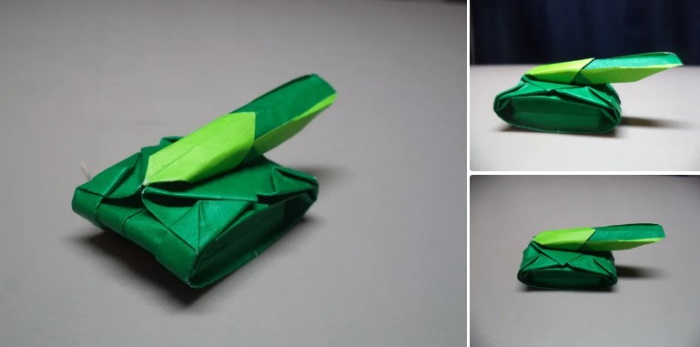
- From a small rectangular piece of paper, twist a barrel for the tank and then insert it into the central hole of the turret.
A cardboard tank is the best craft for boys. It is not difficult to make it yourself, especially if you choose a simple design for the product.
Video about the craft
DIY Cardboard Tank: