Teddy bears, knitted from plush yarn, have become very popular. They are sold in stores, given as gifts, and knitted independently. To make such a toy with your own hands, you need to know how to choose the right yarn and hook. Step-by-step instructions will help beginners knit a beautiful bear.
Choosing Plush Yarn for Knitting a Teddy Bear
Plush yarn is often called "marshmallow". It received its second name for its beautiful pastel shades. The range of colors of such yarn is large, but muted tones look more delicate. The thread itself is elastic, light and velvety. It is used to make warm and pleasant to the body things, as well as blankets and bedspreads.
Knitting toys from such threads has become a separate creative direction called amigurami. Most often, craftswomen knit plush animals, since the velvety texture of the thread resembles short wool and the toys turn out fluffy, pleasant to the touch and cute.
There are 3 types of "marshmallow" yarn and they differ in composition:
- viscose;
- cotton;
- acrylic.
For knitting children's toys, it is better to give preference to the last 2 options, since cotton threads are not wear-resistant. If the child likes the toy, he will play with it every day. Viscose and acrylic yarn will withstand such a load and will perfectly withstand multiple washings without losing shape.
When purchasing threads for work, it is important that they are from the 1st batch of a specific manufacturer. Experienced craftsmen note that different brands of yarn differ in thickness, texture and color.
The table shows reliable manufacturers of high-quality plush yarns, as well as the average price of 1 skein and a brief description of the yarn:
| Trademark name | Characteristics | Price per skein weighing 100g |
| Alize | Thick and elastic threads, suitable for knitting voluminous toys. | 150 rub. |
| Koala Baby | The pile is soft and slightly longer than usual. | 200 rub. |
| Himalayan Dolphin | Tactilely resembles velour. Less elastic than other threads. | 210 rub. |
| YARNART Dolce | Thick threads with a smooth texture. | 180 rub. |
| YarnArt Velour | The yarn is of medium thickness, stretches well and is suitable for knitting small toys. | 160 rub. |
In everyday use, mixed threads with the addition of flax, wool or bamboo perform well.
Matching the hook to the thread
It is important to choose the right hook for knitting toys. Its size depends on the thickness of the thread, the thicker the yarn, the higher the tool number. For example, for YarnArt Velour and Himalaya Dolphin, hook No. 3 or 4.5 is suitable. For Koala Baby or Alize, tool No. 5 or 6 is needed. If you choose too small a hook and thick yarn, the knitted fabric will be very tight. Such toys will be rough, unpleasant to the touch, and also deformed. In addition to the hook, other materials are needed for knitting amigura.
List of everything you need:
- a thick needle with a blunt end and a wide eye;
- scissors;
- holofiber for stuffing;
- stitch markers (to mark the beginning or end of a row).
You will also need various decorative elements, plastic eyes, a nose, beads and satin ribbons.
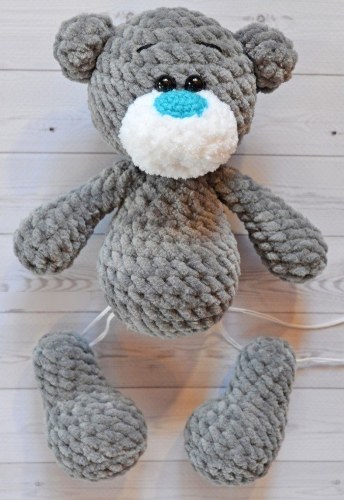
Master class on knitting a teddy bear with a crochet hook
A teddy bear made of plush yarn (you can crochet a toy of any size) will be a good gift for a child from 3 to 10 years old. Before you start working, you need to decide on the color of the threads. The teddy bear can be brown, gray or white. Colored options look interesting. Many craftswomen take blue, pink or yellow threads as the main color.
Explanation of abbreviations used in master classes further in the article:
- single crochet – sc;
- air loop – VP;
- double crochet – dc.
It is important to remember that the main parts - the head, body and paws are knitted from thick yarn, and the muzzle and ears from threads of smaller volume, but of the same color.
Head
Making a toy starts with the head. It is knitted in a circle. In order not to lose the end and beginning of the previous row, you need to use special markers or pins.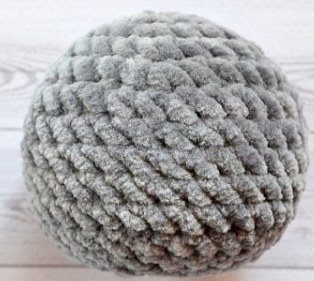
How to knit a bear head:
- Make a slip stitch and knit 7 sc through it.
- In the next row, you need to knit 2 sc in each loop, a total of 14 sc.
- A new chain is knitted by adding 7 new SC. As a result, there should be 19 SC in the row.
- Now you need to knit, alternating 3 sc and 3 increases.
- Up to the 7th row you need to knit, alternating sc (in each new chain their number increases by 2 and an increase).
- There should be 44 sc in row 8. You should knit 3 more rows without increases.
- Decreases begin with chain 13. 6 sc alternate with 1 decrease 6 times.
- From rows 14 to 16, the number of sc decreases by 1 and alternates with decreases.
- In row 17, you need to knit alternating 5 sc and 1 decrease. You should get 16 sc in 1 row.
- The threads should be well secured and the excess cut off.
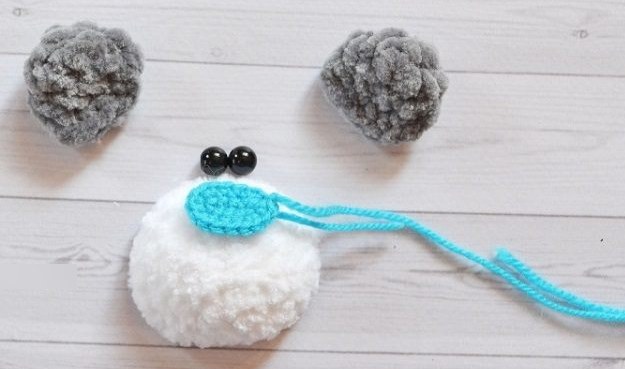
Now you need to knit the convex muzzle and ears of the bear. To do this, you need to change the thread to a thinner one.
Knitting the face:
- Cast on a chain of 7 VP.
- In the 2nd loop knit 5 sc, then in the 1st loop 4 sc. Turn and knit the other side alternating 4 sc and 1 increase.
- Start a new row with an increase, then knit 4 sc and 4 more increases. Repeat the combination, reducing the number of increases by 1.
- Last row knit 25 DC.
 How to knit ears:
- Knit 7 sc into the amigurumi ring.
- In the next row, knit 2 sc in each loop.
- Alternate 1 sc and 1 increase.
- Knit 2 more rows of 18 sc.
The second ear is knitted in the same way. It is important to leave a long thread to make it easier to sew the ears to the head.
Body
To knit the body, you need to change the thread to a thick one.
Step by step instructions:
- Knit 7 sc through the amigurami ring.
- Knit 3 sc in each loop.
- Alternate 1 sc with 1 increase. You should have 19 sc in 1 chain.
- From rows 4 to 6, repeat the combination, increasing the number of sc by 1.
- In the 7th and 8th rows you need to knit 37 sc.
- In the 9th chain you need to knit columns (37) behind the back wall of the previous row.
- Now knitting goes to decrease. Knit 5 sc and 1 decrease. Alternate 6 times.
- Chains 11 and 12 consist of 30 sc.
- In row 16 you need to alternate 3 sc and 1 decrease.
- Chain 17 consists of 19 sc.
- The last row is knitted alternating 4 sc and 1 decrease.
The threads are fixed and the excess is cut off.
Hands
The front paws are very easy to knit:
- Knit 7 sc into the amigurumi ring.
- In the next row, knit 3 sc in 1 loop.
- Alternate 1 sc and 1 increase.
- Knit a new chain of 19 DC.
- In the 5th row, alternate 4 sc and 1 decrease.
- From the 6th to the 12th chain, knit 13 DC.
- In the last row, alternate 1 sc and 1 decrease. You should get 6 sc.
The other paw is knitted in the same way.
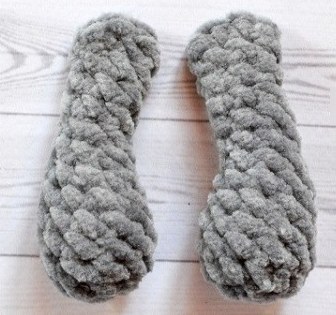
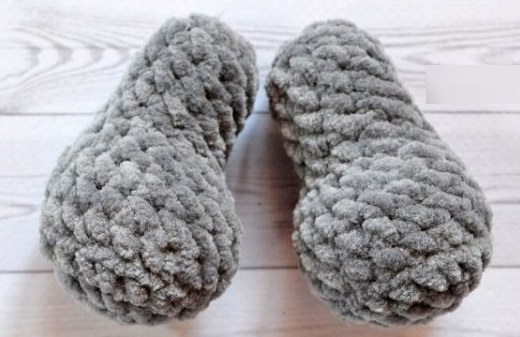
Legs
The hind legs should be larger than the front legs.
How to knit them:
- Cast on a chain of 7 VP, knit 5 sc into the 2nd loop. 3 into 1 loop. Next, turn around and knit on the other side alternating 4 sc and 1 increase. There should be 19 sc.
- A new chain begins with an increase. Then 3 sc, 3 increases, 3 sc again and 2 increases.
- The new chain consists of 1 sc, an increase, 4 sc. The combination is repeated 3 times. Then 4 more sc are knitted, 2 increases.
- 4th and 5th chain knit 26 CCH.
- Alternate until the end of the row 7 sc, 1 increase and 9 sc.
- Alternate 6 sc, 1 decrease and 7 sc.
- Knit row 8 with 15 DC.
- Alternate 4 sc and 1 decrease.
- From rows 10 to 16, knit 13 DC.
- The last row is knitted from decreases.
Knit the other paw in the same way.
Assembly and decoration
The teddy bear made of plush yarn needs to be assembled into a whole toy. For work you will need sewing threads, a needle or a hook.
Procedure:
- First, all the parts need to be filled with holofiber. The head should be stuffed more tightly in the neck area, otherwise it will fall back.
- Using thread and a sewing needle, carefully sew up the holes for stuffing.
- Sew the head to the body. It is more convenient to sew "over the edge". Since the yarn is fleecy, the sewing threads will be barely noticeable.
- When sewing on arms and legs, you need to insert the needle under them. This will make the seam less noticeable.
- Attach the ears to the head. Here you will have to use blind stitches. Sew the muzzle in the same way.
For decoration, you will need plastic eyes and a nose. They need to be secured before the head is stuffed. If this toy is intended for children under 3 years old, it is better not to use small beads, eyes and buttons. The bear's muzzle can be decorated with black threads, and a satin ribbon can be used as decoration.
If this toy is intended for a girl, you can tie the ribbon into a bow and carefully sew it under the bear's ear or on the top of the head. To make a bear for a boy, you can tie the ribbon around the neck in the form of a tie or bow tie. To prevent the edges of the ribbon from unraveling, you need to carefully set them on fire with a lighter.
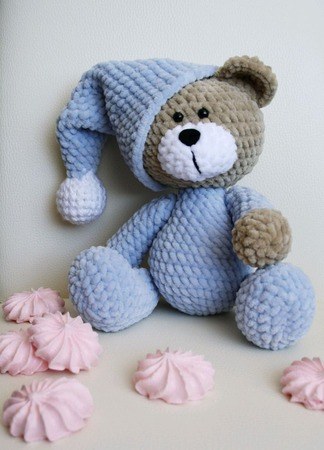
Teddy bear in pajamas
A teddy bear made of plush yarn (you can crochet different models of toys if you calculate and increase the number of rows) dressed in pajamas will be suitable as a toy to sleep with. Knitting such a bear is not difficult, the main thing is to decide on the main and secondary colors of the threads. For example, the main one is brown, the color of the pajamas is light green, and the slippers and cuffs are white.
Handles
How to knit front legs:
- With brown thread make 2 VP and in 2 knit 7 SC.
- Knit 4 sc in 1 loop 2 times and 2 sc. Repeat the combination 2 times.
- Work 3 sc, 1 increase, 7 sc, 1 increase and 5 more sc.
- Until row 5, knit rows of 17 sc.
- 4 sc, 1 increase, 7 sc and 2 decreases. 3 more sc.
- 4 sc, 1 increase, 6 sc and 1 decrease. Then 2 sc.
- 11 sc, 1 decrease. 2 sc.
- 14 sc.
- Change the brown thread to light green. Knit 12 sc, 1 decrease, 1 sc.
- From rows 11 to 13, knit chains of 14 sc.
- Knit 12 sc and 1 decrease.
- From rows 15 to 19, knit chains of 13 sc.
- In the last row, knit 1 decrease, 4 sc, another 1 decrease and 6 sc.
The other leg is knitted in the same way.
Cuffs
The cuffs need to be knitted from white yarn:
- Cast on a chain of 7 VP.
- Knit 1 row with half double crochets.
- Alternate 1 sc and 1 sc until the end of the row.
When the toy is completely ready, the cuffs are sewn along the line of the pajama sleeves.
Legs
How to tie the hind legs correctly:
- Cast on a chain of 7 VP. In the 2nd loop knit 5 SC, in the 1st loop 5 SC, on the other side knit 5 SC and 1 increase.
- Make 1 increase, then work 6 sc, 4 sc in 1 loop, 3 sc, 4 sc in 1 loop. 6 sc and 1 increase.
- 4 sc in 1 loop, 8 sc in a row, 4 more sc in 1 loop. 5 sc in a row and 3 sc in 1 loop, then 8 sc.
- The next 2 rows knit 30 DC.
- Make a decrease, knit 25 sc.
- Work 9 sc, 6 decreases and 8 sc.
- 9 sc, 4 decreases, 5 sc.
- 9 sc, 2 decreases, 5 sc.
- 9 sc, 1 decrease, 5 sc.
- From rows 11 to 17, knit rows of 16 sc.
- The last row starts with 4 sc, 3 decreases and 8 sc.

The other hind leg is knitted according to the same instructions.
Head
How to knit a bear head:
- Knit 7 sc into the slip stitch.
- Knit 2 sc into each loop.
- Knit, adding 8 new sc. There should be 22 sc in a row.
- Alternate 3 sc and 2 increases.
- Up to the 7th row you need to knit, alternating sc (in each new chain their number increases by 1) and an increase.
- In the 8th chain there will be 46 sc. Knit 3 more rows without increases.
- Decreases begin on row 13. 6 sc alternate with 1 decrease 6 times.
- From the 14th to the 16th chain, the number of sc decreases by 1, and alternates with 1 decrease.
- In row 17, knit alternating 5 sc and 1 decrease. There should be 17 sc in row 1.
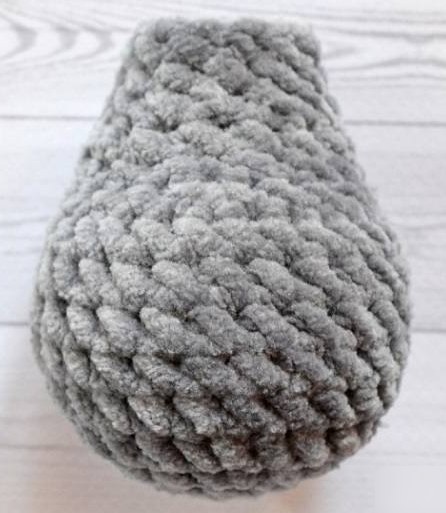
For this model of the toy, the muzzle is not knitted separately, since the shape of the head is slightly elongated in the front.
Ears
You need to knit 2 identical parts according to these instructions:
- Knit 7 sc into the amigurumi ring.
- Knit 2 sc into each loop.
- Alternate 2 sc and 1 increase.
- Knit the next 2 rows with 22 DC.
Cut the threads with some extra length to make it easier to sew the ears to the head.
Eyelids
If you plan to insert plastic eyes before stuffing the head with filler, you can decorate them with eyelids. 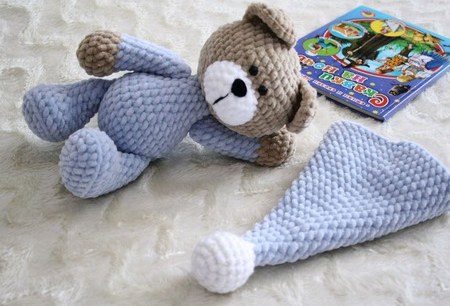 This way the bear will look sleepy. After fixing the eyes, you need to take a thin yarn of the same color as the bear's head and a thin hook. Carefully insert it above the eye and stitch 1-2 rows of half-columns. The eyelids should cover the eye by 1/4.
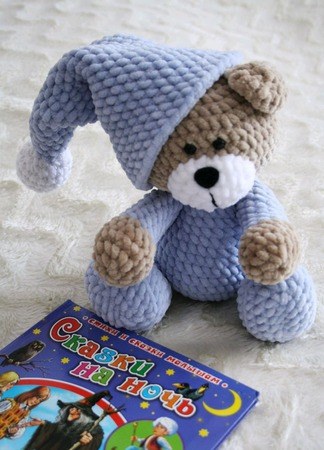
For a boy
A teddy bear made of plush yarn (you can crochet the pajamas separately) in light blue or blue clothes is suitable for boys. This color is calming, prepares the baby for sleep. If the craftswoman who will knit the toy has a lot of free time, she can decorate the top of the bear's pajamas with a felt applique in the form of a car, airplane or yellow stars.
For a girl
To dress up a teddy bear made for a girl, you can knit pink pajamas for it. If you don't want to spend a lot of time, or you don't have the yarn of the right color, you can knit a toy from the main threads. Then sew a cap and a nightgown in the form of a dress from pink or white felt.
Cuffs for trousers
The cuffs on the bear's pants are knitted with white threads. You can make a chain of 10 VP and tie it on 2 sides with double crochets. Then sew 1 small button on 1 side, wrap the strip around the paw, where the main color and secondary color are connected. Push the button between the double crochets and fix it.
Slippers
Slippers can be knitted to match the color of the pajamas or cuffs.
How to knit:
- Knit 7 sc into the amigurumi ring.
- Next row knit 3 sc in 1 loop.
- Knit 4 more rows of 14 sc.
- Knit the next row with 2 decreases.
The other slipper is knitted in the same way.
Nightcap
To knit a cap you will need white and light green yarn:
- Using a light green thread, make a chain of 20 VP.
- Knit 2 rows with half double crochets.
- Change the thread to white, knit 1 row of CCH.
- Change yarn again and knit 2 more rows of sc.
- In the next 5 rows, make 2-3 decreases.
- Knit 3 more rows without decreasing, CCH.
- The last row is made from decreases.
You can sew a pompom made of white thread or a tassel to the top of the cap.
Assembling the toy
The bear made of plush yarn (you can use a crochet hook to connect the parts together, knitting the joints with half-columns) is almost ready, all that remains is to assemble the toy.
Step by step instructions:
- Fill all the parts with stuffing.
- Sew the head to the body.
- Sew on the ears.
- Attach arms and legs to the body. It is important to ensure that they are parallel to each other. The line where the light green and brown yarn joins will serve as a guide.
- Sew on the cuffs.
- Put the cap on your head. You can leave it unsewn or just grab it on both sides.
- Embroider or attach the nose.
The toy can be decorated with sequins, beads or satin ribbon. If you decide to embroider eyes and a nose, you can use the same plush yarn, black, gray or dark brown. The eyes can be embroidered in the form of check marks, as if the bear is already asleep.
The nose is usually embroidered as an oval or inverted triangle. First, the outline is marked, and then it is filled in with even stitches, as in satin stitch embroidery.
A teddy bear made of plush yarn can be dressed in clothes knitted from other threads. For example, wool, acrylic or viscose. Such yarn is thinner and has a different texture. The craft will look more interesting and will be less voluminous. The outfit can be knitted either with a crochet hook or with knitting needles.
Video about crocheting a bear
Teddy bear crocheted from plush yarn: