Popular since ancient times, Japanese handicraft called amigurumi has become widespread in the modern world. There are practically no people who are indifferent to such creativity, performed with a crochet hook.
The secrets of creating dense knitted toys with interesting proportions are available to both experienced craftsmen and beginners. For beginners, there are even entire master classes on making such soulful crafts.
Amigurumi: what is it?
The name of the fashionable creative trend is translated from Japanese as crocheted-wrapped. Amigurumi handicrafts are based on the execution of cute crafts with a crochet hook.
Its main differences are:
- method of execution (use of a smaller diameter hook thread);
- miniature result (8-10 cm, sometimes up to 50 cm);
- in choosing plain yarn for crafts (mostly);
- proportions (the presence of a large head on a small body).
The amigurumi technique is mainly intended for crocheting.
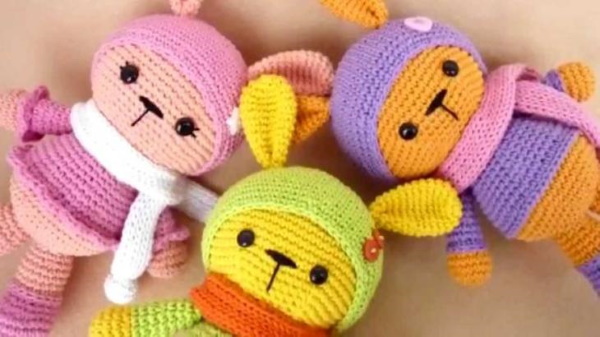
Traditional crafts made in it are considered to be animals with characteristic human features:
- sitting or standing on 2 legs;
- accessories;
- clothes.
To make the toys look cute, their bodies and limbs are made small, and the head is large. The image is complemented with decorations and eyes. All the details are made separately, and then they are sewn together. Even during the knitting process, the animals are filled with synthetic padding.
Necessary tools and materials
The following materials should be used to make amigurumi crafts:
- paint to indicate facial features;
- filler in the form of synthetic fluff or synthetic padding;
- buttons and eyes;
- beads or beads;
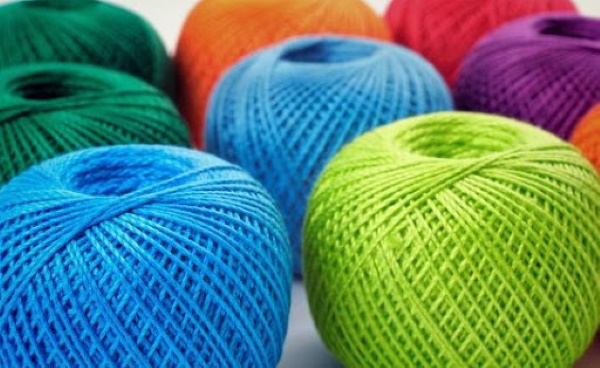
- threads (acrylic or cotton) of different colors and thicknesses;
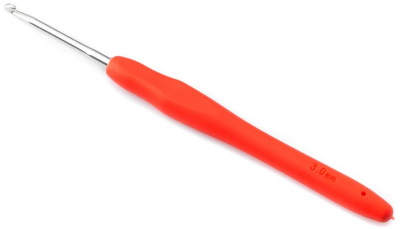
- hook (one size smaller in thickness than the thickness of the yarn).
Schemes with descriptions for beginners
Schemes for creating animals are usually taken as a basis. But they can always be supplemented with your own ideas and developed independently.
Abbreviations found in descriptions and diagrams:
- SC – single crochet stitches.
Hedgehog
The body is knitted spirally, in the round, in a beige shade:
- Having made a circle from the threads, knit 6 sc.
- In the loop of the previous row add 1 sc. The output is 12.
- Come out to 18 sc using increases and columns.
- Increase + 1 sc - repeat to the end of the row.
- Increase + 3 sc - to the end.
- Increase + 4 sc - to the end.
- Increase + 5 sc - to the end.
- Increase + 6 sc - to the end.
- Increase + 7 sc - to the end.
- Increase + 8 sc - to the end.
- 11-14 (rows) all the time knit 60 sc in a circle.
Next, attach the brown yarn and knit:
- 60 sc in a circle 6 rows in a row.
- Decrease, 8 sc.
- Decrease, 7 sc.
- Decrease, 6 sc.
- Decrease, 5 sc.
- Decrease, 4 sc.
- Decrease, 3 sc.
- Decrease, 2 sc.
The resulting two-color ball is filled, giving it a triangular shape.
Then they knit further:
- Decrease, 1 sc.
- Decreasing in a circle.
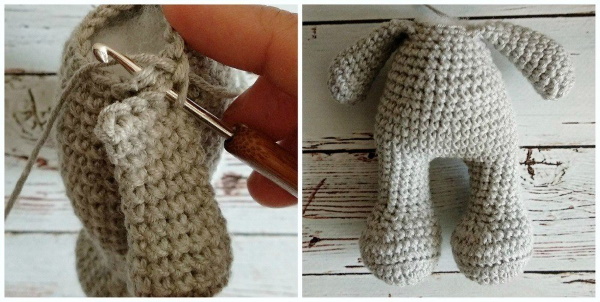
The secured thread is cut and they begin to knit the nose with beige thread:
- Circle, 5 sc.
- 10 sc with circular increases.
- 10 sc.
The thread is secured and left. For the lip, 5 sc are made from beige yarn in the amigurumi ring, then the thread is tightened and set aside.
From the material of the same shade, make 2 ears according to the scheme:
- Circle, 7 sc.
- 7 sc.
- The thread is secured and left.
Pattern for beige front paws:
- Circle, 7 sc.
- Rows 2-5: 7 sc.
- Securing the thread and putting it aside.
For the beige hind legs:
- Circle, 6 sc.
- 12 sc with increases in a circle.
- Rows 3-4: 12 sc.
- 6 decreases to 6 sc.
- Tightening and leaving the end.
All the finished parts of the hedgehog are assembled and sewn together. The eyes are glued to the head. Eyebrows are made using embroidery. Needles are made from boucle yarn, knitting it in a spiral with sc. in the brown area of the toy.
Bunny
Amigurumi crochet for beginners is considered a starting point in knitting in general. Having practiced enough on small toys, you can begin to create something more serious and substantial.
Even a beginner can easily knit a cute bunny.
To create it you need:
- accessories in the form of a bracelet or bow;
- clothes (dress or blouse);
- threads of different colors;
- hook;
- synthetic padding.
First, knit the animal's head from grey threads:
- Circle, 6 sc.
- Add 6 loops, then 1 sc 6 times.
- In rows 4-9 add 1 sc. Repeat all this for 6 rows.
- Row 10 is done like the first.
- Row 11 should look like this: 13 sc, 10 loops, 8 sc, 10 loops, 13 sc.
- Row 12: 23 sc, skip 10 sc, insert hook into 34th loop and make 8 sc. Then skip 10 loops and knit to the end of 23 sc.
- Rows 13-19 are performed without changes.
- In rows 20-23, decrease 1 sc, starting with 7. Repeat each row 6 times.
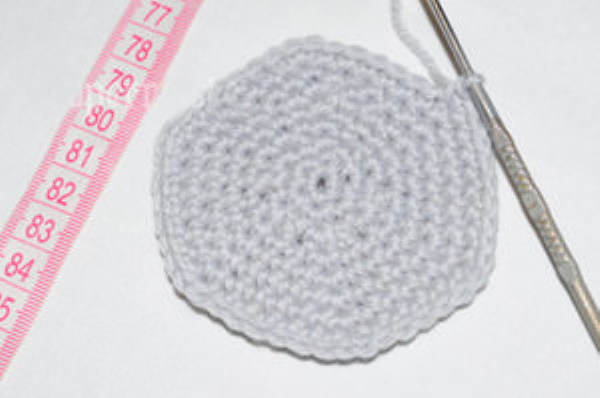
The bunny's ears are knitted on the 10 loops of the head that were left in the 12th row:
- Make 10 sc.
- Add 1 sc and repeat 5 times.
- Next, knit as in the 1st row.
- Add 2 sc and repeat 5 times.
- The next row is performed without changes.
- Add 3 sc and repeat 5 times.
- Next come 10 regular rows.
- In row 20, knit 3 sc, decrease and repeat 5 times.
- The next row is made normal.
- Next come 2 sc with a decrease and 5-time repeat.
- An ordinary row.
- 1 sc, decrease, repeat 5 times.
- After decreasing 5 loops, the hole is sewn up and the end of the thread is hidden.
- The 2nd eye is knitted in the same way.
Amigurumi crochet for beginners is not too difficult. Moreover, there are many schemes and descriptions for such creativity. All of them explain in detail the existing nuances of Japanese needlework. So any beginner can easily make a cute knitted toy with his own hands.
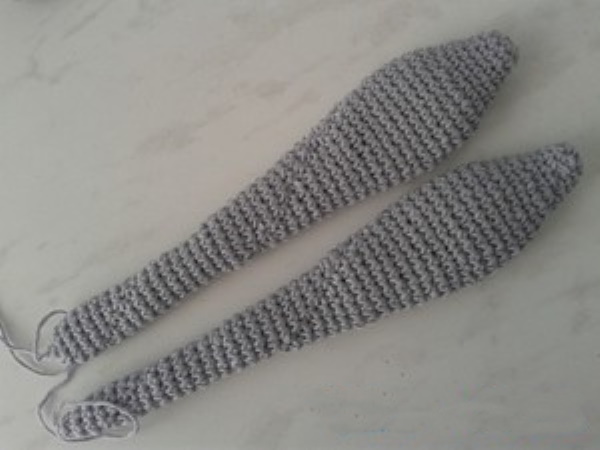
Knitting the body of the bunny:
- Circle, 6 sc.
- Then add 6 loops.
- Add 6×1 sc to rows 3–7.
- Rows 8-12 are done as usual.
- Then come: 5 sc, decrease, 6 repeats.
- Rows 14-17 are normal.
- 4 sc with decrease, 6 repeats.
- Regular rows 19 and 20.
- Decrease 3 sc, 6 repeats.
- The next 2 rows are regular.
- 6 decreases and 2 sc.
- 1 regular row.
The finished body of the hare is filled with synthetic padding and sewn to the head.
Next, take yarn of a different color and make the toy’s face:
- Circle, 6 sc.
- The next 6 increase stitches.
- Next add 6x1 sc.
- The next row is like the previous one, but with 2 sc.
- 1 regular row.
The resulting piece is loosely stuffed and sewn to the head.
The tail is made from the main color:
- Circle, 6 sc.
- Add 6 loops
- 1 sc with increase, 6 reps.
- 2 regular rows.
- 1 sc, decrease, 6 reps.
The piece is filled and a long thread is left on it.
Next, make the handles:
- Circle, 5 sc.
- Add 5 loops.
- 1 sc with increase, 6 reps.
- 17 regular rows.
- The piece is folded in half and 7 sc are made to close the opening.
- The 2nd element is performed in exactly the same way.
The knitted paws are filled to half and their threads are secured.
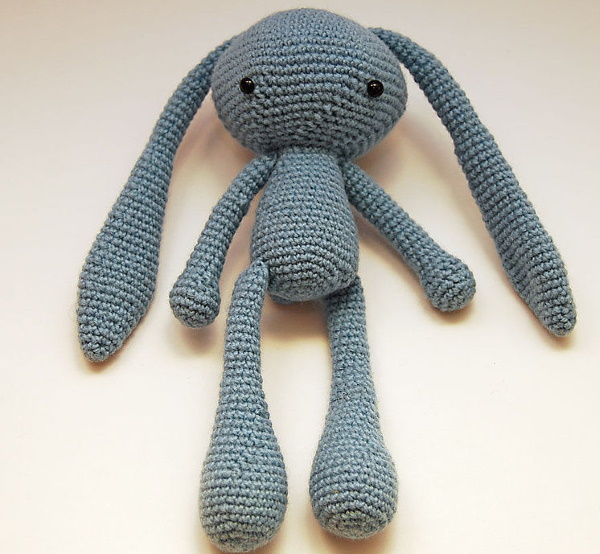
The legs are knitted according to the following pattern:
- A chain of 7 air loops. Then in the 2nd loop from the hook make 4 SC, and again the same amount in one loop. On the other side make the same amount again.
- After 5 columns in the bottom hole, make 3 sc, then 2 as usual, again 3-in-1 and 5 regular ones.
- Start with three in one, then 7 simple sc, again two 3-in-1, between which 4 sc are knitted, and the row is finished with the 8th sc.
- Continue doing regular sc, 3 rows in a row.
- Between a pair of eights in the columns, 6 decreases are made.
- Then first 4 and then 2 decreases are performed, but between two sevens of columns.
- After this, knit regular sc 8 rows in a row.
- On the folded in half piece, knit another 8 sc.
Kitty
Amigurumi crochet for beginners can be in the form of animals or household items. Such creatures are often then used to make souvenirs or interior decorations. Cute miniature crafts are appropriate to give not only to children, but also to adults.
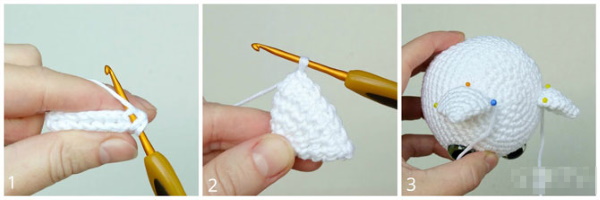
Head diagram:
- 6 sc.
- The same number of additional ones.
- RLS, additional.
- 2 sc, additional.
- 2+1 sc, additional.
- 4 sc, additional.
- 5 sc, additional.
- 6 sc, additional.
- 7 sc, additional.
- 8 sc, additional.
- 60 sc. 12 rows in a row.
- 8 sc, decrease.
- 7 sc, decrease.
- 6 sc, decrease.
- 5 sc, decrease.
- 4 sc, decrease.
- 3 sc, decrease.
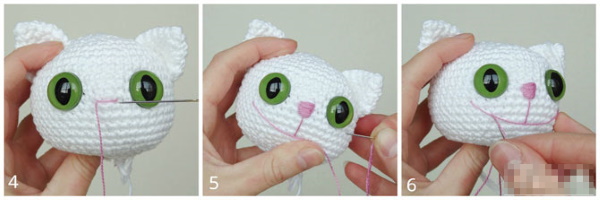
Instructions for the body:
- Circle, 6 sc.
- Additional up to 12.
- SC, additional. Then add 1 SC in each row, up to 48 SC.
- Regular sc repeat 10 rows in a row.
- 6 sc, decrease.
- Regular sc.
- 5 sc, decrease.
- Regular sc.
- 4 sc, decrease.
- Regular sc.
- 3 sc, decrease.
- Regular sc.
Forelimb diagram:
- Circle, 6 sc.
- Additional. The same number in a circle.
- RLS, additional.
- 1+1 sc, additional.
- 24 sc. repeat 4 rows in a row.
- 12 sc, 6 decrease
- Regular sc.
- 14 sc, 2 decrease
- 16 sc. repeat 11 rows in a row with a change of yarn shade in row 13.
- 6 sc, decrease.
- Regular sc.
- Filling the part by 2/3.
Description of the execution of the hind legs:
- Circle, 6 sc.
- 6 additional circular.
- 1 sc, additional.
- 2 sc, additional.
- 3 sc, additional.
- 4 sc, additional.
- 36 sc. repeat 2 rows in a row with a change of shade in the 7th row.
- 4 sc, decrease.
- Simple sc.
- 2 sc, decrease, 6 s.
- Simple sc.
- 1 sc, decrease, 6 s.
- 18 sc. repeat 10 rows in a row.
- 4 sc, decrease.
- Simple sc.
- Fill 2/3 full.
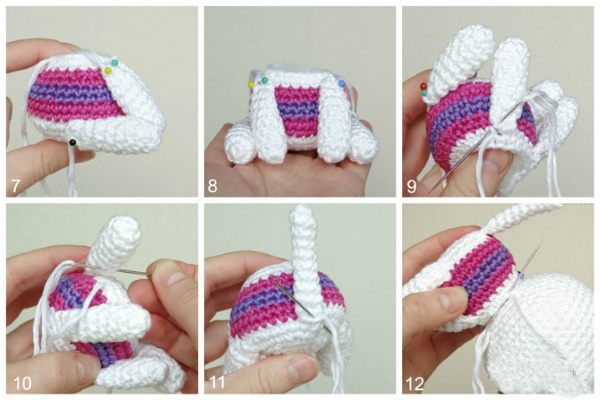
Scheme for creating the muzzle circles:
- Circle, 6 sc.
- 6th round. additional.
- 1 sc, additional.
- 2 sc, additional.
- 3 sc, additional.
Instructions for ears:
- Circle, 6 sc.
- 1 sc, additional.
- Regular sc.
- 2 sc, additional.
- Regular sc.
- 3 sc, additional.
- Regular sc.
- 4 sc, additional.
- Regular sc.
Tail execution:
- Circle, 6 sc.
- 6 additional circular.
- Regular sc up to and including row 30.
Amigurumi crochet for beginners is very simple and does not require any special skills. After all, anyone can learn the art of knitting. Moreover, there are many clear descriptions for such handicrafts that explain its essence. In order to be inspired by such creativity, and not to be disappointed, it is important for beginners to choose the right materials and tools for it.
Fox
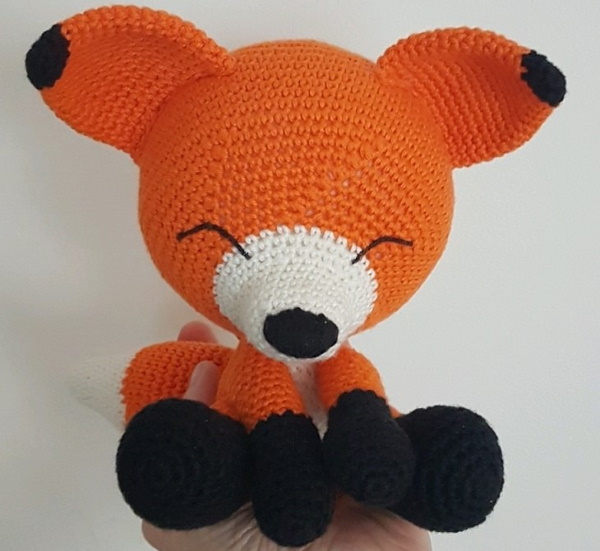
Making a head from orange threads:
- Circle, 6 sc.
- The same number of additives in a circle.
- RLS, additional.
- 2 sc, additional.
- 3 sc, additional.
- 3+1 sc, additional.
- 5 sc, additional.
- 6 sc, additional.
- 7 sc, additional.
- 8 sc, additional.
- 9 sc, additional.
- 10 sc, additional.
- 11 sc, additional.
- Regular sc are repeated up to and including row 23.
- 11 sc, decrease.
- 10 sc, decrease.
- 9 sc, decrease.
- 8 sc, decrease.
- 7 sc, decrease.
- 6 sc, decrease.
- 5 sc, decrease.
- The detail is filled.
- 4 sc, decrease. On the last column, change the orange color to white and knit the muzzle.
- Regular sc are repeated up to and including row 34.
- 3 sc, decrease.
- Regular sc are repeated up to and including row 39.
- 2 sc, decrease.
- The muzzle is filled.
- Regular sc.
- 1 decrease.
- 1 sc, decrease.
- They fill the muzzle completely.
- Continue decreasing on the row until the hole is closed.
At the end of the muzzle, the fox's nose is embroidered in black. The eyes are made from threads of the same color in several folds.
Then the body is knitted with white threads:
- Circle, 6 sc.
- 1 additional.
- 1 sc, additional.
- 2 sc, additional.
- 3 sc, additional.
- 4 sc, additional.
- 5 sc, additional. On the last st. the white shade is changed to orange.
- 6 sc, additional.
- 48 sc. repeat up to and including row 12.
- 6 sc, decrease.
- 5 sc, decrease.
- 4 sc, decrease.
- 3 sc, decrease.
- Filling the part.
- 2 sc, decrease.
- 1 sc, decrease.
- 2 sc, decrease.
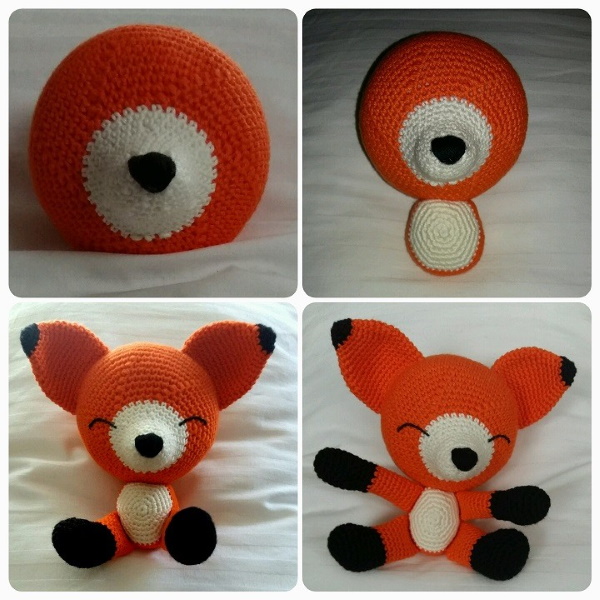
After closing the hole, the thread is pulled through the body so that its end comes out in the neck area. Then the body and head are sewn together.
The ears are knitted with black threads from the very top:
- Circle, 6 sc.
- 6 sc.
- 1 increase. On the outermost column, black is replaced by orange.
- 12 sc.
- 3 sc inc.
- 4 sc, inc.
- 5 sc, inc.
- 6 sc, inc.
- 7 sc, inc.
- 8 sc, inc.
- 30 sc. repeat up to and including row 17.
- The thread is pulled tight and its tail is left for subsequent sewing of the part to the head.
The hind legs start with black:
- Circle, 6 sc.
- 1 increase.
- 1 sc, increase.
- 2 sc, increase.
- 24 sc. repeat 2 rows in a row.
- Make 2 decreases and knit to the edge of the row with columns.
- 20 sc.
- Again 2 decreases and columns.
- 18 sc. On the last one, change the shade to orange.
- 18 sc. repeat 8 rows in a row.
- The element is filled, folded in half and knitted with columns for 2 outer walls. Fasten and leave a long thread.
Execution of the front limbs in black:
- Circle, 6 sc.
- 1 increase.
- 5 sc, increase.
- 6 sc, increase.
- 16 sc. repeat 2 rows in a row.
- 6 sc, decrease.
- 5 sc, decrease.
- 12 sc. Repeat 3 rows in a row. On the last column, change the shade to orange.
- 12 sc. repeat 12 rows in a row.
- Tighten the end and leave it long. Fill the finished parts loosely.
Making the tail with a white shade:
- Circle, 6 sc.
- 1 sc, additional.
- 2 sc, additional.
- 12 sc.
- 3 sc, additional.
- 4 sc, increase.
- 18 sc.
- 5 sc, additional.
- 6 sc, additional.
- 24 sc. On the last column change the shade to orange.
- 7 sc, additional.
- 8 sc, additional.
- 30 sc. repeat 8 rows in a row.
- 8 sc, decrease.
- 7 sc, decrease.
- 24 sc.
- 6 sc, decrease.
- 5 sc, decrease.
- 18 sc.
- The part is lightly filled.
- 4 sc, decrease.
- 3 sc, decrease.
- Finish filling the tail.
- 12 sc.
- Secure and leave a long end of thread.
The chanterelle is collected and sewn.
Teddy bear
First, knit the head:
- Circle, 6 sc.
- 3 sc in 1 hole, 2 sc, 3 sc in 1 hole, 2 sc.
- 1 sc, 2 add, 3 sc, 2 add, 2 sc.
- 2 sc, 2 add, 5 sc, 2 add, 3 sc.
- 18 sc.
- 6 sc, 6 add, 6 sc.
- 6 sc, 1 sc, add, 6 sc repeat 6 times.
- 4 sc, additional.
- 5 sc, additional.
- 6 sc, additional.
- Attach the eyes.
- 48 sc. repeat 7 rows in a row.
- 6 sc, decrease.
- 5 sc, decrease.
- 4 sc, decrease.
- 3 sc, decrease.
- 2 sc, decrease.
- 1 sc, decrease.
- Round 6. Decrease to 6 sc.
- The hole is tightened.
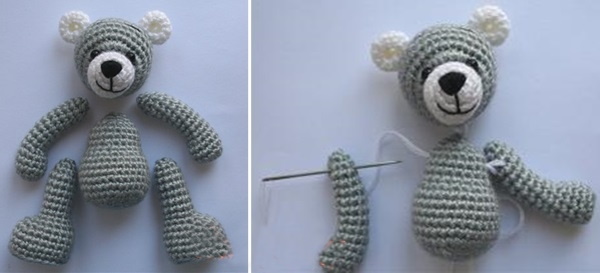
Ear diagram:
- Circle, 6 sc.
- 6 circular additional up to 12 sc.
- 12 sc. repeat 3 rows in a row.
- Leaving a long end.
Ears are sewn onto the muzzle and a nose is designed on it.
Body execution:
- Circle, 6 sc.
- 6 circular additional up to 12 sc.
- 1 sc, additional.
- 2 sc, additional.
- 3 sc, additional.
- 4 sc, additional.
- 36 sc. repeat 4 rows in a row.
- 4 sc, decrease.
- 30 sc. repeat 3 rows in a row.
- 3 sc, decrease.
- 24 sc. repeat 2 rows in a row.
- 2 sc, decrease.
- 18 sc.
- Leaving a long edge.
Instructions for the forelimbs:
- Circle, 6 sc.
- 6 rounds, add up to 12 sc.
- 12 sc. repeat 2 rows in a row.
- 3 sc, 3 decrease, 3 sc.
- 9 sc. repeat 8 rows in a row.
- The hole is tightened.
Execution of the hind legs:
- Circle, 8 sc.
- 8 circular additional up to 16 sc.
- 16 sc. repeat 3 rows in a row.
- 4 sc, 4 decrease, 4 sc.
- 12 sc. repeat 7 rows in a row.
- 6th circle. Decrease.
- Tighten the hole. Sew all the finished parts together, forming a bear.
Beginners need to immediately understand all the intricacies of Japanese knitting toys. This will help them avoid mistakes in creating amigurumi. Crocheted products will look attractive only if they are made carefully and with love, as if for yourself.
Dog
First, create the dog's head and body from grey threads:
- Circle, 6 sc.
- 6 circular additional up to 12 sc.
- 1 sc, additional.
- 2 sc, additional.
- 3 sc, additional.
- 4 sc, additional.
- 5 sc, additional.
- 42 sc. repeat 6 rows in a row.
- 5 sc, decrease.
- 4 sc, decrease.
- 3 sc, decrease.
- 2 sc, decrease.
- 1 sc, decrease.
- 12 sc.
- Gray threads are replaced with blue ones.
- 1 sc, additional.
- 18 sc.
- 2 sc, additional.
- 24 sc. repeat 5 rows in a row.
- Blue threads are replaced with grey ones.
- 24 sc. repeat 3 rows in a row.
- Perform the lower paw.
- 12 sc knit, 12 sc skip.
- 12 sc. repeat 3 rows in a row.
- 6th circle. decrease
- The threads tighten and conceal.
- On the 12 skipped loops, knit the 2nd lower leg, similar to the 1st.
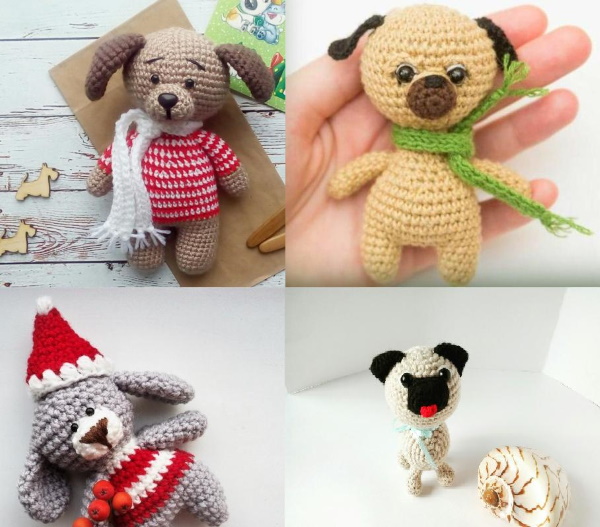
Scheme for the upper legs:
- Circle, 5 sc.
- 5 additional circular.
- 10 sc. repeat 2 rows in a row.
- The grey colour is replaced by blue.
- 10 sc. repeat 2 rows in a row.
- 1 sc, decrease.
- 7 sc. repeat 3 rows in a row.
- The foot is tightly filled, folded in half and 3 sc are knitted together.
Making the ears:
- Circle, 6 sc.
- 6 circular additional up to 12 sc.
- 3 sc, additional.
- 15 sc. repeat 4 rows in a row.
- 3 sc, decrease.
- 2 sc, decrease.
- Fold the ear in half and knit 4 sc together.
For the face:
- Chain of 5 loops, add in 2nd loop, 2 sts, 4 sts in 1 loop, 2 sc from 2 sides, add.
- 2 additional, 2 sc, 4 additional, 2 sc, 2 additional.
- 20 sc. repeat 2 rows in a row.
Creating the spout:
- Circle, 6 sc.
- 1 sc, additional.
- 9 sc.
Secrets for Beginners
The ends of the threads that need to be hidden inside the craft must be long. Short ones will come loose over time, spoiling the appearance of the product. Because of this, the toy may also unravel.
Clothes for animals are knitted from thinner threads than those used to make the toy. For items smaller than 10 cm, a special iriSBN is usually used. Such threads are intended for light items of clothing for knitted dolls.
Table of consumables for various purposes when working on amigurumi animals:
| For what | Name of instruments |
| Weighting and stability of limbs | Plastic circles and ovals; beads; balls or hemispheres |
| Making eyes | Fabric; pieces of leather or felt; special purchased fittings; beads |
| Execution of spouts | Yarn; fabric or leather; buttons |
| For the antennae | Waxed threads; wire; fishing line |
The parts are sewn together either with the same thread that was used to knit the toy, or with denim. For a strength close to the latter, you can also take dental. In order for the toy to turn out decent, its seams should be as neat and invisible as possible.
To rotate the head and paws, the parts are connected to each other with special fasteners called hinges. All knitted components of the product are filled with filler tightly enough so that they spring back after being pressed.
For a product without holes, when starting to knit it, use not a chain of air loops, but a special circle or ring. It is then tightly pulled by the long end of the thread. The number of single crochets starting from the ring is 6 for almost all parts, occasionally 5. The first loops of the rows are always marked so as not to get confused later.
For this purpose, use:
- bright threads;
- pins or rings;
- tip from the beginning of knitting.
The hook for amigurumi is chosen 1-2 sizes smaller than the thickness of the yarn. Its tip should not be very sharp or round. The optimal hook numbers for knitting animals are 1.8 or 2.
Cute traditional Japanese amigurumi animals have won fans from all over the world. Descriptions and patterns for crocheting toys have been translated into many foreign languages. The handicrafts that everyone loves have become available not only to masters of their craft, but also to beginners.
Video about making amigurumi crochet
Simple crochet amigurumi bear:
