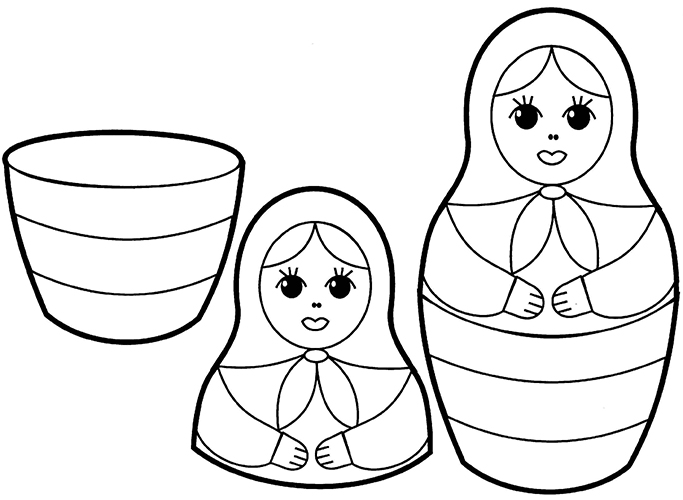
A simple drawing of a matryoshka doll consists of 2 parts (head and body) that are smoothly connected to each other. No skills are required from children complex painting, you will only need to build a doll figure and color it. But you can prepare a pre-made silhouette for your child to trace.
The main stages of the image of a matryoshka doll
Wooden toys that are put one inside another have always been painted according to Russian tradition. The souvenir has many styles. The name of the painting is associated with the area where it was made. For example, Zagorskaya, Kirovskaya, Semenovskaya, Turinskaya and so on.
Using this instruction, you can learn how to draw a wooden toy on paper or another base (egg, stone, etc.):
| Part of the work | Description of execution |
| Head | Draw a small circle. To get even edges of the geometric figure, you can use a compass or a round object of different diameters - saucers, lids, cups, etc. |
| Torso | Draw a second circle below, but larger. Both circles should touch each other. |
| Form | To get the traditional shape of a wooden toy, the circles need to be connected with smooth lines, and the extra details need to be removed with an eraser. |
| Face | Draw a face inside the first circle, which is also shaped like a circle. On the face, draw eyes, a nose, a mouth, eyebrows, and round cheeks. At the top of the face, depict hair covering the forehead. |
| Handkerchief | Draw a knot of the scarf at the bottom of the circle-face. Separate the scarf from the body with wavy lines. |
| Toy design | Draw a base at the bottom of the figure on which the toy stands. In the center of the body, separate the upper part of the figure from the lower part with a semicircular line. Erase unnecessary lines and make the contours brighter. |
| Apron | Decorate the bottom of the toy with colorful patterns consisting of flowers and decorative lines. |
| Coloring | Give the face a light beige shade, make the cheeks red, and the hair light brown. Make the base of the toy brown, and the patterns should be bright. |
Before children start drawing, you can show them visual material with an image of a matryoshka doll, and also lay out the manual on the tables.
Then, step by step, follow the following steps with a pencil:
- The first thing you need to do is draw a circle, which will be the top part of the matryoshka.
- Draw the bottom oval and connect it to the head.
- In the central part of the upper circle, draw a round face and hair.
- Draw eyes, lips and eyebrows on the face.
- Add a bow and an apron under the circle that represents the face.
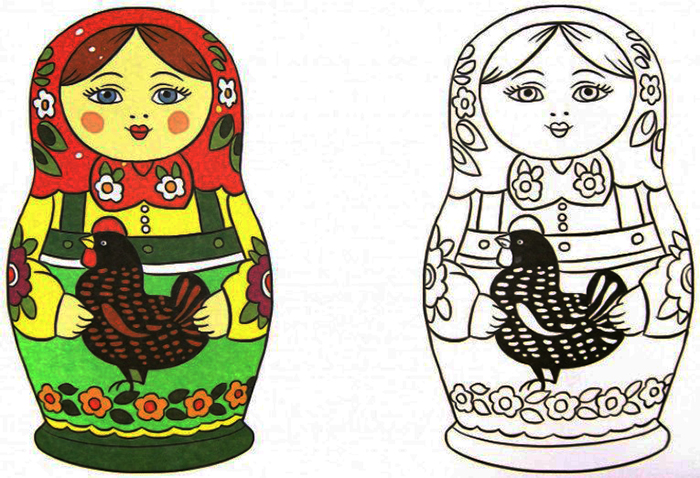
Matryoshka (a drawing for children should correspond to the description) can be brought to life. To do this, you need to color her sarafan and scarf. Young artists can find their favorite saturated colors. The sarafan can be decorated with a floral pattern or bright berries. Or you can offer children to color a ready-made black and white image of a matryoshka.
Simple drawing
To draw a simple picture with your child, you need to follow a few steps:
- Draw an egg with a blunt base.
- Draw a narrow stand on the base.
- At the top of the resulting oval, draw a circle for the face and bangs.
- Draw the face: eyes, nose, cheeks, smile and hair.
- Draw arms on both sides of the body.
To dress a matryoshka doll, you need:
- Draw 2 smooth lines under the face circle from the center to the sides. You will get a scarf.
- Draw a knot and the ends of the scarf.
- Draw the hem of the sundress at the bottom of the figure.
- Draw any pattern on the apron: a flower, berries, circles, and so on.
With paints
To paint a matryoshka doll, you will need the following tools:
- jar of water;
- brushes No. 3, No. 5;
- paints (watercolor, gouache);
- round objects;
- eraser;
- A4 sheet of paper;
- simple pencil;
- cotton swabs.

To complete the drawing, you need to do the following steps:
- Place the sheet vertically and place round objects on it end to end so that the circle at the bottom is larger and the circle at the top is smaller in diameter. Outline both objects with a pencil.
- Connect the circles together.
- To make the toy stable, you need to draw a base at the bottom.
- To draw the doll's face, take another round object. Its diameter should be smaller than the matryoshka's head. Put it to the head and trace it with a pencil.
- Next you need to draw the knot and the ends of the scarf.
- Then outline the hair.
- The next element will be the arms. You need to draw the sleeves, mark the cuffs, outline the hands.
- The eyes and mouth can be depicted as three circles.
- Eyes: The pupil should be smaller than the iris.
- Draw the lips like a bow.
- Place the flower in your hands.
- Use wavy lines to make a border along the edge of the scarf and the hem of the sundress.
- Draw eyebrows, cheeks, smile.
To color the resulting toy, you need to mix shades of white and ocher.
The result will be a flesh color.
- Use the resulting flesh-colored paint to paint the face and hands.
- Before you start using a new color, you need to wait until the previous one dries.
- Paint the sarafan in bright colors, without touching the lines of the scarf, arms and flower.
- Paint the scarf a different color.
- To make it easier for a child to draw patterns (polka dots, flowers) on the fabric of a scarf and dress, you can use a cotton swab.
- Use light paint to paint the shirt, the core and the lace of the sarafan. And make the hem dark.
- Decorate clothes with straight and wavy lines, circles or other patterns.
- Color the hair and eyebrows brown, make the eyes blue, the lips scarlet, and the blush pink. You can liven up the eyes with highlights made with a toothpick and white paint.
The child can dress the doll in any modern outfit. This idea will awaken the imagination of the young artist.
Simple drawing with felt-tip pens
Matryoshka (a drawing for children does not necessarily have to be completely colored with a felt-tip pen) can be drawn with strokes-dashes of different lengths, dots, squiggles.
The result will be a neater picture.
- Use a black marker to draw a circle as evenly as possible.
- At the bottom, on the outside of the circle, draw a knot and a bow.
- Draw hair inside the circle: 2 arcs starting from one top point and ending on different sides of the circle.
- Draw 2 eyes in the central part of the head, and a smile just below.
Draw a big figure eight like this:
- Draw a semicircle 1 cm above the head.
- Draw a second arc at the bottom of the sheet. Its size should be larger than the first arc.
- Connect the left edge of the upper arc with the left edge of the lower arc with a line curved inward.
- Connect the right edge of the upper arc with the right edge of the lower arc with a curved line.
This way you will get the figure of the toy.
Next:
- Draw smooth lines to form the edge of the scarf.
- Draw an apron, the top of which rests on a scarf.
- Draw hands on the sides of the matryoshka (between the apron and the edge of the toy). The sleeve line starts where the scarf ends and is formed from a small rectangle.
- Draw a flower in the center of the apron.
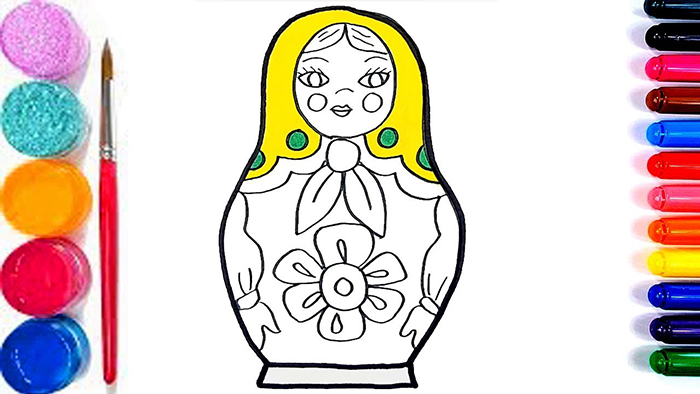
To color the sketch, you need to take felt-tip pens of the following shades: yellow, orange, beige, light and dark brown, green and red:
- Use a yellow marker to color the apron.
- Use an orange marker to color the bottom part of the matryoshka (dress).
- To paint your face, you need to choose a nude shade.
- Use a light brown marker to color the hair. Then take a dark brown marker and draw a few stripes on the hair to create iridescent colors.
- Color the scarf green.
- Color the flower on the apron red.
- Put red dots on the dress.
- Draw a spiral pattern on the apron in orange, bordering the apron in a circle.
- Colour your hands with a flesh-coloured marker.
With colored pencils
Draw the outline of the toy in any way.
Next, follow these steps:
- Draw the face and hair.
- Draw a scarf.
- Draw hands joined in the center.
- Draw a heart on the doll's chest.
- Draw an apron at the bottom of the figure.
- Draw small circles on the skirt.
- Decorate the scarf with small flowers.
- Color the scarf, skirt, heart and lips red.
- Color the apron yellow.
- Flowers on the scarf, circles on the skirt, shirt and eyes are made blue.
- Paint the sleeves green.
Using gouache
Gouache will help your child learn how to create beautiful and correct drawings. Since it dissolves well in water, you can dilute dried paint with water and easily correct mistakes. Or you can cover dark spots with light colors. The finished drawing does not get dirty.
Matryoshka has many painting options. For children who love and know how to draw beautifully, it will not be difficult to show their imagination and create their own, author's toy.
Step-by-step master class on creating a simple drawing:
- Use a pencil to outline the shape of the matryoshka's head - it's a circle.
- Divide a sheet of paper in half from top to bottom.
- Smoothly draw the shape of the matryoshka doll from the left side, from the head to the bottom of her figure.
- Measure the distance from the outermost point of the curved line drawn in point #3 to the straight line dividing the sheet in half.
- Measure the same distance from the center line to the right.
- Do the same with the other points of the curved line. This is done so that the shape of the toy is symmetrical on both sides.
- Draw a curved line on the right connecting the marked points. This will create a mirror image of the left edge of the matryoshka.
- Connect the bottom points of both lines with a smooth arc, forming the bottom of the figure.
- Draw a smaller circle inside the top circle. This will be the face of the toy.
- Draw a small circle under the face, which will be the knot of the scarf.
- Draw 2 smooth straight lines under the knot, going down and to the sides. This will be the bottom edge of the scarf.
- From the circle-knot, draw 2 small ovals to the sides, depicting a bow.
- Draw arms along the body of the matryoshka on both sides.
- Draw a large flower in the center of the lower part of the figure.
- On the face, draw hair and eyes in the form of small circles. The mouth can also be made in the form of a circle.
The toy sketch is ready.
Now you need to take a brush and paints and paint the blank.
- Paint the scarf and bow red.
- Draw the mouth with the same paint.
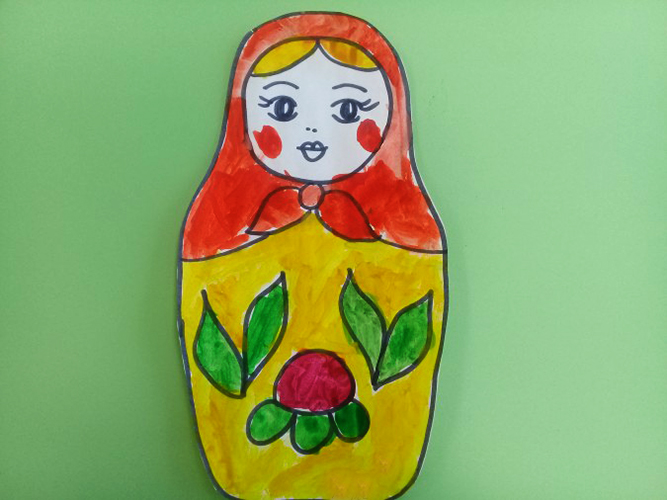
- Dip a brush in yellow paint and paint the flower.
- The edges of the flower and the veins of the petals can be painted red.
- Place black stamens in the center of the flower. Use the same color to darken the outline of the flower in some places.
- Using a thin brush filled with black paint, draw the outline of the leaves around the flower, outline the hands, the scarf and the outline of the entire figure of the matryoshka doll.
- Color the hair and eyes black, draw eyebrows above the eyes.
- To draw a nose, just put 2 black dots.
- Draw round cheeks with pink color.
- Paint the leaves on the sundress green.
- Place round red dots on the sarafan.
- Paint the empty space on the face and dress light yellow.
Matryoshka (a drawing for children should be as interesting as possible) can be made in different ways. Instead of paints, you can use wax crayons or use them in combination with gouache. Since wax repels water, the image will not be painted over. If the layers are thick, you can mark patterns on them with a toothpick or a fingernail.
Zagorsk Matryoshka
This version of the design uses 4 primary colors – red or orange, yellow, green, blue:
- The drawing should begin with constructing a figure, which should be in the center of the sheet. The boundaries of the drawing should be marked on the paper at the top, bottom and sides. This will result in a large frame.
- Draw a semicircle on top of the sheet. This will be the face of the toy.
- The body is oval-shaped.
- Outline the head and body with a single line. Remove unnecessary lines with an eraser. You will get a silhouette of a matryoshka doll.
- Outline a round face.
- Then draw a bow on the scarf and its bottom edge.
- Draw the upper part of the sarafan under the scarf on the neck.
- If children find it difficult to draw hands, you can make a figure without them. Therefore, it remains to draw only an apron with openwork embroidery along the edge.
- Outline the hairstyle. Usually it is a symmetrical fringe.
- Outline the eyes, nose and mouth.
The initial stage of building the matryoshka is complete.
To make a toy in color, you need to follow these steps:
- Cover the scarf with blue color.
- Blue can be used to decorate the apron. For example, draw a stripe along its edge and on the belt.
- You can use red color to fill the sarafan.
- The apron can be painted yellow.
- Yellow color can be used to color the face and neck.
- Dye your hair orange.
Once the main color masses are filled, you can move on to painting, consisting of dots, leaves and flowers.
It is more convenient for a child to make dots with cotton swabs.
- Place red paint on one cotton swab and yellow paint on the other and create flowers of the same size on the scarf using dots.
- Make the same flowers on the apron using red and orange colors.
- Place yellow dots on the apron stripe and blue dots on the lace edge.
- For the dots on the apron belt, you can choose red.
- Beads can be made from dots of different colors.
- To make petals, take a thin brush, put green color on it. Then, applying the entire density of the brush to the sheet of paper, form openwork foliage.
- You can create a leaf pattern by pressing on the leaf with the entire surface of the brush or just its tip.
- Make eyes and cheeks using cotton swabs.
- Use a thin brush to make the lips into a bow, and the eyebrows, eyelashes and nose can be outlined with a felt-tip pen.
- Trace all the details of the matryoshka doll with a felt-tip pen.
Matryoshka can be drawn without an apron. In her hands you can place apples, a samovar, a pretzel, a mug, a teapot.
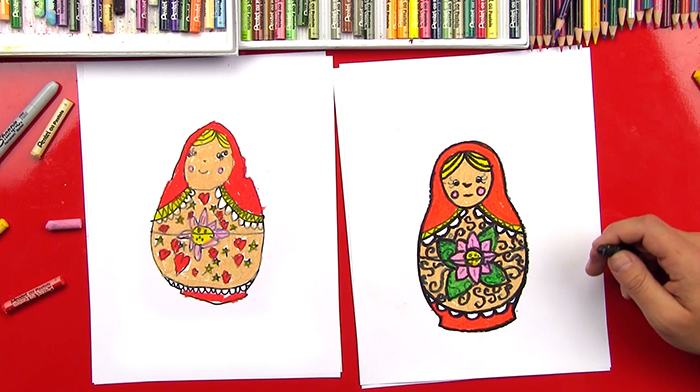
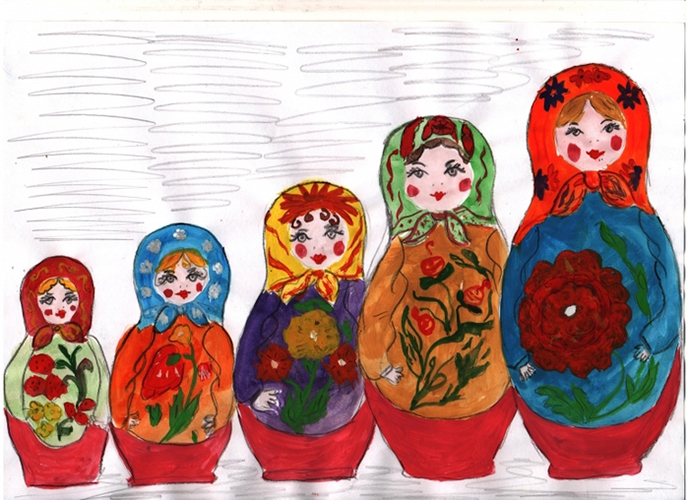
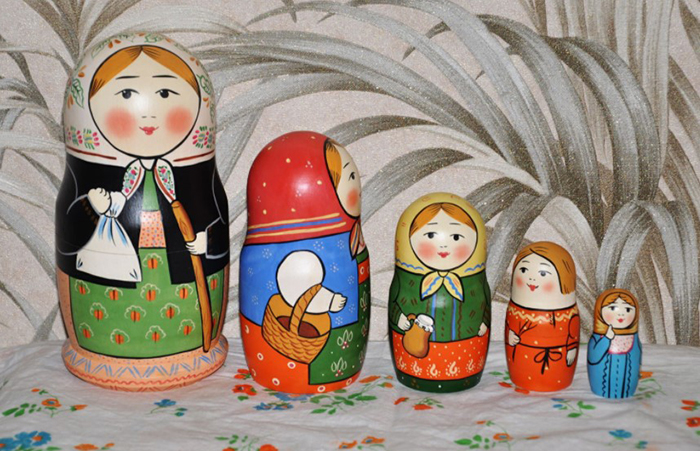
5 dolls
Matryoshka (the drawing for children is more complex taking into account individual characteristics) may differ in outfit from other dolls located nearby.
In order to draw 5 toys on one sheet of paper, you need to follow the following sequence of steps:
- For each figure, you need to select a rectangular area on the paper. Each subsequent figure should be smaller than the previous one.
- In each rectangle, draw the shape of a figurine.
- On each silhouette, mark a place for the face with a circle and draw hands intertwined together.
- Use horizontal lines to define the location of the eyes, nose and mouth.
- Draw a neat face on each figure.
- Make a sketch of bouquets of flowers in hands.
- Place flowers on the dolls themselves.
- Use the eraser to remove the rectangles without touching the doll sketches.
- Create thick, straight hair using shading.
- Outline the contours of the dolls, making them bold.
Children of junior and middle preschool age are taught decorative drawing techniques using straight and wavy lines, dots, circles, rings, etc. They are taught how to correctly compose patterns and arrange elements on paper.
The child can choose the colors for the matryoshka at his own discretion. These toys are usually bright and colorful. The drawing should convey the unique coloring that is characteristic of this particular doll.
Video about drawing matryoshka dolls
Master class on drawing a matryoshka doll: