To get a child interested in drawing, it is worth asking him to draw something simple and familiar to him, for example, a watering can. Such a drawing is quite simple and is suitable for children of primary school age.
A child is familiar with such an object after a summer spent at the dacha, or he may remember that something similar is in his set of sandbox molds. This is a fairly common object. A watering can is in an apartment where flowers grow.
Interesting facts about watering cans
A watering can is a portable container that has been used for many centuries to manually water plants both in the apartment and in the garden. Almost every watering can has a spout and a convenient handle. On some models, the spout ends with a perforated head, due to which the water is dispersed during watering.
The term “watering can” itself appeared in the 16th century. But such containers existed before, they were simply called watering pots. In the form in which the watering can is familiar to people today, it appeared in 1700. Such products can be made of metal, ceramics or plastic.
The design of watering cans usually resembles a rustic style. Often, such pots for watering are used not only for their intended purpose, but also as decoration. Some even cut off the top of the product and plant flowers in the watering cans.
Watering cans can be more rounded, elongated with long and thin spouts or thicker. Such an object is ideal for drawing, as it consists of a minimum number of elements.
What you need for drawing
Watering can - drawing for children is not the most difficult. But you need to choose the right material for drawing.
| Drawing material | Peculiarities |
| Simple pencil | It is better to choose a pencil of medium hardness. It is easier to erase and use for drawing. |
| Eraser | It should also be soft enough. |
| Paper | You can choose watercolor or any other thick paper of A4 size. |
| Black marker | Suitable for creating clearer contours once the main drawing is ready. |
Paints, markers or colored pencils are suitable for coloring the drawing. Older children can be offered to color the product with a simple pencil, create shadows, half-shadows and highlights. Then the image will be more three-dimensional.
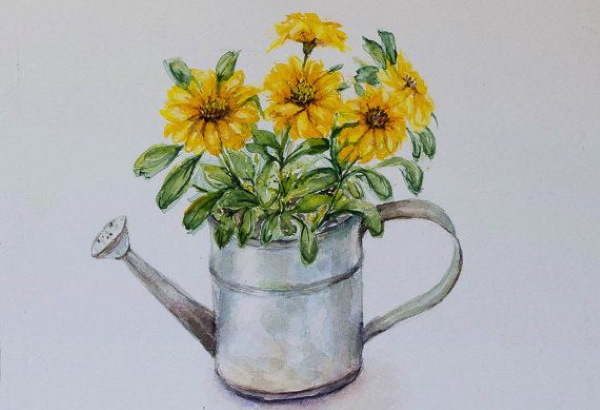
How to draw a garden watering can with flowers
Sometimes these containers are used as flower vases. This is a great idea for a colorful drawing that a child can easily handle.
The drawing stages will be as follows:
- First, mark the guidelines. To do this, simply draw a barely noticeable horizontal and vertical line on a sheet of paper.
- After that, depict the main part of the watering can. Draw the base slightly curved, as well as the upper part. You should get a kind of can, which narrows slightly towards the upper part.
- Now you can add a handle on the right side. For now the watering can looks like a mug, but that's perfectly fine.

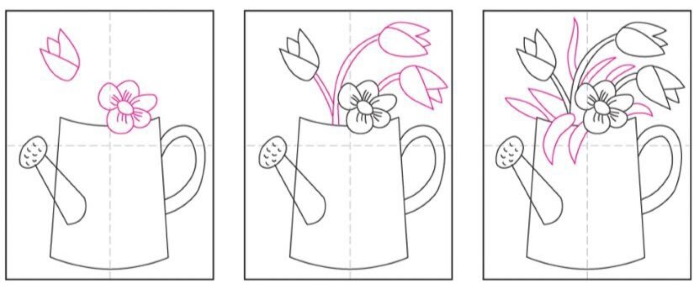
- Next, add the spout of the watering can, and at its end add a circle and several dots to mark the holes. After that, the extra line of the watering can itself can be erased with an eraser. Or you can do this when the entire drawing is ready.
- Now it's time to add flowers. It's easier to start with the buds. One should be drawn slightly higher, and the other slightly extending beyond the edge of the watering can.
- In the next step, you can add a few more tulips and draw stems for the flowers.
- To complete the bouquet, it is worth adding leaves from different sides. They should hang down a little.
All that remains is to remove all unnecessary lines and the drawing is ready. Now you can proceed to the most interesting part and color the resulting image. For this, it is more convenient to use bright spring colors. Paints, wax crayons, pastels, and colored pencils will do. The colors can contrast with each other to create a more interesting effect. It is also worth adding a background to the drawing.

For example, the watering can itself can be painted bright orange, and the background can be made blue or light blue. This combination always looks good. Tulips are usually red, and the remaining flower can be made yellow. The leaves should be green. You can use different shades of this color to make the foliage more diverse.
Once finished, some people prefer to outline the watering can with a thin black marker. You can draw another flower in the center of the container, as watering cans often have different images.
How to Draw a Simple Garden Watering Can
Watering can (the drawing for children can be slightly more complicated) can be depicted using a slightly different technique. Such an image looks more realistic.
To create it, you need to follow a few simple steps:
- First, draw the base of the vessel. The bottom line will be slightly curved, and the top line can be drawn using a ruler. As in the first version, the base of the watering can tapers slightly toward the top.
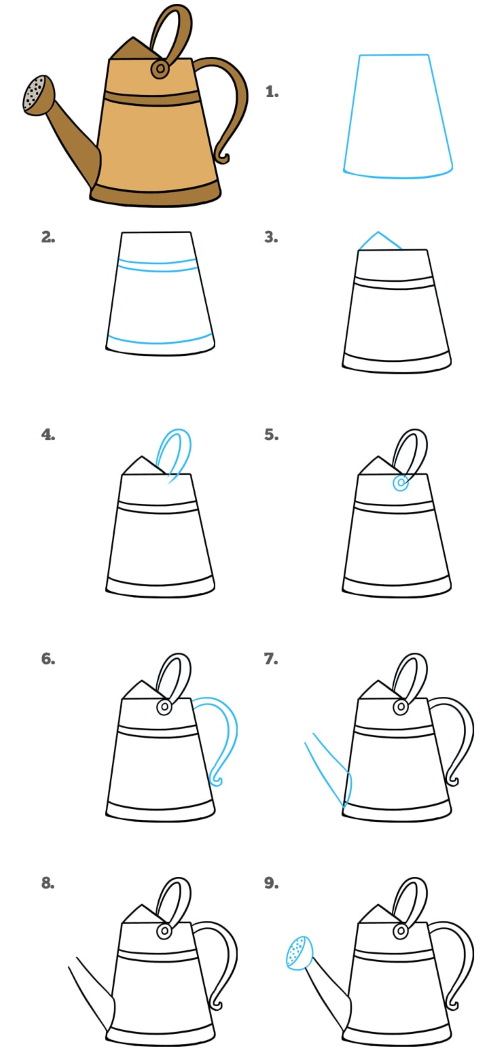
For convenience, you can additionally add guide lines. Leave more free space at the top of the sheet, as it will be needed for an additional handle, with which it is convenient to carry the watering can.
- Draw several curved lines slightly higher towards the top line. An additional one can be drawn slightly lower, closer to the bottom of the container.
- The next step is to draw a small triangle that extends from the upper straight line. This creates a shield or a kind of lid that prevents excess water from spilling out when the watering can is tilted.
- Now draw two U-shaped lines at the top. This will be the top handle for carrying the watering can.
- Draw rivets where the handle connects to the base of the watering can. To do this, simply draw a small circle and another smaller one inside it.
- Now bring out the side handle. It can be slightly bent downwards. Thanks to such an elegant stroke, the watering can will look more interesting.
- Now it's time to draw the nose. To do this, draw a curved line just above the bottom line and draw 2 lines going up. They should converge a little. After that, you can remove the excess part of the base. Then the nose will not look like it's just glued on the side.
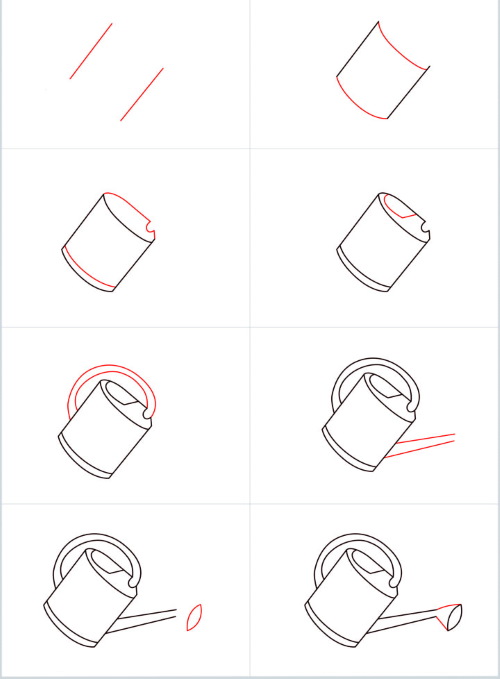
- It should look like the image below.
- Draw a so-called rose at the end of the spout (many also call this part of the container a watering can). To do this, you can draw an uneven oval, and then draw a curved line through its center. Fill the left part with dots, and leave the right part empty.
The watering can is ready. It remains to paint it. It can be done in brown and orange tones, so that it looks even more like a familiar garden tool. Some people outline the image using a black marker.
Blue watering can with decorations
A watering can can become a drawing for children, which they can prepare for their grandmother for the summer season. Such an image can be hung in a country house and admired every day. The picture will turn out colorful in a summery way.
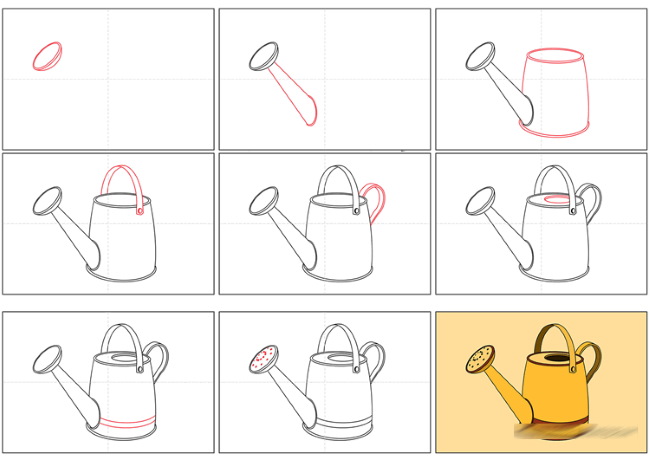
The step-by-step drawing is done as follows:
- First, draw the base of the watering can. To do this, it is enough to draw a straight cylinder. From the middle of the watering can, draw a large circle. The figures are quite straight, so you can even use a compass. This will be a great reason to teach your child to use it.
- In the center of the cylinder, where it intersects with the large circle, add a small circle. Everything looks unclear for now, but that's okay. This is the basis for future decor. On the left side, add a spout, the lines of which converge closer to the top.
Closer to the bottom of the watering can, draw a slightly curved parallel line, like a semicircle. At the same time, its side edges should extend slightly beyond the contour of the base of the container.
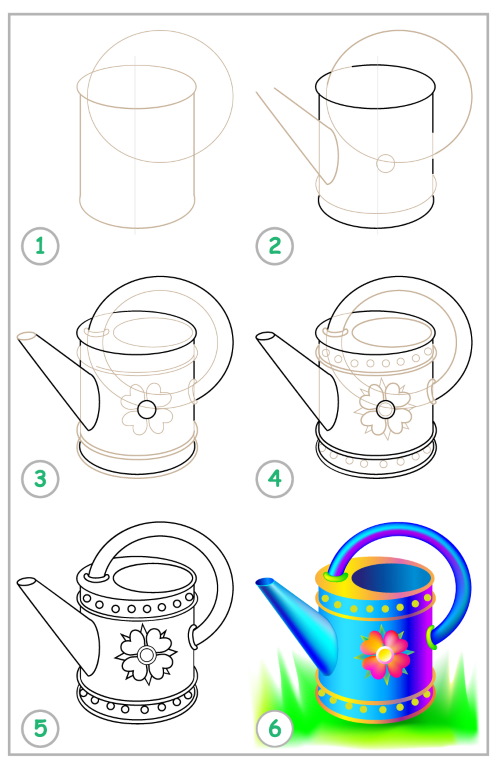
- It's time to add a handle. To do this, draw a slightly smaller circle at the top of the large circle, inside it, and delete the extra lines. Add a flower in the center of the watering can at the intersection with the large circle. It will decorate the watering pot.
- Next, at the top and bottom of the base, you need to add lines of small circles. These are kind of patches for decorating garden tools. They can resemble beads.
- Now you can remove all unnecessary contours using the eraser.
The child can paint the watering can as he or she likes. Or you can use the picture above as an idea. The right parts of the container can be made dark blue, and the rest can be painted lighter. This will create shadows and highlights. The upper part can be painted orange, also using different shades of this color.
To complement the design and make it more summery, add some bright green grass.
Drawing of a watering can by cells
Some beginning artists use one trick that allows them to create images much faster. To do this, you can draw a sheet of paper into small cells or even use a notebook sheet that is already lined as needed.
To draw a large garden watering can, you need to follow these steps:
- First, as usual, draw the base. To do this, it is enough to draw a rectangle with a more rounded bottom. It is not necessary to try to stick to straight lines. Then the watering can will look more cartoonish and funny.
- Draw the “watering can” of the container slightly above and to the left of the base.
- Now, from the element you just created, draw 2 parallel lines that go to the bottom of the container.
- The next step is to add a handle. This can be depicted using two semicircular lines that connect to the base approximately in the middle.
- Next, you can move on to the top handle. First, you can create 2 lines going up and connect them with a small horizontal segment. From there, bend the handle down to the top of the base, but do not reach it.
- Now it's time to make the base more voluminous. To do this, just add another slightly curved line.
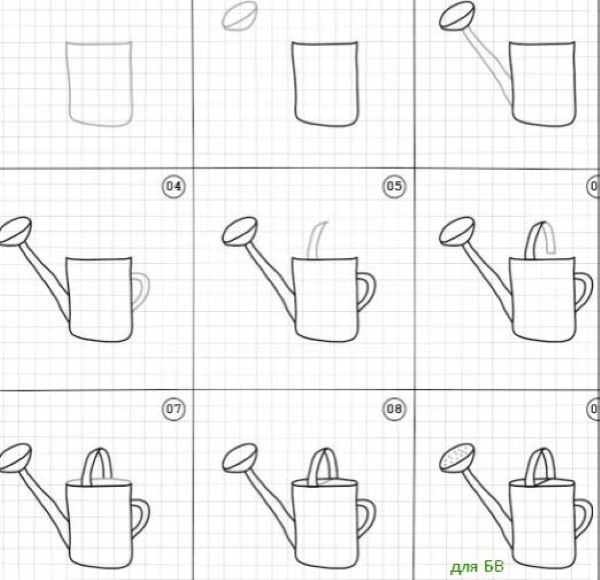
- All that's left is to add a few details, such as holes for the water to pour out.
You can color such an image using any available materials. If the child draws on a notebook sheet, then you should not use paints, they will quickly soak it. Therefore, you can get by with colored pencils, pens or a felt-tip pen. You can choose any colors. For example, you can depict a classic watering can in blue or brown.
More ideas for drawing a watering can
A watering can (you can come up with a design for children yourself) can look more interesting if you add additional elements or give preference to an unusual shape.
You can choose one of the following options that can be used for copying:
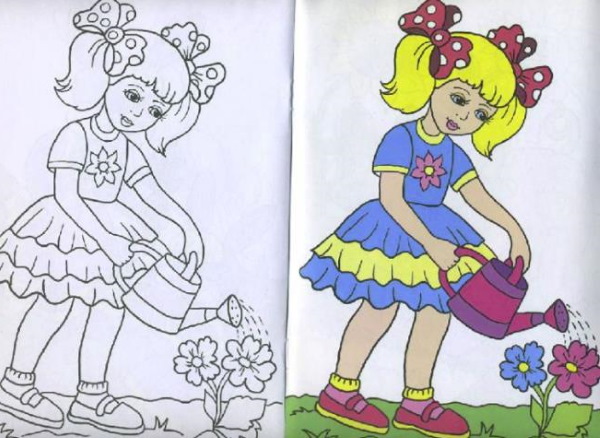
- For example, the option shown above will do. If the girl in the picture waters the flowers with a watering can, then you will get a full-fledged composition. First, you can create a drawing with a simple pencil, and then paint it with bright colors. To make the image bright, you should outline the main lines with a thin black marker or gel pen.

- It is worth adding a small puddle of water and a couple of drops from a watering can and you will get a simpler, but complete composition. On the main part of the watering pot you can bring out a more interesting and complex flower.
If you add just a few simple strokes to it, it will look three-dimensional. If you highlight the contours right away, it will be much easier to color the image. Younger children can be helped. To do this, you can draw the picture yourself, and give it to the child to color.

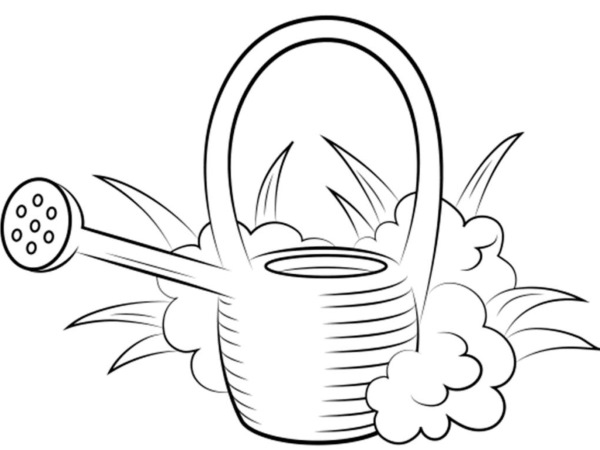
- Or you can create a more cartoonish and simplified version. When drawing such a watering can, you don’t need to think about additional decorations or how to make the spout more convex and voluminous.
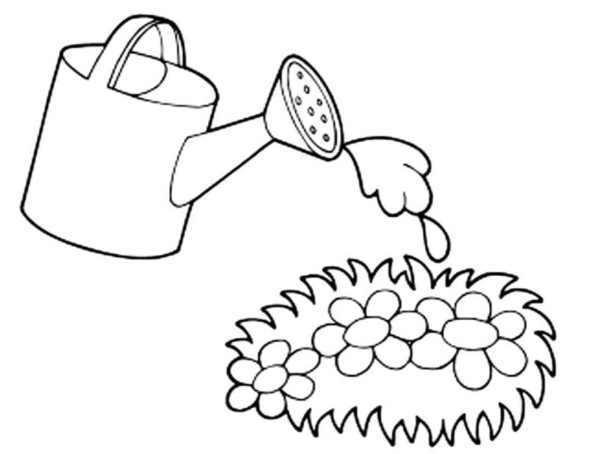
- If drawing a person holding a watering can is difficult, then you can limit yourself to a simple flowerbed. To do this, it is enough to draw 3 simple flowers, and around them, draw grass using a zigzag line. Water can flow from the watering can. If you use markers or paints for coloring, the image will turn out bright and interesting. Such a picture can be safely put in a frame.
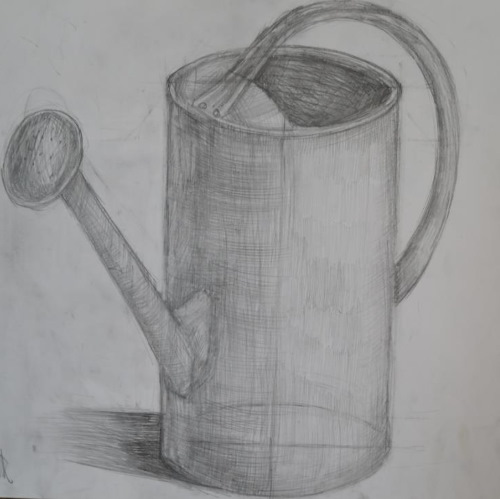
- If the child is ready for more serious drawing according to all the rules of fine art, then you can offer him the following option. Such drawings are often practiced in art schools.
This is a great practice for drawing half-shadows, shadows and highlights. You need to start drawing with a sketch and marking. This will allow you to get more realistic shapes. When coloring, the same simple pencil is used. The sketch is done by hatching. This is quite difficult and time-consuming. But this is an important stage of drawing using this technique.
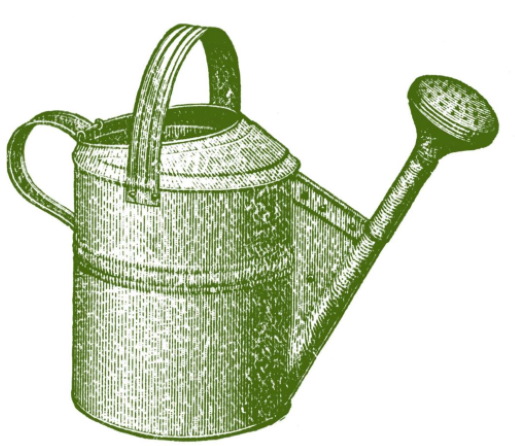
- To understand how gradients, highlights and shadows are formed, you can use the image above. In order for the base of the watering can to look more voluminous, you need to darken the side parts, and, on the contrary, lighten the center.
But when drawing the upper part of the nose, a slightly different rule works. Since it is a semicircle, only the edge of its rounded part is darkened. You also need to try to visually imagine where the light is falling from.
- When coloring an image, you can use different techniques. For example, the option presented above will look original. In this case, shading of varying intensity is performed. However, it is tedious to do it very evenly. This option is more suitable for older children. To simplify the task, you can use a ruler.
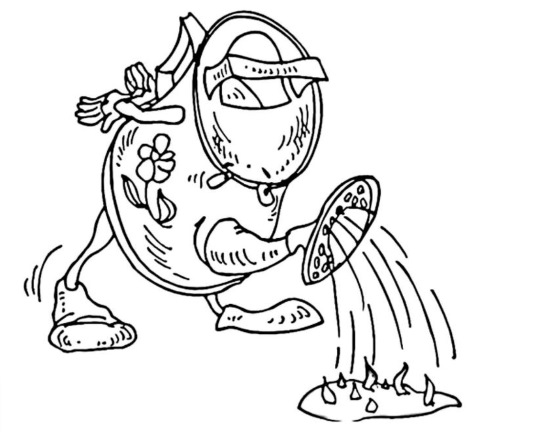
- You can be original and "revive" the watering can. For example, it can water the plants on its own. You can come up with a whole fairy tale with your child or recall the plot of the cartoon "Toy Story", where children's toys actually lived their own lives and got into non-toy stories.
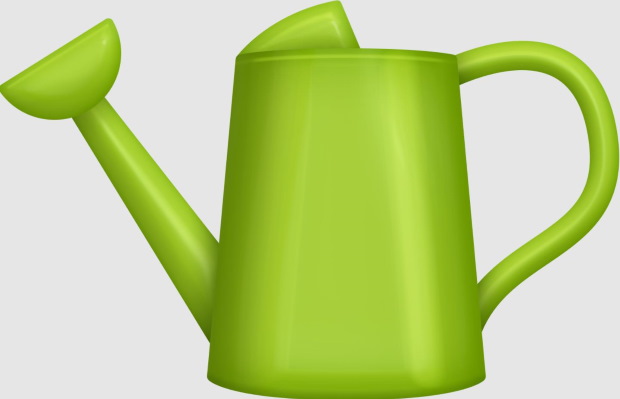
Watering can is a drawing for children that can be original, unusual or, on the contrary, realistic. Everything depends on the child's preferences and age characteristics. If he is ready to work with paints, then you can offer him the following option.
Saturated green looks very good with brownish-orange. If you lighten the line a little on one side and darken it on the other, this will create a volumetric effect, the watering can will look very realistic.
Watering Can Ideas for Indoor Plants
It is important to remember that watering cans are used not only in the garden, but also for watering indoor plants. Such containers are more modest in size, so that it is more convenient to leave them on the windowsill.
There are some interesting ideas for such drawings:
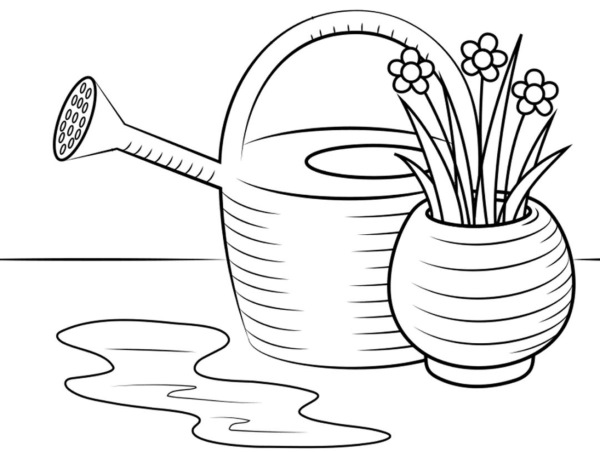
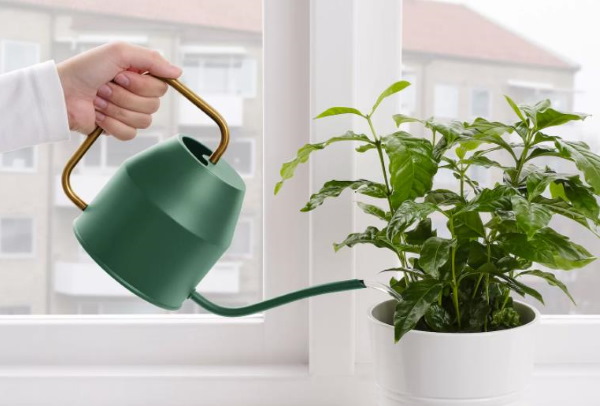
- For example, you can depict a watering can more rounded and with a long handle. And the spout, on the contrary, should be made short. If you draw a flower pot next to it, you will get not only a composition, but also you can make it clear that the watering can is very miniature. It is not necessary to color the image. You can add several horizontal, broken lines coming from the edges of the base of the containers.
- You can also go another way. If you exaggerate the image, you will get a stylized effect. For example, you should make the handle of the watering can disproportionately large, even larger than the base itself. The spout can also be lengthened and made with large perforations. By the way, such unusual watering cans can really be found in some apartments.
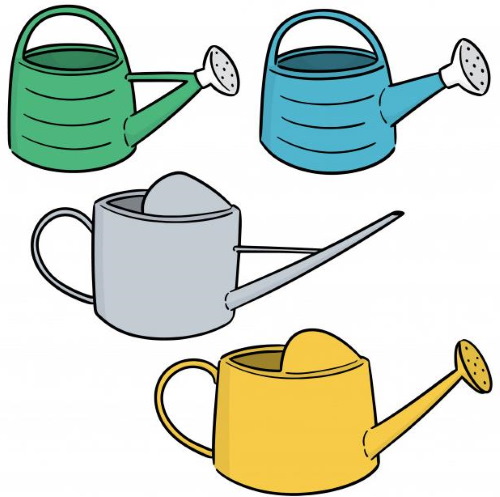
- Compact watering cans for house plants can be made of metal, plastic, and other materials. The spout of the container can be very long and very narrow without a nozzle. Such models are usually used when you need to apply water strictly under the root and make sure that it does not get on the leaves or flowers themselves.

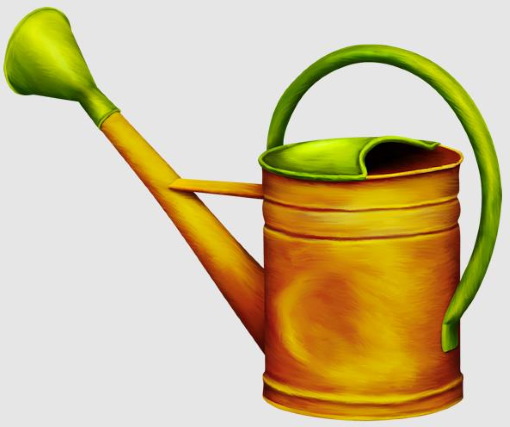
- You can use real decorative watering cans as a basis for the drawing, photos of which can be found on the Internet. For example, the photo below shows such an idea. The watering can has no top. Theoretically, you can pour water into it, but you won’t be able to use it for its intended purpose, since the liquid will simply pour out.
- Watering cans can also have a more simple form. For example, the spout can go almost from the very bottom of the base, and the handle can have an unusual geometric shape.
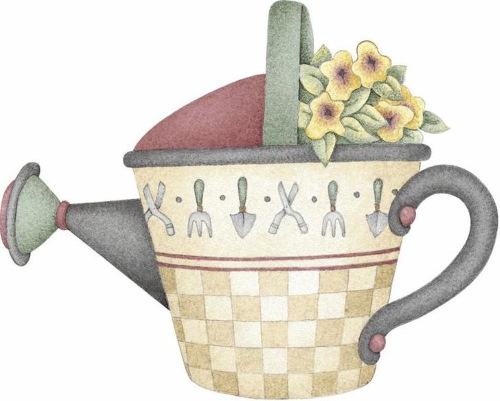
- If you use your imagination and find interesting color combinations, then the watering can can be like this. You can paint its lower part by analogy with a chessboard. In the upper part, you should add miniature images of garden tools that are usually used when caring for flowers.
You can find other options online. You can combine different drawing and coloring techniques. Although the watering can is simple, when drawing it, a variety of ideas can come to mind. You should not limit the child and his imagination. If he comes up with an original idea, then you can even bring it to life and decorate the most ordinary watering can bought in a store in the same way.
When creating a drawing of a watering can, it is not necessary to adhere to strict proportions. But it will also be useful for children to learn about more complex geometric shapes. They will also be able to draw not two-dimensional, flat objects, but those that can be placed on a table or other surfaces and at the same time be slightly rotated.
Video about drawing
Watering can drawing for kids: