A gift box with a lid not only protects the gift from damage, but also creates intrigue for the recipient. You can make beautiful packaging with your own hands. To do this, you need to learn how to properly make a scan, as well as consider several step-by-step instructions for making boxes of various shapes.
What you need to make a box with a lid with your own hands
Regardless of the shape, the assembly of boxes takes place in 4 stages:
| Stage 1 | Creating a drawing (sweep) |
| Stage 2 | Cutting out the parts |
| Stage 3 | Gluing or folding according to the pattern |
| Stage 4 | Decoration |
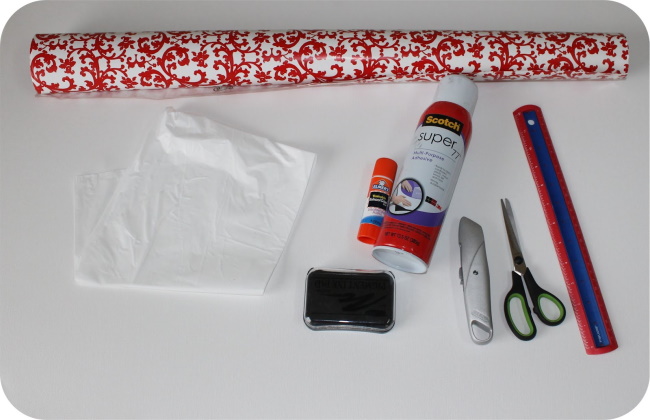
What tools and materials will you need to create a gift box:
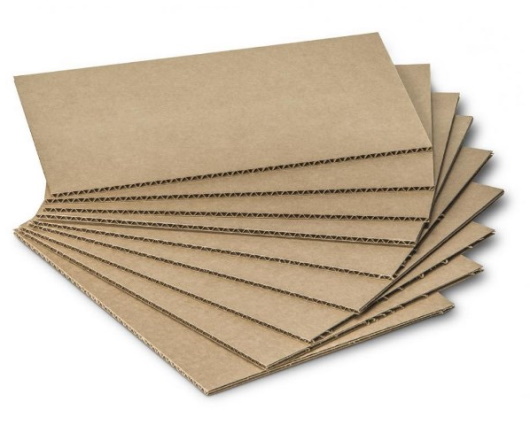
- Cardboard. Corrugated two-layer material is suitable for making large items. Small boxes can be made from colored cardboard for children's creativity.
- Thick paper.
- A long ruler and a simple pencil.
- Scissors and a stationery knife.
- Stationery glue, glue gun, PVA, Moment glue.
- Stapler.
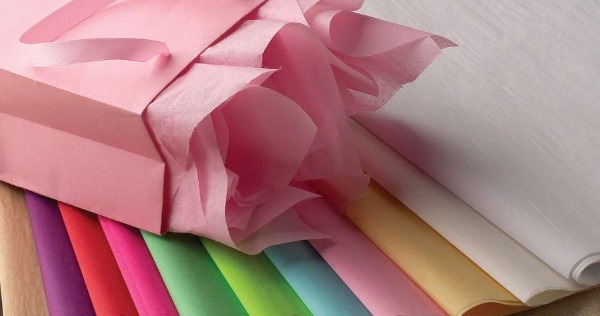
- Bright paper for packaging.
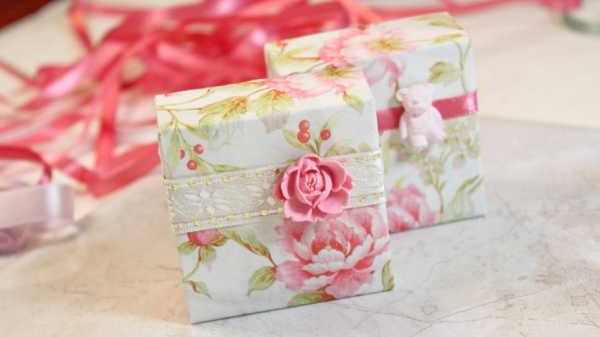
For decoration, you can use rhinestones, beads, satin ribbons, and artificial flowers. You should think about the decor in advance. There should not be too many decorations. They can weigh down the structure, which can cause the box to deform and become unstable.
Rules and features of constructing a paper scan template
What recommendations should you follow when creating boxes with your own hands:
- Before drawing up a drawing, it is necessary to measure the volume of the contents of the box. The dimensions of the package should be slightly larger than the gift for which it is intended.
- For small boxes, it is recommended to use thin cardboard, because it is easier to bend. In addition, cardboard for children's creativity can be multi-colored, glossy or with a shiny surface. Such a box does not need to be wrapped in paper.
- You should not make complicated boxes for presenting gifts to elderly people or children. They will not be able to open the box properly and will be upset if they accidentally damage it.
Decorations should be selected to match the box or the paper it will be wrapped in.
Master class on making a classic square cardboard box with a lid
A box with a lid (the layout is done on the back side) made of thin cardboard, made according to this master class, is suitable for packaging small souvenirs and jewelry.
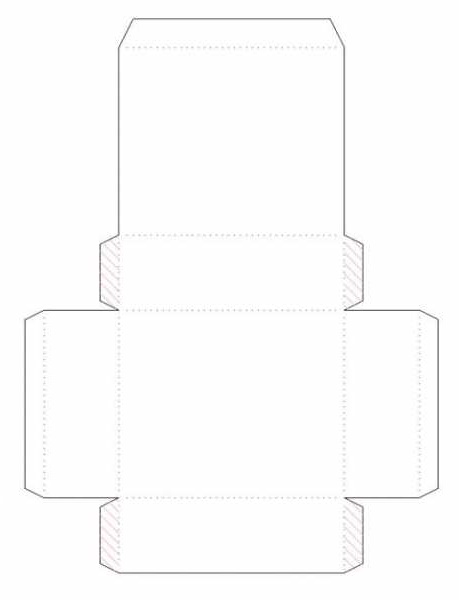
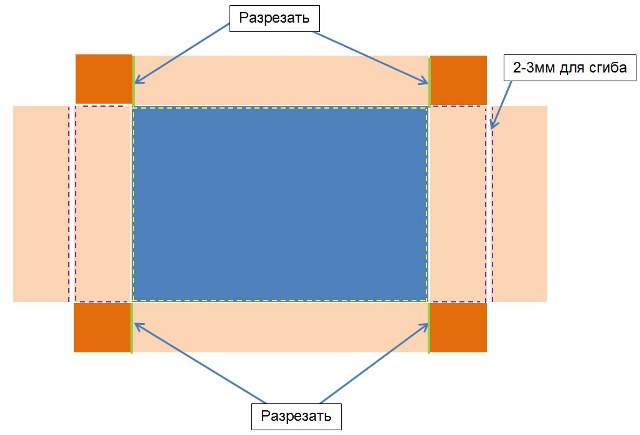
Creating a box scan according to the selected dimensions
For example, the dimensions of a box will be 10x10 cm, with a wall height of 5 cm. You can make the packaging larger by substituting other values in the step-by-step instructions.
Procedure:
- Draw a square with 10 cm sides on the cardboard. This is the bottom of the box.
- From the upper left corner of the bottom, draw a horizontal line to the right, 5 cm long.
- Draw the same line from the lower left corner.
- Connect both lines with a vertical line. This will be 1 of the walls of the box.
- On the right side of the bottom, draw another wall, repeating points 2 through 3.
- From the upper left corner of the bottom, measure 5 cm up and draw a line.
- From the upper right corner, measure 5 cm up and draw a line.
- Connect the lines with a horizontal line. This is the 3rd wall of the box, which should have "ears" for fastening.
- From the left edge of the 3rd wall, step back 1.5 cm to the right. Draw a rectangle 5 cm high.
- Place a ruler on the edge of the small rectangle, step back from its lower left corner and upper left corner, closer to the center, 5 mm. Draw lines so that the corners of the fastening "ears" become beveled.
- On the right side, make the same “ear” by repeating steps 9 and 10.
- Draw the 4th wall with “ears” for fastening by analogy.
Cut out the piece along the outline.
Cover development
How to draw a cover pattern:
- Draw a square with sides of 10.5 cm. This will be the top of the lid.
- From the corners on the left side of the square, draw horizontal lines 3 cm long to the right.
- Connect the lines with a straight line. This will create the left edge of the lid.
- Draw the sides of the lid on the other sides in the same way.
- Add “ears” to the top and bottom sides for fastening.
Cut out the workpiece along the contour.
Assembling the box
How to assemble the box:
- To make the box easier to assemble, you need to press the fold lines. To do this, apply a ruler to the drawn stripes and draw along the lines with the back of the scissors blade. Do not press too hard on the tool, because you can damage the cardboard.
- Bend the “ears” for fastening on the top and bottom walls inward.
- Raise the walls with the “ears”.
- Raise the remaining 2 walls.
- Grease the "ears" for fastening with glue from the front side, connect them to the walls without "ears", gluing to the back side. The fold lines should clearly match the edges of the cardboard.
Press the glued areas with your fingers until the glue dries.
Assembling the lid
The box lid is assembled in a similar way: first, press the fold lines with the back of the scissors blade, then bend the sides, lubricate the fastening ears with glue and fix them, wait until the glue dries completely.
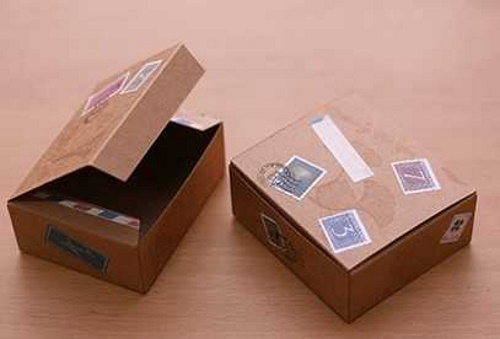
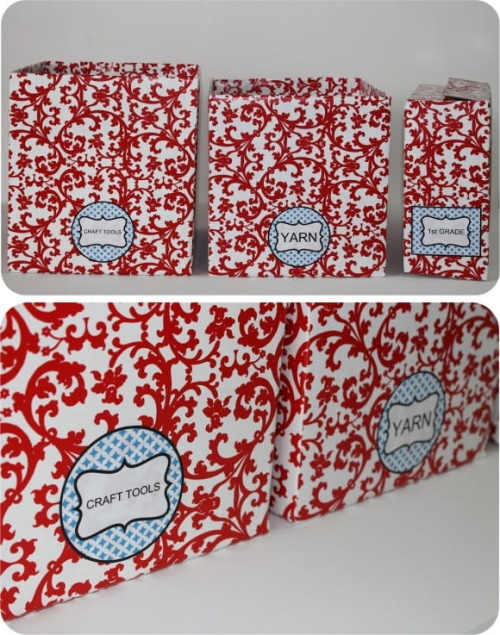
Decorating
Since the box is small, an abundance of decorations will overload it visually and make it not very attractive. Therefore, it is enough to stick a paper emblem on the front side of the lid, which will say who the gift is intended for, or a short congratulation.
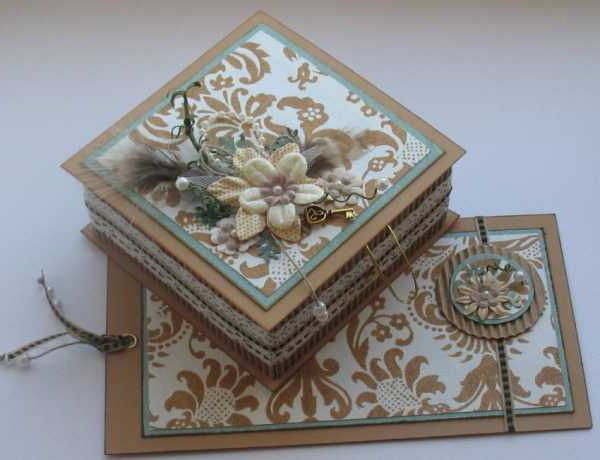
One of the upper corners of the box can be decorated with a small bow made of thin satin ribbon. A large box made according to this principle can be wrapped with shiny paper and a wide satin ribbon crosswise, and a large lush bow can be tied in the center of the lid.
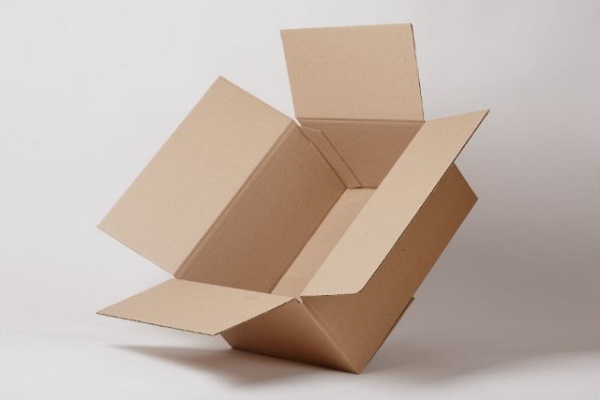
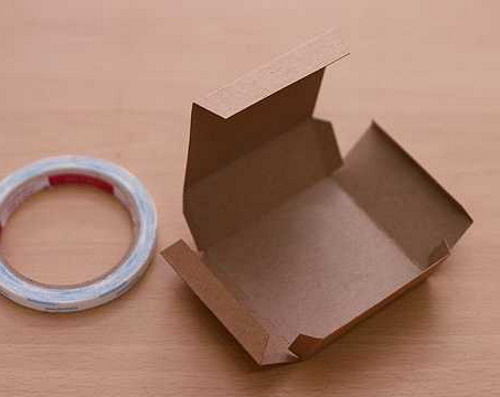
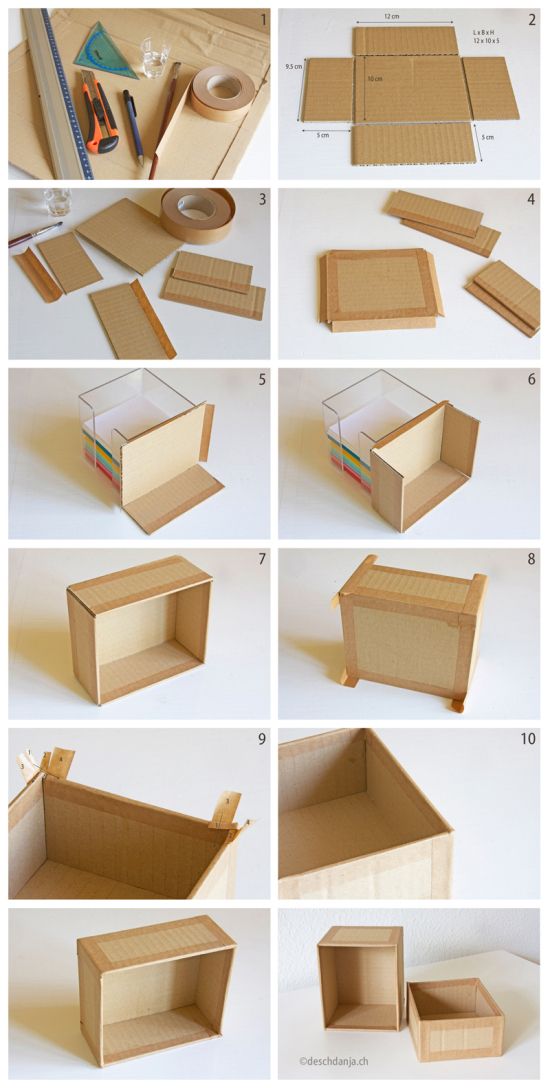
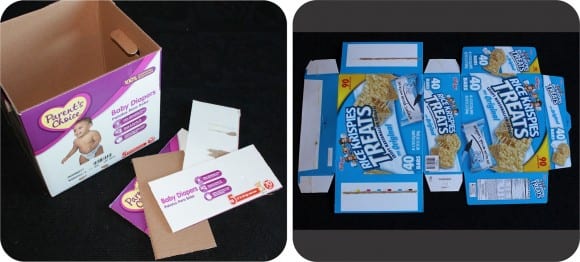
Instructions for making a reinforced box with a lid
A box with a lid (the lid's development should be 5-10 mm larger than the base) made of thick cardboard is suitable for packing heavy items, as well as textiles and fragile souvenirs. For work you will need corrugated double-layer cardboard, as well as thick colored paper.
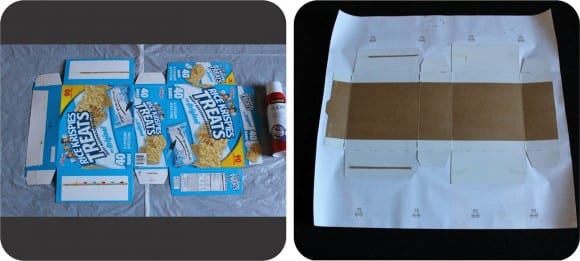
Creating a box scan according to the selected dimensions
This will be a rectangular box with sides of 20x15 cm, the height of the walls is 10 cm. You can choose other values and make the packaging larger or smaller.
Procedure:
- On cardboard, draw a rectangle with sides of 20x15 cm.
- From the lower and upper corners on the left side, measure 10 cm. Connect the segments with a vertical line. This will be 1 of the walls of the box.
- Draw the remaining 3 walls in the same way.
- Add "ears" for fastening on both walls, 15 cm long. The width of the "ears" should be at least 5 cm, otherwise they will not fasten the walls of the box well.
- Make beveled corners on the “ears”.
- Cut out the blank along the contour using a stationery knife and a ruler.
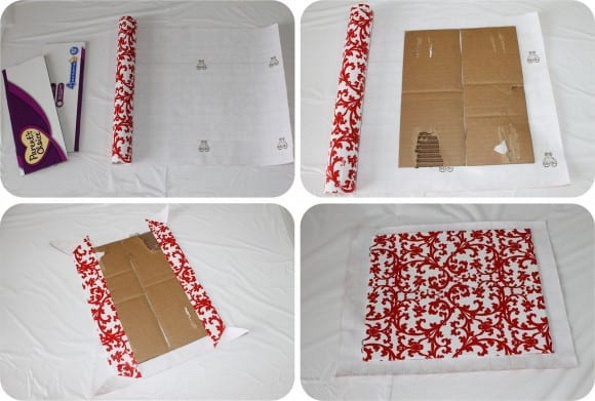
You need to cut out exactly the same blank from thick colored paper, following these instructions. The only difference is that the width of the sides should be 2 times larger. The dimensions of the "ears" for fastening remain the same.
Cover development
In order for the lid to close the box tightly, you need to measure the thickness of the cardboard, then add another 5 mm to this value. For example, the thickness of the cardboard is 3 mm, which gives 3 + 5 = 8 mm. This means that the sides of the lid need to be increased by 8 mm.
How to draw a cover pattern:
- Draw a rectangle on cardboard with sides measuring 20.8 x 15.8 cm.
- Draw 4 sides 5.5 cm wide.
- Add “ears” to the short sides for fastening, at least 5 cm long.
- Make the corners of the "ears" beveled.
- Cut out the blank using a ruler and a utility knife.
Make the same drawing from colored paper with minor changes - the width of the sides should be 2.5 cm larger.
Assembling the box
How to assemble the box:
- Apply the ruler to the marked lines and press them down, turning the blades of the scissors to the blunt side.
- Bend the workpiece along the marked lines.
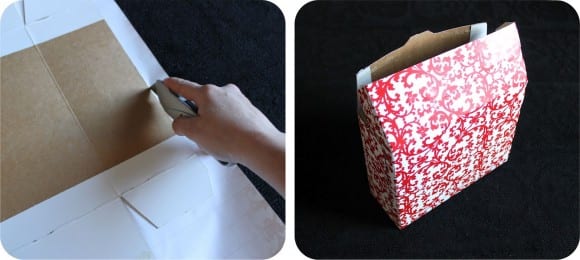
- Bend the ears for fastening inward. Grease them with glue, connect them to the back side of the other walls. It is advisable to use Moment glue. It will fasten thick cardboard more reliably. You can use PVA glue, but then you will need to attach the ears to the walls of the box with a stapler, for reliability.
- It remains to check whether the height of all the walls is equal. If there are small protrusions, they can be carefully cut off with a stationery knife.
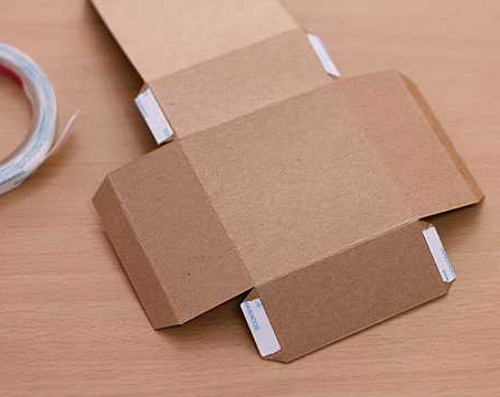
- Mark the fold lines on the paper blank.
- Straighten the workpiece and coat it with PVA glue on the reverse side.
- Turn the box upside down.
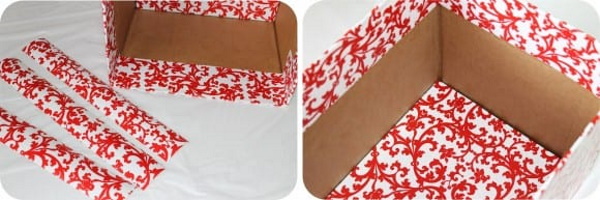
- Carefully glue the paper blank. Smooth the paper with your hands so that no folds form.
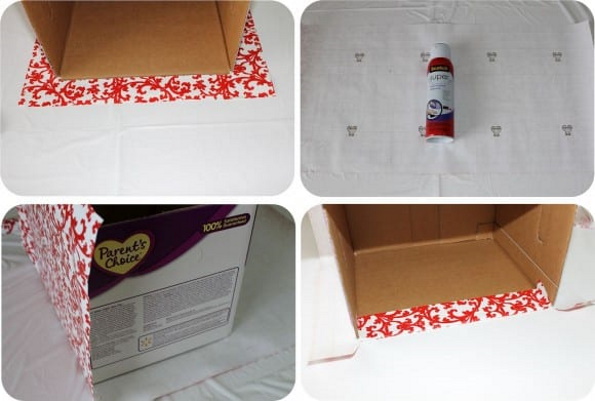
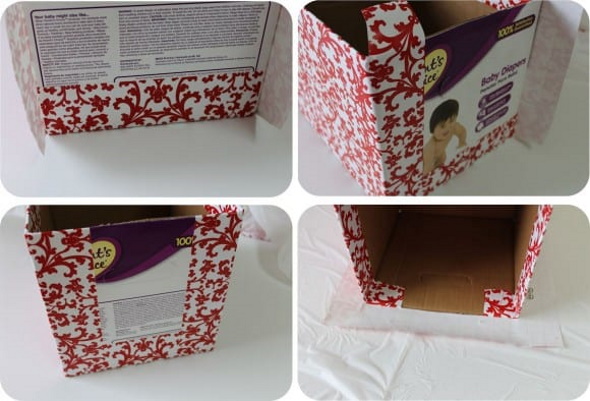
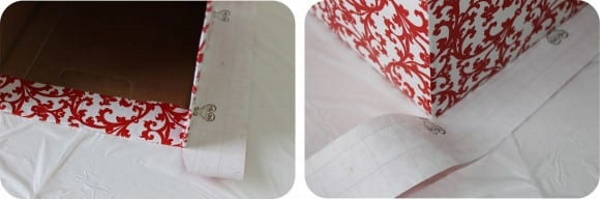
- Next, you need to glue those parts of the paper blank that have "ears". The ears are also glued to the adjacent walls of the box. They are needed not to fasten the walls, but to close the gaps through which the cardboard at the corners of the box can be seen.
- Cover the remaining walls with paper.
- Turn the box over.
- The 3 cm ends that remain unglued need to be coated with glue again and carefully wrapped inside the packaging, covering the cut of the cardboard.
Wait until the glue is completely dry.
Assembling the lid
How to assemble the lid:
- Using a ruler and scissors, mark the fold lines on the cardboard.
- Bend the workpiece along these lines.
- Apply glue to the “ears” and secure them to the back side of the long sides.
- Turn the lid over.
- Coat the paper blank with glue and stick it on top of the lid.
- Glue the paper “ears” to the long sides, then glue them to the short sides.
- Turn the lid over.
Apply glue again to the unglued parts of the paper, fold them over and cover the inner parts of the sides.
Decorating
Since the box is already covered with beautiful colored paper, there is no need to wrap it additionally. You can make a minimalist decor by decorating the package with thin jute thread.
Procedure:
- Measure out 2 m of rope. Cut it into 2 equal parts.
- Place the pieces crosswise on the table.
- Place the box on top so that the corners of the bottom are between the threads.
- Wrap both threads around the box and tie a classic bow on the lid.
This type of decoration is suitable for decorating Christmas and New Year gifts. All that remains is to add a tag with the inscription who the box belongs to.
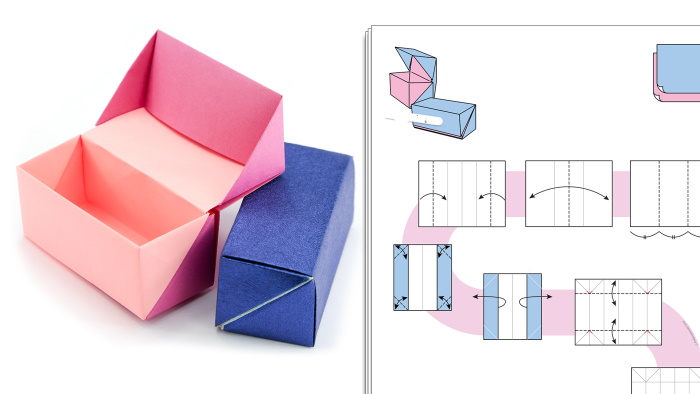
Origami Box with Lid
A box with a lid (no template is needed for such boxes), made using the origami technique, is suitable for packaging jewelry, sweets or small souvenirs.
Assembling the box and lid
For such a box, you do not need to make a drawing of the layout. It is assembled by bending thick paper in different directions. For work, you will need a square sheet. The dimensions can be any.
Procedure:
- Fold a square sheet of paper crosswise.
- Unfold the workpiece.
- Fold the paper lengthwise and unfold it again.
- Turn over to the other side. Place on the table so that one of the corners is at the top.
- Fold the bottom corner to the center, folding it in half.
- Add all the other angles in the same way.
- Fold the bottom part of the workpiece so that a rectangle is formed, the center of which coincides with the edge of the upper corner.
- Bend the top part of the workpiece in the same way. You should get a rectangle.
- Unfold the workpiece.
- Fold the other 2 corners to the center.
- Straighten the workpiece.
- Expand the side corners.
- Fold the top and bottom corners towards the center.
- Open the blank. Fold it along the marked lines. You should get a box. For reliability, you can fix the corners with office glue.
The lid is assembled in a similar manner.
Decorating
As a decoration, you can use a bow made of thin satin ribbon, and also glue rhinestones on sticky tape to the outer edges of the lid. The decor should match the color of the box.
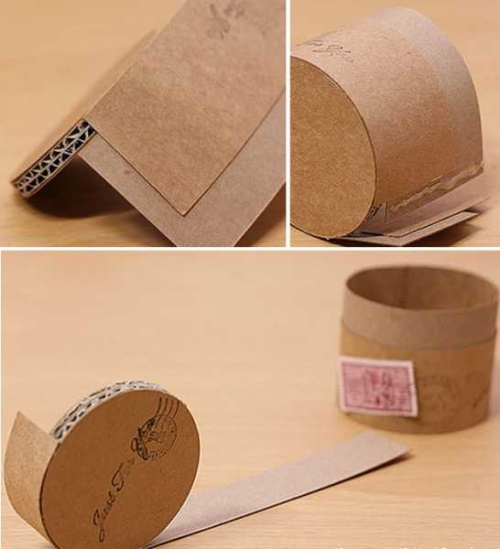
Round box with lid
It is not difficult to unfold a round box with a lid, but assembly will require patience and extreme accuracy.
Creating a box scan according to the selected dimensions
The bottom of the box will be 15 cm in diameter, and the height of the walls will be 10 cm. Other values can be used.
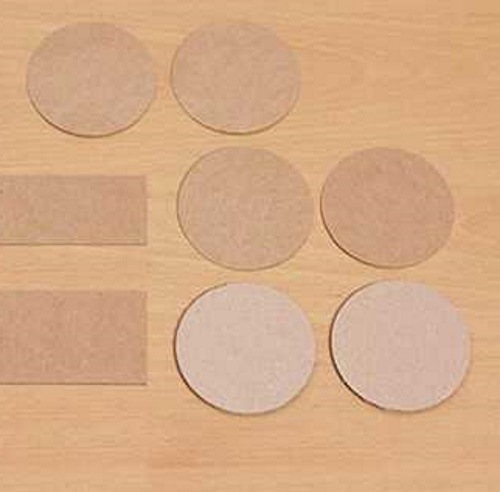
How to make a box scan:
- Draw 2 circles with a diameter of 15 cm on cardboard.
- Draw a rectangle with a width of 10 cm. The length of this piece should be equal to the length of the bottom circumference + 5 mm.
- Cut out another rectangle of the same length. It should be 10 cm + the thickness of the cardboard.
- Cut out the blanks.
Roll the rectangles into rings and secure their ends with paper clips or paper clips.
Cover development
How to draw a cover pattern:
- Draw circles with a diameter of 15.5 cm on cardboard.

- Draw a rectangle 2 cm wide. Its length should be equal to the circumference of the lid + 5 mm.
- Draw another rectangle of the same length, its width is 2 cm + the width of the cardboard.
- Cut out the blanks.
Roll the rectangles into rings and secure their ends with paper clips.
Assembling the box and lid
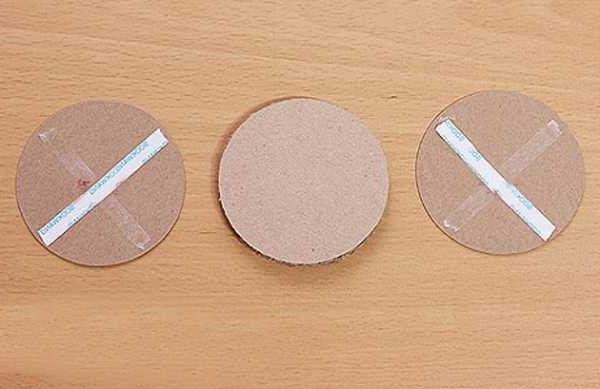
How to assemble the box:
- Glue the circles together.
- Glue a 10 cm wide rectangle to the edges of the upper circle using a glue gun.
- Secure the edges.
- Glue another rectangle on top so that it covers the bottom seam.
The lid is assembled in a similar way: the circles are glued together, a rectangle of a smaller width is glued on, a wider rectangle is placed on top, and their edges are glued together.
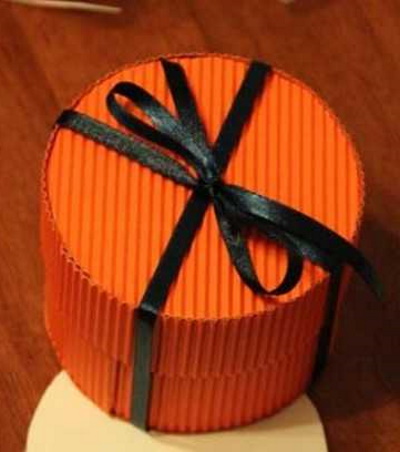
Decorating
A round box can be wrapped in beautiful paper. To do this, you will need a square sheet that is 2.5 times wider than the height of the box walls. The box is placed in the center of this sheet, the corners of the paper are folded upwards. You get a bunch, which needs to be pulled at the base with a beautiful satin ribbon and tied with a bow.
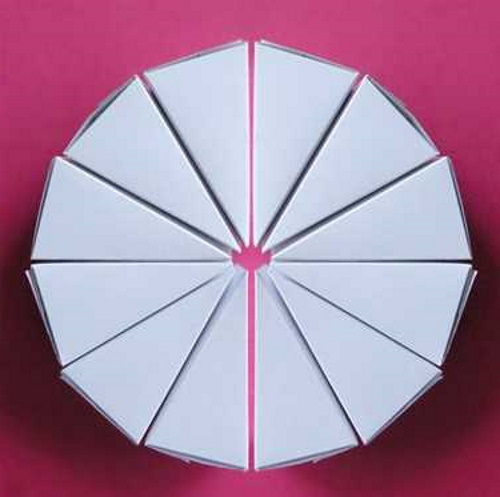
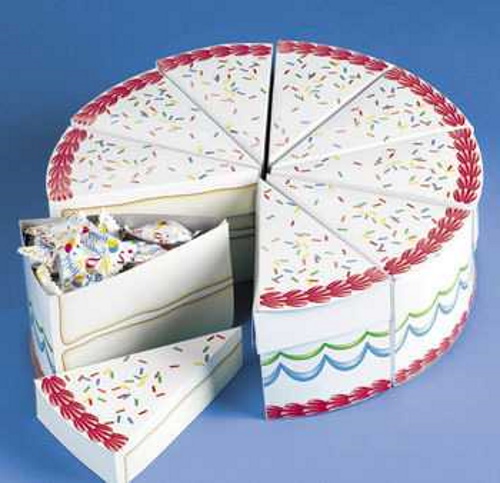
Triangular box with hinged lid
This box is suitable for presenting sweets and tea sets. Drawing up the layout and assembly will take no more than 15 minutes.
Creating a scan of a box with a hinged lid according to the selected dimensions
The sides of the box are 17 cm, the height of the walls is 7 cm. Other values can be used.
How to make a scan:
- Draw a triangle with sides of 17 cm.
- Add walls 7 cm wide.
- On the right sides of each wall add "ears" for fastening. Make their corners beveled.
- Measure the height of the triangular bottom of the box.
- Find the center of the bottom wall.
- From the center of this wall, draw a line equal to the height of the triangle.
- Draw another triangle.
- Add "ears" to its sides for fastening. Make their corners beveled.
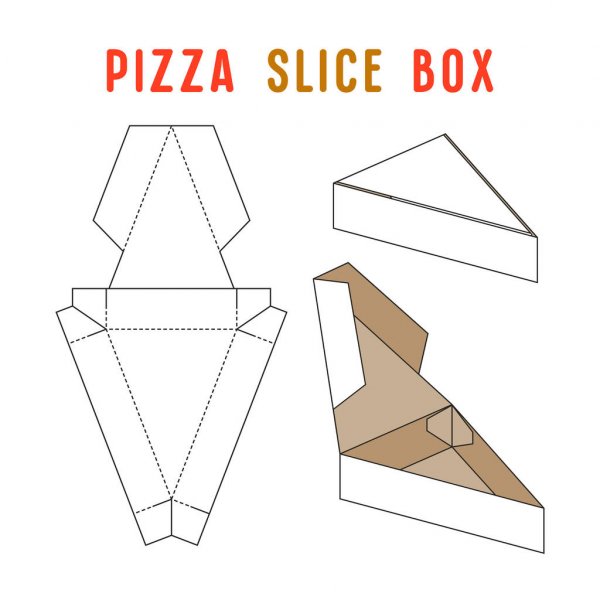
Cut out the workpiece along the contour.
Assembling the box
How to assemble the box:
- Press the fold lines using a ruler and the back of a scissors blade.
- Fold the box along the fold lines.
- Lubricate the fastening ears located on the walls with glue and fix them on the inside of the box. Wait until the glue dries completely.
There is no need to lubricate the "ears" for fastening on the lid with glue, otherwise the box cannot be opened. They are needed so that the lid closes more tightly.
Decorating
Such a box can be decorated with a wide satin ribbon, wrapping it around the walls. A bow can be tied on any side of the box, the main thing is that it is lush and voluminous.
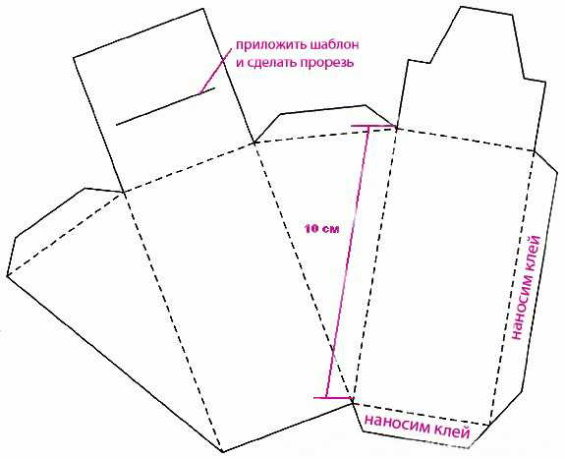
Pyramid shaped box
One of the easiest gift wrapping options. The pyramid-shaped box is assembled without using glue. It takes less than 10 minutes to create the layout and assembly.
Creating a box scan according to the selected dimensions
How to make a scan:
- In the center of the sheet, draw a triangle with equal sides.
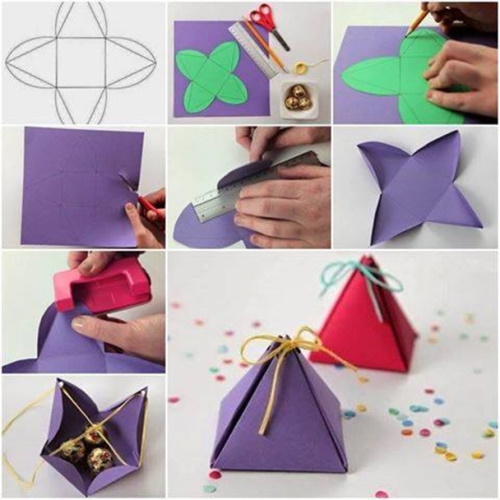
- Add 3 walls of the same dimensions.
- Add ears for fastening to the right side of each wall.
- Make their edges beveled.
Cut out the blank.
Assembling the box
All lines need to be pressed with the back of the scissors. Place the gift inside the box and assemble it, pulling all the walls up.
Decorating
In this case, the decor not only decorates the box, but also holds its walls together.
Use a hole punch to pierce the tops of the walls. Pass both ends of the ribbon through 2 adjacent holes, then fold the ends together and pull them out of the 3rd hole. Tie a fluffy bow at the top of the "pyramid".
It is not difficult to make a box with a lid with your own hands. The main thing is to draw the layout correctly, having previously measured the volume of the box contents, and also to securely connect the walls of the package so that they do not come apart.
Video about the craft
Box with lid. Unfolding: