Traditionally, during the cold season, nature lovers make bird feedersThey are made from milk cartons, plastic bottles, plywood and other scrap materials.
What kind of boxes are suitable for making a bird feeder?
A bird feeder, especially in a harsh climate, must be weather-resistant., and also be strong enough to withstand the weight of arriving birds. Of the available materials, the most suitable for making bird feeders are boxes. It is worth choosing boxes made of thick cardboard, since thin ones will quickly lose their shape and collapse.
The table shows the most suitable products for creating feeders:
| Box view | Pros | Cons |
| Tetra Pak (milk and juice boxes) |
| The difficulty of attaching decorative elements to a smooth surface using glue. |
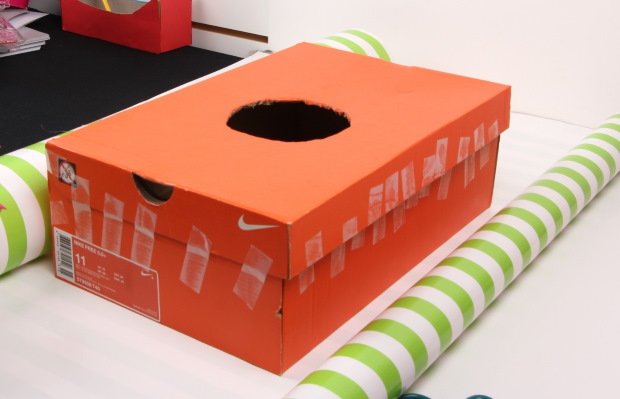
| Shoe boxes |
| The difficulty of decorating with glue. |
| Candy packaging |
|
|
| Plastic cake boxes |
|
|
When landing, birds put physical stress on the feeder, so products made of thin materials will not last long. Also, feeders suspended in open spaces can be damaged by wind and snow. Products made of thin materials are best placed under tree crowns or in gazebos.
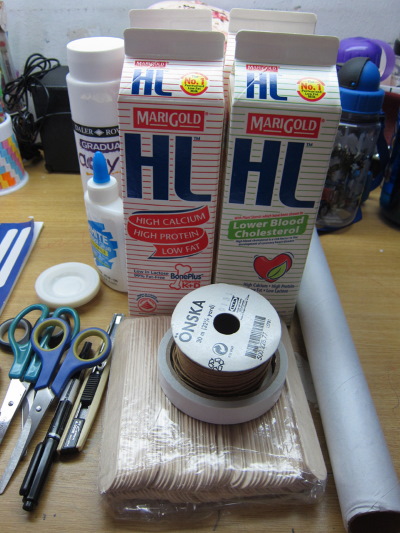
What is needed for work
To make a bird feeder from a box, you don’t need any special materials or tools.

Everything you need can be found at home:
- box (any cardboard, milk, juice, shoe, candy, cake);
- wire or rope to make a loop for hanging;
- stationery knife;
- scissors;
- awl;
- scotch;
- glue;
- office stapler;
- paints (optional).
To work, you need to prepare your work area by covering the table surface with film or newspaper.
Master class on making a simple bird feeder. A guide for beginners
A feeder from a milk box or any other box is made according to a simple scheme. Beginner craftsmen do not need to have special skills.
How to make a simple feeder:
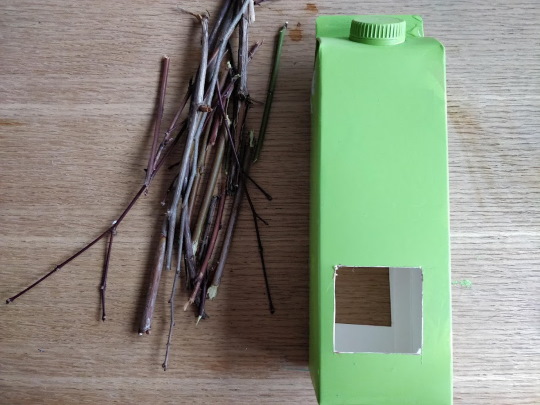
- Wash and wipe the milk carton.
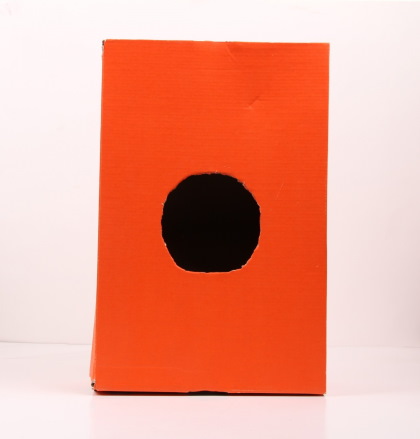
- Mark a hole on the side. It should be at least 6 cm in diameter so that small birds can fly in. The cutout can be made on one, two or all sides, it can be square or round.
- The height of the window should take into account the volume of the feed tray. If you cut the hole very close to the bottom, all the grain will be blown out by the wind. The optimal distance from the bottom is 5-7 cm.
- Cut out the windows using a utility knife.
- Using an awl, make holes in the top of the box on 2 opposite sides.
- Thread a 50 cm long synthetic cord or wire through the holes and secure it in a loop. The use of synthetic material for hanging is convenient because it is resistant to atmospheric conditions, does not get wet or rot.
- The two ends of the cord must be tied together. This will make the loop stronger. Do not make knots at each end of the rope, as after a while the attachment points will become soggy, the ends of the ropes will fall out of the holes and the feeder will fall.
- The surface of the box can be decorated: stick on stickers, paint with paints or make an applique.
Further, in the master classes, diagrams with descriptions of the stages of making simple and creative feeders are presented.
DIY Bird Feeder Ideas with Step-by-Step Instructions
Even the simplest feeder will provide invaluable help to birds in difficult times for them. But if you plan to place a bird feeder in your garden and make it a decorative element, you can familiarize yourself with step-by-step schemes for creating crafts of different types.
Construction from juice boxes
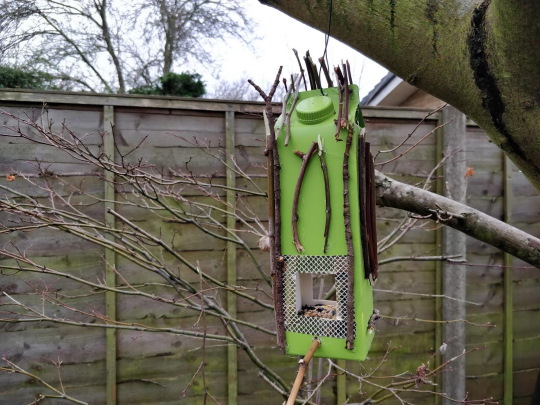
Using a juice box, jute cord, and a few pine cones, you can create an original bird feeder in the shape of a house, which will also serve as a garden decoration.
Materials and tools:
- tetrapak packaging with a triangular top;
- a skein of jute rope;
- cones;
- braid;
- a chopstick, pencil or branch to make a stick;
- dry grass or bast;
- double sided tape;
- glue gun with silicone rod;
- scissors;
- wire.
Instructions for making:
- Mark a hole on the box at a distance of 5-7 cm from the bottom and cut it out. You can cut 2 holes on opposite sides.
- Stick double-sided tape around the entrance window and along one side of the box.
- Starting from the bottom, wrap the entire surface of the box with jute. Cut the threads covering the window with scissors.
- Just below the hole, install a pole wrapped with cord. Secure it with silicone glue.
- Make 2 holes in the top of the box and thread the wire through. Secure it in a loop.
- Start decorating. Cover the window cutout and the place where the pole is attached with tape.
- Make a roof for the feeder from dry grass. It is more reliable to secure it with wire, since silicone glue does not stick to the laminated surface of the box.
- Decorate the grass hut with a ribbon bow and a few pine cones.
- Along the bottom, glue a “fence” of cut short branches using silicone glue, and secure it with several turns of jute rope.
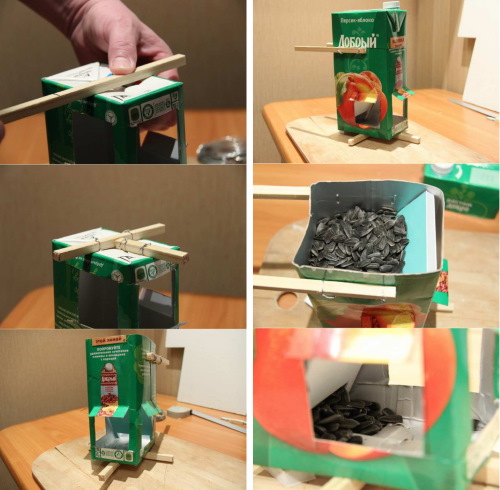
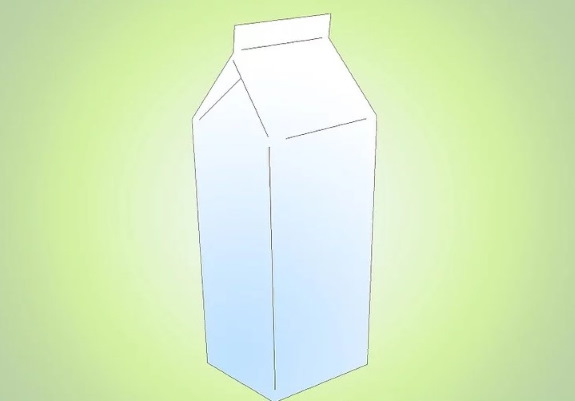
A juice box with a flat top can be used to make a structure with a dispenser. That is, as the birds eat the seeds, a new portion will pour out of the dispenser.
Instructions for making:
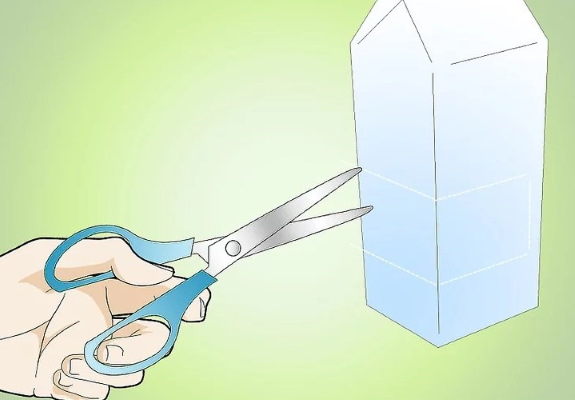
- Step back 6 cm from the top edge of the box, draw a line around the entire circumference and cut off the top with a utility knife.
- On 3 sides, at a distance of 4 cm from the bottom, cut out square windows, leaving a small visor on top.
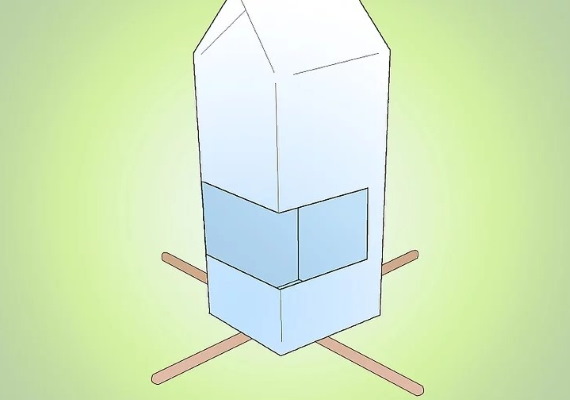
- Cut a rectangle out of thick cardboard, the width of which is equal to the width of the box, and the length is slightly smaller, so that the part can be placed diagonally inside the box. Make a small rectangular cutout in the center of the rectangle at the bottom to pour out the feed. Install the dispenser in the box.
- Use wire to secure wooden slats to the sides of the box so that it will be easy to hang the feeder on a balcony or fence.
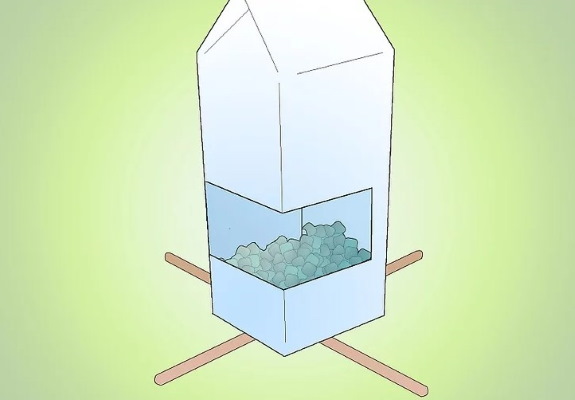
- Pour seeds into the dispenser on top and close the box with the cut off top part.
- If desired, decorate the bird feeder.
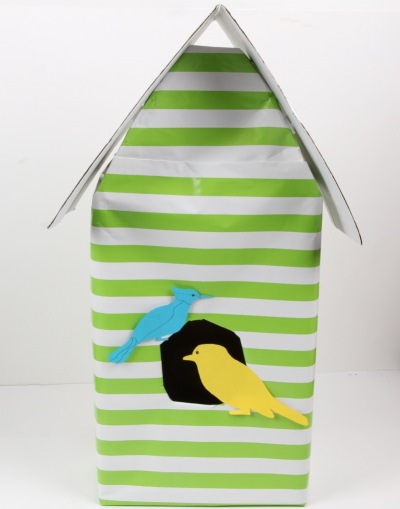
Construction from milk boxes
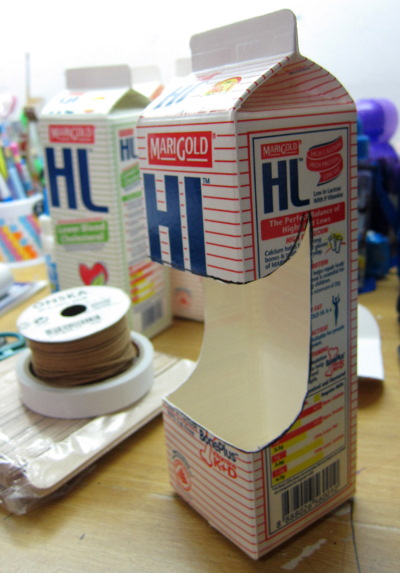
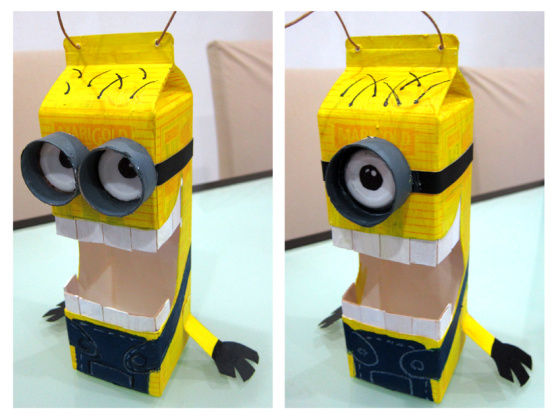
A milk carton feeder can be made in the form of cartoon characters. A craft in the form of a minion will look bright and attractive.
To make it, you need to stock up on tetrapack and paints of yellow, blue and black colors. To make glasses, you will need 2 caps from plastic bottles.
Instructions for making:
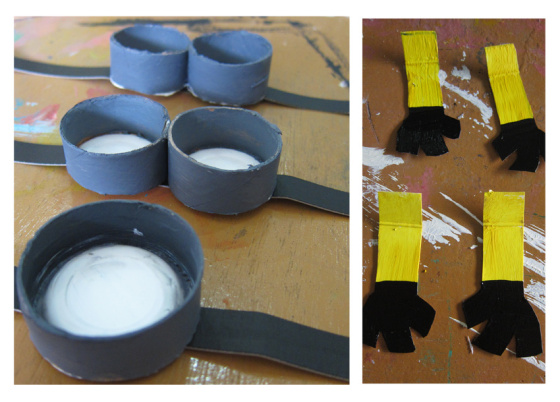
- On the front side of the box, using a felt-tip pen, mark a cutout in the form of a minion's mouth. This will be a rectangle, the sides of which go over to the adjacent walls of the box. Step back 7 cm from the bottom.
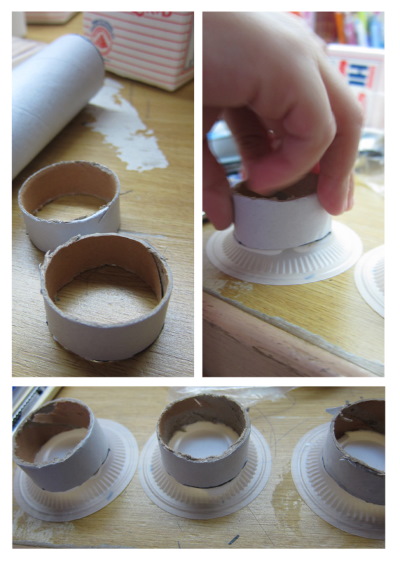
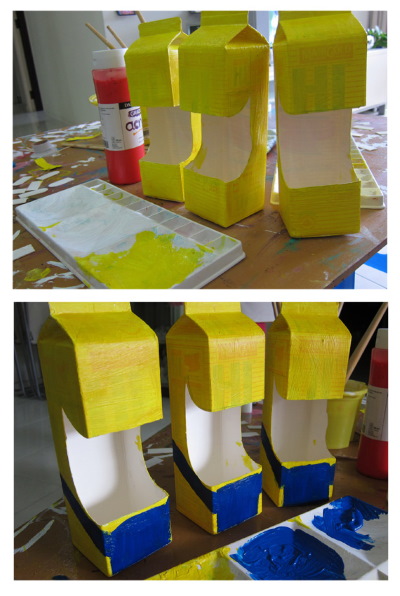
- Paint the box yellow, draw a blue jumpsuit at the bottom. Glue 2 bottle caps as a mouth in the form of glasses. Glue eyes in the form of white circles with pupils drawn inside the caps.
- Use black paint to draw the elastic band for the glasses and paint the minion's hair.
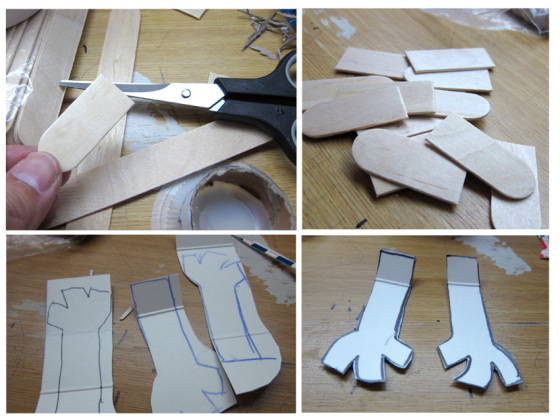
- To make the mouth look like a happy smile, glue teeth made from white cardboard to the top and bottom.
- Attach a wire for hanging to the top of the feeder.
A very simple design of a feeder can be created from 2 milk boxes. One box will be used as a feed tray, and the second will become a roof.
To make this feeder, you need to cut off one side of the first box, and cut the second box lengthwise into equal halves, leaving the top end uncut. Move the halves apart and attach them to the corners of the bottom box-tray.
It is more convenient to fasten the parts of the structure with wire. To do this, make 2 holes in the parts to be connected with an awl, thread the wire through and twist the ends. For hanging, thread a cord through the top of the box.
Candy Box Construction
Candy boxes are a bright material for crafts. You can create both a simple design and a model consisting of several parts.
To make a simple bird feeder in 15 minutes, you need a candy box, as well as:
- wire;
- rope;
- stationery knife;
- decor in the form of colored painted ice cream sticks.
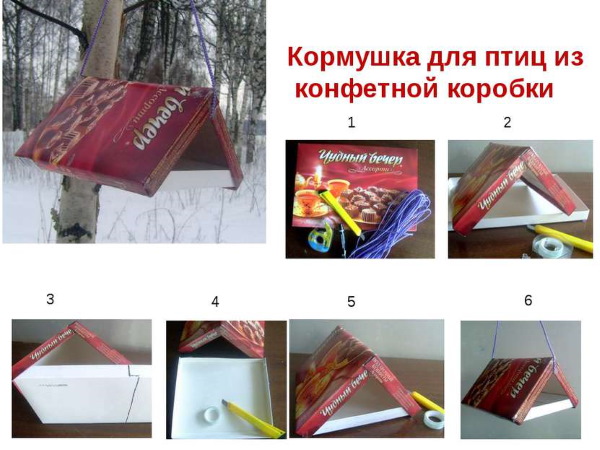
Manufacturing sequence:
- Cut the bottom of the box across the center, move the parts together, placing one half inside the other, glue them together with tape and secure them in several places with wire.
- Mark the middle of the lid and make cuts on the sides of the box in this place. Bend the lid at a 90-degree angle in the places of the cuts, fasten the cuts with tape.
- Connect the roof and bottom with wire fasteners.
- Make holes in the upper part of the structure and attach a loop for hanging.
- Decorate the bird feeder with colored wooden sticks, gluing them in random order.
Very often in kindergartens and schools children are given sweet gifts in packages in the form of fairy-tale houses. It is a pity to throw away such a box, but giving it a second life in the form of a useful thing is a great idea.
If the packaging is thin, you can reinforce it from the inside with cardboard. To do this, you need to open the box and glue sheets of cardboard of the appropriate size. Seal the corners with tape. Make slits for the birds in the places of the drawn windows or doors, while taking into account that there is room for food at the bottom of the box.
You can build a two-story dining room from 2 juice boxes and 1 Raffaello candy box.
The following materials are required for production:
- 2 juice boxes;
- Rafaello box;
- glue;
- rope;
- stationery knife.
Assembly stages:
- Glue 2 juice boxes together side by side.
- Cut out windows in the opposite walls, leaving at least 4 cm from the bottom. This will be the 1st floor.
- Tear off the transparent film from the Raffaello box. Seal the lid with tape.
- Glue the candy wrapper, lid side down, to the wide side of the juice box structure.
- The most important thing is to secure the structure so that it does not collapse. The supporting element will be a cord or rope passed through all 3 boxes and coming out in the middle of the top of the candy package. In this case, even if the glue does not hold, the structure will remain intact.
Creative feeder
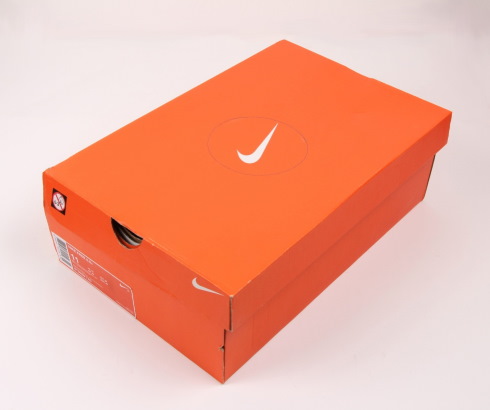
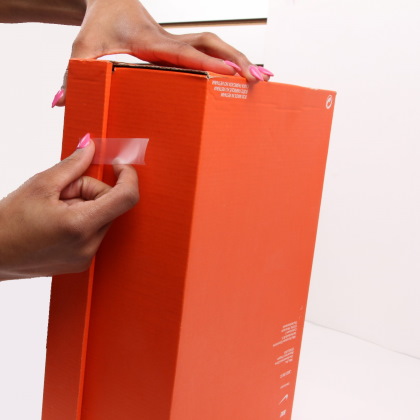
Unusual ideas can come to mind when you get your hands on things that you feel sorry to throw away. For example, you can make a stylish feeder with a dispenser from a beautiful shoe box and a glass bottle.
For the craft you will need the following materials:
- a sturdy cardboard shoe box with a separate lid;
- wire for fastening parts;
- a nice bottle (you can use a small plastic bottle);
- stationery knife;
- awl.
Instructions for making:
- Cut the lid in half. This will be the food tray and the roof.
- Mark the places where the bottle will be attached at the bottom of the deep part of the box. The neck of the bottle should be no lower than 3 cm above the tray. Make 2 rings out of wire that will allow you to periodically take the bottle out to fill it with food.
- Attach the halves of the lid to the main box from the end sides, with the cuts facing backwards. Securely fasten with wire in several places to give the structure stability.
This feeder can be placed on any flat surface. A bright, almost designer version of the feeder is boxes of chips, painted in different colors and fixed on a rectangular piece of plywood.
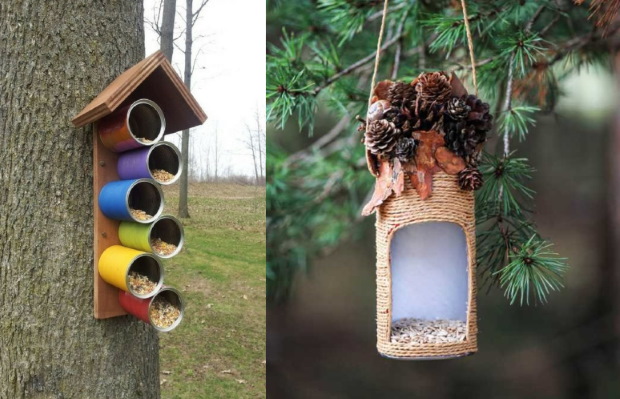
To make it you will need:
- 6 medium round chip cans, painted in different colors;
- a piece of plywood measuring 15 cm by 40 cm;
- 2 square plywood blanks, 15 cm by 15 cm in size, for making the roof;
- screwdriver and screws.
Progress of work:
- Place the cans on the plywood in a checkerboard pattern, 1 piece in each row.
- Secure the containers with their bottoms to the plywood, screwing them with screws from the inside.
- Make a triangular roof out of plywood and secure it to the top of the base.
- Install the feeder on a wooden pole, screwing it with screws. You can hang it on a tree trunk, tightening it with construction clamps. Fill the containers with food.
How to decorate a bird feeder
A milk carton bird feeder can take on a unique look if you decorate it beautifully.
For this purpose, you can use the following decorative elements:
- Natural materials. They are fixed on the feeder in any order, embodying the intended image. Bird windows are decorated with stones or branches. The roof is made of cones, dry grass, leaves and moss.
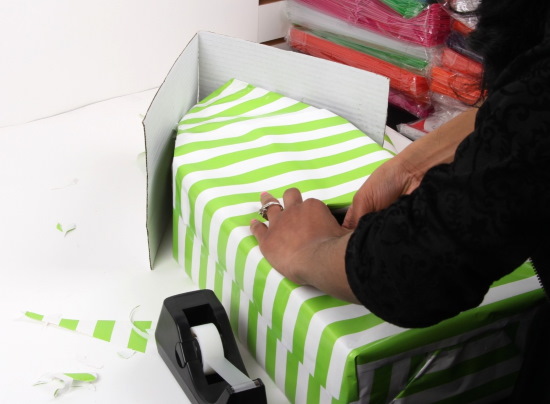
- Wrapping paper. You can completely cover the surface of the box with paper, combine colors and textures, create appliques, or glue three-dimensional figures made in the origami style to the feeder.
- Waste materials. Plastic bottles, their caps, ice cream sticks, cotton swabs, cotton pads, disposable spoons, cups - everything will find its place in the creation and decoration of a bird feeder.
- Acrylic paints. Using the technique of applying drawings and repeating motifs, you can make a painted bird feeder in a folk style (Gzhel, Khokhloma, Palekh) or paint the craft in the form of animals, birds, cartoon characters.
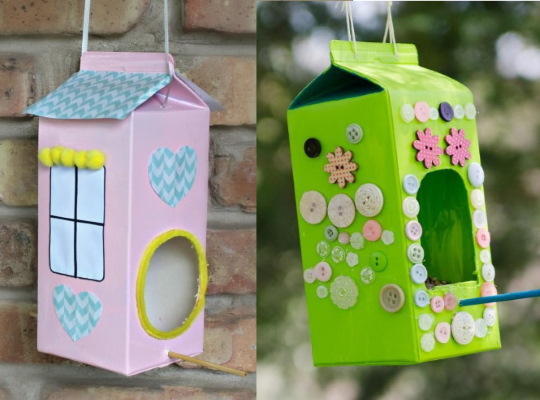
- Decorative ornaments. Large beads and buttons are suitable for decorating the surface, wooden figures of insects and birds will make the product original, and laces and braid glued along the contour will give the craft a finished look.
- Funny inscriptions. Various funny expressions will delight bird watchers.
Practical advice
A milk carton feeder should not only be useful for your feathered friends, but also become a safe place for them to stay.
When making it and determining its location, you need to take into account some nuances:
- The elements of the feeder must be firmly fastened so that the structure does not collapse under the influence of natural phenomena.
- The hanging loop should be made from durable materials that are resistant to gusts of wind and moisture.
- Decorated with natural materials, the birdhouse will serve as camouflage and become less noticeable to predators.

- The location for placing the feeder should be chosen taking into account the impossibility of cats accessing it.
- If you place a bird feeder near your home or in your garden, you can teach children to watch birds and develop a love for nature.
Making a feeder from an ordinary milk box is a good alternative to buying a ready-made canteen for birds and an unconditional help to birds during a difficult time of the year. Joint creative activities with children will help to reveal their talents and awaken a sense of love for nature.
Video on making bird feeders
Milk box feeder: