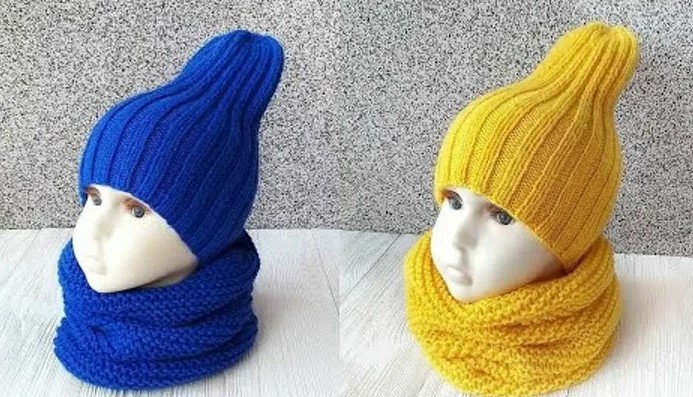
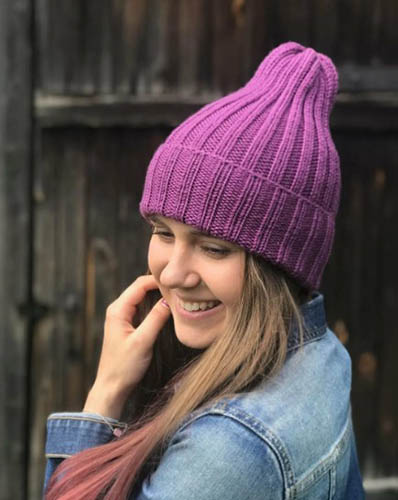
The pumpkin hat is gaining more and more popularity, which is suitable for both adults and children. The "Pumpkin" hat model can be purchased in a clothing store or knitted independently and worn in the autumn and winter periods. The second option is presented in a variety of patterns with detailed descriptions of how to knit the product with knitting needles.
Necessary tools and materials
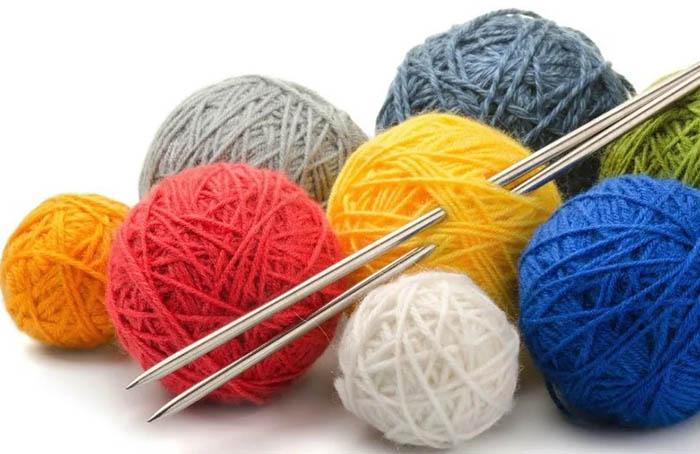
To knit a hat, you need to prepare a minimum set of materials and tools in the form of:
- hook or gypsy needle;
- yarn;
- spokes.
Pumpkin hat with knitting needles (the diagram with the description will allow you to create any pattern) is suitable for the winter period, as well as for the off-season. In the first case, the product should be warm, so it is better to use natural, thick thread material. In the second case, it is recommended to give preference to thin wool or synthetic yarn.
Knitting tools need to be selected in relation to the selected type of thread material. The knitting needles should be slightly larger in size than the thickness of the threads. In this case, the selected yarn needs to be folded in half and a knitting needle attached.
This is the size of the tool that is suitable for the job. However, often the manufacturers of the thread material indicate the corresponding number of needles on the yarn label.
If the product is knitted with an elastic band, it is better to choose merino threads so that the hat is practical, warm and beautiful. In this case, you need to prepare knitting tools No. 3.5 or 3.75.
It is best to knit on circular tools so that the fabric is neat and has no seams. When knitting a hat with English elastic, it is advisable to take knitting needles one size smaller than indicated on the yarn label. Due to this, the product will not be loose.
Before starting work, you first need to take measurements from the head of the person for whom the hat is intended:
| Measure | How to measure |
| Head volume | It is necessary to determine by the level of placement of the edges of the thing. The circumference should be measured along the line of the back of the head, earlobes and forehead. |
| Height of the product | Measure the length from the left to the right earlobe across the crown of the head. Divide the resulting size by 2. |
Schemes with description of works for beginners
There are many different patterns for making a hat, the crown of which resembles a pumpkin in shape. Each option is supplemented with a detailed description, so knitting the product will not be particularly difficult for both experienced and novice craftsmen.
1x1 elastic band
A pumpkin hat knitted with knitting needles (the pattern is simple, so it is suitable for beginner knitters) can be made with a 1x1 elastic band. In this case, the size of the product is approximately 55-57 cm, so the model is suitable for an adult.
Step-by-step description of the scheme:
- Using circular knitting tools, cast on a chain of 76 stitches. Additionally, knit 1 more loop to close the chain into a ring.
- Continue knitting with a 1x1 elastic band, alternating front and back stitches, straight into 76 elements. As a result, the height of the knitted fabric should be 32 cm.
- To form the crown, in the 1st row knit with alternation of 1 front, back stitch, then knit the next front and back loops together with the front one, having first turned the back element on the tool in the other direction so that this loop is crossed before knitting together with the front one. Repeat the alternation of stitches until the end of the line.
- In the 2nd row, make a front and back stitch together with the front stitch (first turn the back loop on the tool). Then knit another 1 front element. Alternate the pattern until the end of the row.
- In rows 3 and 4, make every 2 front stitches together as a front stitch.
- Cut the yarn, pass it through the remaining loops and tighten. At the end, secure the end of the thread.
Before putting on the hat, it is recommended to hand wash it in cool water. Dry the product on a towel, having previously given the item the required shape and placed it in a horizontal position. After such treatment, the product should stretch approximately 1.5 cm in length.
2x2 elastic band
Knitting a hat with a 2x2 elastic pattern, where there will be 2 front and 2 back stitches, helps to ensure a tight fit on the head.
Step by step instructions:
- Cast on 128 stitches and distribute them evenly across 4 knitting needles. As a result, there should be 32 loops on each needle.
- After knitting 1 row, make a mark by tying it with a piece of yarn. This will serve as the beginning of the knitting.
- To the end of the line, make an elastic band of 2 front and 2 back stitches. To make the future product with a turn-up, make a 22 cm tube with an elastic band. In other cases, the length should be 27 cm.
- Once the main part of the fabric is knitted, you can move on to shaping the crown, gradually decreasing the stitches.
- To do this, in row 1, knit 2 front loops, 2 back loops together, 2 front loops and 2 back loops. Repeat this pattern until the end of the row, alternating.
- 2 and all other even rows, up to row 9, design according to the pattern.
- Row 3 consists of 2 front, purl, 2 front and 2 purl stitches together. Repeat the pattern with alternation to the end of the line.
- In the 5th row, repeat to the end of the row, alternating the pattern of 2 knits together, purl, 2 knits and purl elements.
- In the 7th row, from the beginning to the end, repeat the alternating pattern of front, back, 2 front together and back loops.
- Row 9 consists of face stitches. In this row, decrease the back loops. To do this, take the front element by the front yarn, pick up the back stitch and knit 2 loops together with the front one.
- Row 10 consists of knit stitches, knitted 2 loops together.
- In the remaining rows, make all the front stitches 2 at a time, so that only 16 stitches remain on the knitting tools. To obtain a more voluminous crown, it is recommended to leave from 28 to 32 loops.
- Unwind approximately 20 cm from the skein of thread and trim the material. Use a hook or a gypsy needle to pull the yarn through all the stitches and bring it to the back side. To make the crown hold more firmly, pull the yarn through the stitches twice.
- Secure the yarn in the stitches already knitted.
- If desired, the knitted product can be supplemented with ties, a pompom or decorative stitching.
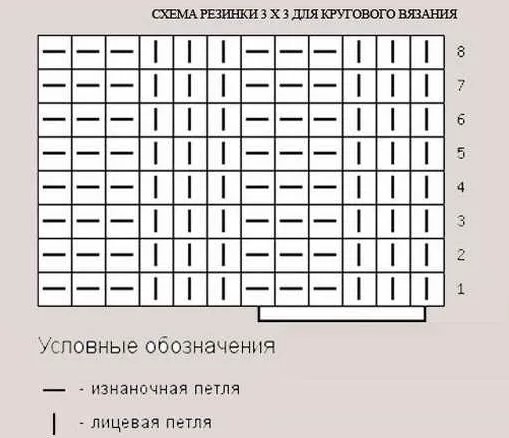
3x3 elastic band
A pumpkin hat with knitting needles (the diagram is supplemented with a detailed description, so there will be no difficulties in work) can be created with a 3x3 elastic band. For this, the product must be designed with circular knitting, without creating a lapel. In this case, there will be no seam on the thing.
For work, it is advisable to prepare a thick thread material that will not lose its shape after washing. If the head circumference is 52-54 cm, the height of the product should be 23 cm, the height of the crown - 5 cm.
Step-by-step design of the product:
- Initially make a set of 72 stitches. Then close the connected chain into a ring.
- When knitting a row, alternate 3 front and 3 back loops. In this case, pick up the stitches behind the front wall.
- In the next row, perform a similar repetition of alternating elements. However, pick up the stitches behind the back wall.
- By analogy with steps 2 and 3, design 45 lines.
- Then perform a decrease. To do this, knit with alternation to the end of the row a pattern of 2 front stitches together front, front and back elements together front and 2 back loops together back.
- Trim the yarn, leaving about 15 cm. Use a needle or hook to pass this piece of thread through all the loops and tighten.
- Hide the thread material on the inside of the item.
By analogy, it is permissible to make a headdress with a 4x4 elastic band. In this case, you need to alternate 4 front and 4 back stitches.
With a lapel
When knitting a hat with a lapel, almost any pattern is suitable. At the same time, there are often no seams on the headdress, because the work must be designed in a circle. This is especially true for fabrics made of thick thread material, where a neat connection can have a rough appearance.
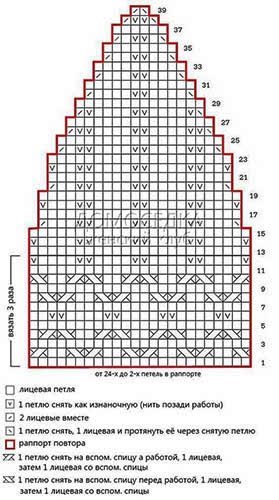
The only difference will be in the length of the hat. To create a lapel, you need to add 7 cm to the height of the crown and the main part of the product. To create a double lapel, you need to add at least 10 cm. Knitting should be done in 1 thread.
Step-by-step description of the scheme:
- Cast on 104 stitches on circular knitting tools, plus an extra loop to close the chain into a ring. The number of elements should be a multiple of 4. Mark the beginning of the work with a marker. If the product size should be 54-55, this number of loops will be enough. If the size is 56-57, cast on 108 stitches and 1 extra element.
- Continue knitting with a 1x1 elastic band so that the height of the fabric is 15 cm. In this case, knit the front and back loops alternately.
- Afterwards, you can move on to decorating the ornament. To do this, in row 1, repeat the pattern of purl and 3 front stitches with alternation to the end of the line.
- In the 2nd row, initially make 2 purl elements. Then remove the front one without knitting and make 3 purl loops, while the yarn should be behind the work (repeat with alternation to the end of the row). At the end of the line, make 2 stitches front and back.
- In the 3rd row, repeat the pattern of a purl stitch removed without knitting (the yarn should be in front of the fabric) and 3 front loops with alternation to the end of the row.
- Knit the remaining rows in the same way as rows 2 and 3, so that the height of the elastic band is not less than 15.5 cm. Finish knitting with row 2.
- To go to decreases in a new row, make a purl stitch. Then knit together the front purl and front elements with a slope to the right side, as well as 2 purl stitches together purl (alternate until the end of the row). Form the extreme purl and purl element after the marker together purl. Then put a marker.
- In the new row, repeat the pattern of front and back stitches together with a left-hand bias, alternating to the end of the row.
- In the next row, knit the front and 2 loops together with the front with a tilt to the left. Repeat this step with alternation until the end of the line.
- As a result, there should be 18 stitches left on the knitting tools.
- Cut the yarn to a length of 20 cm. Pull the loops together with a needle. On the back side, pass the cut thread through the stitches on the crown several times. Hide the end of the yarn.
- Upon completion of the work, perform wet-heat treatment of the product.
From thick threads
A pumpkin hat with knitting needles (the diagram allows you to knit a product not only for an adult, but also for a child) can be knitted from thick thread material. In this case, the product is intended for the cold period of time. It is necessary to take into account that the elastic band should be made thinner, because the yarn is thick. The knitting process should be carried out in a circle.

Step-by-step description of the scheme:
- Cast on 85 stitches using knitting tools.
- 1 row consists of purl loops.
- In the 2nd row, all stitches should be knit stitches.
- In the 3rd row, knit the front and back loops alternately.
- In the 4th row, to create the pattern, alternately make 1 purl stitch and 1 front stitch.
- Knit row 5 in the same way as row 3.
- Row 6 is designed as row 4.
- Continue knitting the product, making 80 rows.
- After that, in each row, decrease by 4 stitches.
- When there are only 15 loops in the row, decrease by 2 stitches.
- Transfer the loops of the crown to the needle with yarn when there are only 11 elements left on the knitting tools.
- When finished, tighten the crown.
Seamless side seam
To create a warm hat, it is better to use mohair yarn. To avoid a seam on the side of the product, you need to prepare circular knitting tools.
Step-by-step description of the scheme:
- Cast on 78 stitches onto knitting needles.
- 1 row consists of 2 front and 2 back stitches. Repeat the loops alternately until the end of the row.
- When creating the 2nd line, rely on the emerging pattern.
- Knit rows 3, 5 and 7 as row 1.
- Knit even rows according to the pattern.
- Row 9 is made with English elastic, creating identical increases. As a result, there should be at least 95 stitches on the knitting tools.
- Then continue knitting the product until the height reaches 25 cm.
- Next, start decreasing stitches to create the crown. When there are no more than 15 elements on the knitting needles, move these loops to a needle with a 10 cm long thread material.
- Tighten the loops by passing the edge of the yarn to the wrong side of the fabric.
- After completing knitting, secure the thread material and give the finished product the required shape.
Secrets for Beginners
Knitting needles and the right type of yarn are not the only requirement for knitting a pumpkin hat.
When knitting a product according to a pattern, it is important to take into account several recommendations:
- To calculate the number of loops in a product, you need to multiply the head circumference by the number of stitches in a 1 cm sample. Then subtract 15 or 20% from the result. This percentage is due to the fact that a hat that was decorated with an elastic band can stretch.
- Beginner knitters are advised to initially make a sample measuring 10x10 cm. The resulting fabric should be steamed and the appearance of the thread material should be checked. To determine the knitting density, you need to count the number of loops per 1 cm. When working, it is imperative to take into account the density of the fabric.
- Before putting the hat on your head, the product must be pre-washed and dried. A flat, hard surface is suitable for drying. If the drying process takes place on a rope, the product will stretch and lose its original shape.
- When deciding to attach a large fur pompom, it is advisable to fix this detail with a rivet. This will make it easy to change the model or remove the pompom before washing.
- In order for the product to have a seam, you only need to prepare 2 knitting tools for work. First, you need to make a canvas, then sew it with a decorative or simple stitch. Everything will depend on personal experience and imagination.
- To avoid seams, you need to prepare circular knitting needles or regular ones, but in the amount of 5 pieces.
For knitting a pumpkin hat, you can use any pattern you like best. In any pattern, the main thing is the sharp closure of the product, and which type of knitting to choose for this is decided by each person individually.
Video about knitting