Ribbon bows can be used anywhere. Their use will add originality to everyday life, decorate gifts for holidays, help create a unique hairstyle. There are many options for tying bows, from the simplest to the most complex and incredibly beautiful.
Selecting a tape
Bows are made from ribbons specially designed for this purpose.
Materials for tapes:
- atlas;
- organza;
- tulle;
- reps;
- nylon;
- paper;
- lace;
- cotton material.
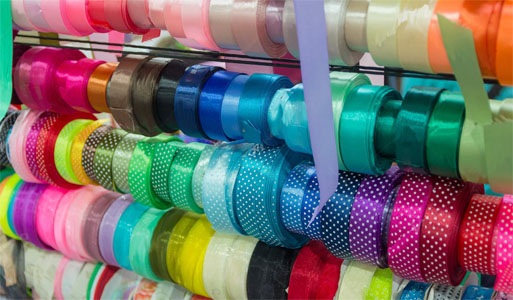
Table of features of materials for tapes:
| Name of the material | Positive aspects | Flaws |
| Atlas |
| The fabric is heavy, shrinks when washed in hot water, and the raw edge quickly falls apart. |
| Organza |
|
|
| Fatin |
| The material does not tolerate high temperatures and becomes electrified. |
| Reps |
| Cotton fabric shrinks when washed in hot water, silk and wool fabric should only be hand washed and dried horizontally |
| Nylon |
|
|
| Paper | A wide variety of colors, glossy shine, easy to work with material | It wrinkles and does not smooth out, and is easily damaged. |
| Lace | Elegant appearance, elasticity, fabric allows air to pass through well | Requires special care: do not wring out, do not overdry |
| Cotton material | Natural, warm, durable, pleasant to the touch fabric. | Easily wrinkled, difficult to iron, shrinks, fades after washing |
Tools
To make a ribbon bow with your own hands, you will need:
- tapes as the main material;
- ruler for measurements;
- well-sharpened scissors;
- tweezers for fixing the ends of the tape;
- source of fire for singeing ends;
- glue.

beads and rhinestones are used for decoration
General recommendations for making bows from ribbons
Before making bows from ribbons, you should consider the following nuances:
- in a correctly made product, the front side of the tape should be visible, and the back side should be hidden;
- the cuts must be singed;
- In order not to spoil the shape of the material, it is not recommended to leave the ribbons tied for a long time;
- if the bow is to be used as a decorative element for clothing, the texture of the bow material must be compatible with the material of the clothing;
- To determine the correct length of ribbon to wrap around the box, you need to make 2 turns of the ribbon around the box and add at least 60 cm for the bow;
- When tying a bow, it is important to leave the free ends of the ribbon as long as possible, and then shorten them with scissors;
- You can shorten the ends in one of two ways: cut diagonally or in a V-shape.

For gift boxes and bouquet arrangements, it is more convenient to use a ribbon with wire inside; the product will retain its original appearance for a long time.
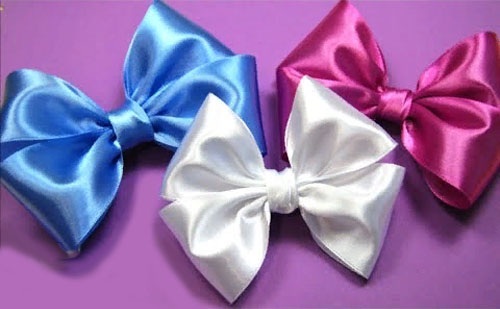
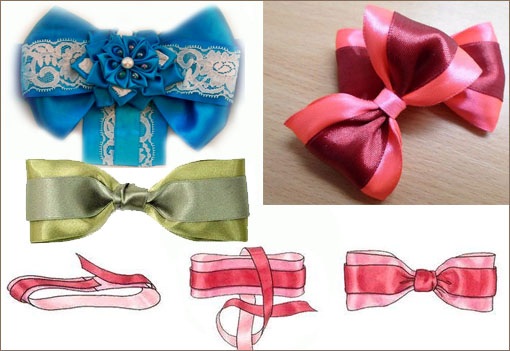
How to tie a beautiful bow from a satin ribbon
How to tie a bow from a satin ribbon in the classic variation:
- determine the center of the tape;
- place the ribbon over your index fingers, the loops should be equal, the bottom of each loop is pinched with your thumb;
- cross the loops;
- pass one loop through another;
- tighten the knot.
To make a strict bow from satin ribbon, you need:
- lay out a strip of material on the table and determine the middle;
- each edge of the tape is fixed with glue in the middle of the tape (when folded correctly, the side view resembles an infinity sign), smooth out;
- a small piece of tape (can be of a different color) is wrapped around the joint;
- glue the ends on the back side of the bow.
To tie a double bow, you will need 2 ribbons of the same length.
- The ribbons are folded together.
- Place 1 loop on each index finger.
- Cross the loops.
- Thread one of the loops through the ring formed at the bottom and tighten.
- Smooth out the finished bow, straighten the ends of the ribbon, you can hide them inside the loops of the bow.
The double bow can be made differently, and it will look a little different:
- take a wide and a narrow ribbon of the same length;
- place the narrow ribbon on the wide one, glue the ends;
- fold the ribbon into a circle and fasten the ends;
- the joint of the glued opposite ends is located in the middle of the bow, the joint is fastened to the parallel part of the future bow;
- wrap the contact area with thin tape.
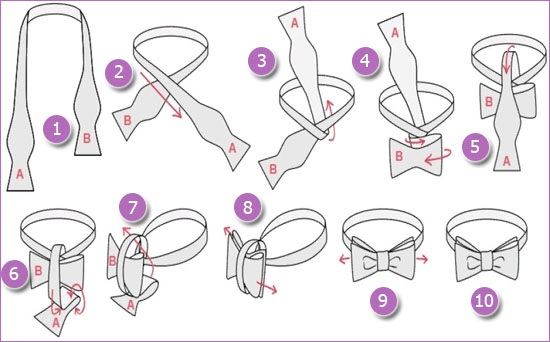
On the neck
You can tie a bow in the shape of a butterfly on your neck from a ribbon in one of two ways:
- Throw the ribbon over your neck and cross the ends.
- Pass the right end of the ribbon up and down. The right part of the tape should wrap around the left part until they cross.
- Now the left half of the tape wraps around the right one, which is in a horizontal position, and is passed through the loop. At the end, a knot is tightened.
- Place the ribbon on your neck so that its ends are different lengths. Cross them (with the longer part on top).
- Wrap this part of the tape around the short part and lower it down.
- Fold the short end into a semicircle.
- The long part is placed in front and also folded into a semicircle.
- Pass through the loop that is behind the 1st half bow.
- Tighten, straighten.
A voluminous bow on the neck is tied like this:
- the ribbon is wrapped around the neck;
- form loops;
- intertwine and tie;
- straighten the bow.
On the dress
How to tie a ribbon bow on a dress:
- the ends of the decorative strip are folded into loops and crossed;
- the crossing point is fixed with glue (in this case, rhinestones are glued on top) or a decorative pin;
- attach an accessory to a dress.
On the belt
To tie a bow beautifully at the waist, you need to follow this order of actions:
- wrap a ribbon around the waist;
- fold the ends into 2 loops, cross;
- skip 1 element into the formed loop;
- tighten.
An original solution for decorating the waist would be a bow with one loop.
Procedure:
- the ribbon wraps around the waist, its ends should be of different lengths;
- a loop is formed from a long piece of tape and crossed with the short end;
- the loop is lowered down, grasping the short end of the tape;
- is tightening;
- The length of the ends of the tape is adjustable.
How to tie a beautiful ribbon bow on chairs
Recently it has become fashionable to decorate the backs of chairs with bows. You need to be very careful when decorating chairs: the color of the bow should match the nature of the event. In order for the bow to retain its shape for a long time, it is better to choose rigid materials (organza), the edges of which should be well processed.
Most often, the backs of chairs are decorated with classic bows.
It is tied like this:
- wrap the tape around the back of the chair;
- make 2 loops at the free ends, cross;
- wrap one loop around the other with a movement towards you;
- tighten, straighten.
Another option for tying a ribbon on the back of a chair involves placing the decoration under the top crossbar.
Description:
- the tape is folded in half;
- hang the tape on the top crossbar, with the loop located on the inside;
- The tails are threaded through the loop and tightened.
How to tie bows beautifully for September 1st
The most popular hairstyle decoration for September 1st is a bow.
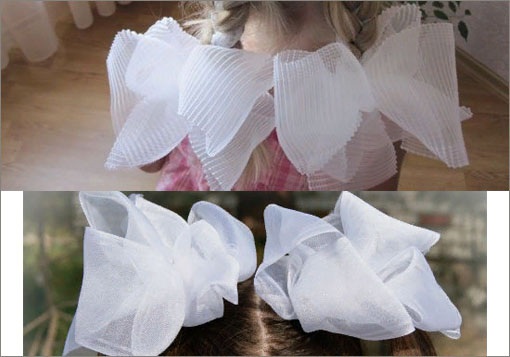
You can tie it in one of 3 ways:
- pleated bow;
- 4 petals;
- luxurious flower.
For option 1 you will need a wide ribbon and an elastic band.
- The hair is gathered together and tied with an elastic band.
- Then the hair is wrapped with a ribbon, one end of the ribbon is left long, the other short.
- The long end is folded several times and tied with the short one. The bow is ready.
The “4 petals” bow is made like this:
- the collected hair is wrapped with a ribbon and tied in a single knot, the ends of the ribbon should be the same;
- the tails are folded into loops and tied into a classic bow;
- The remaining ends are folded and tied in the same way.
Before creating the next hairstyle, the ribbon must be prepared:
- sew the tape along the center;
- fold like an accordion;
- shape the ribbon into a bow or flower and sew.
Attach the bow to the elastic band, gather the hair together, and secure with the elastic band.
Bow on a box for gift wrapping
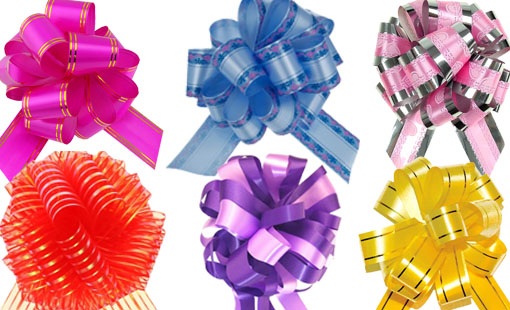
Voluminous bows will always be appropriate on gift boxes.
Making a bow-ball:
- fold the tape in several layers;
- cut off the corners of the resulting rectangle;
- move the cuts to the center by carefully moving the tape;
- tighten the narrowest part of the tape well;
- Pull out all the loops one by one, forming a ball.
To create a lush bow you will need 3 ribbons of different widths.
- Place a strip of medium width in 4 layers, the layers should be located one above the other.
- Also fold the wide strip and arrange the tiers crosswise.
- Place the 1st bow on top of the 2nd.
- Tie the center with a thin ribbon.
Large fluffy ribbon bow
To create a large bow you will need a very wide ribbon, from which you first cut out a square.
- You need to place the base (a small, strong box) in the center of the square.
- Cover the base with the edges of the tape from the top and bottom.
- Make several folds on the short sides of the resulting rectangle.
- In the middle, where the base is, gather the ribbon and tie it.
- Straighten the loops of the bow.
Bow made of wide ribbon
A bow made from a wide, single-color ribbon will look very beautiful and original if a narrow strip with an ornament runs along the entire length of the central line.
Scheme for creating a bow:
- lay out a wide strip of tape on the table;
- along the center line and along the edges, attach a narrow bright strip or a strip with a pattern using hidden stitches;
- wrap the finished strip of fabric around your hand;
- tie up;
- remove from hand and straighten.
From thin tape
For lush bows, a decorative strip of thin material would be more suitable.
To make this craft you will need:
- lay the strip of fabric along its entire length in turns, the turns should be located one above the other. The more turns, the more magnificent the bow;
- tie tightly in the center;
- straighten out;
- arrange the rings in a circle.
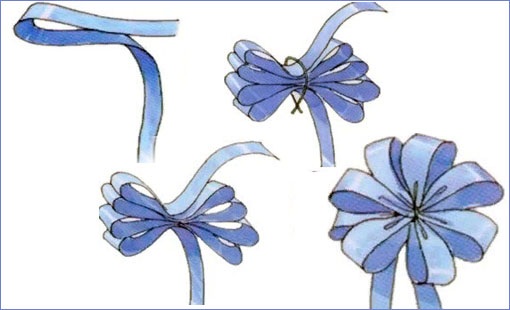
From a narrow strip
How to tie a bow from a small ribbon in the shape of a flower:
- cut the tape to the required length (at least 100 cm);
- measure 20 cm from one end and form the 1st loop about 3 cm long;
- Make the 2nd loop in the same way from the opposite end;
- Make the 3rd loop on the opposite side near the 1st, continue until the entire strip of fabric is used;
- carefully tie the center of the folded strip of fabric with special wire;
- wrap the wire with tape;
- straighten the loops in a circle.
From nylon tape
To make a lush bow from nylon, the ribbon must first be ironed well and the edges treated with fire.
- Now the tape is folded along the center line and stitched with small stitches along the fold. The thread should be pulled tightly.
- Twist the stitched tape into a spiral.
- Sew the accordion gathered edge.
- Attach the finished bow to the elastic.
A voluminous nylon bow can be simply tied on your hair.
To do this you need:
- gather your hair into a ponytail and wrap it with a ribbon;
- tie a single knot (cross the ends of the ribbon, wrap the lower end of the ribbon around the upper end);
- make loops at both ends of the nylon strip, leave both free parts of the tape long, tie;
- from the remaining long ends form one more loop and tie.
From paper tape
To make a "Star" bow from paper ribbon, you need to do the following:
- cut the tape into strips like this: The 1st 3 will be the longest, the 2nd 3 stripes will be a little shorter, the 3rd will be the same amount shorter than the 2nd stripes;
- each strip is folded into a figure eight, the ends are secured;
- the first three largest elements are laid in a circle, making up the bottom tier;
- a tier of medium-sized elements is laid on it in exactly the same way, the petals should be arranged in a checkerboard pattern, and the tiers are fastened in the center;
- The last ones to be attached are the small petals in a similar arrangement.
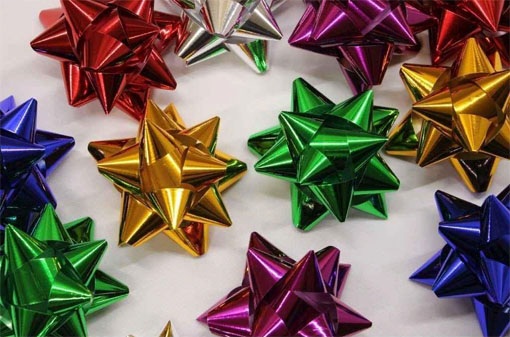
Wrap a small piece of ribbon into a ring and attach it to the center of the craft.
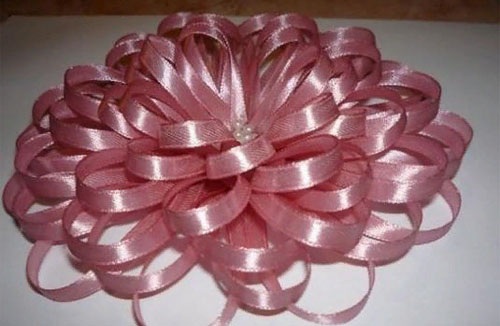
How to make a ribbon bow for discharge
To make the ribbon bow for discharge look elegant, it is better to use ribbons of several matching colors and decorative elements. This bow will be multi-tiered.
Manufacturing instructions:
- work starts from the bottom tier, the tape is cut into pieces 20 cm long, the ends of each piece are singed and sewn;
- the petals are laid out in a circle and connected to each other;
- for the petals of the next tier, cut strips 15 cm long, also make petals from them and fasten them in a circle;
- place the top circle of petals on the bottom one, sew at the center point;
- Decorate the center of the flower-bow with beads and rhinestones.
Story about creating a bow for a newborn boy:
You can make a bow of 3-4 tiers. It is important to remember: the higher the petals, the smaller they are.
Two-tone
To make a two-color bow, you will need 2 ribbons of different colors and widths. The wider ribbon will form the base and background and should be of a single color. You can use a narrow ribbon that is bright and has an ornament.
Work process:
- cut 2 pieces of the same length of wide and narrow ribbon;
- Place the narrow ribbon on the wide one along the center line, secure the ends;
- roll into a ring;
- glue the joint;
- smooth out;
- tighten the bow in the middle with a narrow ribbon, hiding the joint underneath, and tie it;
- adjust the ends.
Openwork "Dior"
The Dior bow is somewhat different from other ribbon crafts with loops and knots. It is a semicircular half of a bow lying in one plane. To make it, you can choose any ribbon, including lace.

Procedure:
- rings are made from ribbons of different lengths;
- the rings are placed one on top of the other from largest to smallest;
- in the middle they are fixed with a stapler, so that each ring takes the shape of a figure eight;
- the smallest ring is placed on top and fixed;
- hide the fixing point under the tape that passes through the small ring.
Using a fork
To make a bow on a fork with your own hands, you will need a ribbon at least 15 cm long and a table fork with 4 tines.
Procedure:
- wrap the fork tines with tape and cross them on the inside;
- determine the length of the ends of the tape, one of them should be much longer than the other;
- pull the long end through the middle gap between the teeth;
- the same end is brought up between the 2nd and 3rd teeth;
- the resulting small loop does not need to be tightened yet;
- the tape is threaded through the loop from the inside;
- pull the end of the workpiece out of the loop, tighten the knot;
- remove the finished bow from the cutlery;
- adjust the ends.
Kanzashi technique
How to make a bow from a ribbon using the kanzashi technique:
- first you need to cut the ribbon into small rectangles, the more rectangles (for example, 15), the more voluminous the bow, each rectangle will be made into a petal;
- place the ribbon face down on the table;
- fold the top corner to the bottom line and secure with a safety pin;
- flip the rectangle;
- on the front side, bend the sharp corner down;
- hide the end;
- secure with a pin;
- do the same on the opposite side;
- fold the workpiece so that the folded corners are inside;
- stitch the bottom edge, tighten the thread;
- turn over, straighten out;
- all petals should be made in a similar manner;
- for the lower tier, put 7 petals on a thread and close them into a circle, for the middle tier - 5, for the upper tier - 3;
- glue the base to the middle of the bottom tier from the wrong side;
- From the front side, glue the middle tier to the bottom, then the top one.
Decorate the middle with a large bead.
From rep ribbons
How to tie a bow from a rep ribbon:
- Fold the ribbon into a figure eight and secure the ends with pins.
- Bend the middle of each loop to the middle of the bow and secure, making 4 small loops.
- Both bows are stitched in the center, the thread is pulled tight, the stitching area is wrapped with thread, and the thread is secured.
From ribbons of different materials you can create a variety of bows to decorate clothes, gifts and interior items. The technique of tying bows is extremely simple, anyone can handle it.
Author: Doroshenko E. N.
Article formatting: E. Chaikina
A useful video on how to make a beautiful bow yourself
You can learn how to make an elegant two-color bow from this video:
You can cut the ribbon inside into strips, melt them and tie bows, it turns out very unusual. I did this for my daughter.