Most complex and beautiful cross stitches attract attention due to the skillful use of various additional techniques and methods. Backstitch appears most often in such works. This stitch, its varieties, step-by-step technique of execution and options for use will be discussed in this article.
What is "back" in cross stitch and when is it used
This type of stitch is used not only in embroidery, but also in sewing. Before the widespread introduction of sewing machines, it was widely used in the manufacture of clothing. Outwardly, it resembles a machine stitch, and therefore it is still used to connect small details of the cut, sewing toys, handmade accessories and other operations.
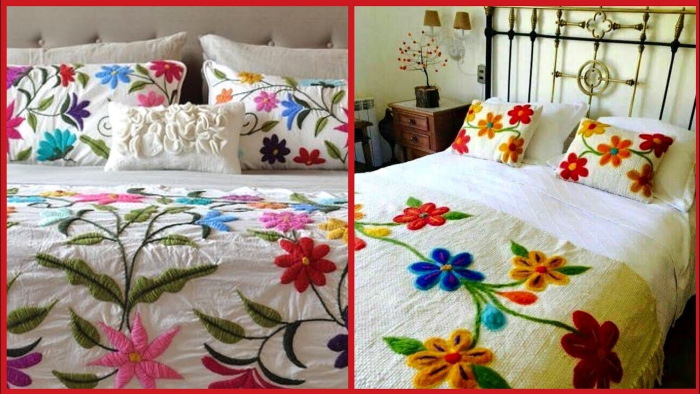
However, backstitch is most widely used in modern needlework as a contour stitch in cross stitching. Embroidered images designed in this way become clearer and more expressive. This technique is also used as an independent type of embroidery for decorating clothes, bed linen, and household textiles.
Translated from English, “back stitch” means “stitch back”.
There are other names for this stitch, known in the needlework community:
- back;
- back stitch (back stitch, backstitch);
- back the needle;
- line;
- contour seam.
Basics of technology
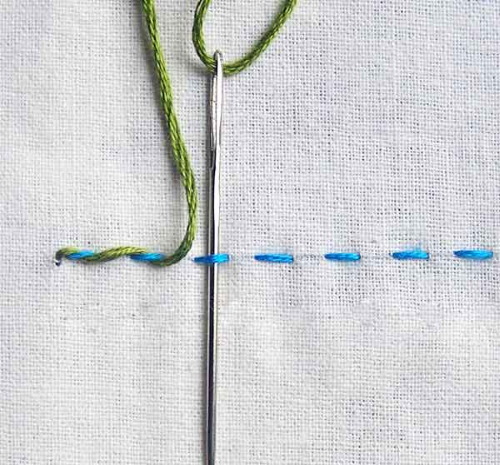
Backstitch is embroidered step by step, following a clear algorithm, most easily on canvas. In most cases, the stitch size will be equal to one cell of fabric.
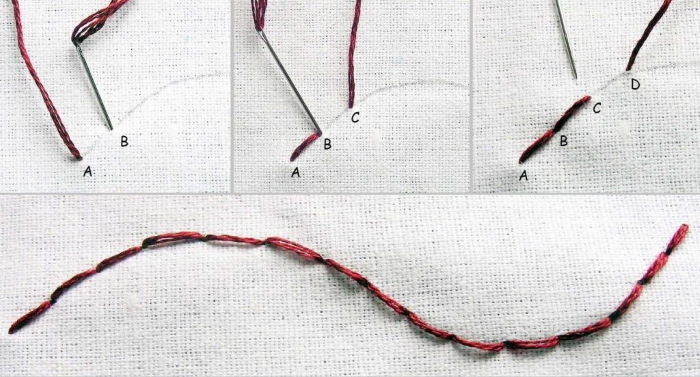
During the work process, it is necessary to adhere to the following order of actions:
- Secure the thread on the back side of the embroidery. It is preferable to choose a knotless method of fastening as the most neat and unnoticeable.
- Bring the needle and thread to the front side.
- Step back one stitch and bring the thread to the wrong side.
- Bring the needle to the front side at the point where the second stitch begins.
- Insert the needle into the point where it connects to the first stitch and pull it to the wrong side.
- Repeat steps 4 and 5.
Types of backstitch seams
In addition to the basic “classic” backstitch, other varieties are also used in embroidery:
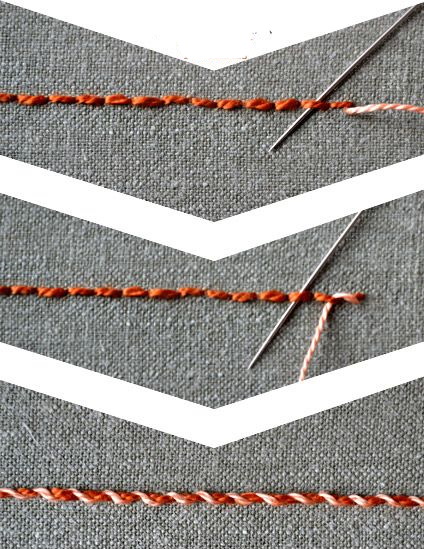
- "Whipped thread". Also known as "whipped needle". To perform this stitch, first lay a regular backing. Then, under each stitch, pull a thread of a different color, pulling it tightly. The result is a decorative two-color stitch resembling a twisted cord.
- "Cascade". The technique for making this seam is the same as in the previous version. The difference is that the additional thread is not tightened, but laid in a wave-like pattern on both sides of the main seam line.
- "Double Cascade". Unlike the "cascade", two multi-colored additional threads are laid symmetrically to each other. The result is a three-color seam with a double "wave" on the sides of the main back.
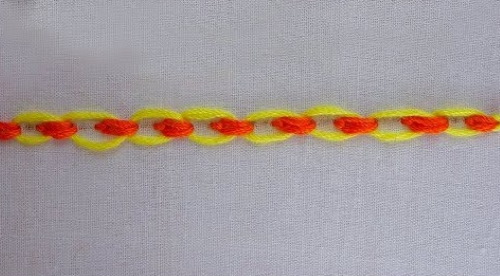
- "Double stitch" or "double backstitch". First, embroider 2 parallel backstitches at the same distance from each other along the entire required length. Then perform a "cascade", passing a thread of a different color alternately through both seams.
The back stitch is also often used in bead embroidery, attaching each bead with separate stitches.
Rules for using backstitch in embroidery
To make a smooth and high-quality contour seam, you need to follow several simple technological rules:
- The backing stitches are laid over the work after the main counted cross stitch is completed.
- Be sure to use a hoop to avoid thread sagging.
- Make the outlines with a thin needle that will not damage the cross stitch.
- Backstitch is a countable stitch, so it should be laid strictly following the pattern.
Failure to follow these simple rules can lead to serious errors that will be difficult or even impossible to correct.
How to read an embroidery pattern with a backing
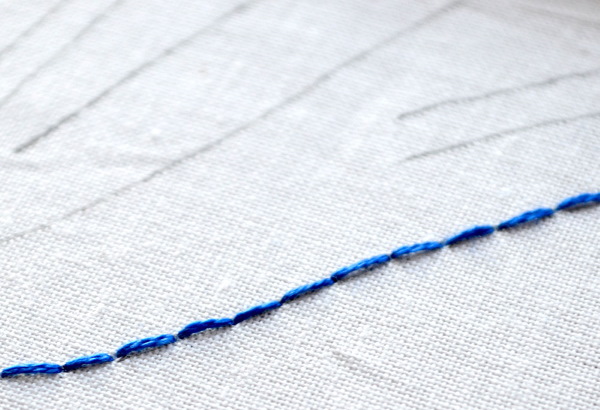
It is not difficult at all to embroider backstitch step by step, following the instructions exactly. On the diagram it looks like a continuous contour line laid over a grid with marked crosses.
If the outline stitch is made with one color of thread, then, as a rule, it is applied to the pattern in black. If the embroidery uses outlines of different colors, then they are also depicted in the pattern with multi-colored lines. The color and number of the floss, the thickness of the backing (1, 2 or more threads) are indicated in the key to the pattern.
In the picture, the seam line runs clearly along the canvas cells: horizontally, vertically or diagonally. You should not arbitrarily deviate from the diagram, otherwise the outline of the image may become greatly distorted.
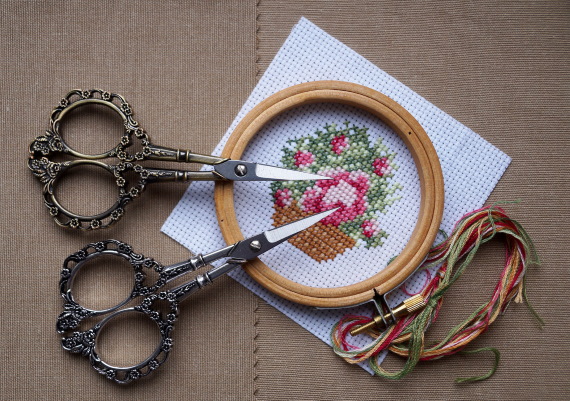
Materials and tools
Making a contour seam does not require any special devices and tools other than those needed for any embroidery. However, some nuances should be taken into account. This will make the work easier and help to achieve a high-quality result.
Below is the required minimum of tools and materials, as well as their features and conditions necessary for comfortable and successful work.
| Tool/material | Property/variety | Notes |
| Embroidery hoop | Matching embroidery size | The fabric must be well stretched and secured. |
| Textile | Uniform weave of threads | It is most convenient to embroider on Aida canvas, you can also embroider on linen, evenweave and other dense fabrics. If the structure of the material is dense, the outline is first marked with a disappearing marker or pencil. |
| Needle | Thin, with a sharp tip | The needle should easily pass through the “crosses” without damaging them or leaving any noticeable traces of the puncture in the fabric. |
| Threads | Cotton floss | The outline should be thin, smooth and clear. On small embroideries or small canvas, the backing is laid in one thread. On large canvas, the embroidery is done in two threads. Very rarely, there can be more than two threads of floss. |
The correct selection of tools and materials will help avoid wasting time and unnecessary material costs.
How to Embroider with Backstitch: Step-by-Step Instructions
Before you start doing the backstitch, you should “refresh” the finished work with a cross stitch. To do this, carefully wash it in warm soapy water and iron it. If you don't do this, it will be difficult to draw a neat and even outline.
In addition to the general rules described above, there are specific nuances and features of contour embroidery depending on the type, size and purpose of the work.
"Backstitch" on small embroidery
Miniature embroidery is often used to decorate clothing, accessories, and various objects. Beginners can try backstitch for the first time in small works, precisely following the step-by-step descriptions. Small plots using the back stitch will also be useful for teaching children needlework.
The application of this embroidery element is quite wide:
- small tabletop pictures and paintings;
- decorating bed linen and table textiles;
- brooches;
- magnets;
- bookmarks;
- decoration of cosmetic bags and eyeglass cases;
- keychains;
- souvenirs.
The main purpose of contour embroidery in miniatures is to give clarity to the image. In small works, the size of each cross is quite large relative to the size of the drawing. Because of this, the image is kind of blurred. The contour gives completeness and integrity to the plot.
Thanks to the backing, even a simple work can look complex and interesting. As a rule, the "outlining" on simple small embroideries is done last, after the cross-stitch work is completed.
"Backstitch decor" for combined embroidery
The contour stitch is actively used in handicrafts made using mixed techniques.
It harmoniously combines not only with the traditional cross stitch, but also with other types of embroidery:
- Jacobin;
- blackwork;
- Assisi.
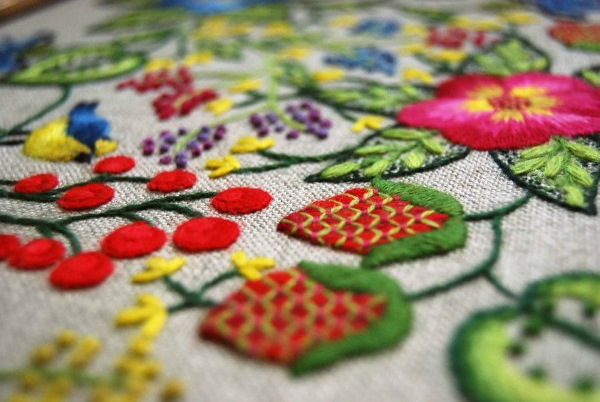
Jacobean embroidery is distinguished by its characteristic images of plant motifs. The combination of various embroidery techniques and stitching makes the design appear voluminous and convex. Backing is used here to create thin branches, stems and veins on the leaves, as well as to frame individual elements.
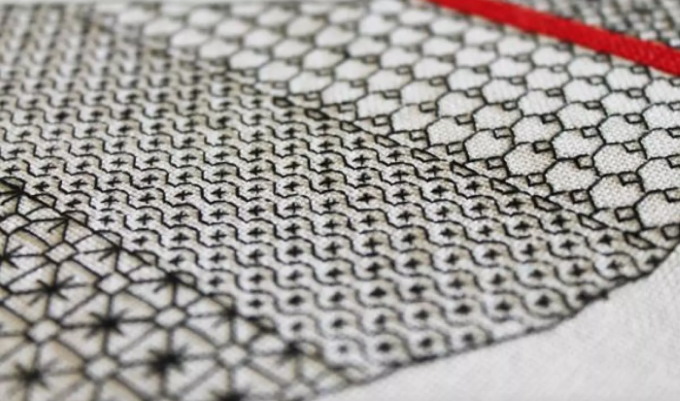
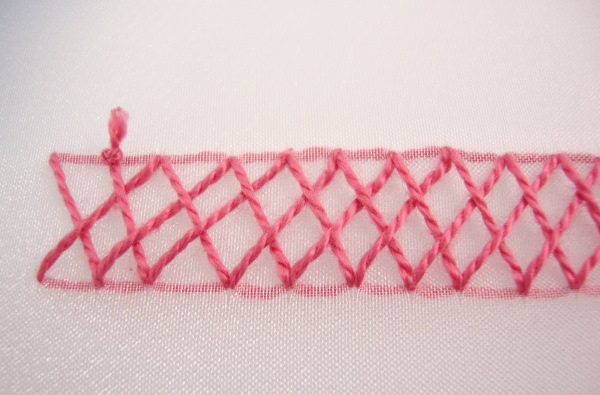
Blackwork is a monochrome embroidery based on a variety of contour stitches. Modern blackwork may include small colored cross stitches. The back stitch is used very widely here.

Italian embroidery "Assisi" can be called "reverse image". Its technical peculiarity is that first the outlines of the figures are laid out with backstitch, and then the background is embroidered with a cross. The pattern is created due to the unstitched areas of the fabric.
In modern combined works, backing can be used in various capacities:
- independent decorative element;
- finishing and detailing;
- technological technique.
The back stitch can be used to embroider large fragments of plots, figures, silhouettes. In some combined products it can even be the main stitch. The sequence of actions in such cases is determined individually.
Depending on the techniques used and the amount of work in each of them, backstitch is performed not only at the end, but also at the beginning or in the middle of the embroidery process. The detailing of the contours depends on the "adjacent" techniques.
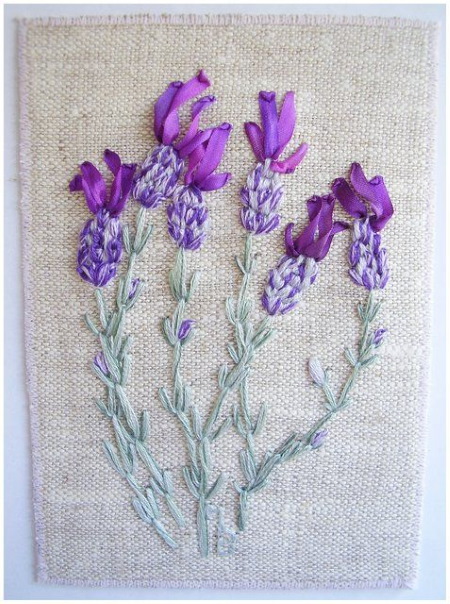
For example, if the plot includes ribbon embroidery, it is done last. Otherwise, you can easily damage, crush or stain the ribbon flowers. It will be almost impossible to fix such a defect.
In addition, creating contours at the last stage of work is associated with technical difficulties, since some areas hidden by ribbons are difficult to reach with a needle. In the combined technique, the backstitch can also be used as an auxiliary technique, sewing on beads, sequins, bugles or small beads. In this capacity, it is often called the "arched stitch".
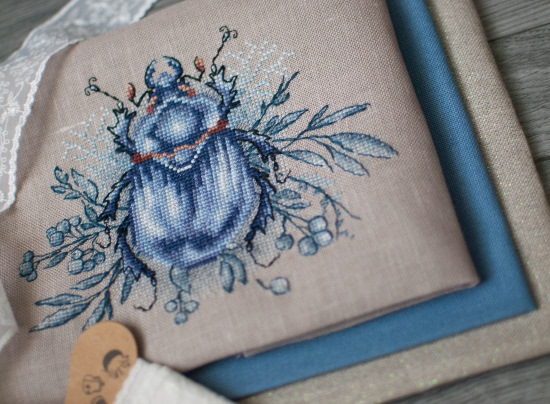
"Backstitch" on expensive embroideries
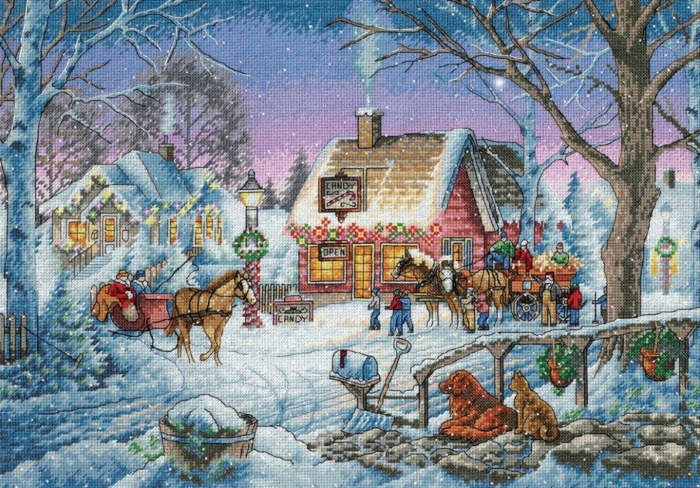
Backstitch embroidery step by step, strictly following the instructions, is especially important when working on complex subjects. Large and expensive sets from well-known manufacturers almost always include this technique. It is this technique that makes a hand-made picture complete, integral and interesting to look at.
Complex paintings may contain a large amount of background: outlines of figures, details of people's faces, facial expressions, plant stems, tree bark, animal fur, patterns on household items, architectural elements, and much more. As in most cases, all contour lines should be laid after the cross stitch is completely finished.
Expensive sets of famous brands are created by experienced, highly professional designers. Therefore, the contour seam in such works looks appropriate, harmonious and unobtrusive, despite the large volume. If you follow the pattern and instructions exactly, embroider slowly and carefully, then a good result is guaranteed.
However, beginning needlewomen should not take on a complex plot the first time. Laying the backing on large paintings requires a high level of concentration and experience in embroidering large, multi-layered patterns.
A seam that is sewn unevenly or out of place will be almost impossible to fix. After its removal, traces of needle punctures will remain on the fabric. In addition, an inexperienced embroiderer may accidentally damage the crosses when ripping the thread.
Contour stitches should be done as carefully as possible. Rough, crooked or too thick lines, twisted threads can give expensive artistic embroidery the appearance of a cheap primitive craft, nullifying all the efforts of the craftswoman.
Embroidery of alphabet and numbers using "backstitch"
The back stitch is often used to create letters and numbers.
The use of inscriptions in embroidery is quite wide:
- author's signature on a large painting;
- children's embroidery;
- postcards;
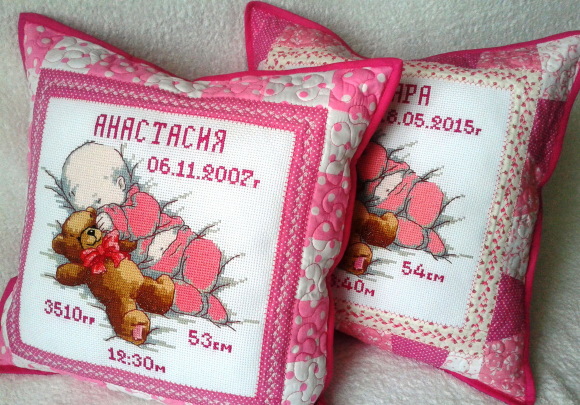
- metrics for newborns;
- wedding metrics and towels;
- marks on clothing and personal belongings;
- napkins and tablecloths with monograms;
- element of the plot of a painting;
- interior signs.
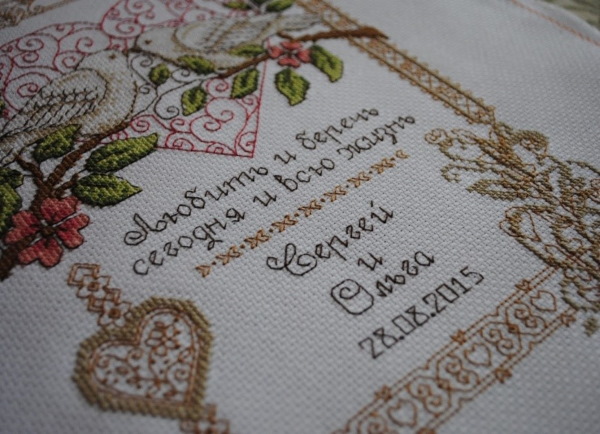
The inscriptions are almost always embroidered in one thread. Backstitch can be used to embroider different types of fonts, written and printed letters of various styles. Contour stitch is also used to border letters and numbers embroidered with a cross or satin stitch.
Variations of various embroidery fonts are easy to find on the Internet, but you can also create them yourself. To do this, simply draw the desired letter outlines on a regular notebook sheet in a grid or with a disappearing marker directly on the canvas.
If you plan to embroider a more or less long text (for example, a wish on a wedding towel), you need to draw a sketch of the future product with the exact location and outline of the letters and words.
Recommendations for embroidery
Backstitch embroidery must be done step by step, following the technology and sequence of execution, in order to obtain a clear picture.
However, there are several professional nuances that will save time and materials, make the process more comfortable and create a beautiful work:
- If your design includes a lot of backing or is entirely made of backing, you should choose an evenweave fabric rather than canvas as your base. This will give your work a neat, professional look. The large squares of canvas and the visible weaves of its threads can give your embroidery a “student” look.
- Small details and contours are embroidered in one thread. On large-format paintings, the backstitch can be made with a double thread. Also, by changing the number of folds, you can show perspective in landscapes: embroider the foreground with a double thread, and the background with a single thread of a less saturated shade.
- The length of the backstitch stitches should match the size of the crosses, otherwise the contour lines will look unnatural. Because of this, the integrity of the composition will be disrupted.
- If the embroidery consists of a counted cross stitch, a half cross stitch and a contour stitch, then it is done last. If this order is violated, the thin line in one thread will lose its clarity during the process of cross stitching. In addition, it can sag or fray.

- In combined work, including embroidery with beads, sequins, ribbons or sewn-on elements, you should do the opposite. In such cases, the backing is laid before working with volumetric decor, since large or lush details can make it difficult for the needle to reach the desired area of the fabric.
- You should not try to hide untidy crosses behind the outline thread. Such “masking” will not only not help, but will make the embroidery defects more noticeable.
- If the main part of the work is done with a dense small cross, you need to use a thinner needle to lay out the contours.
In modern needlework, backstitch is widely used in various types of artistic embroidery as an additional element. This simple stitch is accessible even to beginners in applied art. To master it, you will only need a needle and thread, a clear understanding of the order of actions and a desire to create.
Author: Veronica Reutova
Video about embroidery
How to backstitch: