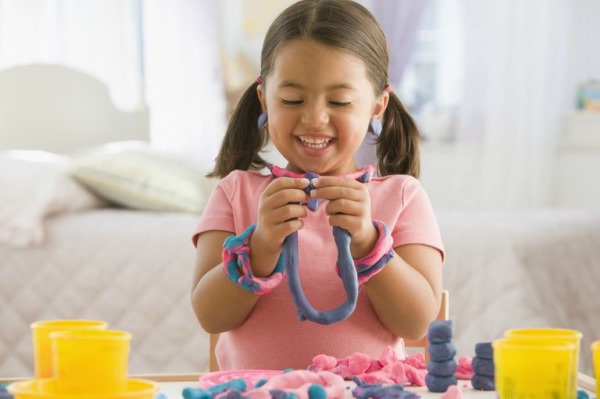
Making crafts from plasticine is one of the main types of creativity that comprehensively develops a child. It is important to develop fine motor skills from a very young age, which is greatly helped by modeling from plasticine, which is discussed in the article.
Why do we need to teach children to sculpt with plasticine?
There are many creative activities for children: one of them is modeling with plasticine.
This activity has the following beneficial properties for the child's development:
- Development of aesthetic perception and creativity.
- Development of spatial thinking.
- Development of fine motor skills of fingers.
- Development of intelligence.
- Development of speech function.
- Positive effect on the nervous system, development of perseverance and accuracy.
The influence of plasticine modeling on the artistic development of a child is due to the fact that this type of creativity activates creativity and love for the world around them. The child acquires an aesthetic worldview and is able to create something new. This can also include the development of spatial imagination, which has a beneficial effect on future success in school mathematics and drawing lessons.
The development of speech and intelligence is a consequence of the activation of fine motor skills of the fingers in the process of working with plasticine. At this time, there is an impact on the areas of the fingers, which causes both hemispheres of the brain to be in good shape, and the child’s nervous system calms down.
In addition, studies were conducted with first-graders. Among those whose finger motor skills were poorly developed, they noticed rapid fatigue from the first letter at school. Modeling from plasticine in the preschool period significantly helps to ease the burden of the first written assignments.
What kind of plasticine to choose for crafts
You can make crafts from plasticine from different materials, since there are many options to choose from.
Plasticine contains crushed clay, Vaseline, wax and synthetic substances (polyethylene, rubber and others). When purchasing this material for modeling, it is necessary to take into account the age of the child and the safety of plasticine, since there are also toxic types of products.
Basic requirements for quality plasticine:
- Plasticity of the product, taking into account the weakness of the child's hands.
- It should connect well with each other.
- High-quality plasticine does not stick to your hands and does not leave marks.
- Brightness of the product's color.
- The composition does not contain toxic substances, there is a note about safety for children on the packaging.
Types of plasticine for modeling with children:
- Classic plasticine of domestic production. Pros: It sticks well and can be purchased everywhere. Cons: It is difficult for a child to knead the plasticine and, as a rule, such plasticine leaves marks on clothes and furniture. This type of product is not intended for children under 3 years old.
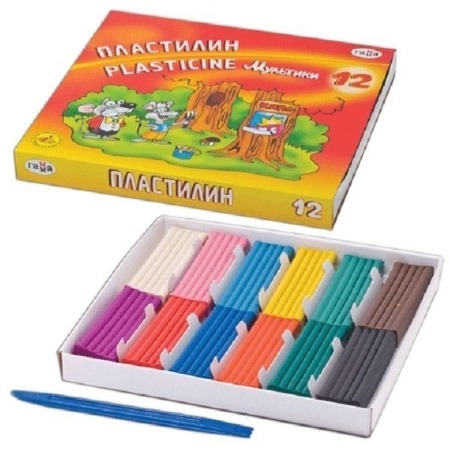
Recommended brands of classic plasticine: “Luch”, “Gamma” (8 colors cost about 50 rubles).
- Plasticine is imported. Its advantages are softness, bright colors, the ability to mold individual parts and is suitable for small children. The disadvantages are that such plasticine is too soft, which affects the durability of crafts and the price.

Recommended brand: Play-Doh (8 colors cost about 500 rubles).
- Ball plasticine consists of polymer balls that are connected with a special glue. The advantages of this type of product: does not stick to hands, does not leave marks, bright colors. Most often it is used for modeling applications on cardboard.
Cons: unsafe for small children, composition of unnatural substances (foam). Used mainly to create pictures on a plane, since it is difficult to connect together.
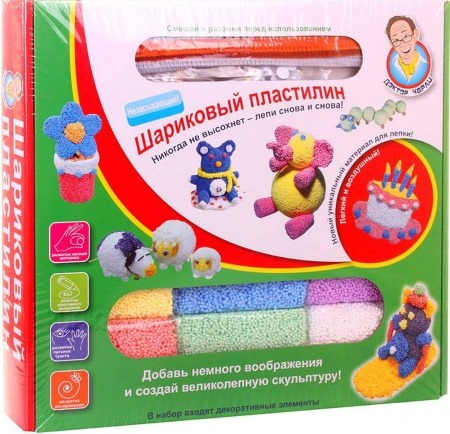
Recommended brands: “Doctor Charlie” (8 colors will cost 500 rubles), “Hobby” (8 colors - 300 rubles). Ball plasticine is quite expensive, but you can save money by buying colors separately.
- Wax plasticine – refers to a type of classic plasticine with a significant wax content. The main advantage of such plasticine is its plasticity and ease of gluing. In addition, it is safe and does not contain toxic substances.
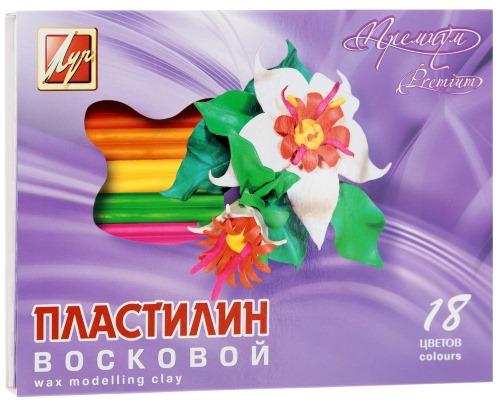
The disadvantages are that it is suitable for beginners and the smallest, as it easily falls apart over time. Recommended companies for purchase: “Luch” (8 colors - about 60 rubles) and “Premium” (the price for 8 colors is the same).
- Sculptural plasticine – is aimed at an older age of the child and his abilities. The soft type of this plasticine is suitable for children. Pros: affordable, development of the child's creative potential. Cons: it needs to be kneaded before sculpting, short shelf life.
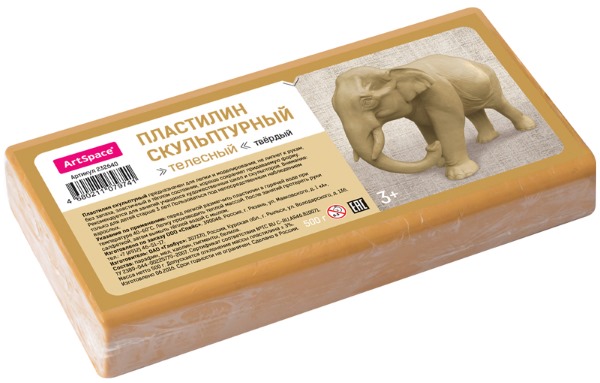
Popular brands: “Luch” (500 g - 50 rubles), “Gamma” (100-300 rubles), “Globus” (500 g - 60 rubles).
- Dough-plasticine – the safest type of plasticine, as it is prepared from edible products at home or bought in a store. This type of product was invented for the smallest children who try to taste everything around them, and classic synthetic plasticine is dangerous for a child because it can block the airways.
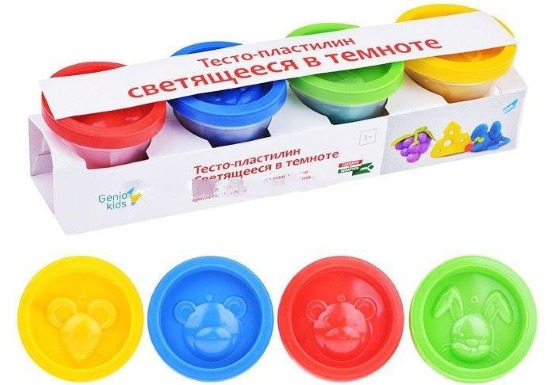
As for store-bought play dough, it is absolutely safe, but at the same time, manufacturers have made it too salty so that children will not eat it.
The advantages of this type of material are softness and safety. The disadvantages are: it is not intended for complex crafts that will be stored for a long time, the dough dries quickly, it is impossible to mold new figures from the used dough, as is the case with plasticine.
Possible solution: lightly moisten the dried dough with water and knead it well. Recommended brands: Genio Kids (8 colors - 200 rubles), Play-Doh (8 colors - 500 rubles).
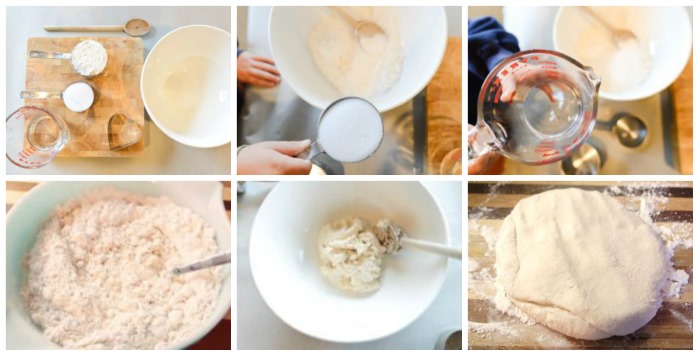
A homemade version of modeling dough. You will need the following ingredients: 1 cup flour, 1 cup water, ¼ cup salt, 1 tbsp vegetable oil and food coloring. Mix all ingredients and put on the stove until thickened, adding the desired coloring.
- Floating plasticine has such a name due to the fact that it is so light that it floats on water. The advantages of this type of plasticine are: softness, pliability, does not contaminate work surfaces. The disadvantage is its poor adhesion of individual parts.
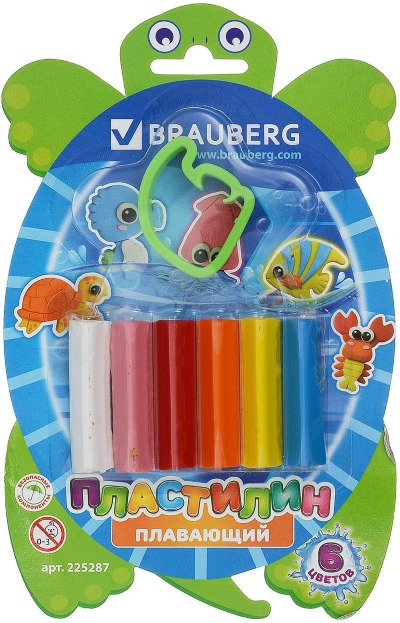
Recommended companies: “Luch” (from 60 RUR), “Brauberg” (from 70 RUR).
- Clay is another type of modeling clay. It is intended for older children who want to move to the next level in modeling. Modeling clay comes in different varieties. It looks like plasticine, but differs from it in that the clay cannot be kneaded again after it hardens.
Pros: softness, brightness, the ability to mold a product from neutral-colored clay and paint it, long-term storage without losing its appearance, low price. Disadvantages of clay: the product needs to be dried.
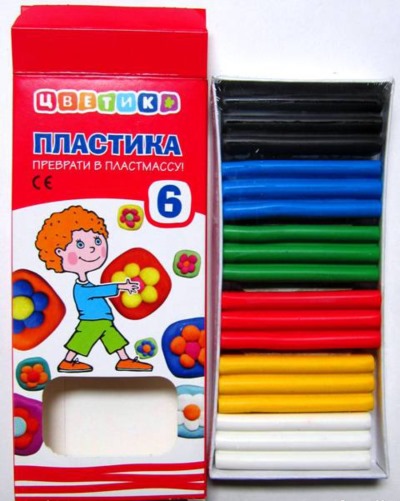
Recommended brands: Sculpey III mix, FIMO Kids, Idigo, "Tsvetik" and "Yozki". The cost of 6-color clay for modeling is 200-300 rubles.
- Hand chewing gum - plasticine-polymer. This material has an unusual property: if you throw a ball on a hard surface, it becomes a bouncing ball.
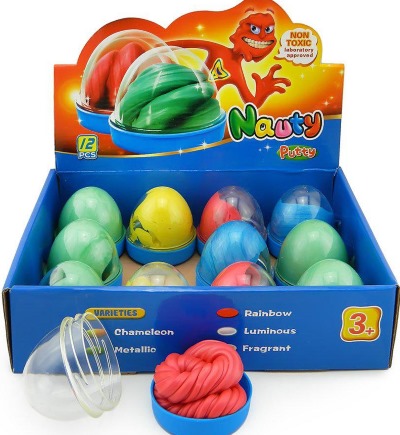
Popular brands: “Handgum”, “NanoGum”. Such products cost from 200 rubles.
- Plasticine soap – a new type of modeling products. It is no different in appearance from classic plasticine. It contains soap, which allows the finished crafts to be used for washing hands. The advantages include: softness, safety of the composition, does not stick to hands, pleasant smell, the ability for a child to make beautiful soap himself. The disadvantage is that the products dry out.
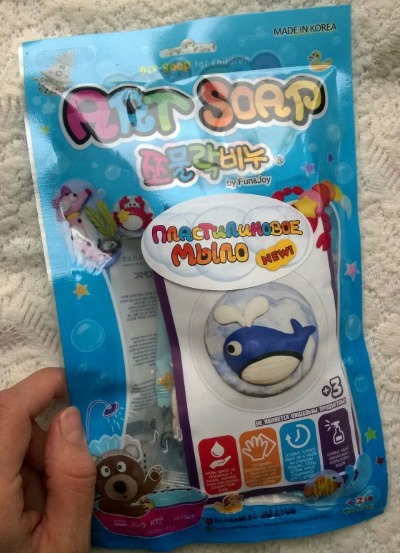
You can find this plasticine under the brand name “Art Soap” (a set costs about 100 rubles).
| Age | What types of plasticine are best suited? |
| 1-2 g | salt dough, soft or waxy plasticine |
| 2-3 g | soft types of plasticine |
| from 3 and up | classic or sculptural plasticine |
Useful tips for sculpting
The main problem with modeling from plasticine is the marks that remain on furniture or clothes. This is due to a poor quality product for creativity. To get rid of marks on clothes, it is recommended to put them in the freezer for 20 minutes, this will allow the plasticine to peel off the fabric.
It is important not to wash the clothes, since under the influence of heat the plasticine spreads more throughout the fabric. Ammonia is also used for cleaning; the dirty area is moistened with it and then washed.
In order for modeling with plasticine to be effective for the child's development and to interest him, it is necessary to show in the first lessons how to work with the material, how to roll a "sausage", how to make the simplest figures (a ball, a cylinder, etc.). In the first steps, joint work is important. In addition, it is worth constantly watching small children so that they do not accidentally choke on the product.
Often difficulties arise due to the hardness of plasticine, so it is worth buying softer types. If a small child is not interested in modeling, it is useful to attract him with a game. For example, to mold a bone for a toy dog. It is important to encourage the child in his first steps, which increases the motivation to develop his skill.
If a child fails to implement a conceived idea, and does not allow outside help (typical of 2-3 years old), then it is worth molding what he wants yourself, and then explaining how to do it. It is important to remember that loss of interest in modeling occurs from disappointment in one's own strength. It is necessary to praise and support any creative idea.
Master classes on plasticine crafts
You can make different crafts from plasticine, but parents sometimes have difficulties when a child asks to mold complex figures. For this purpose, special master classes have been developed that will help in creativity, stimulating children's interest in modeling. Below are some examples of what crafts you can make with your child.
Transport
The ideas for modeling transport are as follows. To make a helicopter, you will need: classic plasticine, a plastic tube, a glass.
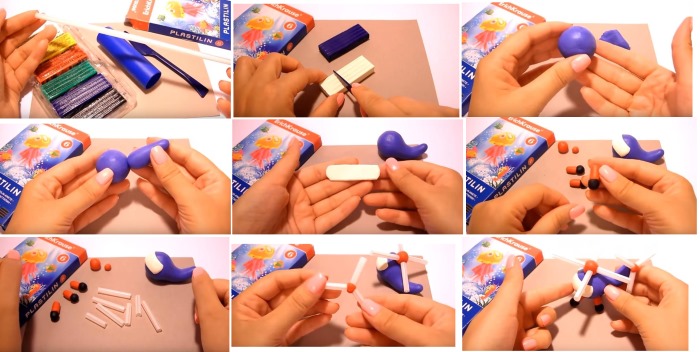
Manufacturing (step by step):
- Knead and connect together 1 block of blue and ⅔ of a block of white.
- Make a ball out of most of the blue and white plasticine.
- From the remaining part, make a helicopter tail in the shape of a “carrot”.
- We connect the ball and the tail of the helicopter, lifting its part.
- From the remaining white plasticine, make a thin flat rectangle (the helicopter's front window).
- Attach the window to the helicopter body.
- Take orange/red plasticine and make 2 small balls (one of them is bigger). Make 3 small “sausages” from the same color plasticine.
- Take black plasticine and make 3 small balls out of it.
- Lightly connect the black and red balls one after the other.
- Make 5 pieces of 4 and 3 cm from a plastic tube.
- Take a larger orange ball and insert 4 cm tubes into it on either side.
- Take another orange ball and insert the remaining smaller tubes into it.
- Attach the propellers and wheels to the “body” of the helicopter.
To make a steam locomotive you will need: soft plasticine (2 orange, 1 white, 1 yellow, 1 black, 3 green, 2 red), a board for modeling and a stack.
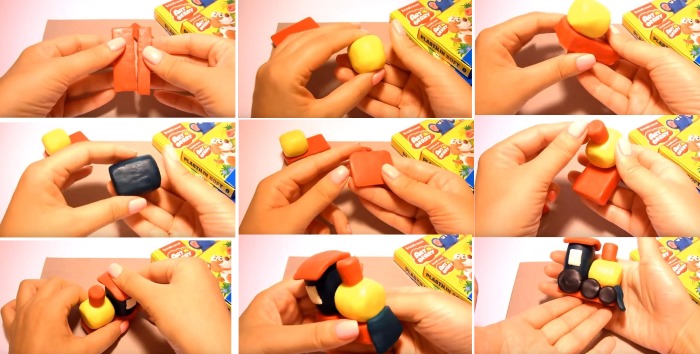
Manufacturing:
- Take an orange block and divide it into 2 parts using a stack. Connect one half with a whole block of orange plasticine.
- Knead the yellow plasticine, turn it into a ball and make a cylinder.
- Attach the yellow cylinder on top of the orange piece.
- Take 2 green plasticines. Connect ½ of one block of plasticine with a whole block. Make a rectangular parallelepiped out of it (locomotive cabin).
- Take the remaining orange plasticine and make a rectangle out of it, leaving a small part for the pipe.
- Make a pipe in the shape of a cylinder. Attach it to the yellow part of the locomotive.
- Peel off a small part of the white plasticine and make 2 equal rectangles.
- Connect the roof, cabin and windows.
- Take 1/4 of the green plasticine and make a circle out of it, then cut out a trapezoid. Glue it to the locomotive.
- From a whole block of black plasticine, cut 3 pieces of different widths with a stack. Roll them into “sausages”.
- Divide each into 2 parts.
- Roll the pieces into circles (wheels of a steam locomotive) and connect them to the steam locomotive.
Animals
You can make crafts from plasticine that your child would want to play with in the future.
For example, to make an elephant you should take 1 white, 1 black and 2 blue bars of plasticine.
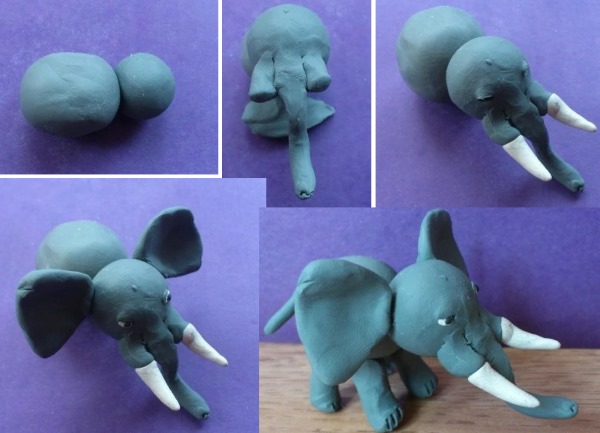
Step-by-step sculpting of an elephant:
- Knead the white and black plasticine and mix them together.
- Divide the blue plasticine into 3 unequal parts.
- Make a ball from the middle part (elephant's head).
- From the larger part, make an oval, elongated elephant body.
- From the remaining part of blue plasticine make a trunk and 2 protrusions for tusks. Attach the blanks from the edge where the elephant's head is located.
- Make cuts for the eyes with a stack. Roll 2 sharp-angled tusks from white plasticine and attach them.
- Stick small black and white dots on the place where the elephant's eyes are.
- Chip off ½ of the 2nd block of blue plasticine and make 2 ears for the elephant.
- Make 4 legs and a tail for the elephant from blue plasticine.
You can also make a sheep from plasticine. For it you need to take: 1 white, 1 black and 1 blue block of plasticine.
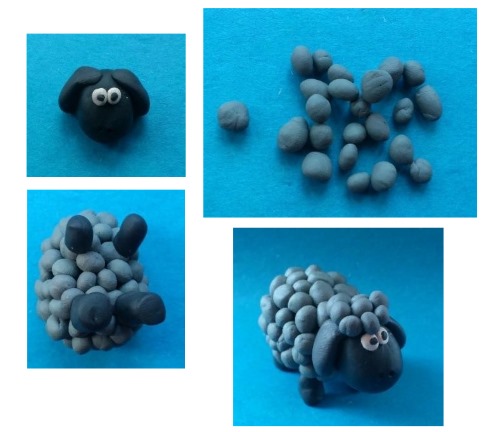
Step-by-step modeling of a sheep:
- Divide the black plasticine into 2 unequal parts (leave some for the legs). Make a ball from the smaller part (head), stick 2 small white and black balls (eyes) to it. Attach 2 ears here. Make nostrils with a match.
- From a large part of black color, mold an oval-shaped body.
- Divide the grey plasticine into small balls.
- Cover the body with grey balls.
- Make legs from black plasticine and glue them to the body.
- Use a toothpick to attach the head and body.
Flowers and plants
To make a lily you will need: 1 yellow, 1 white and 1 green block of plasticine.

Below is a step-by-step instruction for sculpting:
- Make balls from yellow and orange plasticine. Flatten them and put the orange inside the yellow, wrap it into a “sausage”.
- Divide it into 6 parts. Flatten each of them and make petal shapes.
- Make small balls from brown plasticine and glue them onto each petal in random order.
- Take a wire or a pencil. Stick green plasticine on it.
- Glue the petals around the circumference.
- Attach the flower to the pencil.
- Make “sausage”-shaped sheets from green plasticine and glue them to the trunk.
You can glue brown plasticine balls onto the wire and attach them to the flower.
You can make a cactus from plasticine, for this you will need:
- any bottle cap;
- plasticine of green, yellow, blue and brown colors;
- match.
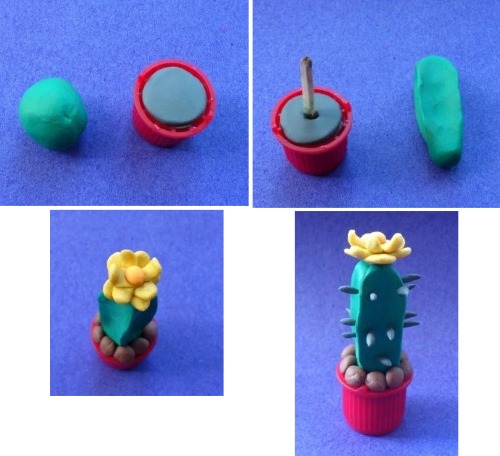
Step-by-step modeling of a plant:
- Take any plasticine and fill the lid with it. Stick a match into the center of the cactus pot.
- Take some green plasticine and mold it into a shape resembling a cactus.
- Place the cactus on a matchstick so that the plant is “in a pot”.
- Make small balls from brown plasticine and attach them to the pot.
- Make a flower out of yellow plasticine and attach it to the end of the cactus.
- Make small thorns from blue plasticine and glue them to the cactus trunk.
Flying saucer
You will need: 4 matches, a stack, plasticine. Below are step-by-step instructions.
- Take black plasticine and make a ball out of it, then flatten it.
- Take yellow plasticine, roll it into a ball and flatten it (it should be 2 times smaller than the black one). Connect the black and white disks.
- Take ½ a block of blue plasticine and make 3 balls out of it. Insert matches into them.
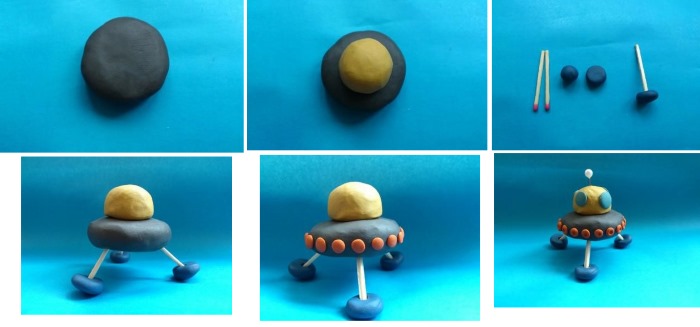
- Insert the other ends of the matches into the blue disk to form the legs of the flying saucer.
- Take ½ of orange plasticine and make many circles from it, which are placed on the blue disk.
- Glue a small white ball (antenna) onto the 4th match.
- Make several circles from blue plasticine and glue them onto the yellow body along the circumference.
Vegetables
You can mold a carrot from plasticine. To do this, take 1 orange and 1 green block of plasticine.
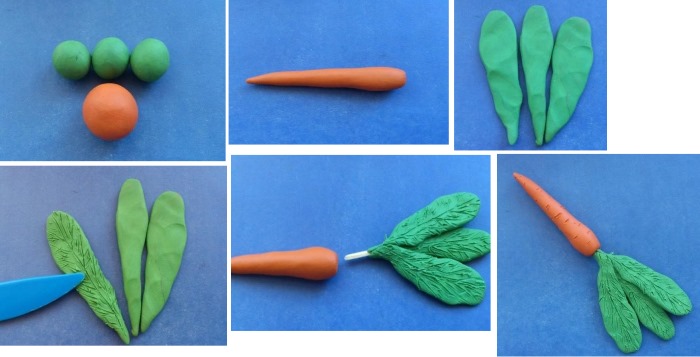
Carrots step by step:
- Knead the orange plasticine and make a ball out of it.
- Divide the green plasticine into 3 parts and roll them into balls.
- Make a sharp-angled cone shape from the orange ball.
- Make elongated circles from green balls.
- Use a stack to draw a pattern on the green plasticine.
- Take a match or a toothpick and glue the green branches to it.
- Insert a match with leaves into the root of a carrot.
- Make notches on the root with a stack.
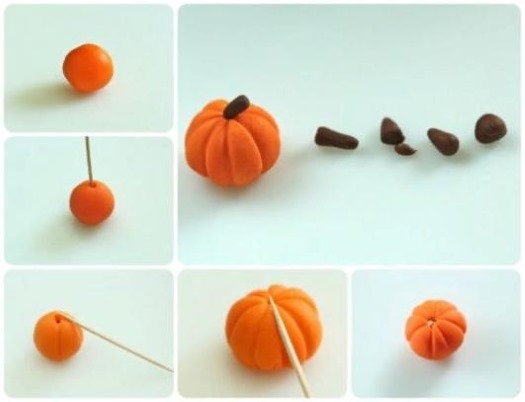
To make a pumpkin from plasticine, it is recommended:
- Make a ball out of orange plasticine.
- Use a toothpick to make lines on the ball.
- Make a shoot out of brown plasticine and glue it to the middle of the vegetable.
Mushrooms
To make a plasticine craft in the form of a fly agaric mushroom, it is suggested to follow these steps:
- Take 1 piece of red plasticine and roll it into a ball.
- Compress the ball to form a disk shape.
- Make a cone out of the disk.
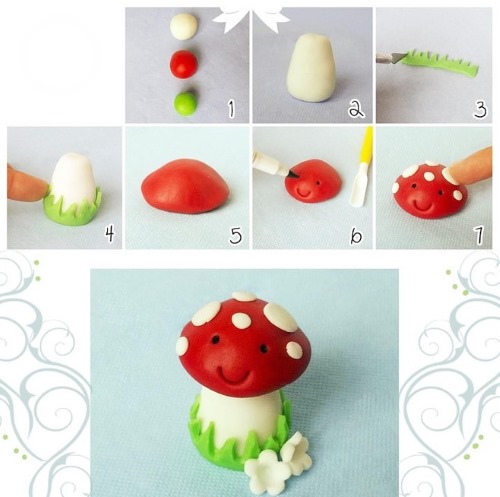
- Take 1 piece of white plasticine and make a cylinder out of it, then round the bottom and make the top thinner (you should get a mushroom stem).
- Cut off ⅓ of the white plasticine and divide it into 15 small balls.
- Take ½ of a block of white plasticine and roll it into a “sausage”. Make a rectangle and turn it into a “wave” (lifting the plasticine successively).
- Make a thin long strip from white plasticine (to fit under the hat). Draw neat stripes on it using a stack.
- Glue 15 white balls to the cone (mushroom cap). Connect the stem and the cap. Attach the “wave” to the middle of the stem.
- Make grass from green plasticine if desired.
Compositions by seasons
You can also make crafts from plasticine in the form of a panel.
For example, to create a panel "Willow branches", it is enough to take any plasticine, toothpaste, gouache, a stack, a drawing pencil and a white sheet of cardboard. If there is old "mixed" plasticine left, it can be put to use.
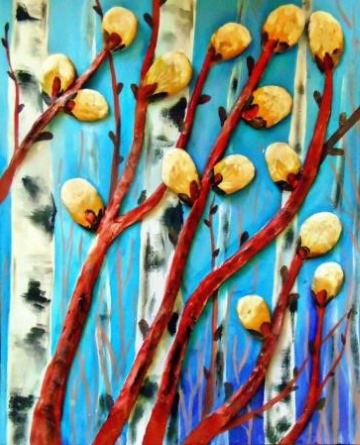
Instructions for creating a painting:
- On a sheet of white cardboard, make a sketch of birches with a pencil. Color them with gouache.
- Take any plasticine and roll “sausages” that will later become willow branches.
- You can try on the sizes by placing them on the picture (the branches should be the entire length of the sheet). Glue the branches to the cardboard.
- Make 14 balls from plasticine, which are then glued to the branches. These will be willow cones.
- Roll small balls from another plasticine and attach them to the willow branches. These should be the buds of the tree.
- Take toothpaste and carefully apply it to the branches, cones and buds. This will degrease the plasticine. Let the picture dry.
- Take red, brown, yellow, white and black gouache. Paint the branches and buds red-brown. Cover the cones with yellow paint, apply a little white gouache to the ends. Apply spots on the branches and buds with black paint.
The composition is suitable for older children (10-11 years old). The following picture should be obtained.
The next composition on the theme of winter, you need to take:
- blue cardboard;
- green, brown, yellow and white plasticine;
- toothpaste;
- gouache and pencil for sketching the drawing.
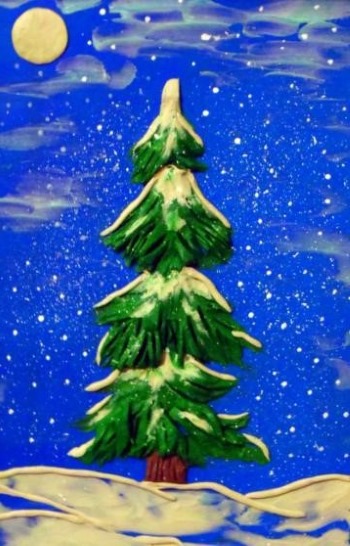
Step-by-step instructions for creating a panel:
- On the blue cardboard, draw a straight vertical line in the middle. This is necessary to mark the trunk of the spruce, since it is convenient to mold branches along it.
- Divide the green plasticine into three parts, each larger than the other.
- Take a large piece of green plasticine and make a triangle out of it. Glue it to the bottom of the trunk line.
- Take the middle part, make a triangle and glue it above the bottom one.
- Similarly, make a triangle from a small piece of plasticine.
- Use a stack to make cuts to look like branches with needles.
- Take brown plasticine and make a rectangle out of it. Glue the tree leg to the cardboard.
- Take white plasticine and stick it randomly onto the branches of the spruce and onto the clearing to create snow.
- Make a circle from white plasticine and stick it to the upper corner of the picture (it should look like a moon). Make clouds from the same plasticine and spread them on the cardboard. Make small balls and stick them all over the sheet (falling snow).
As you can see, making crafts from plasticine is a creative process that develops children's artistic and mental abilities. Here, a huge scope for imagination opens up, which justifies the benefits of modeling from this material.
Article formatting:Natalie Podolskaya
Video about crafts from plasticine
How to make crafts from plasticine - master class on making a rose: