Baba Yaga is a famous old witch from children's fairy tales. A costume of such a character may be needed for a theme party or New Year's carnival. It is not difficult to choose suitable clothes, but to make a hooked nose, you need to know what materials can be used, as well as consider several detailed instructions for making a false nose with your own hands.
Baba Yaga's nose as the most important part of the costume
The classic Baba Yaga costume consists of 4 parts:
- long skirt with a torn hem;
- a jacket patched with pieces of fabric of different colors;
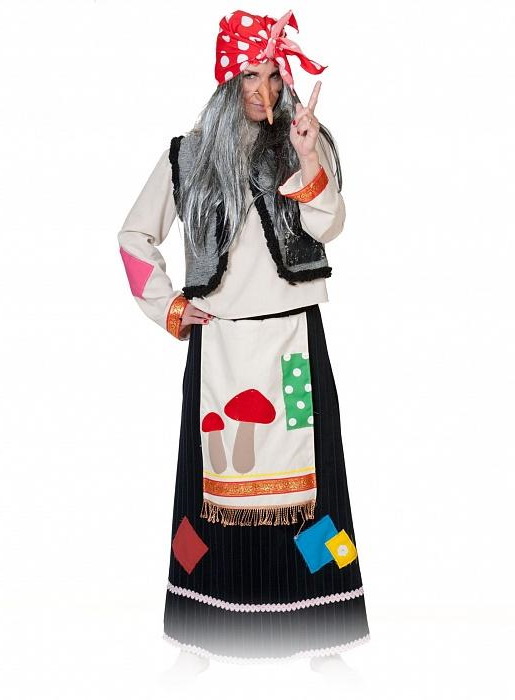
- a bright scarf on the head;
- shaggy hair sticking out in all directions.
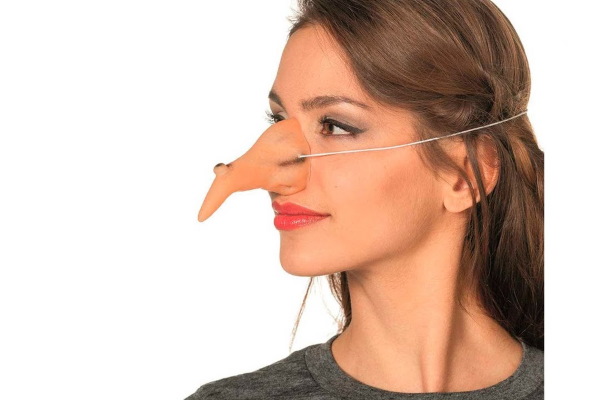
However, the image cannot be considered complete without a false hooked nose with warts. This detail allows the carnival participant to truly get into the image of an old and evil witch. A ready-made nose can be purchased in stores that sell goods for pranks and holidays. However, a nose made by hand will be better.
Firstly, it can be created taking into account the features of your own face so that the overlay holds well and does not cause discomfort. Secondly, a hand-made nose can be painted in any colors you like, and also decorated in a special way so that the carnival image turns out to be unique.
What can you make Baba Yaga's nose out of?
You can make Baba Yaga's nose with your own hands from scrap materials.
The table shows examples of the 3 easiest to perform variations of Baba Yozhkin Nose, as well as the basic materials for their manufacture.
| Type of nose | What materials can be used to make it? |
| False nose with elastic band | Paper and glue (papier-mâché technique) |
| Half-face Baba Yaga mask | Waste material (bottles, boxes, paper) |
| A false nose that sticks to the skin to create make-up | Cotton pad, PVA and BF-6 glue |
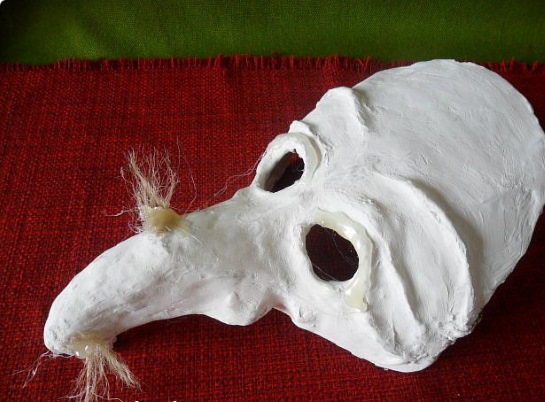
Step-by-step instructions for making Baba Yaga's nose from paper and papier-mâché
You can make Baba Yaga's nose with your own hands using the papier-mâché technique. This method will take a long time (3-4 days), as the part will need to be dried well. If you dry papier-mâché items on a radiator, in an oven or with a hot hair dryer, they may become deformed or crack.
The craft should dry at room temperature, gradually. Such a nose turns out beautiful and realistic, and the long wait will "pay off" with admiring glances from other carnival participants.
Preparation of materials
What you will need for work:
- a small piece of regular plasticine (color is not important);
- medium-sized artist brush with soft bristles;
- PVA glue;
- 2 sheets of newspaper, or 4 sheets of thin A4 paper;
- petrolatum;
- scissors;
- awl;
- a piece of cardboard;
- food film;
- lighter or matches;
- thin elastic band (about 35 cm long).
For decoration you need paints, acrylic ones will do. You can use gouache, provided that after drying the work will be covered with colorless acrylic varnish. You will need 3 colors: flesh, brown and white.
Doing the main work
Before you start creating this costume element, you should measure the base of the child's nose with a measuring tape. This is necessary so that the false nose "sits" well and does not fall off.
Next steps:
- Knead the plasticine well and mold it into a blank. The widest part should correspond to the width of the real nose. Next, you need to give the part a curved, hooked shape.
- Using a brush, the workpiece must be well lubricated with Vaseline. If you skip this step, the paper will stick to the plasticine, and it will be extremely difficult to detach it without damaging it.
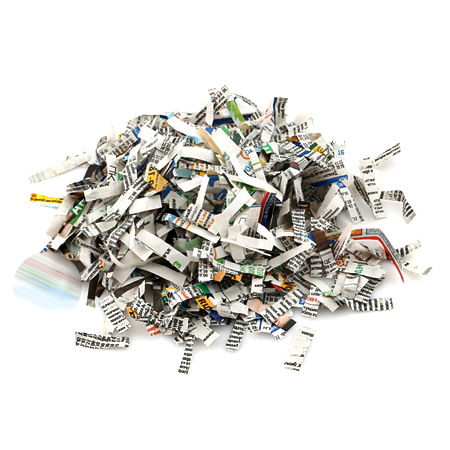
- Paper or newspaper sheets should be torn into small pieces (1-2 cm). It is not recommended to cut the material with scissors, since when gluing layers, the transitions between the pieces will be too noticeable, which will harm the aesthetics of the part.
- Place the first layer of paper on the workpiece without using glue. You can wet the material in water to make it more pliable. Vaseline can be absorbed into paper, so the glue can leak through and still “stick” to the plasticine. The first layer, without glue, will definitely prevent sticking.
- The paper needs to be smoothed with your fingers so that no air gets under it and large folds do not form.
- Now you need to apply another 6-8 layers, generously greasing each piece of newspaper with PVA glue. It is important to ensure that there are no gaps or thin layers left anywhere, otherwise, the part will turn out flimsy.
To remember where the new layer is already laid out and where it is not, the paper needs to be selected by color. For example, for the 2nd layer, use pieces with printed text, for the 3rd layer - pictures, for the 4th layer, white scraps from the margins of the newspaper.
- The very last layer needs to be well coated with glue using a brush.
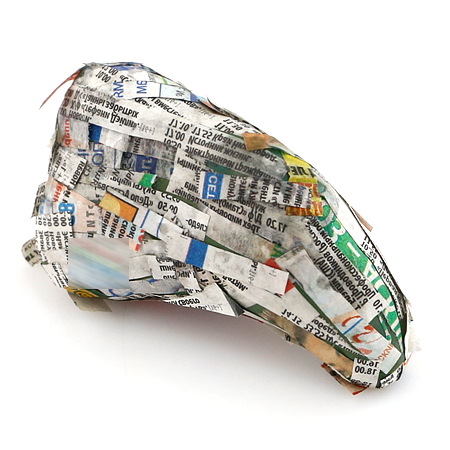
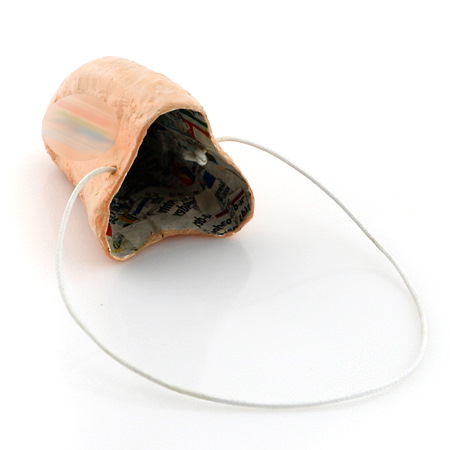
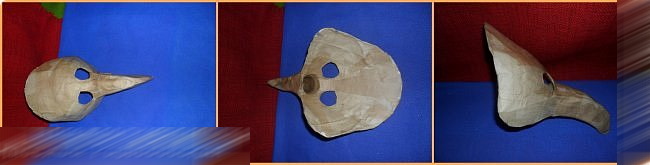
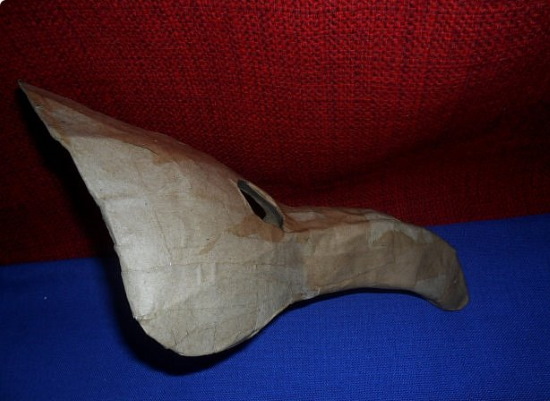
Dry the nose on cardboard wrapped in cling film. This way the part will not stick to the base. Do not remove the workpiece from the plasticine base for about 3-4 days. It should become strong and dry.
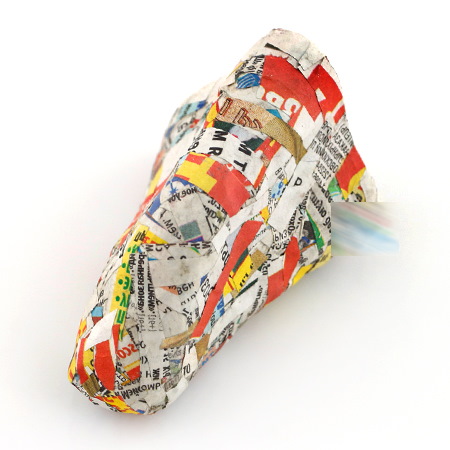
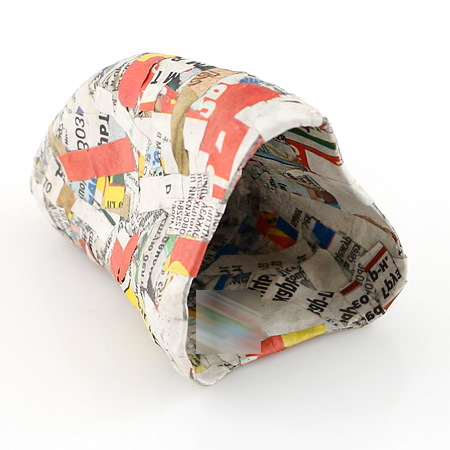
When the paper is completely dry, the plasticine can be picked up with toothpicks or a knife and carefully pulled out of the paper "body". Use scissors to cut off all the unevenness at the base of the nose. At the bottom, use an awl to pierce small holes so that air can get inside.
Closer to the wings of the nose, on the sides, you need to make 2 more holes where the elastic will be threaded. You should pierce the nose not too close to the edges, so that the elastic does not tear the structure when stretched.
Nose painting
To ensure that the colored paints are applied more evenly, the first layer should be white.
Once the white paint is dry, you can start painting:
- Paint the nose with a flesh-colored shade. If this shade is not available in the palette, you will need to mix white with orange in a 2:1 ratio. The darker the skin of the person for whom Baba Yaga's nose is intended, the more orange you need to add. If the skin is tanned, you can add a drop of brown or olive color.
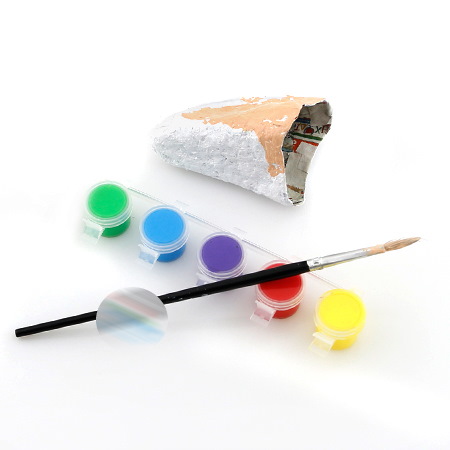
- Dry the paint.
- Mix brown and white in equal parts and draw wrinkles on the nose, as well as darken its lower part and wings.
- Draw a large wart on the tip of the nose using brown color.
If the product was painted with gouache, then you need to apply varnish so that the paint adheres well and does not stain your hands.
The final stage
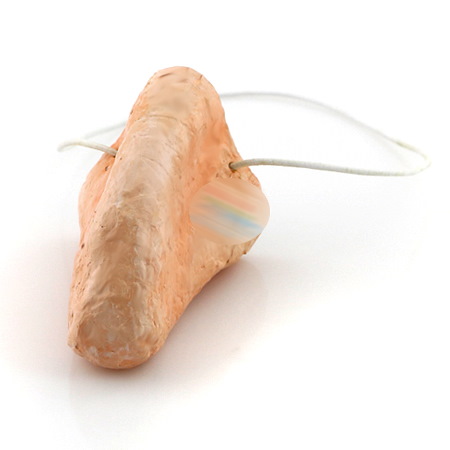
All that's left is to thread the elastic. Its edges need to be singed with a lighter so that they don't unravel. Thread the ends through the holes intended for them and tie large knots so that the elastic doesn't pop out. Baba Yaga's false nose made of papier-mâché is ready!
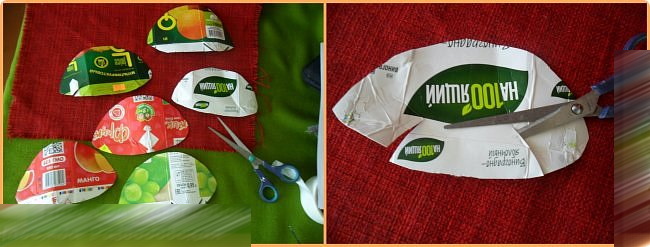
Nose made from waste material
You can make Baba Yaga's nose with your own hands from second-rate materials. A small amount of waste material will allow you to create not only a nose, but also a full mask on half of the face, which will make the carnival image delightful and realistic. It will take about 3 days to make such a mask.
Preparation of materials
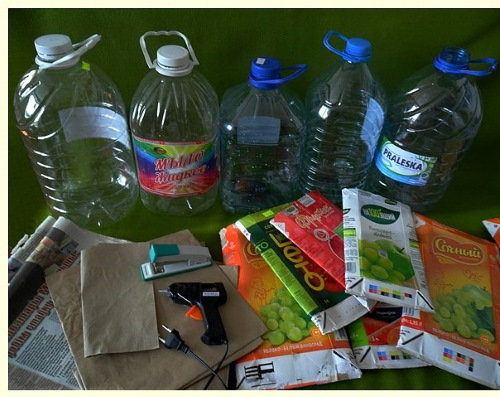
What tools and materials will be needed:
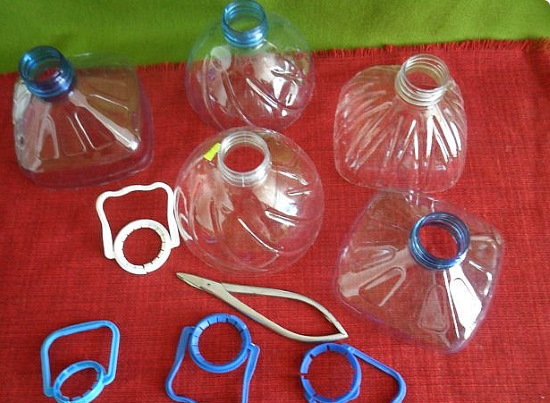
- large plastic bottle (5-6 l);
- large juice container (2 l);
- 1 newspaper or 6 sheets of thin A4 paper;
- toilet paper;
- stapler;
- hot glue gun;
- tow;
- flour;
- hot water (1.5 l);
- set of acrylic paints;
- medium sized artist brush;
- scissors;
- dark colored marker;
- awl;
- thin elastic band;
- lighter or matches;
- wood putty;
- fine grit sandpaper;
- masking tape;
- Moment glue;
- colorful scarf.

In this master class, instead of PVA glue, flour paste will be used. For 1 liter of hot water, you will need 4 tbsp. of flour. Put the pan with the mixture on low heat and stir until the mass thickens. This should be done immediately before pasting the mask with pieces of paper. If you prepare the paste too early, it will dry out and become unusable.
Doing the main work
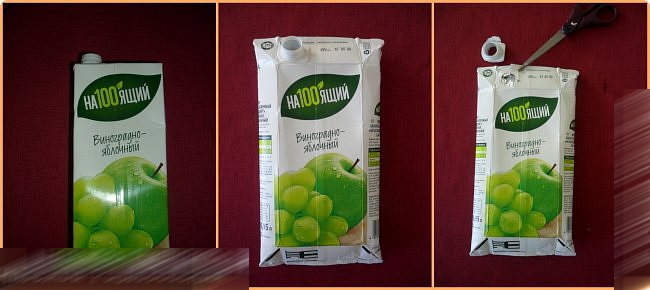
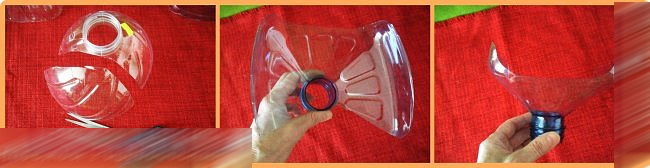
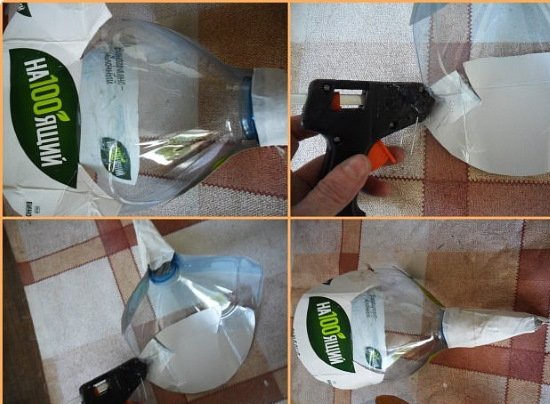
Before you start working, you need to unscrew the cap from the bottle and remove the ring with the handle. You also need to remove the cap from the juice box, cut off the top and wash out the remaining liquid.
Further procedure:
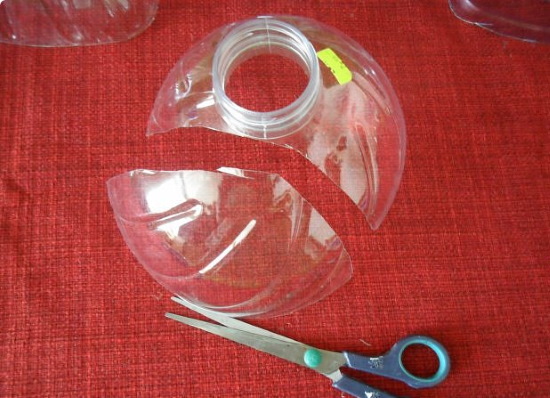
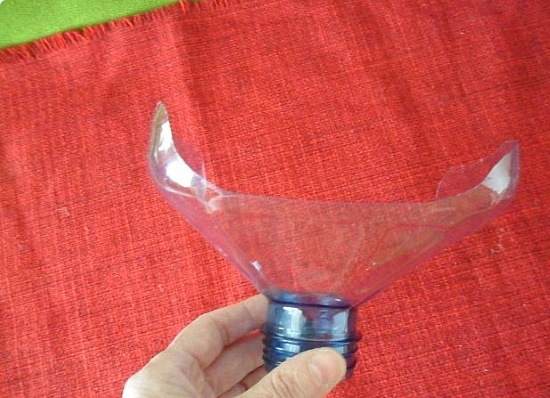
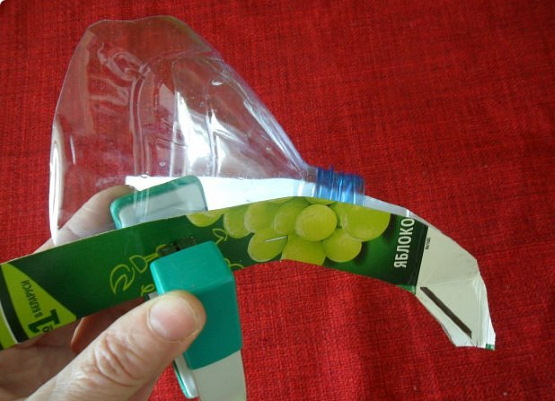
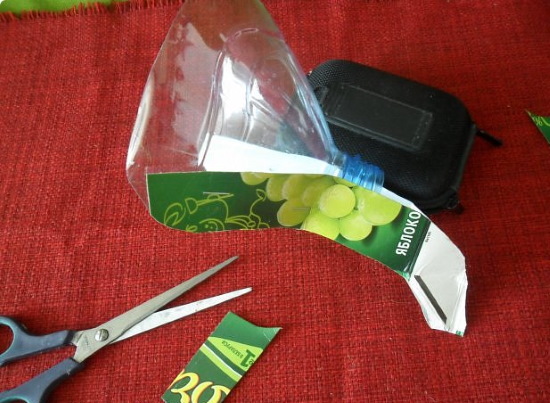
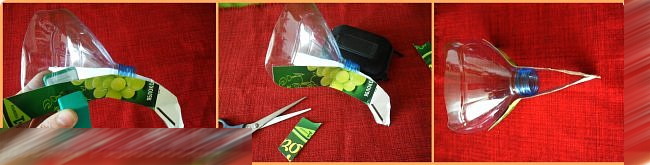
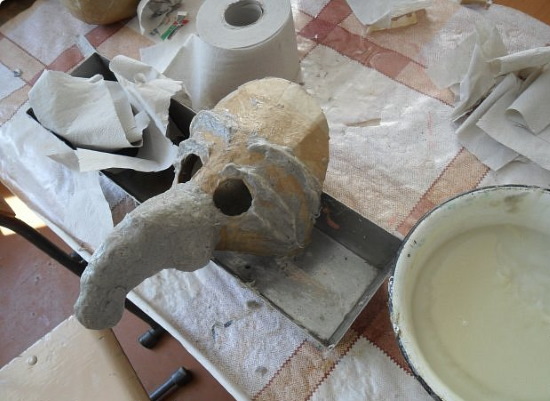
- Cut off the top of the bottle.
- Cut out the shape of the mask from plastic, without eyes yet, just the outline. The neck of the bottle is the base of the nose.
- Try the blank on your face. Nothing should get in the way. If the edges of the mask extend beyond the face, you need to make marks on the plastic with a felt-tip pen and cut off the excess.
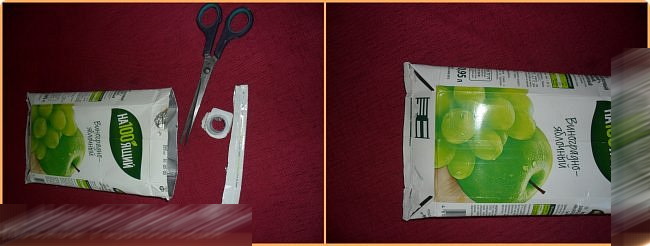
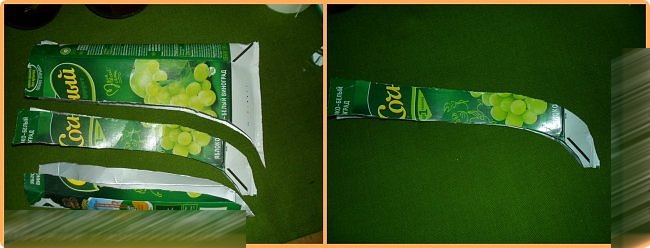
- Flatten the juice box. Draw the shape of a curved nose on it. The tip of the piece should be located in the part where the bottom is glued.
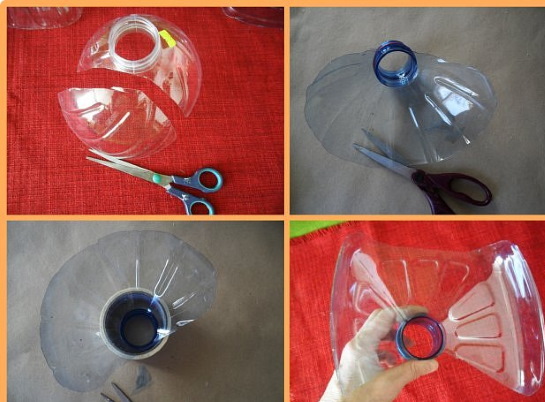
- Cut out the blank with scissors.
- Attach the free edges of the cardboard to the plastic bottle with a stapler. The ends of the cardboard nose should be located on the sides, relative to the neck of the bottle. It is advisable to insert 3 paper clips on each side so that the structure is strong.
- Trim the ends that extend beyond the mask with scissors.
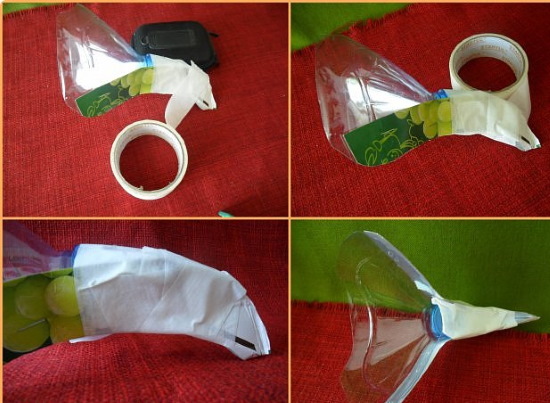
- Wrap the nose with masking tape, maintaining its volume and completely covering the through holes.
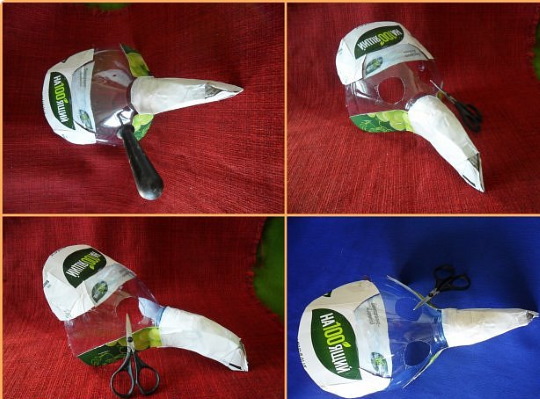
- Cut out a piece from the box in the shape of the mask's forehead. Make 2 side cuts to make the cardboard more pliable and staple it to the top of the plastic blank so that the sharp edges of the staples remain on the outside.
- Try on the mask and mark the location of the eyes with a felt-tip pen.
- Use an awl to poke holes, then insert scissors and cut out holes for the eyes.
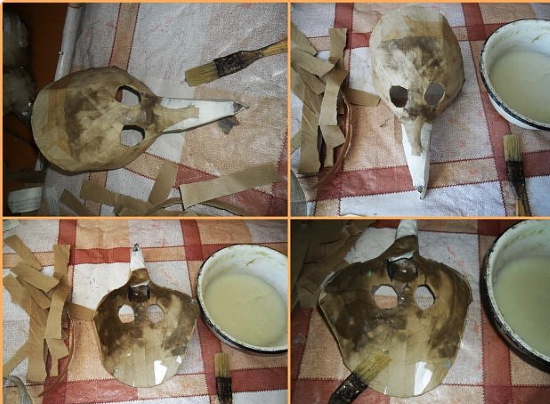
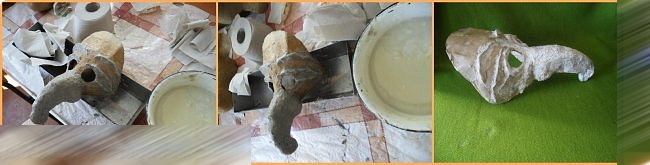
- Tear newspaper or paper into small pieces. Paste them over the entire mask, inside and out, smearing the paper with flour paste. 3-4 layers are enough.
- Leave for 24 hours until the paste has completely hardened.
- Prepare a new portion of paste and cover the mask with pieces of toilet paper. Form warts, forehead wrinkles and other skin irregularities from them.
Leave the product to dry for 24 hours.
Decor
All that remains is to give the mask a beautiful look.
Procedure:
- Apply a thin layer of putty to the front and back sides of the product and let dry naturally.
- Sand the surface with sandpaper, removing minor imperfections.
- Where you want the warts, apply 2-3 drops of hot glue and insert small pieces of tow into them, as if they were hair growing from a skin bump.
- Paint the mask flesh-colored.
- Mix brown paint with white in equal proportions and darken the wrinkles, the tip of the nose, and its wings.
- Paint over the warts with brown. This should be done carefully so as not to paint the tow hairs, otherwise they will stick together and look unnatural.
- When the paint dries, use an awl to carefully poke holes for the elastic on the sides.
- Cut a 35 cm long piece of elastic tape. Singe the ends of the piece with a lighter so that they do not unravel.
- Insert the ends of the elastic into the holes and tie thick knots.
- Using hot glue, attach eyebrows made from short tow to Baba Yaga.
- Make hair from long tow.
- Fold the colorful scarf diagonally.
- Place the fold line above Baba Yaga’s eyebrows.
- Glue the fabric to the mask along the edges using Moment glue.
- The ends of the scarf and its main part should remain free.
Now the mask can be put on the face. The scarf should be pulled over the head and its ends tied at the back of the head, covering the elastic band.
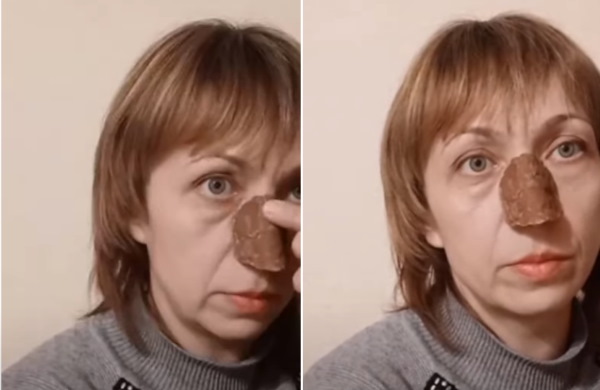
From a cotton pad and PVA glue
Baba Yaga's nose can be made part of real makeup. The advantage of this method of making this costume detail is that you can give the nose any shape with your own hands. It will look as natural as possible, without a noticeable transition from natural skin to the artificially created body part.
Preparation of materials
What you will need for work:
- PVA glue;
- acrylic paints;
- cotton pad;
- medical glue BF-6;
- hair dryer;
- scissors.
You will also need some face cream to apply to your skin before sticking on the false nose.
Doing the main work
During the process of making this part, it should be constantly tried on so that it fits perfectly in shape to the real nose.
Procedure:
- Divide the cotton pad into 2 halves.
- Stretch 1 of the parts. The thinnest area will be applied to the bridge of the nose. It is important that the cotton pad covers the true wings of the nose well.
- Apply face cream to the skin.
- Moisten the stretched half of the disk in PVA glue, apply it to the face and form a part that repeats the anatomy of the real body part.
- Remove excess cotton wool.
- Use your fingers to distribute the cotton wool so that the transition from the disc to the skin becomes as thin as possible.
- Remove any excess cotton wool again.
- Soak the other part of the cotton pad in glue and begin forming the artificial nose. It should be sharp and hooked.
- Use your fingers to make holes for the nostrils, otherwise it will be difficult to breathe in such an overlay.
- Dry the blank directly on your face with a hairdryer. Then carefully remove it and dry it with hot air until it hardens completely.
- Carefully trim off any uneven edges at the base with scissors.
- Color the nose flesh color.
- Using brown paint, draw 2 warts: on the tip of the nose and on the right wing.
- Dry the paint.
All that remains is to lubricate your own nose with medical glue BF-6 and attach the overlay.
Decor
Now you need to apply makeup that will help hide the transitions from the cotton wool to the skin. To do this, you should use a thick foundation that matches the color of the artificial nose. Then you need to do eye makeup and draw wrinkles and warts on the face.
It is not difficult to make Baba Yaga's nose with your own hands. The main thing is to strictly follow the instructions and not to rush. It is also very important not to forget about the holes for air intake.
Every artificial nose should have them, even when it seems that breathing remains easy without them. From an excess of warm air, the plastic mask and papier-mâché nose will begin to fog up, causing itching, and the cotton pad pad may come off.
Video about the craft
How to make Baba Yaga's nose: