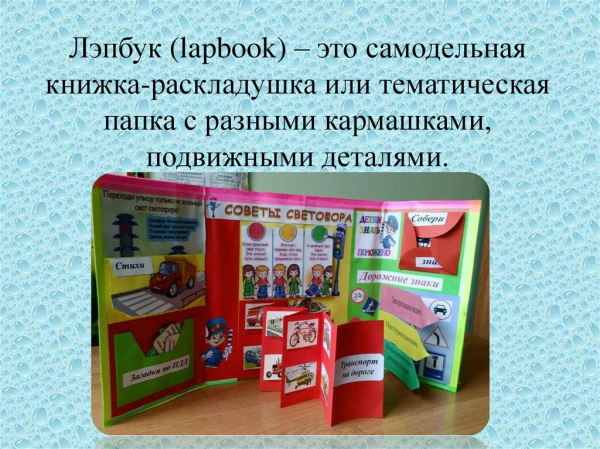
A lapbook is an interesting teaching aid that is actively used today by teachers, educators and parents. It allows you not only to gain new knowledge, but also to develop imagination, thinking and logic. How to make such a manual with your own hands is described below in the article.
What is a lapbook
The idea of creating a lapbook came from the American T. Duby. The girl came up with the idea of taking a miniature folder and filling it with interesting contents in the form of pictures, paper appliques, poems, labyrinths, various materials, and pockets with filling.
The resulting manual was used to consolidate the knowledge that she conveyed to her own children. Interestingly, the girl herself did not try to promote her creation to the masses. She simply posted a photo of the product on the Internet. As a result, Dubi's friends were the first to become interested in the new product.
Very quickly, the lapbook became popular all over the world. Not only parents but also teachers began to actively use it. The title of the manual is translated from English as “book on the knees”. It is small in size, so it is convenient for a child to examine it on his lap.
Each lapbook includes a huge number of game elements.
These can be unusual moving parts (including three-dimensional ones), figures of favorite characters from cartoons and fairy tales, opening windows with filling for any taste, rotating circles, rustling, ringing and squeaking parts, paper and fabric (most often felt) appliques.
Craftsmen often make secret places with surprises in the product. They are especially pleasing to little lovers of secrets and mysteries.
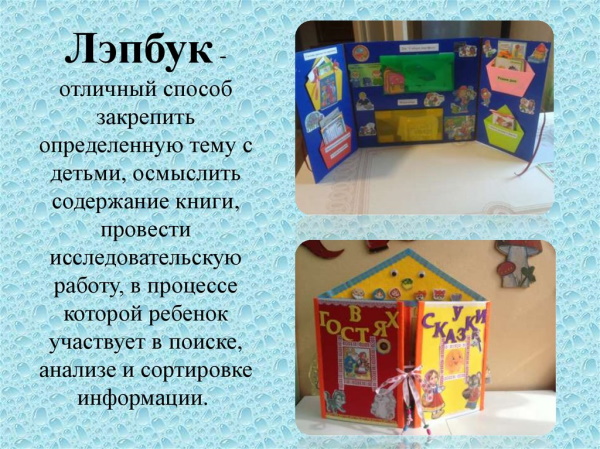
At first glance, it may seem that a lapbook is a toy. It really captivates and occupies a child for a long time. But it is also a very useful educational product. Usually, the first couple of lessons the child studies all its capabilities, and only then begins to study with the lapbook.
It is important not to rush the student at the first stage. Even just playing with pictures, circles, inserts, a child, without even noticing it, develops well, assimilates a lot of new information.
Requirements for a lapbook
A lapbook (how to make it yourself is described in detail later in the article) must meet several requirements at once.
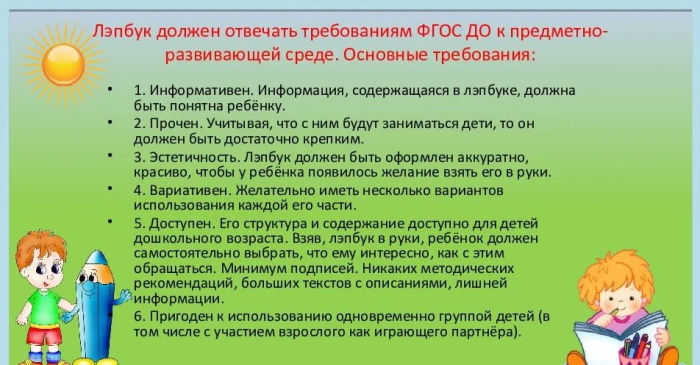
The most important among them are:
- safety;
- durability, high quality;
- interest, external attractiveness.
It is important to choose only safe, high-quality materials for the product. It is important that all of them are approved for use with children. For example, if parts of the future book for classes are connected with a stapler, then its staples on top should be decorated with a soft decorative element.
Another option is to use strips of self-adhesive paper. Then the metal part will not fall out and hurt the little students.

How durable you need to make your lapbook depends on where you plan to use it. If exclusively at home, then you can take paper. In kindergarten or school, the product is used daily by dozens of children.
Therefore, it is better to make its base from durable cardboard and additionally laminate the main parts with a special transparent film. Another option is to make a fabric lapbook. This choice is especially relevant for the youngest students.
The fabric product will be made not only strong, reliable and durable, but also as safe as possible. To make learning interesting and enjoyable, the lapbook should be originally and beautifully designed. Brightly colored materials are chosen for the base and all parts of the product.
All additional accessories are thought out with special care. The younger the child for whom the product is being created, the larger the details should be and the more often the fairy-tale theme should be used.
Types of lapbooks
Lapbook (how to make it yourself will tell you the information below) today is found in different types. All existing products are divided into several groups according to different features. For example, by purpose, shape, material.
Purpose
First of all, lapbooks are divided by purpose. These are: game, educational, congratulatory, autobiographical.
Game lapbooks can be designed both for playing with a teacher and for independent children. When creating such a product, the master should emphasize its entertainment value. All educational information in it should be easy to perceive.
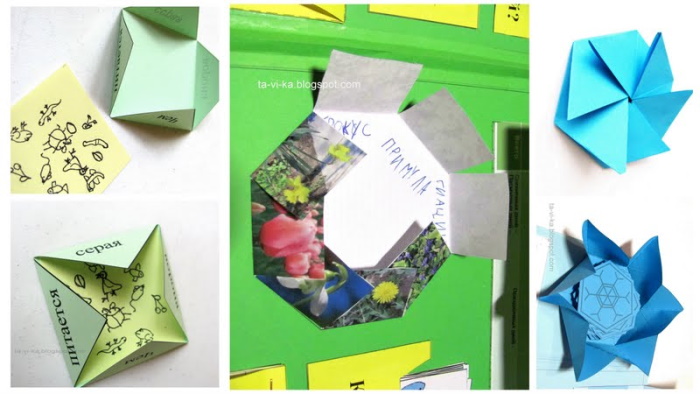
In a gaming lapbook, it is worth making as many moving, interesting elements as possible. For example, circles, windows, pockets, petals, inserts made of different materials will do here. Labyrinths, board games with chips and a cube, comparison and picture search cards, board games are often included separately in the product.
Another interesting option is to add a small bag to the whole complex, into which miniature objects for guessing by touch, different materials and fabrics are placed.
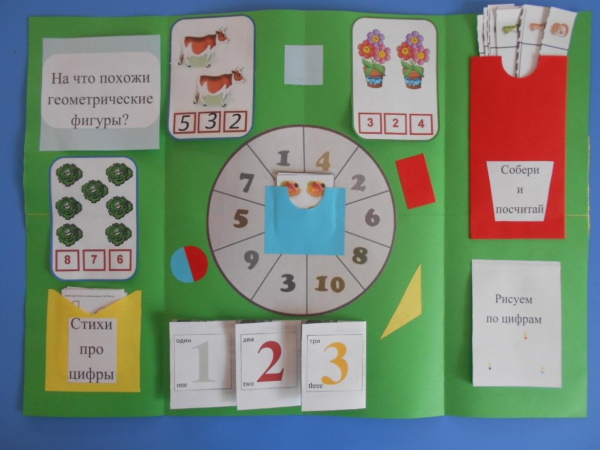
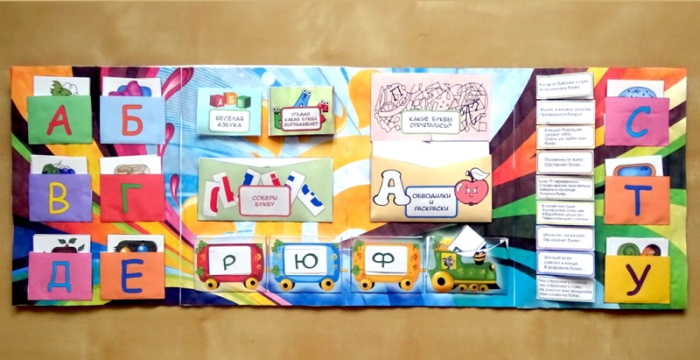
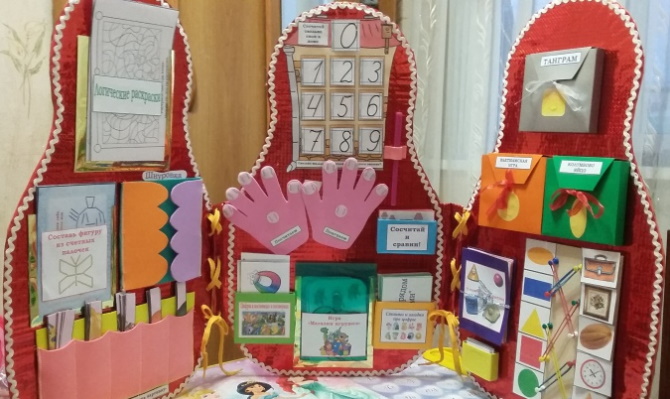
The educational lapbook is a great way to help students learn new (even complex) topics and reinforce previous material. It is suitable for both organized group and independent work.
In such a set you can add as many educational cards and games as possible, as well as proverbs, sayings, questions for developing memory, any thematic quizzes, interesting facts. It is great if the child initially uses the manual with an older assistant.
A congratulatory lapbook will be a great gift option for children of different ages. This is both a pleasant and useful gift. It will be especially successful if you make it yourself, taking into account the person's tastes and hobbies.
A congratulatory lapbook may be completely without mentioning studies. Unusual themed products are suitable for the holiday.
For example, for a toddler it will be a lapbook with pictures and games from favorite cartoons, fairy tales, for a schoolgirl it will be an option in the form of a house for a paper doll with a collection of outfits, for a teenage boy it will be a large book with favorite superheroes, comics about them and new exciting stories.
You can give your friends a product with shared favorite photos or even with themed magnets on a favorite topic.
An autobiographical lapbook can please both a child and an adult equally. For example, you can make it about a baby, collecting on the pages of the product photographs from birth, memorable tickets, crafts and funny sayings.
This lapbook will be interesting to look at in the future. It will become a beautiful keeper of memories, will collect the best moments of the child's life.
Form
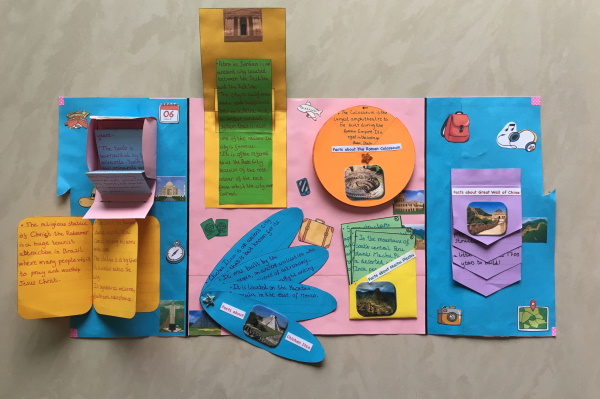
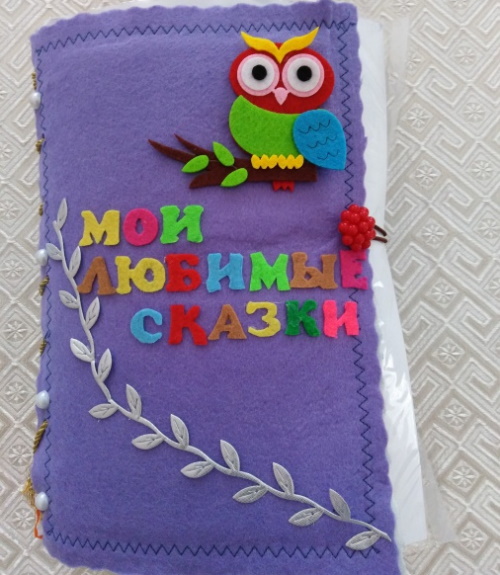
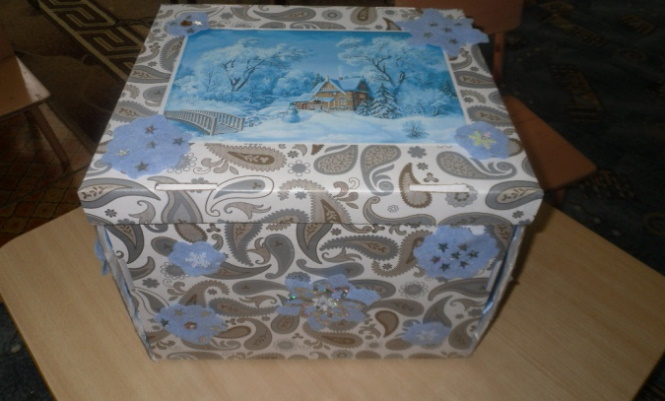
The classic shape for a lapbook is considered to be a square or rectangle. The product is made in the form of a small book or album. It can open or simply be a neat rectangle on which individual sheets are folded.
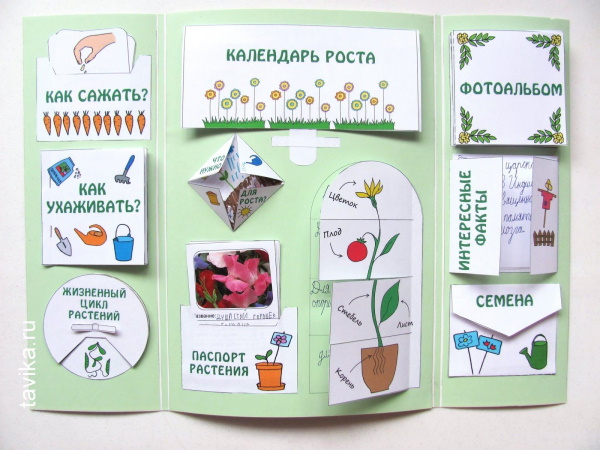
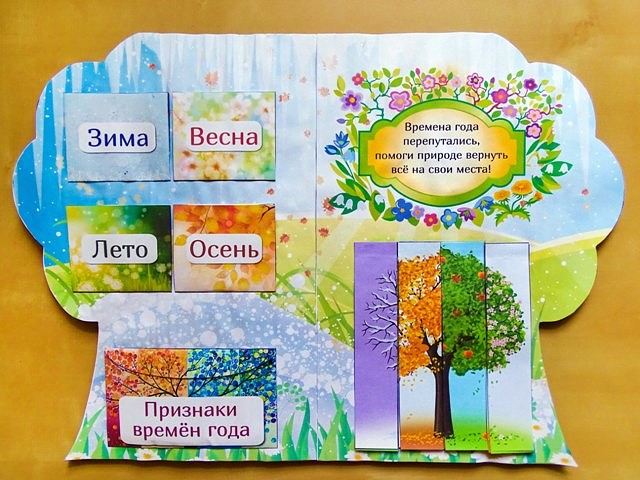
Examples of different forms of lapbooks:
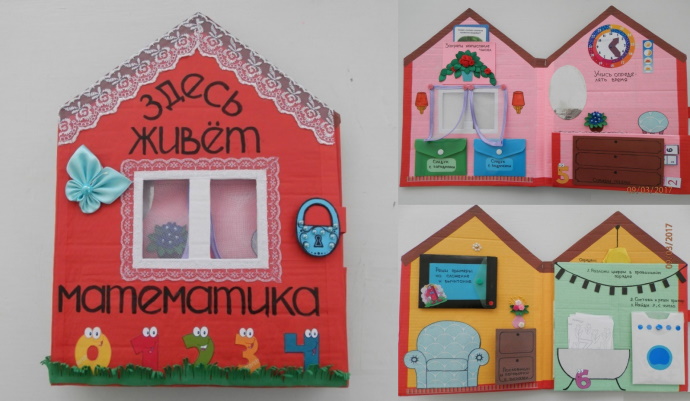
Less common are figured lapbooks. Such products can be made thematic depending on their content. For example, if there is an autobiography or congratulations inside, then the lapbook will look great in the form of a heart.
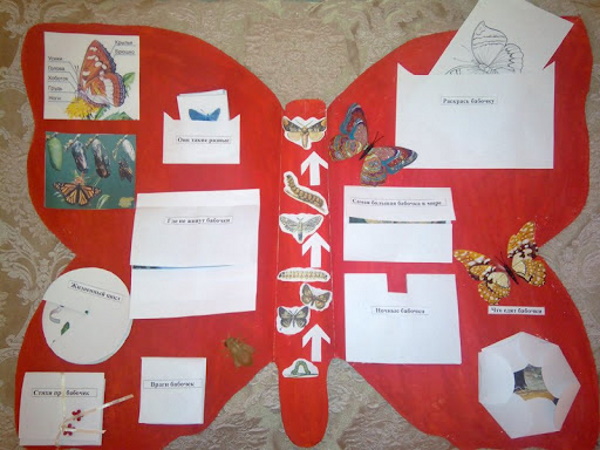
And little students will be interested in studying products in the form of butterflies, flowers, recognizable fairy-tale characters, and various geometric figures. If a certain topic is planned to be considered in the lapbook, it can be reflected in the form of a craft.
The theme of food, dishes, cooking – the shape of beets, candy, cups, frying pans. The theme of toys, crafts – the shape of a nesting doll. The theme of nature – the shape of a cloud, tree, bird. Modern craftsmen increasingly make lapbooks in the form of a small folding box.
The components of such a product are fastened with fasteners, buttons, and braid. If you remove the selected fasteners, the craft falls apart, revealing all the interesting contents to its owner. Inside the lapbook there may be all the same pockets, notebooks, envelopes.
Material
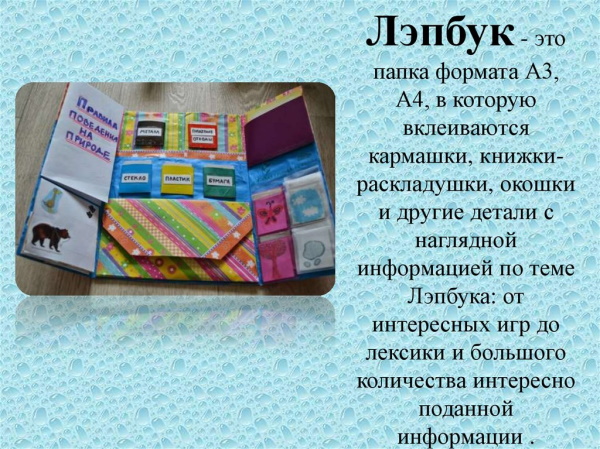
A lapbook (how to make it yourself is most often of interest to teachers and educators) can be created from different types of material. As already noted above: the main thing is to choose one that is safe for the child.
For example, building materials such as finishing plastic are not suitable. It is better to use safe and inexpensive bases: cardboard, paper (white or colored), Whatman paper. Even candy boxes and store folders will work here.
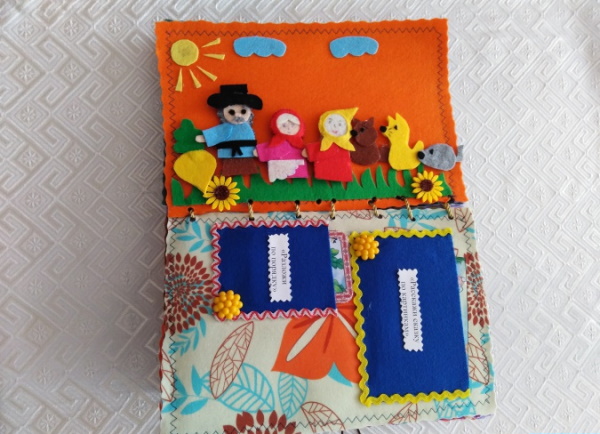
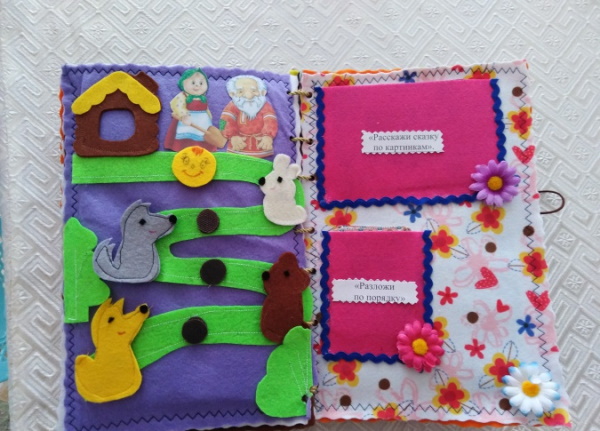
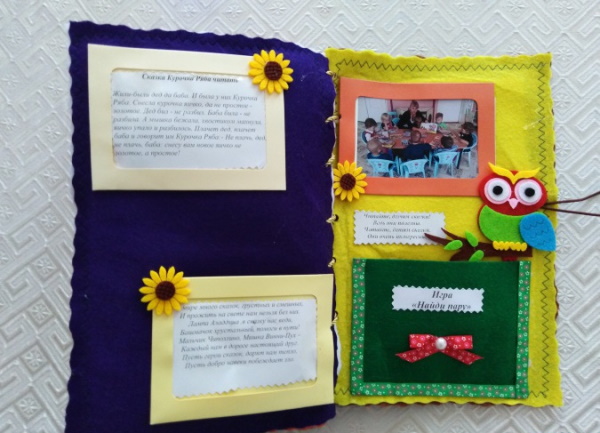
How to make it yourself from felt
The safest lapbook option is one made from soft, comfortable fabric. Such a product will definitely not hurt even the smallest student. In addition, it turns out to be strong and reliable.
The first thing to do is to decide on the theme of the product. It can be general or narrow. The second option is always easier to do. It is best to take paper and a pen in advance, sketch out a rough plan for creating the craft.
Next, he draws a model of the product. Here he immediately notes how it will look, what the planned sequence of tasks is, the locations of all moving parts, games, and details.

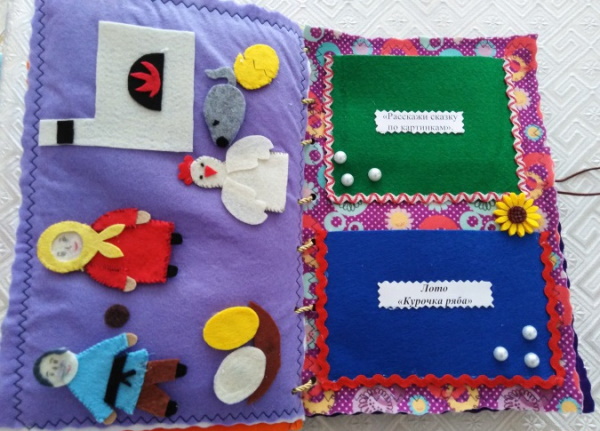
First, all parts of the future lapbook are drawn on thick paper and cut out. Then they are applied to pieces of fabric and also carefully cut out.
Next you need to:
- Place the resulting felt pieces on the fabric, secure with pins and determine if they are the right size.
- Sew the blanks to the fabric base.
- Fix pockets for different games and insert cardboard into them.
- Decorate each page of the future "book". For example, using buttons, beads, bows, flowers, stickers. You can paint directly on the fabric with acrylic paints.
- If desired, glue the laminated names of games and tasks on different pages.
- Use an awl and a needle to sew the sheets of the future lapbook. You should immediately thread a ribbon into the needle so that the product can be tied into a beautiful bow.
Instead of a ribbon to secure the structure, you can use a loop and a button or even a zipper.
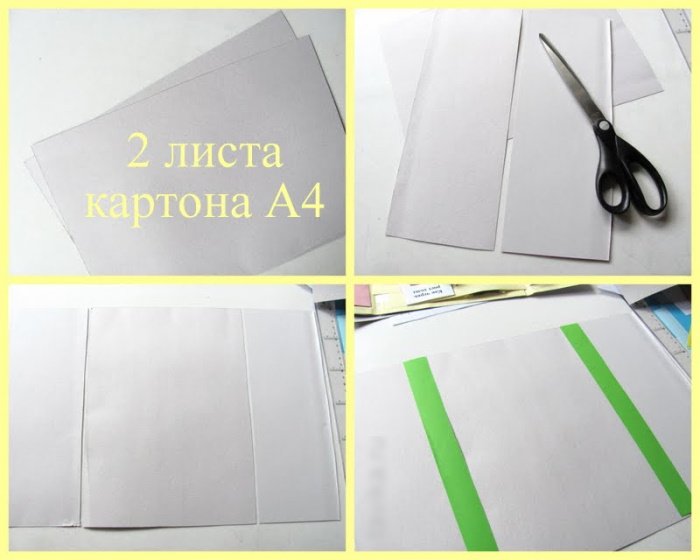
How to make from cardboard
You can make a lapbook with your own hands even from cardboard. How to assemble the product correctly is described below in the article.
To begin with, a layout of the future cardboard book with lessons is also drawn. It is convenient to do this on A4 sheets folded in the form of a lapbook. Next, you will need to come up with and prepare all the details.
The table offers some interesting options:
| Lapbook parts | Peculiarities |
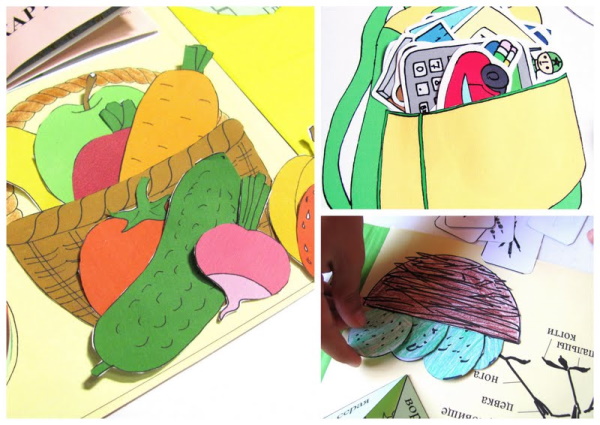
| Figured pockets | Can be made in the form of a bird's nest and eggs, a basket and vegetables/mushrooms/berries, a backpack and educational accessories. |
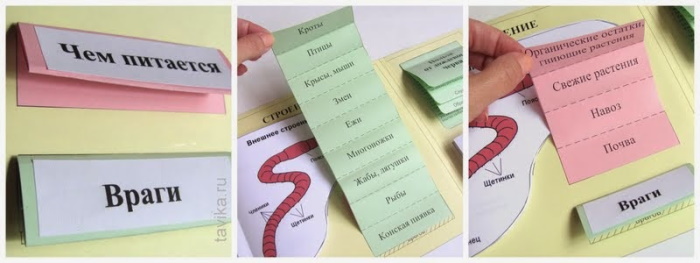
| Classic pockets | The easiest way is to write questions on the pockets themselves, and make cards with answers to insert into them. For example: which mushrooms are edible? |
| Envelopes | They can be shaped or regular. Parts of games and tasks are placed inside the envelopes. |
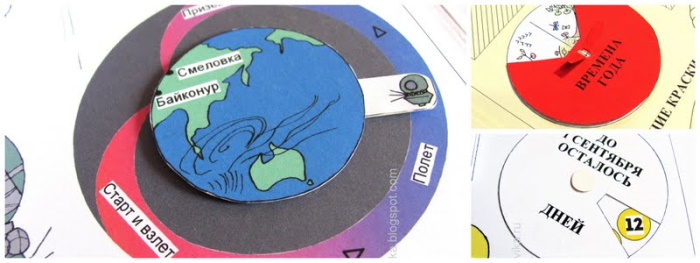
| Rotating circles | It will be interesting to make them in the form of a planet, a wheel with a calendar or seasons. |
| Stripes | The most interesting option is a strip folded several times. On its main part you can write a title. For example, "Insects". And on the unfolding part - all their popular representatives. |
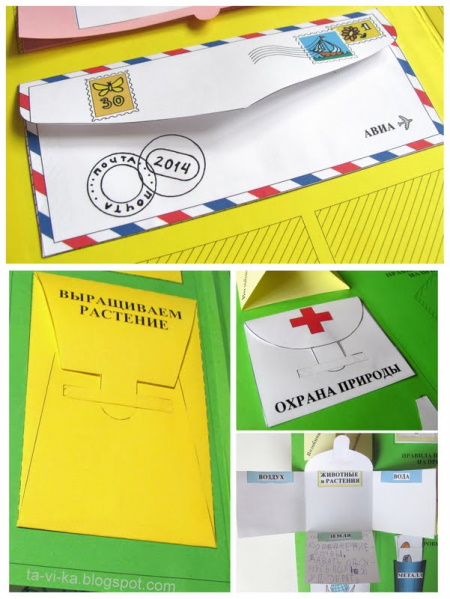
When making the product in question, the cardboard rectangle is laid out on the table. About 1/3 of it is folded on each side. After that, all the prepared games and decorations can be attached to the base. High-quality glue and double-sided tape are suitable for this.
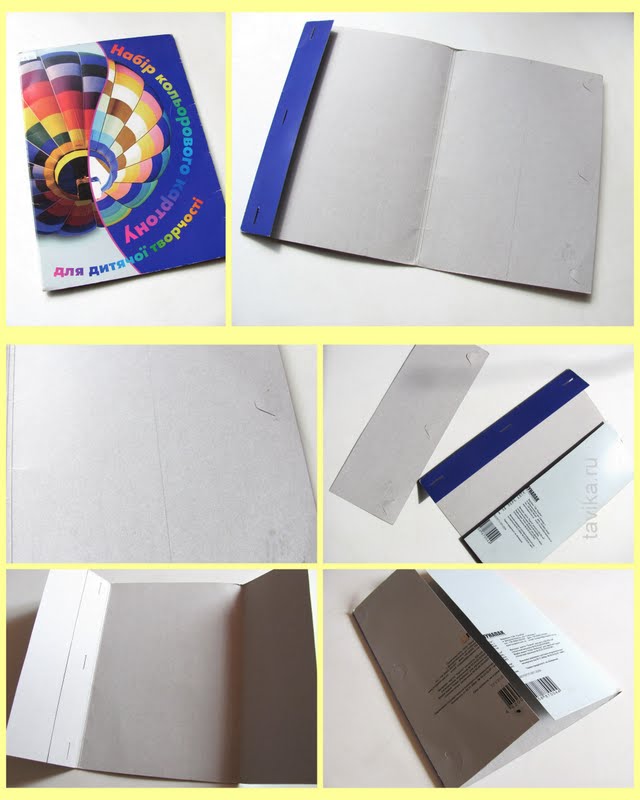
From the folder
It will be even easier to make a lapbook from a ready-made cardboard folder. This base is simply laid out on the table and complemented with details. You can pre-cover the inside of the folder with colored paper to make the product look brighter and more interesting.
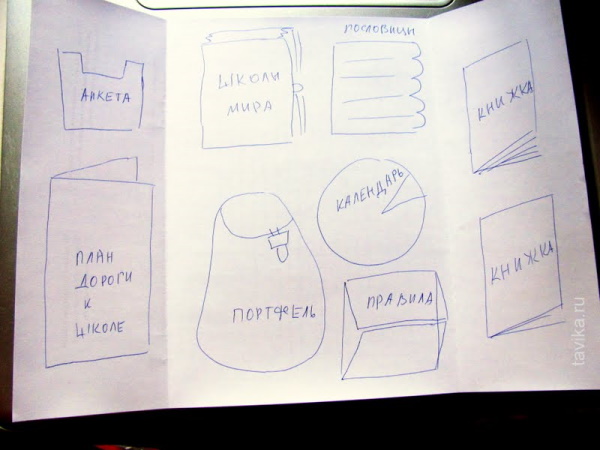
For example, from such a base it will be possible to make an interesting lapbook for future first-graders. On the first page there will be glued a self-drawn map to school and a questionnaire for the kids, how they feel about studying, how ready they are for it, whether they want to gain knowledge.
Children will be able to put their answers to the questions into a capacious glued envelope.

In this case, the middle part contains a calendar of days left before school, rules of conduct in educational institutions, interesting facts about them from all over the world. You can supplement the base with thematic proverbs and stick a pocket in the form of a backpack and cards with items that fill it.
In the last part, it is worth adding entertaining material. For example, funny pictures, jokes, adventure games, labyrinths.
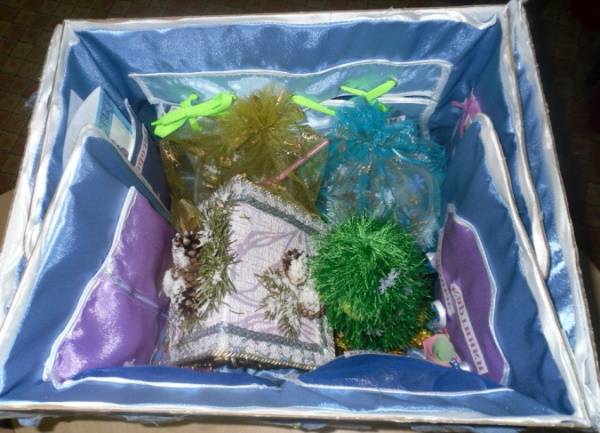
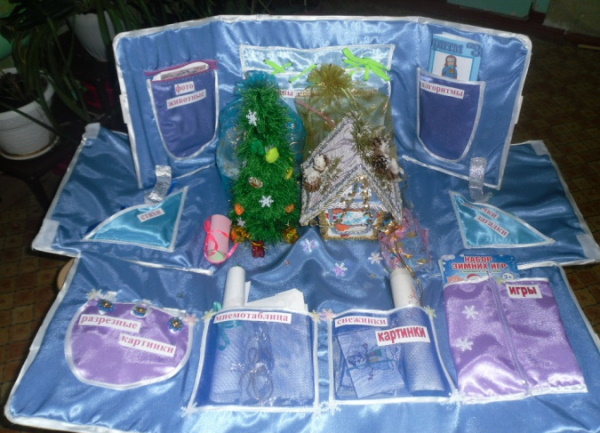
Out of the box
Another simple option is to make a lapbook from a large box. In the process, the middle part for the base and two side parts with a margin in width are cut out of it. These allowances are then applied to the central part when gluing. The resulting base is covered with colored paper of the master's choice.
Next you need:
- Strengthen the base to create the main middle section and two closing flaps on the sides.
- Use flowers to highlight 3 vertical or 6 horizontal sections for decoration.
- Decide on the outer side of the product and glue a wide ribbon onto it so that the craft can eventually be tied.
- Place games and decorations on the main parts. For example, pockets, pictures, moving parts, laces, buttons, cards with text.
- Decorate the finished product to your taste.
The resulting lapbook should not be used immediately. It is worth giving it time to dry well.
Tips and tricks for implementation
Themed lapbooks are a great way to save money on toy purchases.
Often, after watching cartoons, children ask their parents to buy various products with the image of the character they like. The requests are repeated after each new video. Instead of buying toys, you can make a themed lapbook with the story of your favorite character. This will also be an excellent developmental aid.
The product may be related to school subjects. A lapbook is a great way to learn new information and consolidate old information. It is a way to get to know an unloved subject better and change your attitude towards it.
Instead of colored paper, the base of the product can be covered with felt. Then the parts can be attached to it using miniature Velcro.
If you want, you can make a lapbook with your own hands quickly and easily. You can either repeat existing ideas using other people's layouts or create a unique book/box for your child.
Video about the craft
How to make a lapbook: