Epoxy resin is a material that can be used in creativity. To make unusual products at home, you need to know how to mix the components correctly to get a quality substance. You also need to familiarize yourself with the safety rules when working with epoxy resins and learn about the difficulties that may arise in the process of their creation.
What is epoxy resin, its properties, how does it work
What is epoxy resin used for:
- Filling floors and other large surfaces (tabletops, chair seats).
- Making jewelry, pouring dried flowers and other small items, creating beads of unusual shapes.

- Bonding of various hard surfaces.
- Connecting electronic components.
- Glass manufacturing.
Varnishes and paints for interior and exterior use contain epoxy resin. It provides a smooth coating that protects the painted surface from corrosion and other negative environmental impacts.
Epoxy resin is always used in combination with hardeners. These can be phenols, tertiary amines and their analogues. The proportions of resin and hardener affect the viscosity and density of the resulting material.
Epoxy resin has 3 states of aggregation: liquid, viscous and solid. In a solid state, resin can exceed the level of steel in strength. Resin is not subject to changes under the influence of acids. It is also not capable of dissolving in water. It cannot be mixed with water.
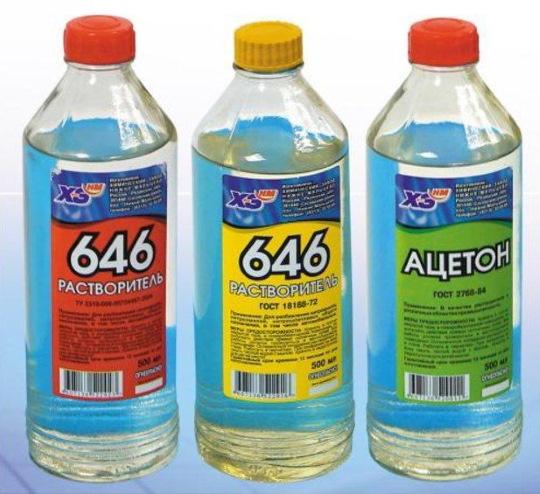
What to dilute the resin with if necessary:
- acetone group solution;
- halogens;
- alkali.
After solidification, all reactions occurring inside the solid material are irreversible.
Other features of epoxy resin:
- Strong bonding of surfaces. Shrinkage remains at a minimum level.
- Resistance to high humidity. The places where 2 surfaces are glued become hermetic. They do not let water through.
- Resistance to high mechanical loads (does not scratch, does not split from drilling and minor impacts).
- Transparent material. This property is highly valued, since the resin can be colored if necessary using suitable dyes.
- In a hardened state, the resin is non-toxic and cannot cause harm to human health.
There is also epoxy glue. It should not be confused with resin, as it is a different material that is only intended for bonding hard surfaces.
What are the differences between glue and resin:
| Properties of resin | Properties of glue |
| The curing of the resin can be accelerated. | The glue hardens slowly. |
| The resin is transparent. | As it hardens, the glue becomes cloudy or yellow. |
| Flexible, suitable for working with small parts. | Less pliable, not suitable for fine work. |
| Beads of various shapes and other three-dimensional objects can be made from resin. | Glue is used only to securely connect 2 solid surfaces. |
| You can change the viscosity and density of the material by using a hardener. | The texture of the glue cannot be changed. It is a ready-to-use mixture. |
Epoxy glue contains substances that should not be in resin. Because of this, it cannot be its analogue.
How to make epoxy resin with your own hands
Epoxy resin (you can make high-quality material at home only if you strictly follow the instructions) does not take much time to make.
First, you need to prepare the necessary tools and materials:
- resin;
- hardener;
- scales;

- dye (if you plan to make a colored product);
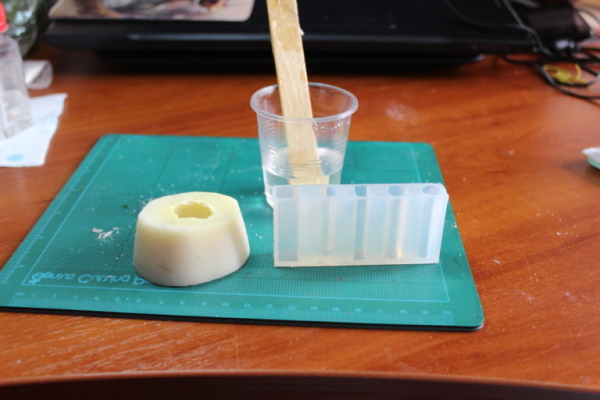
- container for mixing components;
- syringes or disposable measuring cups.
The resin should be stirred with a wooden spatula or skewer. It should not have any dirt or small, peeling chips on it.
Proportions of components
Determining the amount of ingredients is not difficult. The standard mixture is 1 part resin and 9 parts hardener. If you need to fill any surface, for example, a countertop, then you will need to calculate what percentage of the total material is wood or stone.
Experienced craftsmen advise beginners to make resin with their own hands in small quantities. The more epoxy resin, the faster the process of its hardening occurs. This phenomenon is explained by the fact that a large volume of material releases strong thermal energy.
You need to practice on small amounts first to get the hang of working with larger amounts of resin.
Sequence of works on production of epoxy resin
Step by step process of making epoxy resin:
- The parts of resin and hardener are weighed on scales or measured out with measuring cups so that the proportions are accurate.
- Pour the ingredients into a clean and dry container.
- Mix the components with a wooden spatula for 6-8 minutes. Mix vigorously. First clockwise, then counterclockwise. Remove material from the edges and bottom of the container and add it back to the mixture.
It is important that the resin and hardener are completely mixed. Areas where there is less hardener in the mixture may remain uncured. However, one should not forget about rapid polymerization. The components must be mixed thoroughly but quickly. The temperature of the materials during mixing should not exceed +26 degrees.
- If you want to get a colored product, then the dye is added at this stage. The additive should not exceed more than 8% of the total weight of the entire mixture. The dye is added drop by drop, constantly stirring the resin.
- The finished mixture is poured into a clean and dry mold. Pour carefully and slowly. Sharp splashes can seal air bubbles in the material. However, even with careful pouring of the resin, air bubbles may appear on the surface a few minutes after pouring.
They can be eliminated by heating the surface of the mixture with a building hair dryer or a gas burner. The fire should not touch the resin. The optimal distance from the tip of the flame to the surface of the material is 15 cm.
- If an error was made in calculating the proportions and there was not enough material for the surface being poured, the process of preparation, painting and pouring the resin will have to be repeated from the beginning. This should be done after 48 hours have passed since pouring.
The layer on which the new resin will be poured must be hardened. A little softness and flexibility are acceptable. But in no case should you pour over a liquid layer. Air bubbles will be trapped inside and some areas will not dry completely.
The part can be taken out of the mold 3 days after pouring. The hardened resin can be processed (grinded, drilled holes and polished) 7 days after pouring.
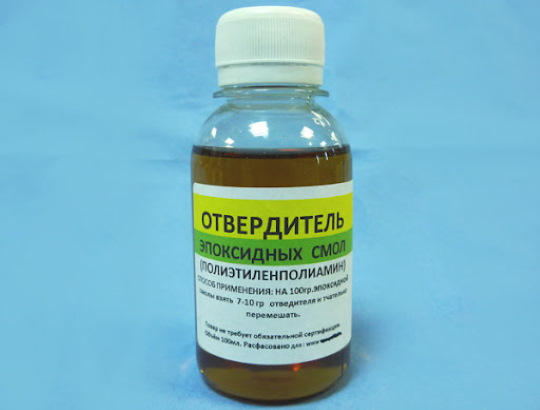
How to Make Your Own Resin Hardener
Epoxy resin (it will be difficult to make a hardener at home) in its pure form is often sold complete with a hardener.
There will be enough substance in the container to obtain a polymer. In rare cases, there may not be enough hardener. This problem is often encountered by novice craftsmen who, due to inexperience, measure the proportions of ingredients incorrectly.
It is impossible to create a hardener from improvised components. Special chemicals are needed for the work, which can only be purchased in specialized stores.
What does the hardener consist of:
- Telalit 410;
- Etal-45M:
- CHS-Hardener P-11.
Only professionals can work with such substances. It is necessary to know the exact dosage and use special protective equipment. If a small amount of hardener is not enough to harden the resin, then dry alcohol can be added to the mixture.
How to do it right:
- Crush the dry alcohol tablets thoroughly until they turn into powder.
- Add alcohol powder to the resin. For every 10 parts of resin, add 1 part of dry alcohol.
- Stir the mixture.
- Leave the resin for 12 hours to thicken.
This method can be used as a last resort when working with a small amount of epoxy.
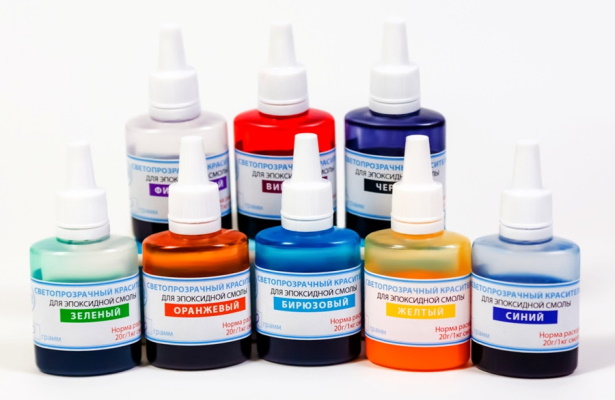
Features of coloring
Epoxy resin is a transparent material. It can be made colored by adding special dyes.
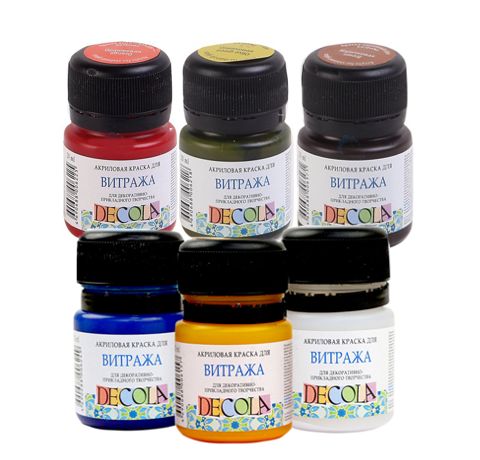
Types of paints for epoxy resin and their properties can be seen in the table.
|
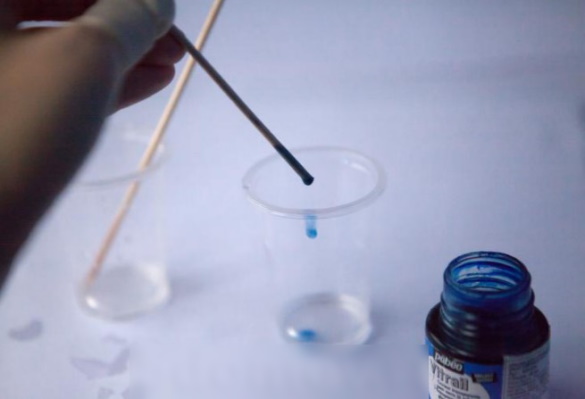
The appearance of the finished product will depend on the amount of paint added to the mixture. If you add 2-3 drops of dye to the resin, it will acquire a translucent shade and will transmit light.
To obtain a more saturated color, you will need more colorant. To obtain a deep and saturated color, the epoxy resin is first painted white, and then the colorant is added. Epoxy resin can be colored not only with special compounds. A good dye can be obtained using non-trivial methods.
Epoxy resin (you can make a coloring pigment of an unusual shade at home by mixing the components listed below in the article) can be painted with materials such as:
- Ink from ballpoint and gel pen refills.
Be careful when using pigment from ballpoint pens. Sometimes they can give unpredictable results. For example, green paste gives a brown tint when mixed with resin. It is better to test the dye on a small amount of material in advance.
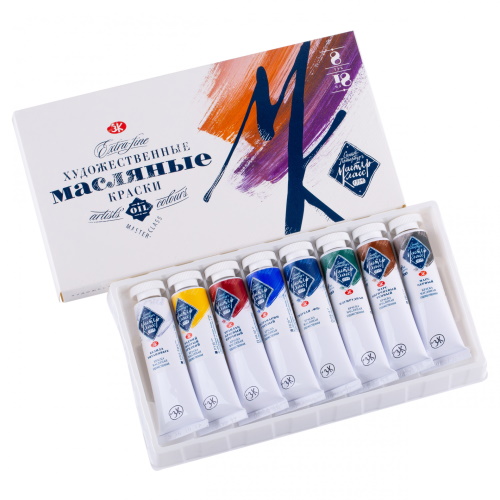
- Oil paints (artistic).They should be used drop by drop before the hardener is added to the resin.
- Paints for polymer clay.They give bright and rich shades.
- Alkyd paints. They mix well with resin and do not react with it.
- Powder toner for printer.Useful if you need to get a thick black color.
- Talc and colored powder. With their help you can obtain delicate, pastel shades of resin.
- Crushed graphite from colored pencils. Mixes with resin with difficulty, but produces rich colors. It is better to use pencils with soft lead.
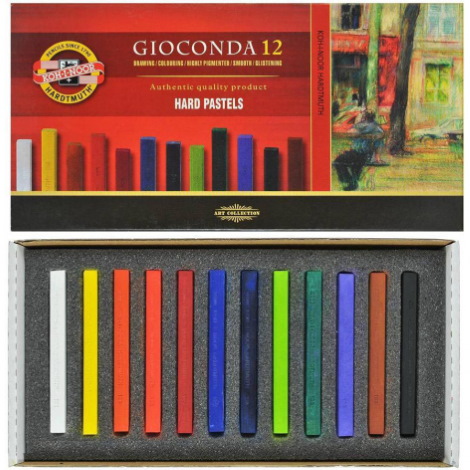
- Dry pastel. The result is a rich, matte color.
- White cosmetic clay or chalk. These substances will help give the resin a snow-white color.
- Green stuff. Gives the resin a rich green color.
- Water-based stained glass paints. The best option for dyeing resin at home.
How to use dyes correctly:
- Oil and alkyd paints should not exceed 8% of the total mass of the mixture being painted. Excess of these dyes affects the resin hardening process. It may remain in a rubber-like consistency and not harden more.
- When adding other dyes, it is not recommended to exceed 5% of the total mass of the composition.
- Paints should not be diluted with water. It can negatively affect the process of hardening of the mixture.
- The temperature of the material being painted should be about 25 degrees.
The paint needs to be stirred vigorously so that it quickly gives the composition the desired color.
Resin volume, vessel shape and their influence on mixture heating
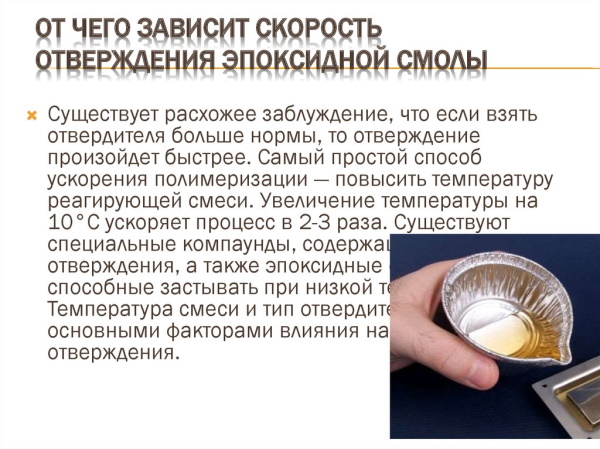
Regardless of the polymerization method (cold or hot), epoxy resins generate a large amount of thermal energy when mixed with a hardener. The degree of heating can be so high that the composition begins to bubble and boil. Sometimes the mixture can ignite. The more heat, the faster the resin hardens.
The release of thermal energy is affected not only by the number of components, but also by the shape of the container in which they are mixed. Resin in a square or round container heats up more. A nuclear reaction occurs by analogy. For example, the critical mass of plutonium is slightly more than -230 kg. A chain reaction will occur if a 6 mm thick cake is made from plutonium.

Similar metamorphoses occur with epoxy resin. These are not physical, but chemical changes. In plutonium, free neurons expand the concentration when the weight is equal, only the volume is smaller. This causes a chain reaction.
Thermal quanta in epoxy resin start working by analogy. They are close in shape to a cube and a sphere. When mixing resin and hardener, the quanta expand their concentration, and the material heats up. Therefore, when a lot of resin is required, for example, for pouring a tabletop, a container with a flat bottom and low edges should be selected for mixing the ingredients.
It is important that air comes into contact with most of the mixture. It will serve as a cooler. Also, to cool the mixing container, you can put ice or a larger container with cold water under it. There is another method that prevents overheating of the epoxy resin. You need to pour the resin in layers. This process is called discrete pouring.
First, pour a thin layer of resin and wait for it to harden completely, then pour a new layer. Continue filling the mold until you reach the desired filling thickness. It is important that dust and other foreign particles do not get onto the curing polymer while the lower layers are drying. Water ingress will be especially dangerous for the mixture.
Stages of solidification
The process of epoxy resin curing can be divided into 6 stages:
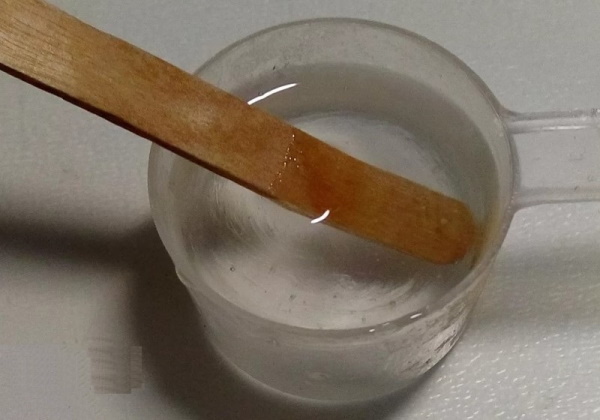
- The mixture is very liquid. It easily penetrates even the smallest cracks and pores.
- The resin begins to thicken. Its consistency resembles vegetable oil. This resin can be used to fill smooth surfaces.
- The resin becomes even thicker. Now it resembles honey. Such material is no longer suitable for pouring. It can only be used for gluing hard surfaces.
- The mixture becomes similar to silicone. It's already difficult to tear off a small part of it.
- This stage is often called the plasticine stage. The resin no longer sticks to surfaces, but becomes pliable. Various figures can be molded from it. However, special molds are required for hardening, otherwise the mixture will spread again and lose its shape.
Stage 6 – completely hardened resin. Resembles strong plastic. Does not press or scratch.
How to treat resin after it has cured
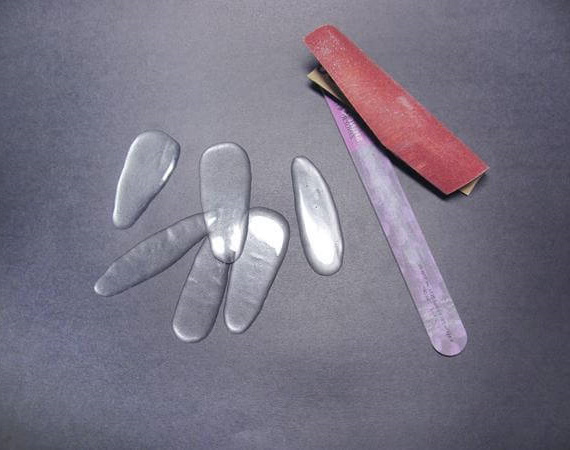
Once cured, the resin may be rough and cloudy, so some sanding and sanding will be required to make the piece more attractive.

Usually sandpaper of different grain sizes is used for work. Small bumps and bubbles can be removed with coarse sandpaper. Then the product should be treated with thinner paper, which is often called zero paper. This treatment should be done before polishing. Small details can be processed with a manicure milling cutter.
Polish will help make the surface of the epoxy resin smooth and reflective. The substance should be applied to the surface of the product and thoroughly rubbed with a polishing disk. Such devices are used to polish the car body. If there is no polishing wheel, then you can use foam sponges or a special cloth.
How to check the quality of the resulting composition
When making epoxy resin at home, you need to make sure of the quality of the composition before you start working with the forms.
How to check the quality of resin:
- Mix the ingredients to make enough mixture to fit in a tablespoon.
- Leave the resin in the spoon until it hardens. It will heat up faster from the metal.
- If after hardening the mixture became similar to rubber, then not enough hardener was added, or there is oil in its composition. This is not a quality mixture. If the liquid has hardened to a solid state, then it can be used for pouring in large quantities.
Safety rules when working with resin
Substances that trigger the hardening process, such as amines and acid anhydrides, can negatively affect human well-being. If you work with epoxy resin regularly, they can cause harm to your health.

Therefore, it is necessary to follow the rules that will make the work process safe:
- Put on a respirator with a built-in filter on your face.
- Protect your hands with latex gloves. Fabric protection will not work, as liquid resin is easily absorbed into soft materials.
- Protect the work surface with polyethylene film. It will be very difficult to remove solidified drops of resin from the countertop and floor.
- Cover your head with a cap or scarf. Hair may get caught in the solidifying mass and remain there, permanently ruining the appearance of the product.
The liquid resin should be poured into the mold carefully, without sudden movements, so as not to create splashes that could get on your skin or clothing.
Applications of homemade epoxy resin
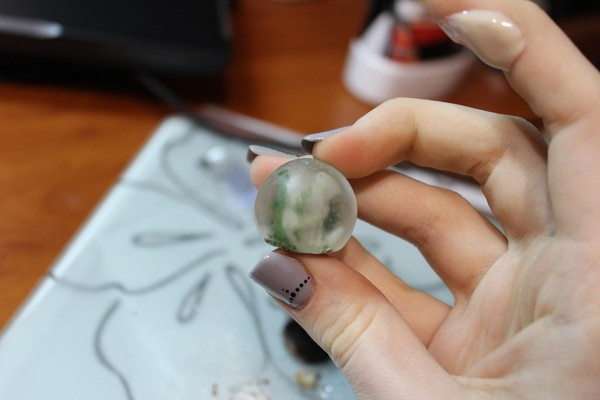
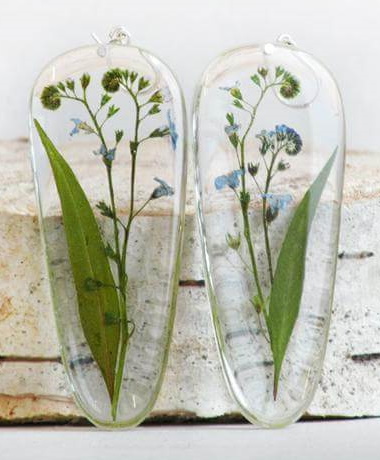
Epoxy resin (you can make various items from it at home) is often used to create beautiful jewelry. Homemade beads, earrings, bracelets and elegant necklaces can be sold on marketplaces that work in the handicrafts direction.
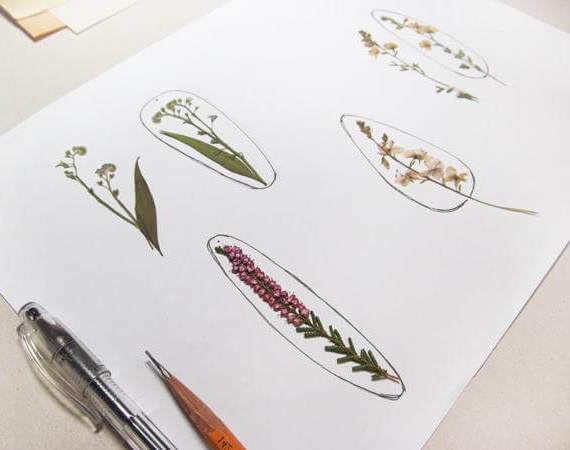
Particularly prized are decorations made from epoxy resin with embedded dried flowers and small objects.
How to make dried flower earrings:
- Prepare the mixture by combining the ingredients in the proportions indicated on the package.
- Leave the mixture for 2 hours to thicken.
- On a piece of paper, draw the shape that the earrings will have, for example, stars, hearts or diamonds.
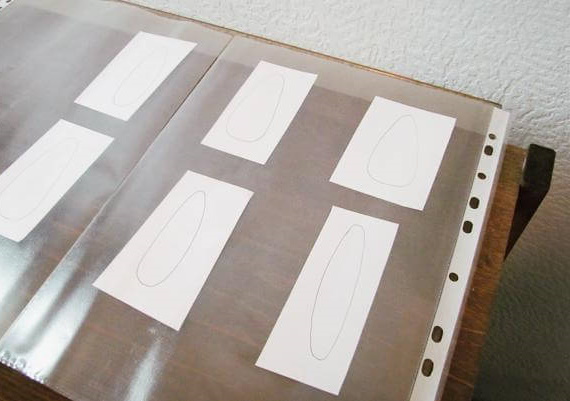
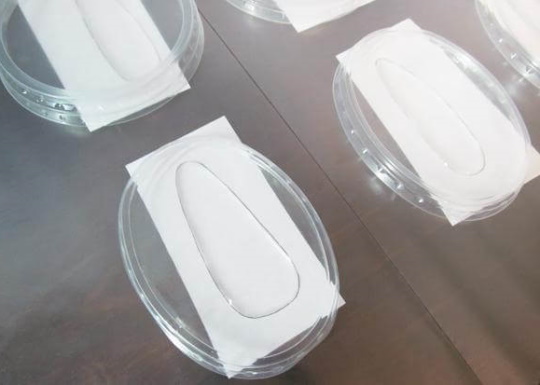
- The table on which the resin will harden must be level. You can check the slope of the surface with a building level. Cover the surface of the table with film.
- Place paper stencils on top of the film.
- Cover the paper with files to store documents.

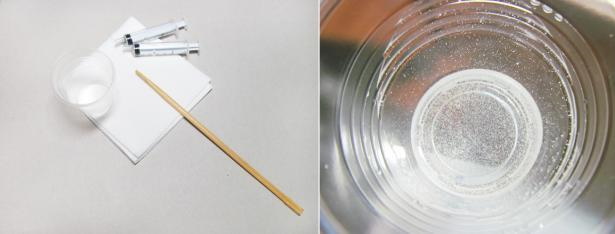

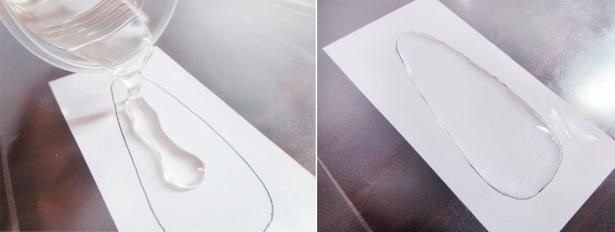
- Place a small amount of resin on top of the file. Spread it with a wooden skewer to create the shape of the stencil. The layer of the mixture should not exceed 2 cm.
- Cover the blanks with lids of suitable size and leave until set for 48 hours.
- After the resin has hardened, separate the file. Remove any unevenness from the blanks using sandpaper or a nail cutter.
- Mix a new batch of epoxy resin.
- Apply a little resin drop by drop onto the hardened pieces.
- Use tweezers to arrange the dried flowers.
- Cover the blanks with lids and leave until solidified.

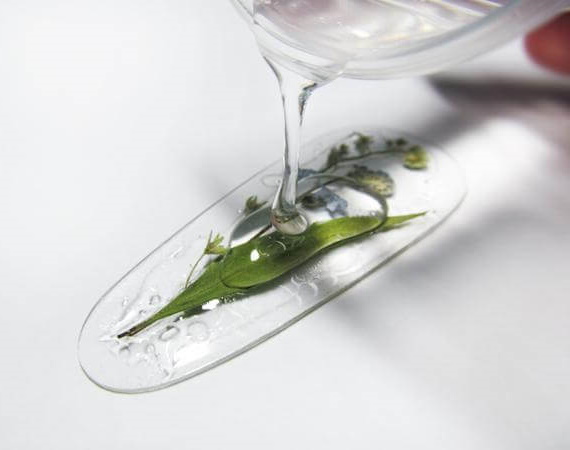
- To make the pieces more voluminous, you can add a little more resin.
- After hardening, process the blanks with sandpaper and polish.
Using a needle or a thin drill, make holes in the earrings. Insert the hooks.
At home, you can make not only jewelry from epoxy resin, but also unusual pieces of furniture or figurines for interior decoration. The main thing is to observe the proportions of all ingredients when preparing the mixture, and also learn how to process the hardened resin so that it looks beautiful.
Video about the material
How to make epoxy resin:
To prepare the resin you need to take the resin and the hardener!🤔😱
It’s a pleasure to look at such creativity, I want to try it myself.