Handicrafts are especially useful for children, as they develop fine motor skills and imagination. You can make an interesting craft with your own hands - a hut on chicken legs. It will take a little time to create it, but the result will please both adults and children.
Recommendations for making crafts
A DIY hut on chicken legs is a unique craft that is created from natural materials.
The options for manufacturing materials can be completely different:
- Cardboard.
- Tree.
- Textile.
- Cones.
There are a large number of master classes consisting of a different set of materials. This gives an excellent opportunity to choose the appropriate option taking into account individual financial capabilities and aesthetic taste.
A few small recommendations can make this task easier:
- It is worth deciding in advance what material the craft will be made of. You need to choose the method that you not only like, but also that is accessible to your individual abilities. If a person can knit well, the craft can be made from threads. Woodworking enthusiasts will like options made from this material.
- Don't be afraid to fantasize. It is not always possible to follow master classes. You can deviate from the rules and add your own touches to the craft. For example, replace one material with another. However, this must be done in such a way as not to damage the structure. For example, you cannot make the top wooden and the leg from the hut cardboard. A heavy top can break the product, thereby nullifying all efforts.
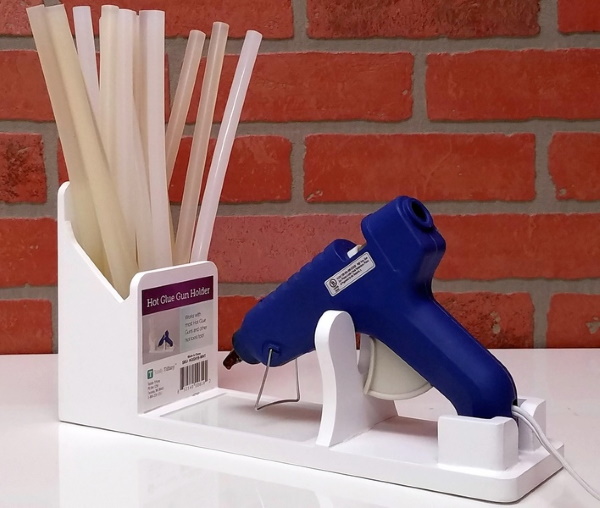
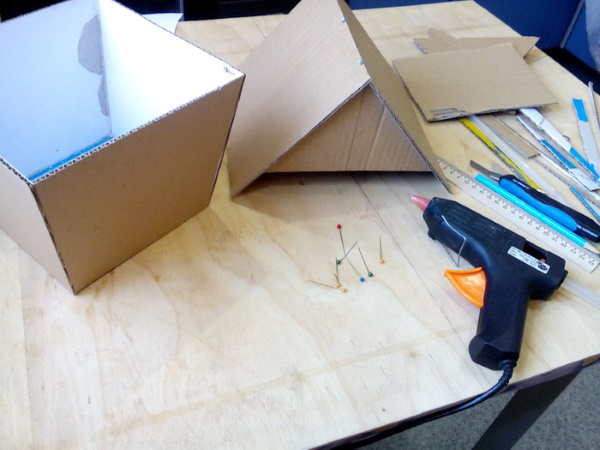
- For independent creativity, you do not need to buy any professional tools. This rule also applies to crafts made from natural materials. You can buy a hot glue gun, because if the materials need good adhesion, PVA from a tube is unlikely to provide it.
- The craft of a hut on chicken legs has such elements as windows and a door. You can draw them, or you can use a printer and print out the necessary elements.
- The hut on chicken legs will look most impressive in the appropriate surroundings. It would not be superfluous to create a clearing on which the craft will stand, make trees from twigs, decorate the hut with berries or artificial mushrooms.
Master classes
A hut on chicken legs made by hand will be a beautiful addition to the interior or will be perfect for a craft for a child in a kindergarten. To prevent the creation process from turning into a routine, you need to approach this matter with enthusiasm and faith in your own efforts.
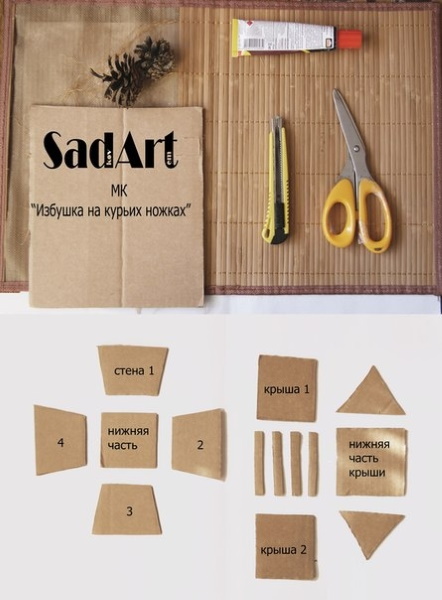
For beginners
A hut on chicken legs is not an easy craft for everyone. Creating such an item with your own hands for beginners sometimes turns into an impossible task. The simplest master class will allow you to make it quickly, but beautifully. This option is suitable for those who urgently need such a craft. For example, a child in kindergarten.
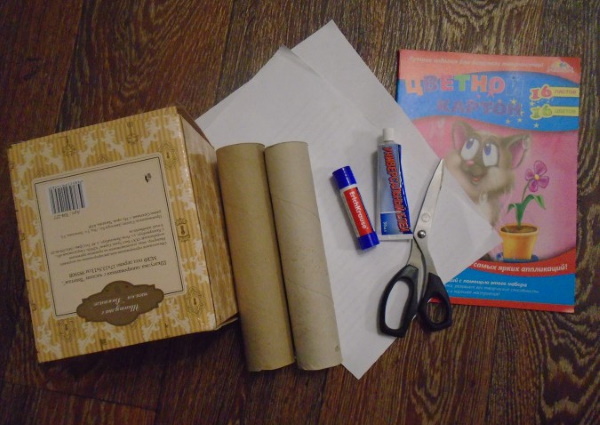
To create you will need:
- Sketches of a wooden wall, windows, doors, roof. They can be found on the Internet and printed in the required size. On the Internet, you can choose a picture for any taste. For example, the walls of the house in the form of logs, the roof - from spruce branches or tiles. It is also worth printing a background image for the design of chicken legs.
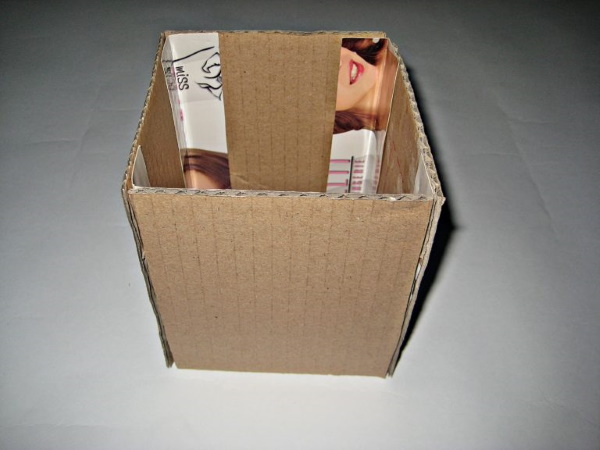
- Paper box – suitable for many products (tea, cocoa).
- Cardboard for the roof. You can cut up an unnecessary paper box.
- An album sheet or just thick paper (for the legs).
- Glue or double-sided tape.
- Scissors.
Step by step instructions:
- Sketches of windows, doors, walls and roofs are printed on plain paper.
- Cut out all items from the templates.
- The roof is made from cardboard or pieces of thick paper.
- Attach the roof to the paper box.
- Sketches of the walls are glued onto the 4 sides of the container, then onto the roof.
- They complement the house with windows and a door.
- Roll 2 tubes out of paper for the legs and fix them. They should be of such a size that the hut can stand on them stably.
- The tubes are attached to the bottom of the hut using glue or tape.
- A chicken leg template is glued onto the legs.
The hut will be even more beautiful if you are not lazy and put it on some kind of foundation. This can be a cardboard clearing. You can also supplement it with printed templates of mushrooms or trees.
From a paper box
A DIY hut on chicken legs in its simplest form is made from an ordinary paper box. The container for the craft can be of any size - it all depends on the person's preferences. You should not take only boxes from dairy products.
To create you will need:
- Paper box – 1 pc.
- Cardboard.
- Scissors.
- Plasticine.
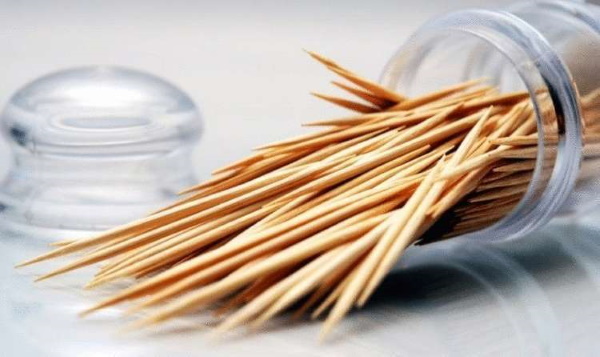
- Toothpicks or skewers for roof decoration (you can think of another option: twigs, moss).
- PVA glue or any other that will be of liquid consistency. You can also take a regular glue stick.
- White paper.
- Paint brush.
- Gouache or watercolor paints.
- 2 wooden twigs that look like chicken legs.
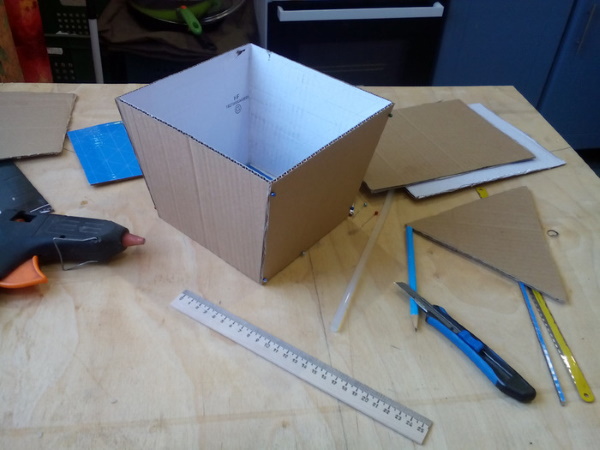
Craft diagram:
- Blanks for the roof are cut out of cardboard: 4 triangles.
- Glue them together and secure them to a paper box. Do not use tape, as it will interfere with further work.
- The box is covered with white paper and allowed to dry a little from the glue.
- They paint the walls in the form of logs, simultaneously adding windows and doors.
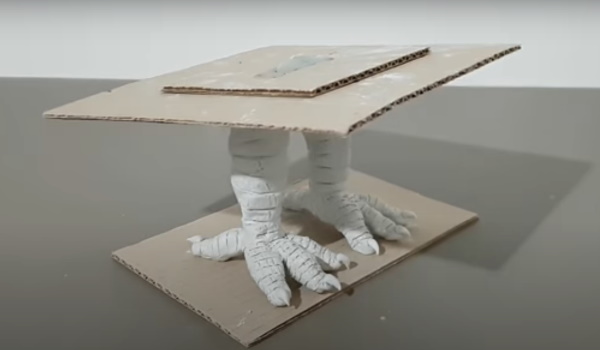
- Attach the legs to the hut using plasticine.
- Toothpicks or skewers are glued to the roof (depending on the size of the roof).
The hut can be placed on a pedestal or a homemade lawn made of moss. If you can't find twigs, you can make chicken feet out of plasticine, just choose the right color. In this case, feet made of this material are attached to the paper tubes at the bottom of the base.
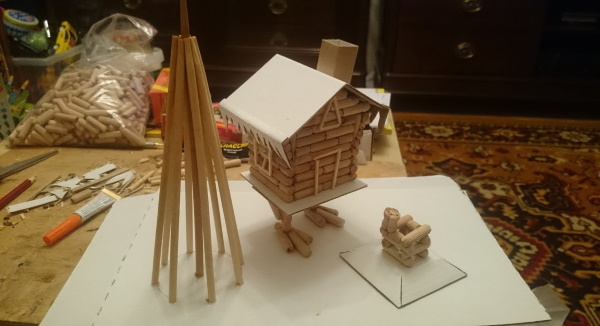
From pseudo-tree
A hut on chicken legs made by hand looks very impressive if it is made of wood. But not everyone who wants to has the opportunity to process the bars or find suitable sticks. In such a situation, a little trick comes to the rescue: make a hut from pseudo wood.
To create this craft you will need:
- Self-adhesive paper stylized as wood.
- Twigs or straw.
- Glue or double-sided tape.
- Paints and a brush for drawing (can be replaced with colored pencils or felt-tip pens).
- Album sheets.
- Whatman.
- Scissors.
- Cotton wool.
- 2 sticks for the legs of the hut.
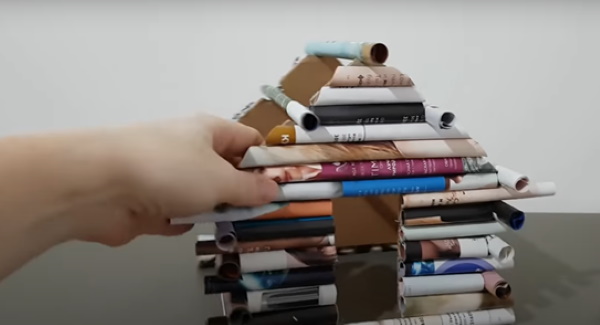
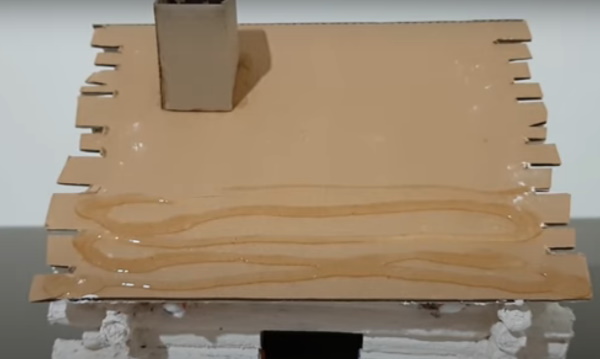
Creation scheme:
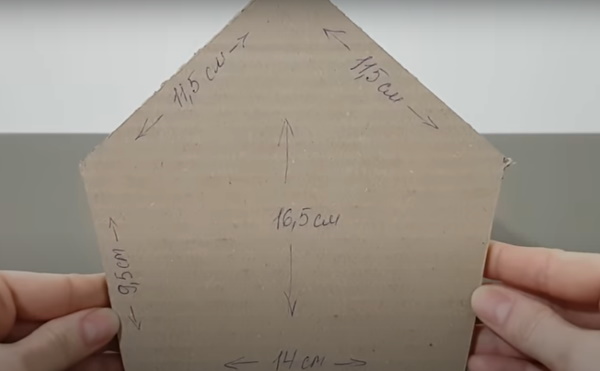
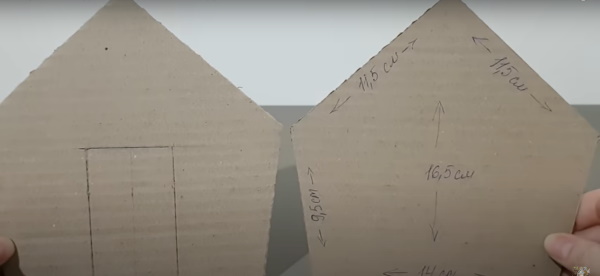
- A square is made from whatman paper – the base of the hut and the roof.
- Connect the parts together in any convenient way.
- Self-adhesive paper is glued to one side of the album sheets.
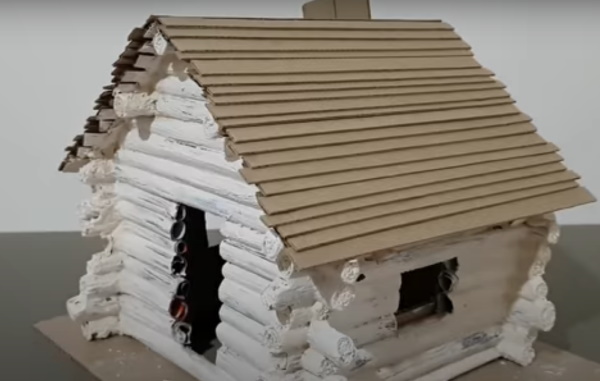
- Cut out strips of the pasted paper of such a size that they can be easily rolled into a tube. These will be the log blanks.
- The resulting pseudo-logs are attached to the house on all sides so that there is room for windows and a door. For this, some of the tubes are shortened.
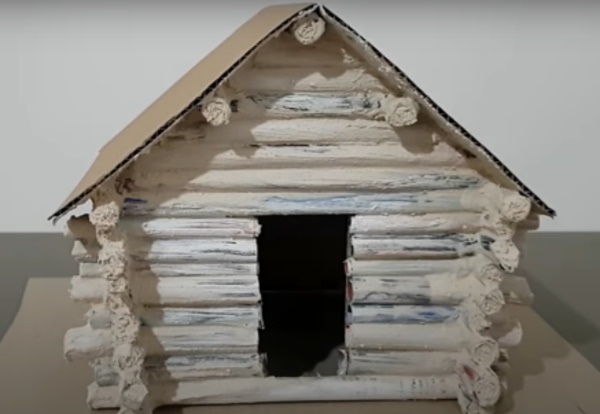
- Circles are cut out of self-adhesive paper to match the diameter of the tube opening.
- Circles are glued onto small pieces of cotton wool and inserted into the hole of the log. This will allow the voids in them to be closed.
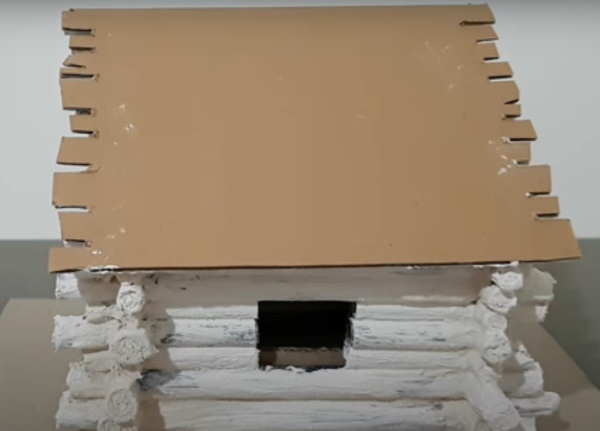
- Windows and a door are drawn on the walls of the house.
- The roof is decorated with straw or twigs.
- They attach the legs to the hut.
The time of work depends on the size of the craft. The larger the dimensions of the house, the longer the process of creating the craft will be.
A little tip for making tubes: you can take a simple pencil, put it on a sheet of paper and roll it up. The remaining tip of the paper is greased with glue and the pencil tool is removed – you get a smooth and beautiful tube.
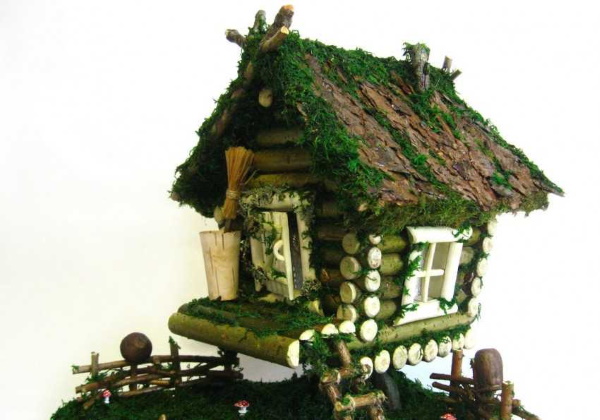
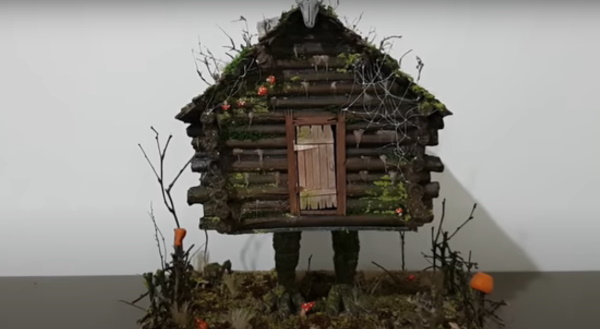
Original
You can make a house on chicken legs from a wide variety of materials. This master class is suitable for people who have the time and opportunity to collect the necessary parts. But the painstaking process of creating the craft will please you with its wonderful result.
For creativity you will need:
- Moss (slightly dried).
- Cones.
- Toothpick.
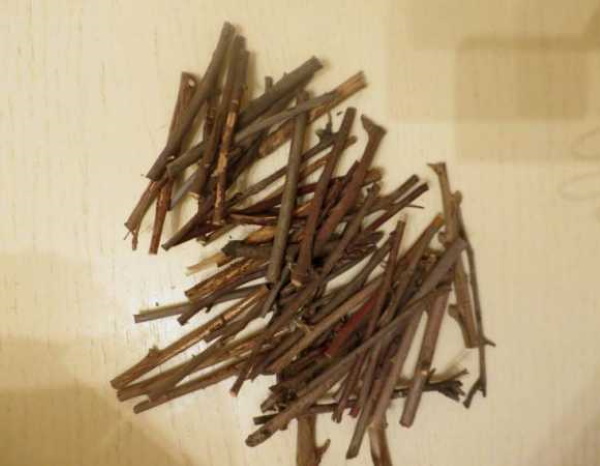
- Tree branches.
- Pine needles.
- Thin bark or birch bark.
- Threads are brown.
- Wire.
- A paper box or thick Whatman paper.
- Glue (you can use hot glue).
- Window and door templates.
- Paints and brush for drawing.
- Scissors.
Creation process:
- The hut shape and roof are cut out from whatman paper.
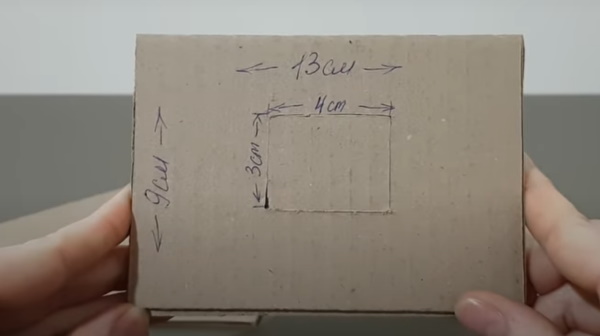
- In the hut, holes are cut for windows and a door.
- Templates of windows and doors are glued to the inside of the house.
- Two legs are formed from wire and secured to the bottom of the hut in any convenient way.
- Two tubes are made from paper, the length of which is proportionate to the wire.
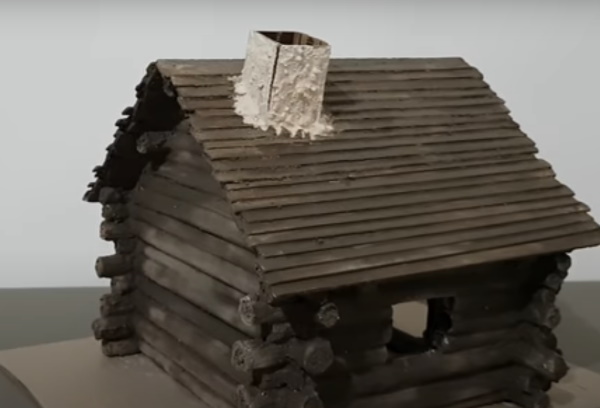
- Put the tubes on the wire, masking it. Paint the paper to match the chicken legs.
- They connect the hut and the roof.
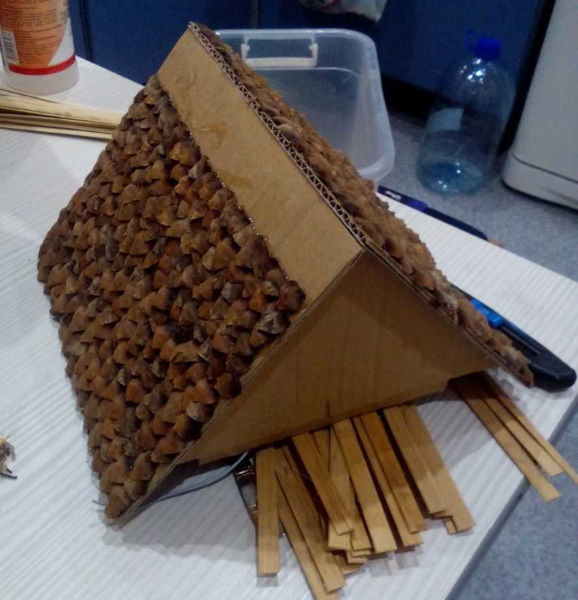
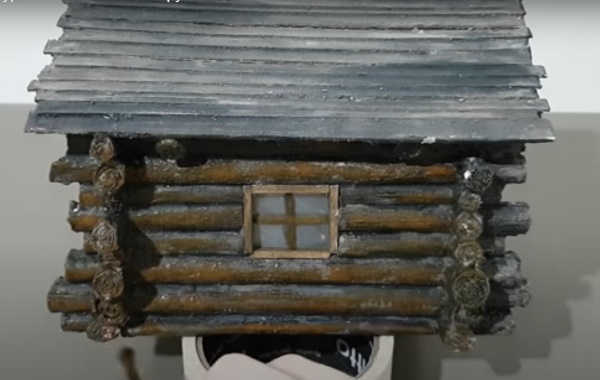
- The roof is coated with glue and bark or birch bark is attached to it.
- The outer walls of the house are decorated with tree branches, leaving a small gap between the sticks.
- The holes between the branches are coated with glue and moss is applied to it. You can use a toothpick to help.
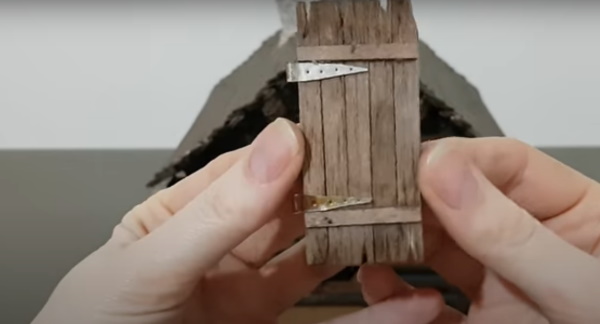
- From the remaining branches, make a ladder, tying everything together with brown thread.
- They attach the ladder to the hut.
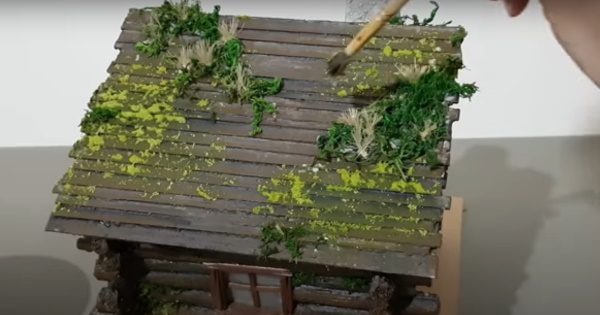
- The roof of the house is sprinkled with pine needles. The scales are separated from the cones and fixed to the legs of the hut.
This master class is very complex due to the large number of materials used. But the result is very unusual and beautiful. A little advice: the moss must be dried. If you use it freshly picked, then after some time it will dry out, and bald spots may appear on the craft. This will not decorate the house.
From fabric (option 1)
An original and quite simple way to make a craft is to use fabric. Almost every house has scraps of material or a wardrobe item that you wouldn’t mind using to create a house. This could be a T-shirt, a sweater or any clothes made from natural fabrics, not synthetics.
If you don't have anything suitable at hand, you can buy a piece of material of the desired color in the store. The cost of the fabric is calculated in meters. But it is not necessary to buy such a volume, sellers can cut off 20 or 30 cm, as much as the buyer wishes.
Materials required:
- Paper box.
- Album sheet.
- Scissors.
- Glue.
- Fabric (burlap works great).
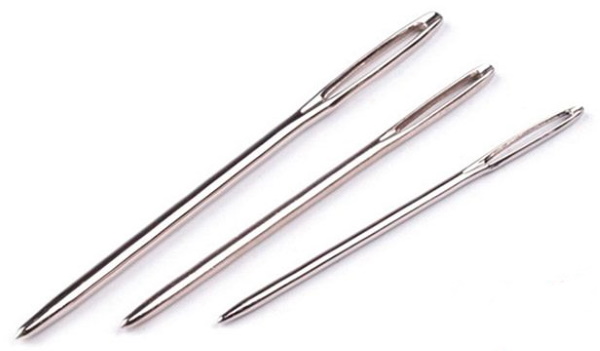
- Sewing needle.
- Twigs or any other material for legs.
- Threads to match the color of the fabric + jute or sisal.
- Buttons for windows.
Creation process:
- The roof is made of paper.
- They attach the roof to the house.
- Patches of fabric are cut out to decorate the walls of the hut and its roof.
- Windows and a door are formed from buttons. They are sewn onto the blanks.
- Using glue, attach the fabric to the house.
- They attach the legs.
- They are wrapped with jute or sisal thread.
It is not necessary to overcast the pieces of fabric. If you replace the PVA glue with hot glue, the threads will hold firmly to the hut.
From fabric (option 2)
For the craft you will need the following materials:
- Fabric for the hut.
- Needle and thread for sewing.
- Wire for legs.
- Cotton wool or padding polyester.
Creation process:
- 5 squares are cut out of the fabric.
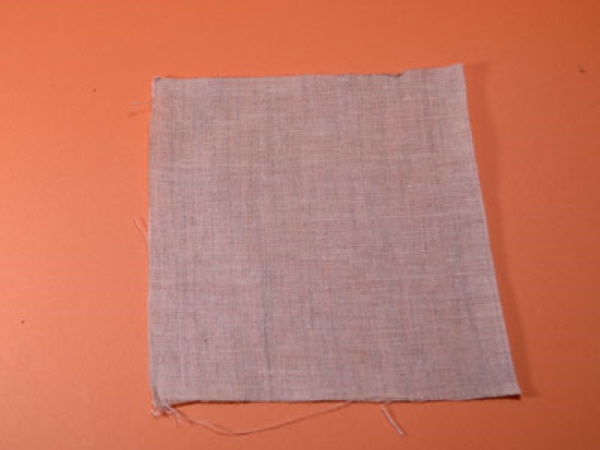
- The edge of each piece is overcast.
- Windows and doors are embroidered on the walls of the house.
- Sew all the pieces together, leaving a small opening for stuffing.
- They stuff the hut and sew up the hole in the fabric.
- They make a roof blank and repeat the same thing as with the walls of the house.
- The roof and the house are connected by sewing the two parts together.
- The legs are made from wire.
- They are attached to the bottom of the hut.
- They wrap the wire with threads.
The hut will be soft, beautiful and unusual. You can make the legs out of fabric and also stuff them with cotton wool. But then, so that the hut stands firmly, you need to pour some pebbles at the base of the legs and insert wire.
From toothpicks
Making a hut out of wood is very difficult. Not everyone has the opportunity to trim and select planks of the same size. But almost every apartment has toothpicks. They will help you make an excellent craft, even if you don’t have good wood at hand.
Materials required:
- Paper box.
- Double-sided glue or tape.
- Paints and brush for drawing.
- Paper for legs.
Creation process:
- One part of the box is used to make a hut, and the other part is used to make a roof.
- All parts are connected using glue or double-sided tape.
- Attach toothpicks to the walls and roof of the house in a similar manner.
- They paint the walls and roof with crafts.
- They draw windows and doors.
- Tubes are made from paper and attached to the bottom of the house.
- They paint the legs.
If you don't have toothpicks, you can replace them with skewers.
From the vine
An unusual version of the craft can be made from vines.
To create you will need:
- Vine branches. They should be collected in advance, cut to the desired length and allowed to dry for 1-2 days.
- Paper box.
- The paper is white.
- Paints and brush for drawing.
- Paints.
- Toothpicks.
- Hot glue (thin stick).
- Cotton wool.
Algorithm of actions:
- The vine branches are cut to the required length.
- A hut template is made from a paper box.
- The vine branches are attached to the walls and roof of the house using hot glue. It is necessary to imitate log masonry.
- Using a toothpick, push cotton wool into the holes between the branches.
- They make legs from twigs and attach them to the bottom of the hut.
- Windows and doors are made from paper and painted.
- Glue the remaining elements to the craft.
The vine grows almost anywhere. Its shoots are flexible and this gives a good opportunity to work with them. Even ordinary scissors can be used to form the desired size of sticks.
From matchboxes
It will take a minimum of time to create a craft from matchboxes. Even if you do not have the required amount of such material at hand, it is easy to buy in any store. The low cost of such a product is a big plus in the creative process.
For this craft you will need:
- Paints and brush for drawing.
- Scissors.
- Twigs or dry grass.
- Matchboxes (the quantity depends on the size of the craft).
- The cardboard is thick.
- Glue.
- Toothpicks.
- Paper.
Creation process:
- Two squares are cut out of cardboard: the top and bottom of the hut.
- Matchboxes are glued to one of the squares.
- When gluing, holes are formed for windows and doors.
- Once the house has reached the desired size, a second square is glued on top, thus securing the craft.
- A roof is cut out of cardboard and attached to the house.
- Using glue, toothpicks are fixed to the roof.
- Windows and doors are cut out of paper and painted.
- The elements are fixed in the corresponding openings of the house.
- Tubes are made from cardboard for the legs of the house and attached to its base.
- The paws are made from twigs and inserted into the bases of the tubes.
- They paint the legs with paint.
- They decorate the hut with twigs and dry grass.
This hut is easy to make, so you can involve children in its creation.
Complex option
The complex version of the craft consists of a large set of materials:
- Foils.
- Paper (needed to create tubes).
- Hot glue and a glue gun for it.
- Self-hardening clay DAS.
- Cotton wool.
- Cardboard.
- Seine.
- Dry moss.
- Wires.
- PVA glue.
- Acrylic paints.
- Wooden branches.
Creation process:
- Tubes are made from paper.
- They cut out the blanks for the house.
- Windows and doors are cut out with scissors or a stationery knife.
- Using hot glue, connect all parts of the walls together.
- The tubes are glued onto the house.
- A roof is made from cardboard and attached to the house.
- The space in the tubes is filled with cotton wool.
- They paint the entire house, except for the roof, with watercolors.
- Small holes are cut on the sides of the roof.
- Strips are cut from cardboard.

- They cut a pipe out of cardboard and attach it to the roof.
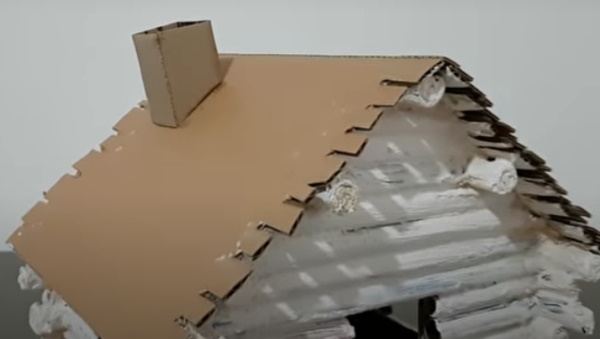
- The roof is coated with PVA glue.
- They glue strips of cardboard.
- They paint the house with paint.
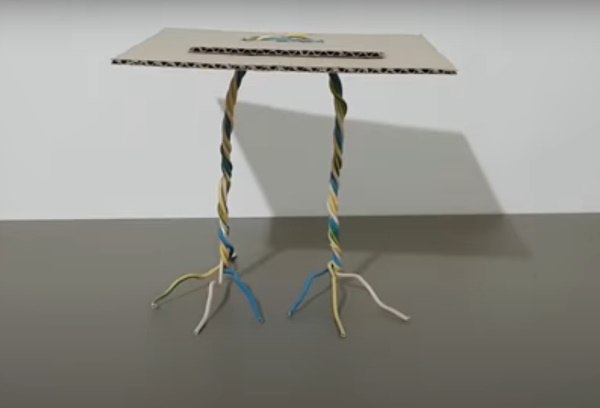
- Four wires are gathered together and twisted into an arc.
- Cut a square out of cardboard - the base for the legs of the hut. Make 2 holes in the middle for the wire.
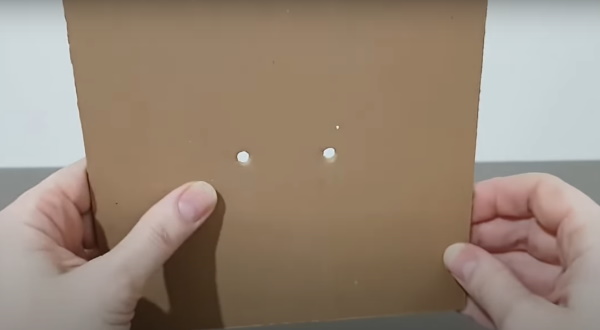
- The wire is pulled through the holes in the square to form the legs.

- Cut out a second square – smaller in size. Cut out a small rectangle in the middle.
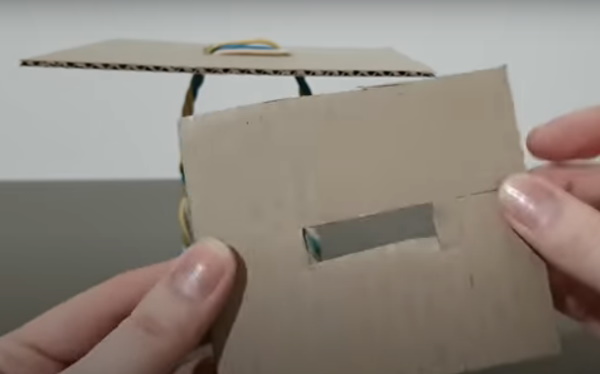
- Place a square with a hole on the base of the hut. The wire should fall into the hole of the smaller workpiece.
- Chicken legs are wrapped in foil. Everything is fixed with hot glue.
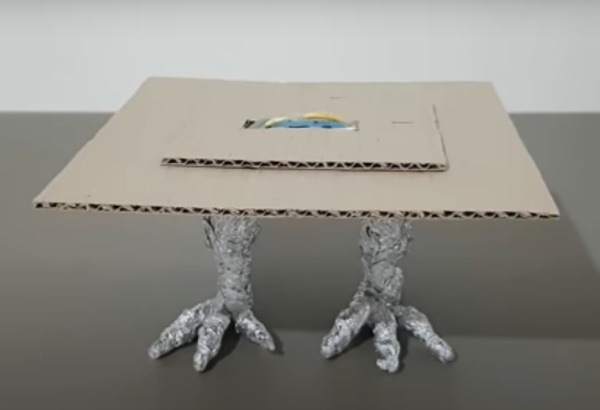
- The legs of the house are decorated with polymer clay. Using a toothpick, lines are drawn.
- They make windows out of cardboard and stick them into the openings of the house. They paint them.
- A door to the hut is made from cardboard and foil.
- The roof and other parts of the house are decorated with moss. Tree branches are fixed to the roof in random order. Cotton wool is applied in small quantities to the walls of the craft and painted gray.
- Connect the legs and the hut itself together. If desired, the remaining materials can be used to make the surrounding entourage for the craft.
This craft takes a lot of time, but it looks very realistic.
Life hacks
If a person wants to make something with his hands for the first time, but has zero knowledge of hand-made, modern technologies come to his aid. In craft stores, you can find convenient options for houses that can be assembled in a couple of minutes. If you add a little creativity, you will get an excellent option for a craft. To create a house, you will need the main thing - to buy a blank for it.
Craft stores have the following options:
| Name | Description | Price |
| "Astra & Craft" wooden blank for decoration "Baba Yaga's House" L-652. | A beautiful blank for a craft. Width – 12 cm, length – 13 cm, height – 14.5 cm. The set includes house parts and decorative ornaments: an owl, a cat, and a stand for the craft. | From 300 rub. |
| Rectangles 150x93 mm, 140x90 mm. | Such parts are sold without additional decorative details. They can be used to form the main parts of the hut. | From 20 rubles per 1 piece. |
| Blank for a wood mill house. | Pine blanks for a wooden house. The size varies from 5 to 8 cm in width, from 3 to 4.5 cm in thickness and from 5 to 10 cm in height. | From 10 rubles per 1 house. |
| Plywood wall for a house from dljatvorchestva | Wooden blanks for a house with windows already cut into it. Size 9 by 10 cm. | 5 rubles for 1 wall. |
Purchasing such a blank significantly simplifies the process of creating a house.
An approximate master class using such material will additionally require:
- Paints.
- Twigs.
- A piece of fabric to imitate curtains in the window.
- Dried berries.
- Moss.
- Glue.
Creation process:
- On the inside of the house blank, fabric is glued to imitate tulle.
- Assembling a house blank from "Astra & Craft".
- The hut is painted using paints.
- Let the paint dry.
- Using glue, decorate the roof of the house with twigs, pieces of moss, and berries.
- A clearing of moss is made under the hut.
This is the fastest version of the craft, which even with zero knowledge of creativity will turn out beautiful and neat. Very often, parents in kindergarten are asked to participate in various handicraft competitions. A craft in the form of a hut on chicken legs can surprise even the most fastidious jury. In addition, creating such a masterpiece with your own hands will allow you to occupy time and get closer to your children.
Video about making a hut on chicken legs
How to make a hut on chicken legs:
I was looking for an option for building a Baba Yaga hut from a birch switch, and in July I specifically asked a neighbor to cut down a dozen thin birches no thicker than 10 cm in diameter in the forest for me. I put them in a barn and they will dry out by next summer. I know the principle of building a hut, and I also know how to make a log house like in a large hut. And the hut will be no more than 50x50 in size and 60 cm high. But not a single master class suited me - cardboard, fabric and other trash - this is until the first rain, and from toothpicks and matches - this is generally ridiculous. I will have to design and make everything myself. In May I will plant a vegetable garden and start creating it. A place for this decorative hut has already been prepared in the flower bed, I have even made Baba Yaga, I molded the head from baked clay, hair, clothes - everything as needed, painted, put glass eyes - a beautiful Baba Yaga turned out! All that's left is to make her a house and a mortar. It's a pity that there is no MK, that no one has made this from real wood.