Admiring the beautiful paintings of famous artists, many people have a desire to master this art and even develop their own interesting ideas for drawingsIt is best to start learning with such a simple material as gouache.


Thanks to its aesthetic properties and ease of use, it will make drawing lessons for beginning artists enjoyable and easy, and will be an excellent start to future masterpieces.
A type of gouache
Gouache is a type of water-based paint. It contains white, crushed pigments, and water-adhesive substances that bind them, such as starch, dextrin, and gum arabic. Some manufacturers also add glycerin, oil, honey, and acrylic to the paint.
Types of gouache are presented in the table:
| Variety | Characteristic |
| Artistic or professional | Gouache is ideal for creating large paintings. It is characterized by high covering power and matte velvetiness. One stroke of bright concentrated paint will easily cover a layer of watercolor. |
| Poster | The paint is intended for drawing posters and theatrical scenery. It is characterized by the brightness of tones, durability and quick drying properties. In the composition of poster gouache, white is replaced by kaolin, due to which the drawings do not fade quickly. |
| Fluorescent | The paint is a mixture of dyes, PVA glue, antiseptic, plasticizers and luminophores on organic resins. Thanks to this composition, the drawings look bright and glow under the influence of ultraviolet light. The paints have low covering power, they should be applied to a white base with thin strokes. There are even neon paints that glow in the dark. |
| Acrylic | Gouache contains acrylates, which ensure ideal adhesion of paint to the surface. The drawing is characterized by brightness and maximum resistance to mechanical damage. The product is not very popular. |
Preparatory activities
Gouache painting ideas can be realized using the following materials:
- gouache paints;
- sheets of paper;
- tassels;
- palette;
- simple pencil;
- dishes for water.
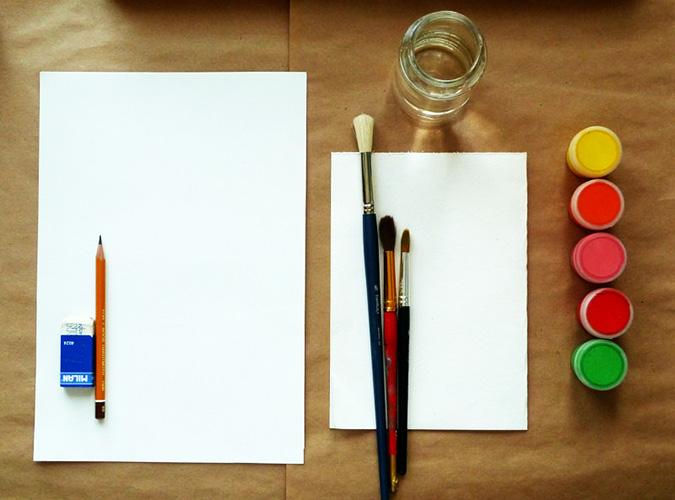
To start working, you can buy a minimal set of artistic gouache of 6 colors. By mixing them, it is easy to get a variety of shades. Professional artists also use a palette knife to mix gouache, which is also used to apply thick paint to paper and remove its remains. To draw and correct drawings, it is worth using a pencil with an eraser.
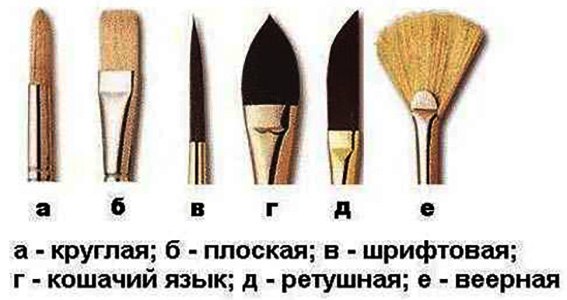
Particular attention should be paid to the choice of brushes. Too soft material is not suitable for applying paint. Synthetic and kolinsky brushes are mainly used.
Brushes made from animal hair are suitable for drawing:
- Squirrel brushes are moderately soft, with a pointed tip. Such products are convenient for applying thin strokes and making a drawing with distinct contours. The brushes do not last long, as they wear out quickly.
- Goat hair brushes are used for shading gouache and creating backgrounds.
- Pig bristle products help create a textured surface to the design.
- Badger hair brushes are suitable for painting with diluted gouache.
The work uses nylon brushes, foam sponges, rollers, threads, paper napkins and other auxiliary materials that will give the work a specific texture.
The shape of the brushes also matters.
Even a novice artist needs to have several types of tools:
- Flat brushes are used for applying broad strokes, painting large details and filling in backgrounds.
- Round and oval products are considered universal. Depending on how hard you press on the tool, the line can be thin or thick.
- Contour brushes are the ideal choice for drawing individual elements.
- Fan brushes are convenient for working with glazing techniques and background filling.
The main requirement for the surface of the material for the drawing is density. Fabric, wood, plywood, ceramics, glass are suitable for drawing. But it is best for beginners to start creating their masterpieces on paper. It should not be thin, otherwise it will warp from the applied gouache.
You can also create pictures on cardboard with a uniform texture. Based on the idea of the drawing, you can use not only white, but also colored or tinted cardboard.
Types of techniques
Before you start creating drawings, it is worth familiarizing yourself with the basic secrets of working with gouache paints.
You can experiment with the following techniques.
- Glaze – this is the production of complex shades due to optical mixing of colors. The effect is achieved by successively applying transparent and translucent layers of gouache after the previous layer has completely dried. You cannot make a stroke until the previously applied gouache has dried, since this will result in a “dirty” color. It is not recommended to apply more than 5 layers.
- Wet on wet. This method is convenient for depicting haze or other similar phenomena. Gouache should be generously diluted with water and applied to paper, immediately after which diluted paint of a different tone is applied. As a result, the edges of the drawing will be blurred. You can also slightly moisten the base before starting work.
- Sgraffito. The technique, reminiscent of engraving, allows you to create interesting textures, which is often used for the foreground of the drawing. First, a light color should be applied to the base, after drying, make strokes with dark gouache. When the top layer dries, you need to make scratches on it with a sharp stick or needle. As a result, the naked lower layer will be visible.
- Paste technique. An original texture can be achieved by applying thick, undiluted paint to the paper. You can experiment with strokes in different directions. To ensure that the paint holds its shape well and does not crack, add PVA glue to it.
- Splashing. The method is often used to create small details: stars, pebbles, leaves. It is necessary to dip a bristle or synthetic brush into paint, then pull the bristles and release. The part on which small details are not to be applied should be covered with a sheet of paper or newspaper.
- Mixed media. This method involves using gouache together with other paints. Gouache, watercolor, pastel, markers, and colored pencils can be present in one painting.
Painting with gouache has some features that should be taken into account:
- The material is water-soluble. The consistency of diluted gouache should be liquid and creamy, then the paint will smoothly flow from the brush and lay evenly on the paper. Too thick gouache can crack and crumble after drying.
- The dried colours can be mixed with a soft, damp brush to create subtle shading and other changes to the design.
- You can correct mistakes and apply layers of gouache one on top of the other, allowing each layer to dry periodically.
- Gouache paints dry quickly and become slightly lighter compared to the wet product.
- You should draw from dark to light. Light tones and highlights are applied to dark details.
- When combining shades, you need to remember the light circle. Neighboring colors give beautiful unpolluted tones. To draw a contour, it is recommended to choose a tone from the opposite sector. It is worth creating shadows not with black, but with green, blue or purple.
- If the paint has dried, it is easy to restore it by soaking it in water for 2-3 days. Then the gouache must be thoroughly mixed until it is uniform.
Step-by-step master classes
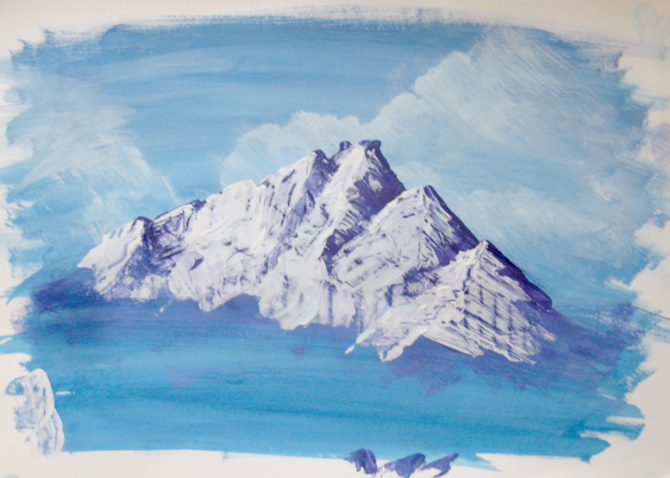
Gouache painting ideas should match the artist's skills. Beginners are advised to start with the easiest images, such as trees, mountains, rivers, landscapes.
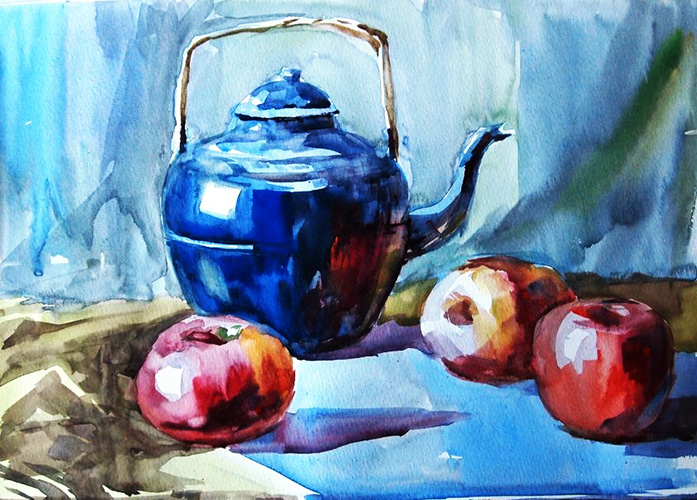
Drawing still lifes and portraits requires certain skills in artistic creativity. To master the technique of drawing with gouache, you should learn step by step, from simple to complex.
Simple drawings
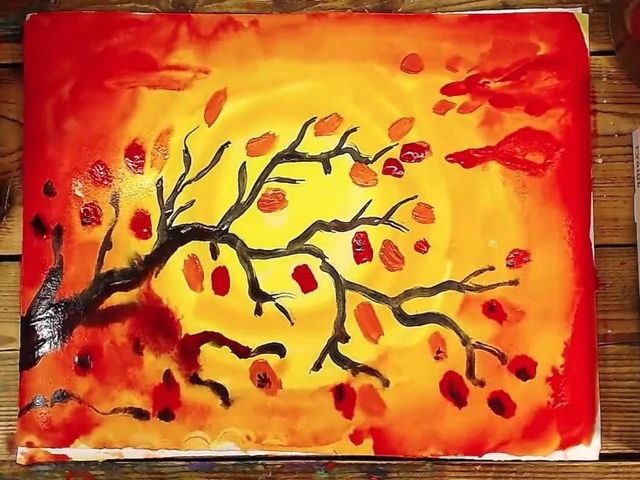
Ideas for drawings are often suggested by the surrounding beauty. Gouache can be used to depict any landscape or its individual element.
Sea
For work you will need the following materials and tools:
- gouache in white, blue, red, green, yellow, purple, black and brown colors;
- bristle and synthetic brushes;
- simple pencil;
- thick paper;
- palette;
- glass of water.
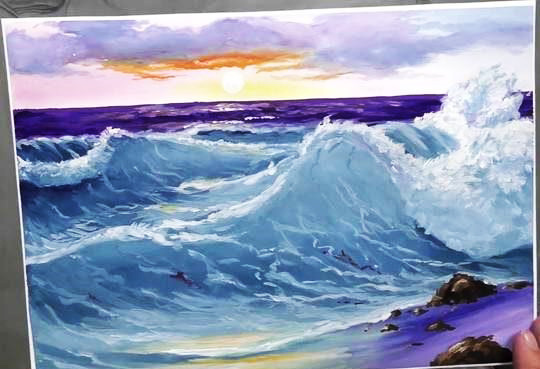
Master class:
- Before you start drawing, you should secure the sheet of paper with office tape.
- Draw two horizontal lines with a pencil at a small distance from each other, which indicate the horizon and distant waves.
- Dip the brush in water and wet the sheet of paper above the top line – the sky area.
- Take a drop of red gouache with a brush and spread it with strokes on the damp paper from the beginning of the sheet to the center. Add a pale blue shade to the upper right.
- Draw a yellow spot in the central part of the sky. Then stretch the spot to the left and right with smooth strokes. Carefully rub all the shades, if necessary, you can add saturation to them. Leave the canvas to dry a little.
- Prepare white paint, add violet and blue to it on the palette. Apply gouache with thick strokes to the still slightly damp area of the sky, drawing lush clouds. Below the clouds, on a yellow blurred strip, draw the sun with a thin brush and white paint.
- Mix red and yellow gouache. Use a round brush to paint orange clouds above the sun. Above them, darken the previously painted blue clouds with blue, giving them volume. Then carefully connect the border of the two colors.
- Add volume to the sky by drawing dark blue in some areas. You can smooth out the transitions with white, a mixture of blue and red gouache, or just a damp brush. The tops of the clouds should be given a white tint. Leave the drawing to dry completely.
- Prepare paint for painting the sea: combine white and blue gouache with a drop of red. Cover the entire painted sky with another sheet of paper and draw a clear purple horizon line 5 cm wide under its edge.
- Make a gouache mixture to obtain a turquoise shade: add a little green and blue to a large amount of white paint.
- Wet the sea area with a damp brush and apply a thick layer of turquoise paint, leaving only the lower part of the sheet uncovered, which should be painted in a light purple tone.
- Add blue paint to the prepared gouache mixture and draw waves diagonally across the sea. Use white paint to draw volume to the waves and make smooth transitions, mixing paint at the border of colors. Using a thin brush and thick white, depict sea foam.
- Combine white with yellow and use the resulting mixture to paint a reflection of the sky on the waves.
- Shade the purple corner with blue. Use black and brown gouache to depict the stones on the shore, adding white highlights. If necessary, refine the details.
Ideas for girls
Gouache painting ideas in floral style are most liked by girls.
These can be single flowers, bouquets or entire flower meadows.
Lilies of the valley
For the drawing you will need the following materials:
- thick paper;
- gouache in white, red, blue, green and yellow;
- wide and thin brushes;
- cotton swabs;
- glass of water;
- palette.
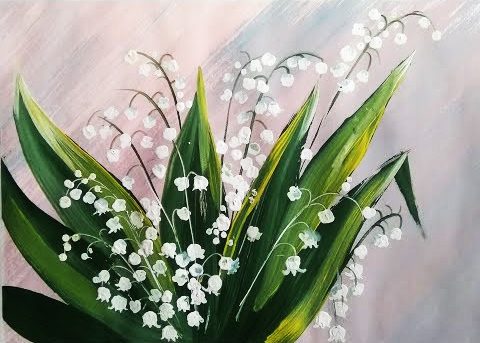
Master class:
- Make a background for the drawing. Mix a large amount of white gouache with a drop of red. Apply a soft pink paint to the sheet with a wide brush using diagonal movements. Add a drop of blue gouache to the mixture to obtain a purple shade and apply the paint over the pink background in the same way.
- Use a wide brush to paint green leaves. At the base of the leaf, the brush should be drawn wide, and at the top, the tool should be turned on its edge to smoothly sharpen the leaf.
- Using light, smooth movements without pressure, draw the thin stems of the flowers.
- Dip a wide brush into yellow paint and draw a light strip on the right side of each leaf, without going all the way to the bottom of the leaves.
- Using a thin brush, paint the tips of the leaves with white gouache. Draw white lines of the stems on the green foliage.
- Draw flowers using a cotton swab and white paint. Use the swab to draw white circles of flowers, but they should not be perfectly even. The circles at the very top of the stem should be the smallest, and those at the bottom should be larger. The latter should be given a more realistic shape of lily-of-the-valley inflorescences, adding pointed edges to them.
- Using a soft blue color, add shadows to the flowers in the middle of the bouquet.
Sakura
To depict a flowering tree you will need:
- 6 basic colors of gouache (white, red, blue, yellow, green, black);
- bristle or synthetic brushes;
- thick A4 sheet;
- container with water;
- palette.
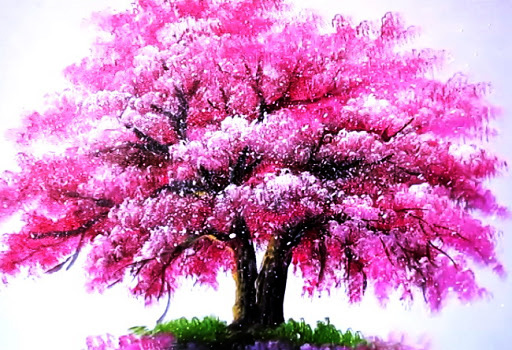
Master class:
- Start by drawing the tree trunk. Mix black and yellow and draw the base of the trunk with broad strokes. The branches located above will be thinner. The branches should look realistic, bend, and curve.
- Make a paint mix for the crown by mixing red gouache with a small amount of blue. You should get a reddish-violet shade.
- Dip a flat bristle brush into the mixture and cover the tree crown with broad strokes in one direction, leaving small gaps. The edges of the crown should be decorated with a practically dry, fluffy brush, patting it in a vertical position.
- At the bottom of the sheet, draw the base with light pink, well-diluted gouache. Decorate the corners of the sheet in the same way.
- Wet the brush well, dip it into green paint and use vertical strokes to imitate the grass cover.
- Give the tree trunk some texture and light and shadow, highlighting some parts with a mixture of brown and white. Add some branches on top of the dried crown.
- Finish the design of the tree crown. Mix the whitewash with the remains of the red-violet gouache until you get a soft pink shade. Apply the thick mixture to the crown with the tip of the brush, lightening its individual parts.
- Add more white to the pink paint. Wet the brush and use the gouache splashing method to create the effect of fallen petals.
- If desired, you can add white color to some parts of the crown.
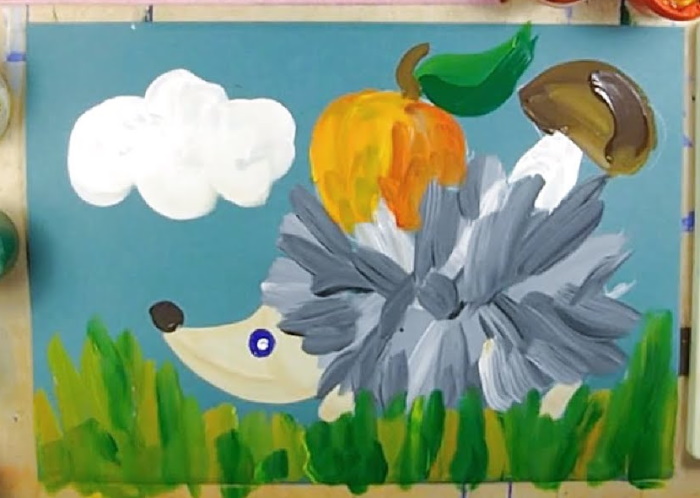
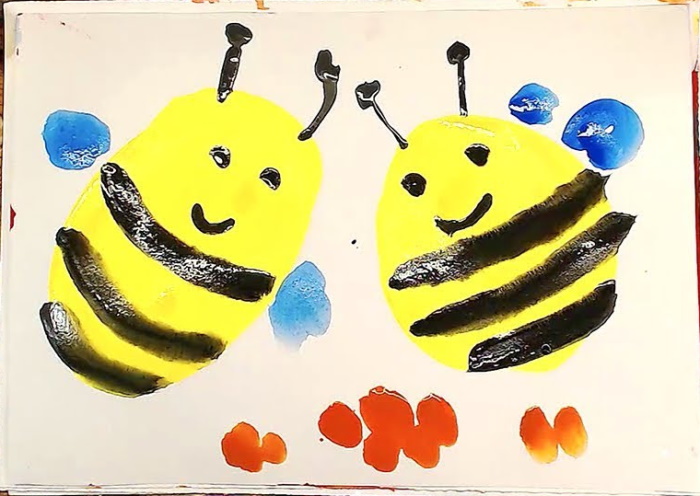
For children
Gouache drawing ideas can also be brought to life using non-traditional drawing methods, which is especially interesting for children. Examples of such methods are the following 2 master classes.
Winter nature
Materials required:
- a sheet of blue paper;
- gouache in white, black, brown, blue, green colors;
- brushes;
- container with water;
- crumpled paper.
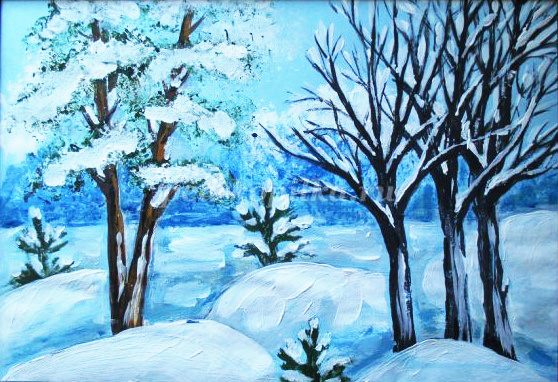
Master class:
- Place the sheet horizontally. Start drawing clouds using a stamp made from crumpled paper. Apply white gouache to the lump with a brush and use the stamp to draw clouds. Use the same method, but using blue paint, to create a forest in the distance.
- Use a round brush to paint smooth lines of white snow on the ground.
- Draw pine trunks using two shades of brown.
- Using stamping technique, make green needles for the pine trees.
- Use white paint to draw a white snowdrift at the foot of the tree and show snow on the branches.
- Apply black strokes of tree trunks with a semi-dry brush, draw branches with a thin brush. Also place a white snowdrift at the foot. In some places, the snow can be shaded with beige or pink gouache.
- Draw small green fir trees.
- Use white and blue gouache to paint snow on the trees and ground.
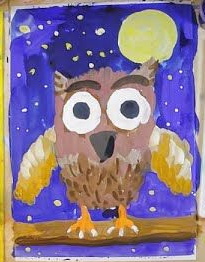
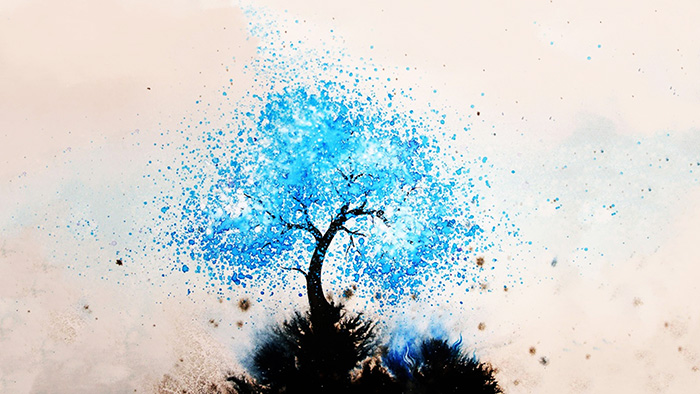
Starry sky
To work you will need:
- watercolor paper;
- gouache of different colors;
- brushes;
- palette;
- glass of water.
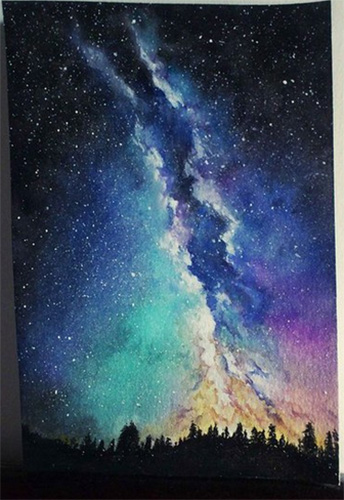
Master class:
- Use a pencil to mark the approximate horizon line. Use a wide brush to moisten the entire area of the starry sky.
- Apply the main colors of the first background layer to a damp sheet of paper: blue on top, light green and pink on the edges, and yellow at the bottom. The gouache should not be thick. It is necessary to leave unpainted stripes in the center of the sheet.
- Darken the slightly dried drawing at the edges, make the colors more saturated. Some transitions can be made soft, smooth, while others, on the contrary, contrasting.
- At the bottom of the sheet, use a round and thin brush to depict a dark forest.
- Create a star pattern using the paint splashing method. Dip the brush in white gouache, then pull the bristles back and release. Repeat the action until you get the desired effect, but it is important not to overdo it.
Gouache paint is an ideal assistant for bringing to life the most diverse ideas of drawings, depicting the surrounding world in bright colors. Even beginning artists have opportunities for exciting creativity, mastering the technique of painting with paints, testing their talent in painting.
Video about gouache paintings
Landscape painting master class: