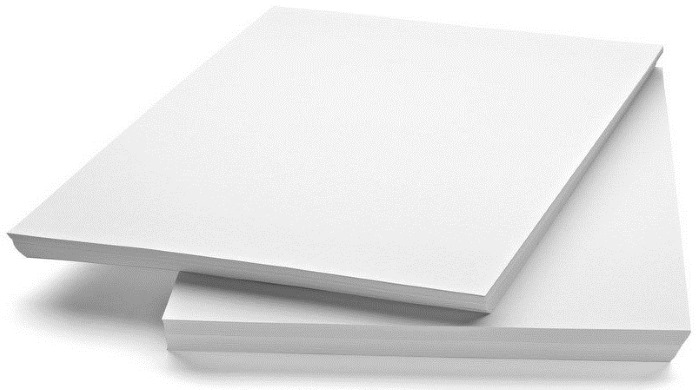
Watercolor paper, unlike regular paper, is characterized by high density in mass, but it is weakly glued. Due to this, this type of paper retains water well and allows you to achieve the effects of blurring and soft gradient. At the same time, the sheets are a little rough and unsmooth.
Sketchbooks are mainly made from paper sheets that are highly resistant to abrasion and medium density. Therefore, beginner artists and professionals can easily create any ideas for drawings.
Paper and accessories
When creating watercolor sketches, you can use colored pencils and regular paints.
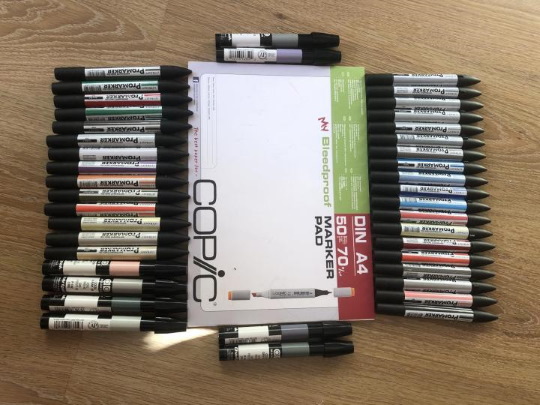
Additionally, the basic set should include the following accessories:
- the water tank is medium in size;
- slate pencils;
- watercolor pots;
- brushes of different sizes;
- eraser;
- disposable dry wipes or towel;
- thick paper sheets for watercolor paints or a sketchbook for drawing;
- if necessary, references that will give the artist something to focus on when creating a drawing.
There are a large number of sketchbooks for drawing on sale. They differ in the texture of the paper sheets, coloring, binding and format. When choosing a product, you need to consider your own preferences, as well as the characteristics of the material used for drawing.
When creating drawings with watercolors, it is recommended to choose sketchbooks with thicker sheets of paper. They are suitable for quick sketches and small watercolor drawings. Smooth sheets of paper are suitable for working with ink and pencils.
Also, when choosing a sketchbook, you need to pay attention to the presence of a spring, thanks to which the paper will not bend when opened, making the creative process much more comfortable.
Once you have completed the sketch, you should definitely draw all the elements of the drawing:
| Image details | How to highlight |
| Background | The background of the drawing is faintly visible through the palette of colors. Therefore, it is recommended to use a black marker to emphasize those areas where the most muted distant places are present. |
| Giving an image multiple accents | You can use a colored marker. Pastel shades are suitable for shading the background located in the image in the near perspective. |
| Creating a penumbra | To give the clouds a milky appearance, you need to make strokes from the center of the paper to the upper edge, gradually reducing the pressure on the marker. This will create vertical asymmetry and a penumbra. To simplify the work, it is best to use watercolor paint, since at the end of the stroke it begins to run out, leaving a pale color. |
| Drawing graphics | When using white for highlights, you need to choose a specific moment when the sun's rays will illuminate certain areas of the skyscrapers. |
| Detailing of objects | For this purpose, it is recommended to use wide marker tips. Convex and visible parts of the structures, as well as their outlines, are subject to detailing. Next, it is necessary to create volumetric effects, paying attention to dark shades. The latter should be superimposed on top of the hatching. |
| Adding freshness to the drawing | When applying a black marker on top of bright paint, it often shows through. Therefore, it is allowed to highlight the painted areas with a white and black felt-tip pen. |
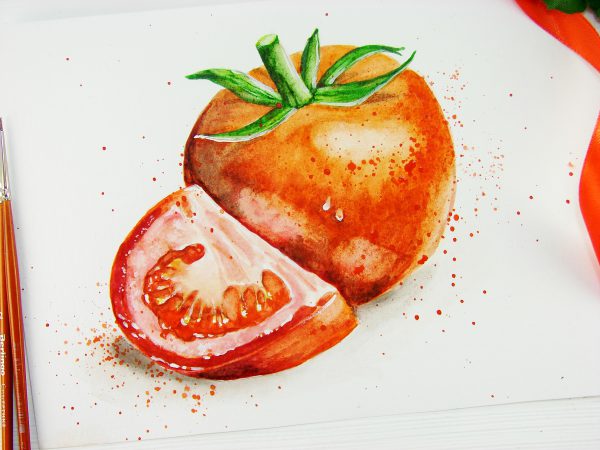
Vegetables in Watercolor
Watercolor sketchbook ideas should be light and simple. Fruits and vegetables are excellent subjects for sketching, as they are characterized by interesting coloring and structure, which a novice artist can transfer to a sheet of paper, conveying the realism of the objects.
Together with children, you can depict a ripe tomato. To work out the inner and outer parts of the fruit, it is recommended to create a composition of a small slice and a whole vegetable. Thanks to this, the image of the pulp with seeds will be better visible.
Step-by-step stages of creating a drawing:
- In the sketch, establish the main compositional strokes. In the middle, depict a whole vegetable in a circle, drawing an oblong stalk. In the foreground, near the whole fruit, depict a slice. Create a pattern of pulp and sepals near the stalk.
- Use an eraser to erase any extra strokes and begin drawing in color.
- Apply the base tone of the vegetables using red watercolor. Carefully work the pulp, leaving white veins near the bones and the stem. Shade the seeds with a light yellowish color.
- Paint the sepals and stalk with a greenish tone. Highlight the shadows with the second layer.
- Saturate the underpainting of the skin with a dense red pigment. Since the lighting of the drawing will fall on the right side, this part of the vegetable needs to be made much lighter.
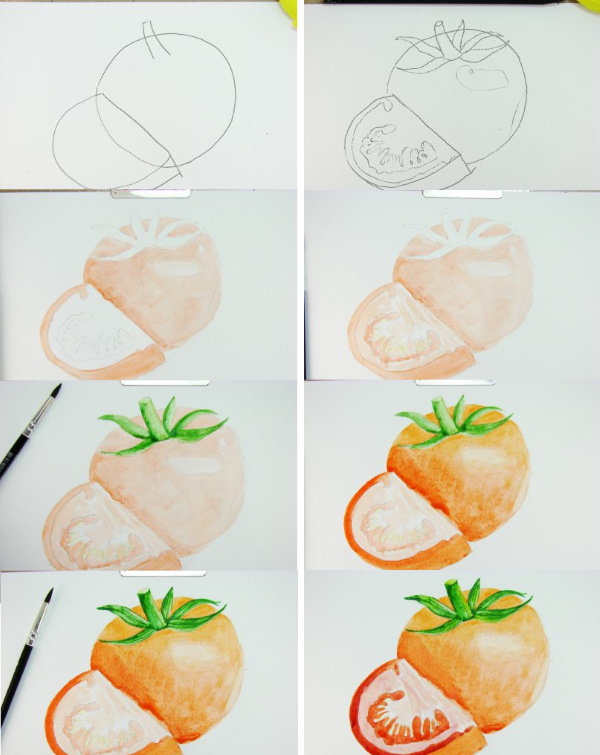
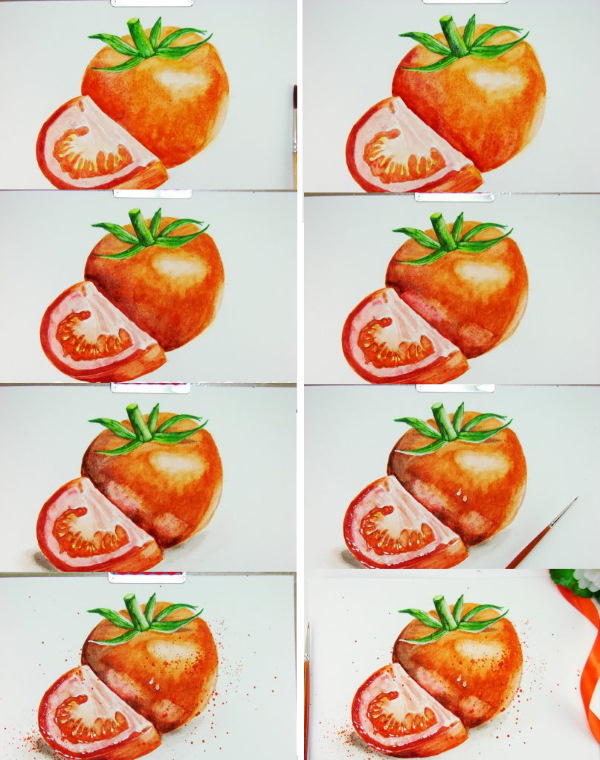
- When the sepals and stalk are dry, draw the usual texture.
- Saturate the pulp and color of the tomato with a mixture of reddish and dark red shades. Use the latter to additionally paint the core of the vegetable with a light layer under the skin. Fill the area near the skin with seeds with red pigment.
- Shade the dark left side of the whole fruit with a burgundy tone. While the pigment is not completely dry, wash out the light highlights.
- Create a falling floating shadow under the objects using a light brown shade, additionally highlighting the darkest areas on the vegetables.
- Use white watercolor paint to depict small highlights on a tomato slice. On the whole vegetable, highlight 2 small drops and work on the thin edges of the sepals.
- When finished, apply splashes of red watercolor to the surface of the sheet.
Mountain landscape
Watercolor drawing ideas allow you to create a beautiful and fascinating mountain landscape on a sheet of paper. Not only a professional artist, but also a novice amateur can cope with such a composition theme. To do this, it is enough to strictly follow the step-by-step instructions.
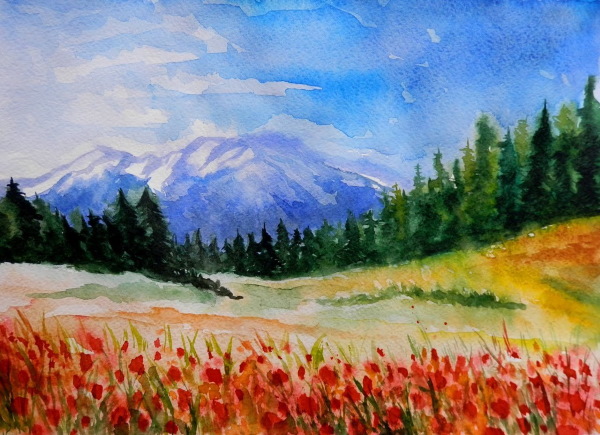
You can paint a mountain landscape with watercolors by following these steps:
- Soak a sheet of watercolor paper in clean water.
- Take blue pigment on the brush and paint the sky with it. To achieve a more natural look of this part of the drawing, it is recommended to take more material on the brush and mix it with water more often.
- Load your brush with light brown watercolor and mark the upper border of the clearing.
- Paint the meadow with dark blue paint. Use a similar pigment to refine the base of the mountains.
- At the foot of the mountain, along the entire length of the sheet, mark the trees with green watercolors.
- Large trees should be painted with a darker shade of paint. The base and edges of the mountains should be treated with a similar color.
- On the right side of the sheet, draw the plants and draw the details located in the clearing with yellow-orange and green-brown paint.
- On the middle background, depict many different green trees.
- On the slopes, draw snowy areas using a thin brush and blue watercolor.
- Apply the shadow of the trees to the clearing, cover the lower part with ochre. Put liquid paint of a red shade on the brush and, lightly tapping the tool, create flowers on the clearing.
- Add green grass to some flowers, cover the sky with an additional layer of greenish tint.
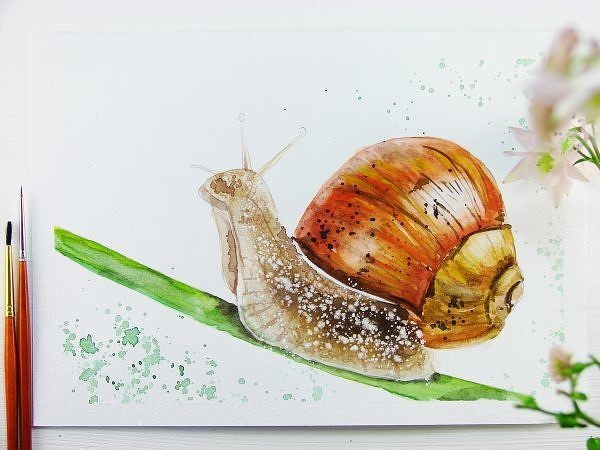
Snail
Watercolor painting ideas can be composed in a natural theme. The composition can include any fauna inhabitants. A snail is a plot in which simple details and a light color scheme participate. To simplify the drawing process, you can create a light composition by depicting a snail as the main object and a thin green stem of a plant.
The steps you will need to follow to create the drawing are described below:
- To create a sketch, start by marking the stem by drawing its outline with two diagonal strokes.
- Draw the body of the mollusk and the outline of the raised head.
- Draw a shell above the body, having first marked the slope with a line.
- Draw 2 small and 2 large horns on the head.
- Clean up the sketch with an eraser and start filling it with different shades.
- Treat the snail shell with clean water. Apply pigment in the following shades: brick, dark yellow and brown.
- Leave highlights on each turn of the shell to add volume.
- Treat the mollusk body and the shell with water. Apply light yellow paint.
- Fill the outlined stem with light green watercolor, and apply a shadow under the snail using light brown.
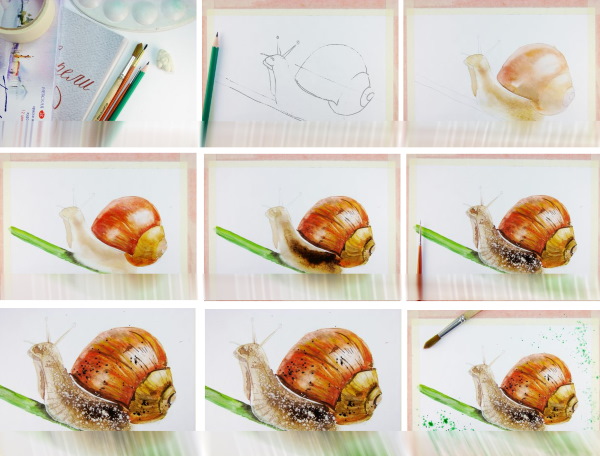
- Finish the top turn of the shell with a mixture of dark yellow and brick pigment.
- Paint the next turn dark yellow, shade the lower part with reddish ocher.
- Highlight the outer remaining turns with a translucent brownish shade.
- Using a thin brush and brown paint, recreate the texture and shadows on the shell.
- Fill the shaded part of the mollusk's body with brown.
- Before the paint dries, apply small splashes of white watercolor to the snail's body.
- Use a brush to draw thin veins of texture, and use light brown to mark the shadow on the stem.
- Finish the texture on the sink with deep black pigment, fill the white background with green splashes.
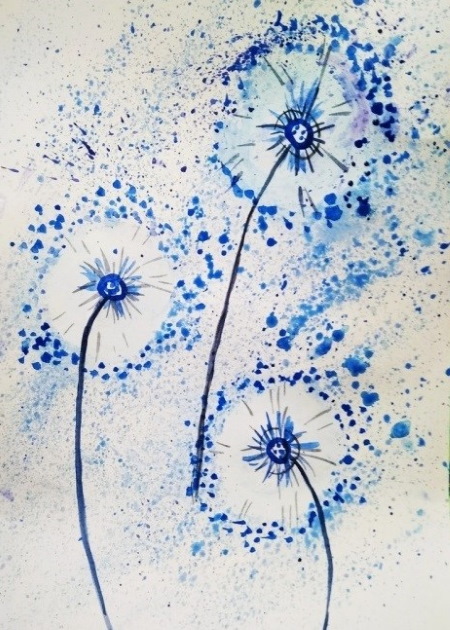
Flowers
Watercolor painting ideas for working with children should be simple and exclude complex elements. You can depict flowers using the splash technique. Dandelions are the fastest. To draw, it is enough to prepare paints, a sheet of paper and cotton pads.
You can create a flower drawing using watercolors by following these steps:
- Place 3 cotton pads on a white sheet of paper.
- Add blue paint and a small amount of water to the palette and mix everything thoroughly.
- Spray the entire sheet of paper with a brush, previously filled with paint, lightly tapping it with your finger.
- Remove the cotton pads from the surface of the paper, make the remaining white circles slightly blue. Use a clean cotton pad to lightly blot the edges of the circles and rub the blue drops around the circle.
- Dip another thin brush into dark paint to depict the core of the dandelions.
- Using the tip of a thin brush, draw the thin stems of the plant.
- Additionally, add a few drops of paint around the dandelion using a thin brush.
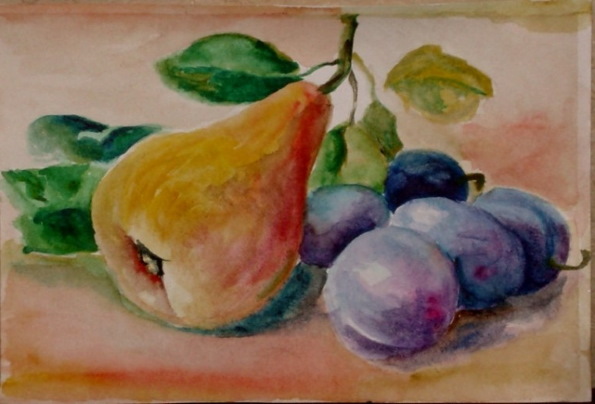
Still life
You can make a still life with watercolors, depicting a pear with plums on canvas. This idea for a sketchbook drawing will not cause any particular difficulties for beginning artists. At the same time, you will need to prepare a minimal set of accessories.
To draw a still life on your own, you need to follow these steps:
- Using a simple pencil, draw the outline of a pear in the form of a simple light bulb.
- Draw a tail with several leaves to the narrow part of the image.
- Next to the pear, add 6 plums, placed close to each other, in a mound.
- Paint the drawing in layers using paint of the following shades: reddish, orange and yellowish.
- On the underside of the pear, highlight the darker side and draw a black dot at the base.
- Paint the plums with a mixture of blue and lilac paint. Paint the foliage with green shades, trying to recreate the shadows as close to the pear as possible.
- Fill in the stems on the pear, plums and the branches leading to the foliage.
- Once the composition shades are created, display the transitions and shadow.
- Express the side and the black dot as much as possible, carefully draw the veins on the leaves, and recreate the depressions and shadows on the plums.
- Repeat all the colors with pigment, especially the plums, since they are located next to each other and need to be visually separated from each other. Using dark paint, carefully highlight the areas between the plums.
- Using grey or light purple watercolor, paint the background, paying attention to the shadows located at the base of the fruits.
At the end of the work, it is recommended to go over the contour of all the lines with a black liner so that the created still life sparkles with new colors and looks really bright.
Hedgehog
The drawing can be created together with children, as it is very simple to design and at the same time quite interesting.
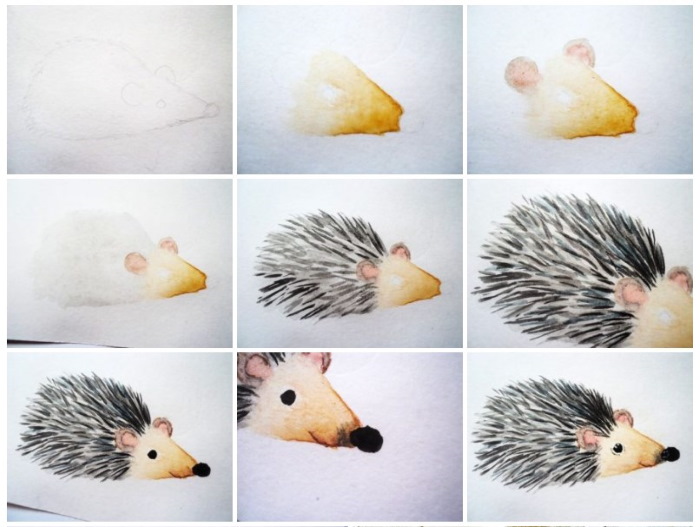
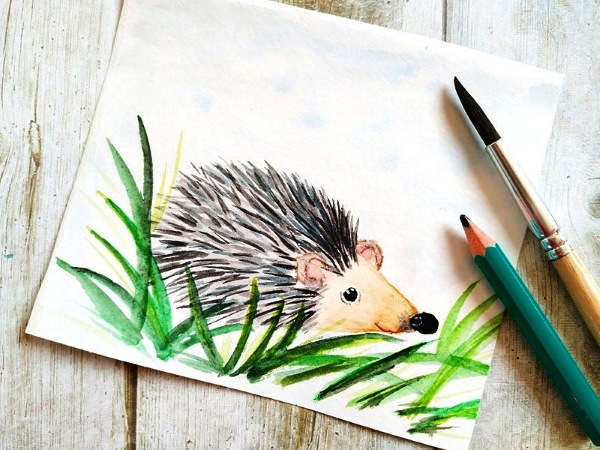
By following these steps, you can create a composition:
- Use a simple pencil to draw the outline of the hedgehog.
- Dilute light brown paint with water and apply to the surface of the sketch. Paint from the tip of the muzzle to the needles, making the shade lighter closer to the animal's body.
- Add a small amount of red watercolor to the pigment to give it a pinkish tint, and paint the inside of the ears with this mixture. Highlight the edges of the ears with gray watercolor.
- When the paint dries, outline the ears again. Use grey paint to highlight their corners.
- Add a little black watercolor to the gray shade and apply needles to the canvas.
- Paint the nose and eye with black paint. Make a shadow near the nose with brown paint and draw a smile.
- Using a thin brush and black paint, outline the eyelids near the eye, and draw a few dots in a circle on the nose with white watercolor.
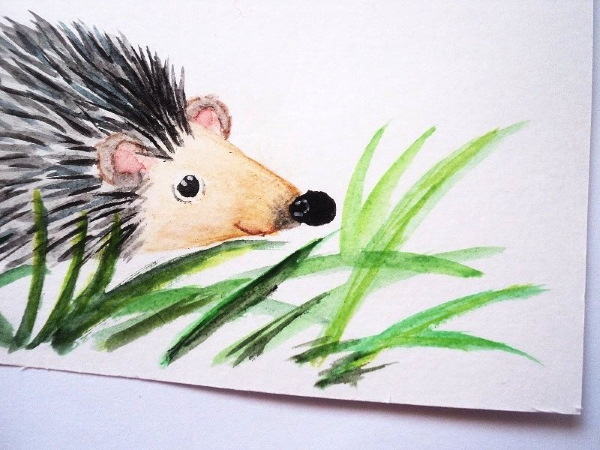
- When the drawing is well dried, use green paint to depict the grass, alternating light and dark shades.
Useful tips
Useful tips that will be useful for beginning artists when creating drawings in a sketchbook:
- Beginning artists need to draw no more than 15 minutes a day., which allows you to better adapt to working in a sketchbook.

- It is necessary to choose a drawing album that will match the tool you are using. There are a large number of different sketchbooks on sale, designed for working with different materials. Therefore, you can choose the album that is more suitable for a certain drawing technique.
- Beginners initially need to purchase basic materials in the form of watercolors, erasers, pencils, a drawing album or a sketchbook. In the future, with improvement in this direction, you can buy many accessories of excellent quality.
- Putting dates. When creating a new sketchbook, it is recommended to write the initial date on the cover. This will make it much easier to find a particular work after several years.
- It is necessary to hold your hand correctly. Most people hold the pencil as if they were writing when sketching. However, this is considered a serious mistake because it is undesirable to use the muscles used in writing. When creating different images, the position of the hands should always be different.
On a sketchbook, you can use watercolors to bring to life any idea that can be presented as an unusual and beautiful drawing. For copying, you can use absolutely any images that you like best. In this case, you can copy your own photo, placing it on the main page of the notebook.
Video about drawing
Watercolor Painting Ideas: