Lions are often the main characters of cartoons and comics. Artists have drawn them in different styles for centuries. Sometimes, to convey the greatness and power of this predator, it is enough to depict its head with a lush mane.
Lion head pencil drawing for kids
Leo is a large predatory animal, which symbolizes strength, courage, wisdom and justice. Its image is often used in heraldry.
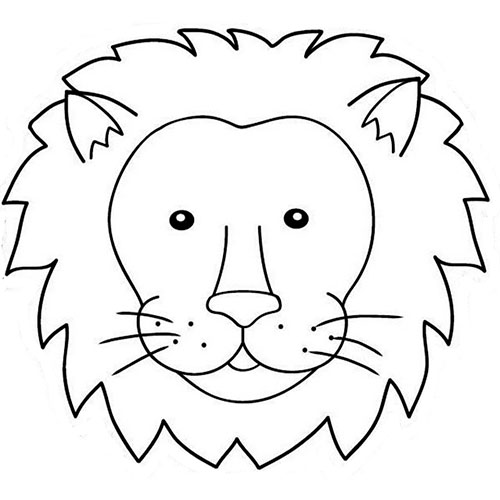
Simple options for drawing a lion's head are great for children. In this case, the lion will not be very realistic, but its main characteristics will be clearly visible. However, the main thing is that the child will understand that he drew it himself and feel proud and happy.
The drawing process can be carried out in the following sequence:
- Draw a small equilateral triangle in the center of a sheet of paper.
- Draw the second triangle, which should be located under the first one. Its base will be the bottom line of the first triangle. The second triangle is inverted - its top is located at the bottom. The drawn triangles are the lion's nose.
- Draw the rest of the facial details near the nose. The eyes, represented by small dots, are located near the top of the first triangle. Above each eye, there is one short stroke. These will be the eyebrows.
- Draw 2 C-shaped arc lines connected to each other under the lower triangle. This will represent the mouth. The result should look like a smile. All these details of the lion's muzzle should be enclosed in a circle. This will be the outline of the head.
- Draw the ears, each of which is represented by a semicircle.
- Below the head outline, draw the neck, represented by a pair of parallel vertical lines. Don't make them too straight: they should be slightly rounded.
- Add a chin to the lion. It is located at the bottom, under the round outline of the head, and has the shape of an upside-down letter "P".
- Draw the ears in detail. Draw one small circle in each to form ear holes.
- Draw whiskers that grow from the area between the mouth and nose. Here, you should first put several dots, thereby indicating the places where each whisker will start. There should be at least 2 dots on the left and right. Then, you can draw lines from each dot. These will be whiskers. From the dots on the right side of the lion's muzzle, the whiskers go to the right, and from the dots on the left side, respectively, to the left.
- Draw the lion's mane. It is located around the head and is represented by a zigzag line.
You can leave the drawing unpainted, or you can add color to it.
For this you will need 3 colored pencils:
- orange;
- pink;
- black (instead of it, you can use a simple pencil, which was used to draw the outline of the drawing).
Most of the drawing is painted orange:
- lion's mane;
- his neck;
- head;
- upper part of the nose (upper triangle);
- edges of the ears.
It is important to keep in mind that since this is wool, you should not paint everything too densely; you can leave small white areas unpainted.
The ear holes should be made pink, and black is used to color the bottom of the nose.
In profile
The head of a lion (the profile drawing is almost no different in complexity from the frontal image) in profile is done as follows:
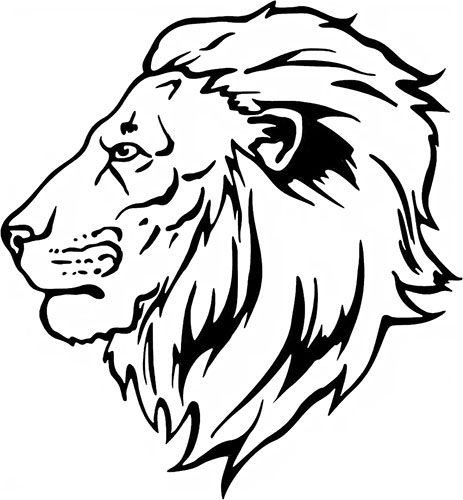
- Start with a circle and the outermost line that runs along the left side of the circle and extends slightly beyond it. This line will become the nose.
- Mark the location of the main parts of the head. In particular, an arc line is drawn at the top, on which the ears will be located, and a little lower - the line of the eyes.
- Draw the ears, each of which will be represented by a semicircle. The left ear is slightly larger, since it is closer to the viewer.
- To the left of the main circle, outline the mouth.
- Draw the lines of the neck and mark the place for the cheeks.
- Using many lines starting from the top of the head and cheeks, depict the lion's mane.
- Add eyes, mustache, and draw the nose and mouth in detail.
- Use the eraser to remove any unnecessary elements.
Black and white drawing
You can draw a lion's head using:
- With a simple pencil. It will be needed to mark the contours of the drawing and perform shading.
- With an eraser. They will need to remove extra lines that will inevitably appear during work.
- Patience. This is especially important if the work is being done by a child.
In order to see a beautiful drawing of a lion's head as a result, you must follow the following instructions:
| No. | Stage | Description |
| 1 | Drawing a nose | The nose is located approximately in the center of the paper sheet. It should be represented by a small horizontally elongated oval. You can immediately color its lower part with a pencil. The upper part remains uncolored: this creates a glare on the surface of the nose. From the center of the lower part of the oval, which represents the lion's nose, draw symmetrical arced lines. One should be located on the right, the other on the left. Both should be rounded so that their ends eventually point upwards. These lines should be approximately the same size. |
| 2 | Drawing a mouth | It should be represented by a semicircle located under the muzzle. |
| 3 | Drawing the eyes | First, draw a small arc line above the nose, a few centimeters away from it. Place one eye to the left and one to the right of this line. Each of them should be represented by a circle. The eyes should be shaded immediately with a pencil, leaving the areas where the pupils are not painted. As a result, the lion's eyes will be black, and the pupils will be white. |
| 4 | Drawing the outline of the head | The contour line of the head starts from the muzzle on the left, goes up, smoothly rounding first to the left, then to the right and ends at the top above the eyes. Another contour line should be drawn on the right side of the drawing according to the same principle. It should be symmetrical to the first and start from the muzzle on the right, go up, smoothly rounding first to the right, then to the left. It should end at the same point where the previously drawn contour line ends. |
| 5 | Drawing eyebrows | They should be represented as a pair of S-shaped lines. Each line is located near an eye. The lion's right eyebrow (the one on the left in the picture) is located slightly above and to the right of the right eye. The left eyebrow (the one on the right in the picture) is located slightly above and to the left of the left eye. |
| 6 | Drawing the mane | The lush mane is located around the head. First, you can draw a large circle, and then draw the clumps of fur. In this case, you should remember this feature: the clumps of fur at the top are short, and at the bottom they are longer. |
| 7 | Drawing ears | They should "look out" from under the mane. Each of them can be represented by a pair of arced lines. At the same time, clumps of wool should also be depicted under each ear. |
| 8 | Drawing bangs | It should be located on the lion's forehead. It is done with a pair of arced lines. They start from the point on the forehead where both arced contour lines connect and end a few cm above the eyes. |
| 9 | Add a mustache | Lions have many small black dots on their muzzles, where the whiskers grow from. First of all, these dots should be depicted. They are not located chaotically, as it may seem at first, but in horizontal rows. Each row should have from three to seven dots on the right side of the muzzle and the same number of dots on the left side of the muzzle.
Total 4 rows:
When drawing the whiskers themselves, which start from these points, remember that the lines should be thicker at the base and become thinner as they move away from their starting point. It is also necessary to make the whiskers of different lengths. Do not forget about bends in different directions. This will add realism to the drawing. |
Once the mustache is drawn, you can admire the finished drawing. But it will be black and white.
If you want to add some colors to it, you can use the following shades:
- brown;
- yellow;
- orange.
When coloring, it is necessary to remember: the lion's muzzle is lighter than the mane. You can conduct some experiments with shades. In this case, the pencil drawing will act as a coloring book.
Color
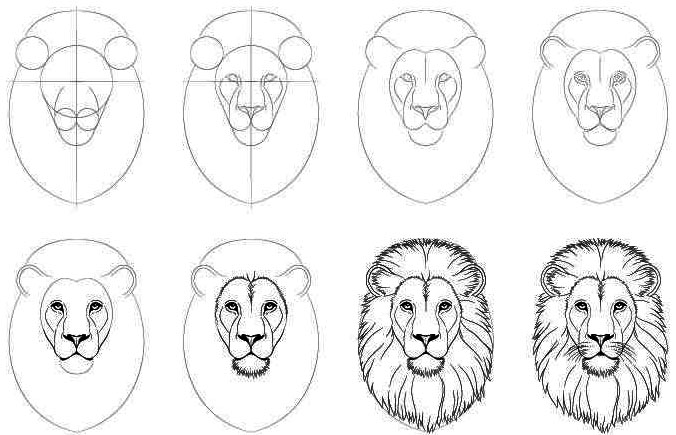
The lion's head (the drawing can be either colored or black and white) in the colored version is done as follows:
- Draw an oval. Its edges should be slightly jagged to create the appearance of a luxurious lion's mane.
- Make a sketch in the oval. There should be a wide nose approximately in the center. Also, you should schematically depict the eyes and ears. Each of the ears should be represented by an arc line.
- Use the eraser to remove unnecessary elements.
- Work on the lower part of the head. It is necessary to clearly outline the chin line and depict the mouth. To simplify, you can use light intersecting lines. They will help you avoid making mistakes when drawing the nose and mouth. Then these auxiliary lines can be removed with an eraser.
- Draw the mustache. It will be several lines. The dots should indicate the places where they grow.
- Work with paints. You should use brown, yellow and white colors of different shades. It is important not to allow the appearance of clear distinctions in colors. To do this, you should make light small strokes.
Graphics
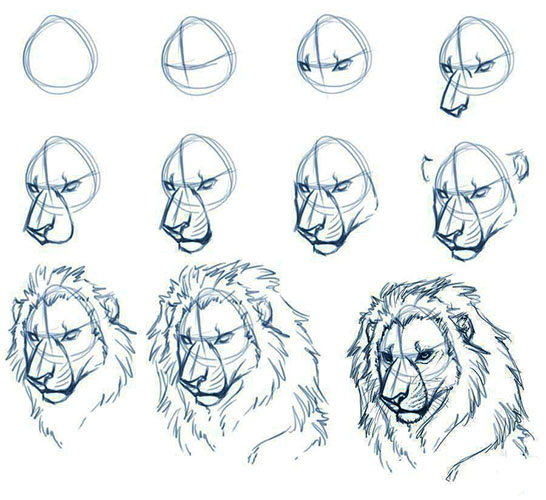
Drawing in a graphic style is suitable for beginners.
To draw a lion you need to do the following:
- Draw 2 parallel vertical lines. At the top, the lines are connected by a horizontal line, and at the bottom, they change their direction by 45° and rush towards each other. After crossing each other, they do not end, but each goes some distance in its own direction. These will be auxiliary lines that are designed to simplify the subsequent stages of drawing the lion's head.
- Draw the eyes and muzzle of the lion. The eyes are located to the left of the left vertical line and to the right of the right vertical line. The muzzle is drawn using 3 arced lines located around the X-shaped connection at the bottom.
- Make a round outline of the head. At the top, draw the ears, represented by semicircles.
- Draw the mane, remembering that the fur at the bottom is longer than the fur at the top. The main thing when drawing the mane is to correctly depict the "prickly" lumps of fur.
- Remove unnecessary lines and use the final touches to give the lion's head a more realistic look.
Anime
The lion can be presented in anime style. At first it may seem that such a drawing is difficult to do, but in fact it is not difficult.
The work takes place in the following stages:
- Draw a pair of circles of different sizes. The smaller one is located inside the larger one.
- Add guide lines to the face. Using these lines, sketch out the eyes and open mouth.
- Draw the mane, add ears and eyes. Try to make the mane "prickly" and "needle-like". The ears should be represented as semicircles, and the eyes of an anime lion should be narrowed.
- Outline the fangs and the shape of the nose with wrinkles.
- Give the lion's face a realistic shape, adding wrinkles between the eyes, and finish working on the fangs.
- To highlight the inner part of the ears, draw separate lines inside them.
- To wrinkle the nose, add a few lines to it. Each tooth should be drawn in the open mouth.
Cartoon drawing
Lion head (a cartoon character drawing that children will especially enjoy) Alexa from the Madagascar cartoon can be done if you follow these steps:
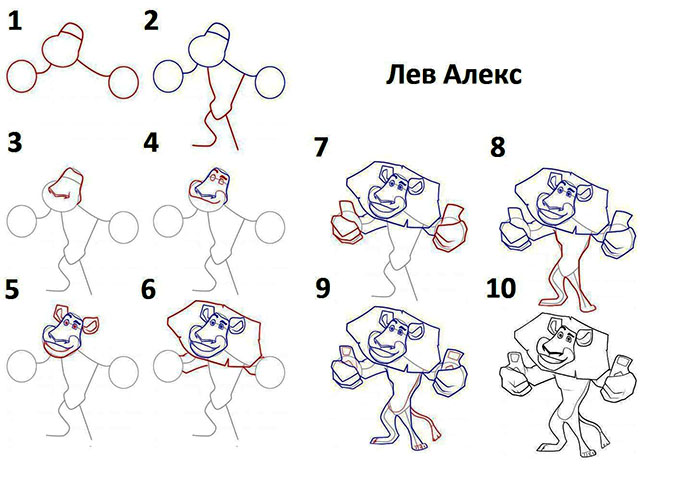
- Create the outline of the head.
- Draw Alex's ears.
- Finish drawing the next elements of the face - the nose and the right eye.
- Draw the upper eye, mouth, and upper teeth in it.
- Move to the bottom teeth and add the tongue.
- Using zigzag lines, draw Alex's lush mane around his head.
- Colour the image. The colours used here are mainly orange and brown.
Head with crown
Since the lion is the king of beasts, it would be a good idea to depict a crown on his head. First, draw the head itself, and then add the symbol of power. The crown can have different shapes, but beginners should limit themselves to a simple option.
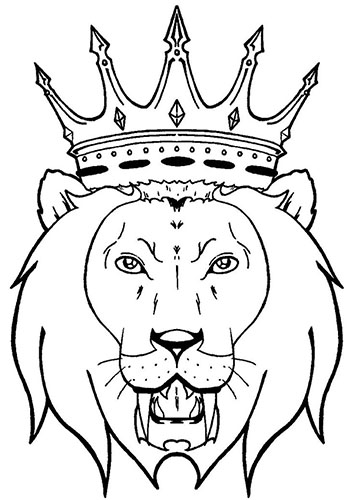
For example, you can do the following:
- Draw a couple of horizontal lines above the lion's head.
- Between these lines there should be small circles and diamonds in a row.
- Move to the top of the crown. Here, several triangles are drawn, connected to each other at the base. At the top of each triangle is a small circle.
Head of a roaring lion
One of the lion's favorite activities is roaring. In this simple way, he shows others his unrivaled greatness.
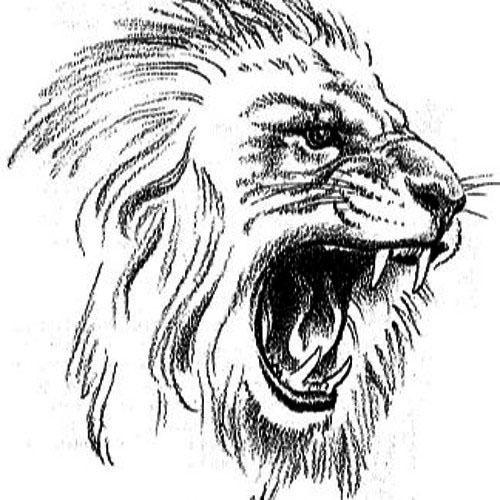
The growling head of the "king of beasts" in profile can be depicted by following these steps:
- Draw a nose and draw a curved line underneath it to represent an open mouth.
- Draw a face with a closed eye.
- Draw an ear.
- Increase the thickness of the open mouth, draw teeth and tongue here.
- Draw characteristic lines near the mouth that appear on the lion's face when it roars.
- Mark the points from which the whiskers grow.
- Draw the outline of the neck.
- Finish drawing the back line.
Drawing a lion's head is not difficult. The main thing is to remember its main features - what the mane looks like, where the eyes, nose, and whiskers are located. For work, you will need a minimum of tools and materials - a simple pencil, a sheet of paper, and an eraser. If you decide to color the drawing, you will also need colored pencils or paints.
Video about lion head drawing
Master class on drawing a cartoon lion head: