In ancient times, Dymkovo toys were often used to decorate the home. Real craftsmen made them from clay and applied various bright paints on top. These products are so beautiful and interesting that they are still made today. It is best to start making them yourself from plasticine.
What is a Dymkovo toy?
Dymkovo plasticine toy is the easiest way to create a souvenir, which is suitable for a beginner craftsman. Not only an adult, but also a child can cope with such a task. The product can have different shapes and sizes.

For example, you can sculpt from plasticine:
- whistles;
- animals;
- human figure;
- rattles for babies;
- decorative figurines.
Craftsmen who follow centuries-old traditions make mainly birds, domestic animals, beautiful women or men of the original Slavic appearance.
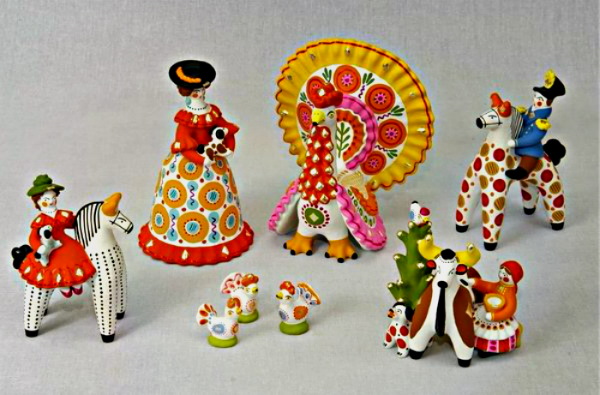
However, looking at the results of the creative work of modern masters, one can see more complex compositions: for example, men sitting on horses or women holding bread in their hands, greeting guests.
When forming Dymkovo toys, craftsmen use a simple pattern. Bright colors are used in small quantities for their painting.
If we talk only about traditional products, then their background must certainly remain white. However, many modern toys may violate this rule. As for the ornaments that are applied to the surface of the product, this is often a smooth painting, combined with small geometric patterns.
Tools and materials
Dymkovo toys can be created after preparing the necessary materials and tools.
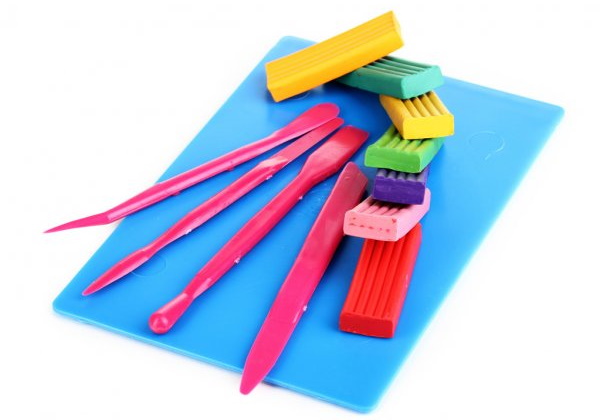
Plasticine
It will be the main material. Most of all, you will need white, because the background of the classic Dymkovo figurines is exactly this color. The base of the toy is made of white plasticine, and then other colors are applied to the surface, mainly those that are the brightest.
Namely:
- blue;
- red;
- yellow;
- orange;
- green.
Stacks
Stacks will help to divide pieces of plasticine into parts of the required size. As a rule, these simple tools are included in almost all sets of plasticine intended for children's creativity. Special stacks have sharpened and rounded edges. They can also have the shape of a spatula or a loop.
With the help of such devices you can:
- remove excess plasticine;
- make cuts;
- work out the details and texture.
If for one reason or another there are no stacks, you can use similar improvised means.
Board
The board on which the work will be done must be special. It will help keep the table clean. There are boards that are designed for sculpting figures. If the toy is no more than 20 cm in size, then a board with sides of 22 by 35 cm will be suitable for its manufacture.
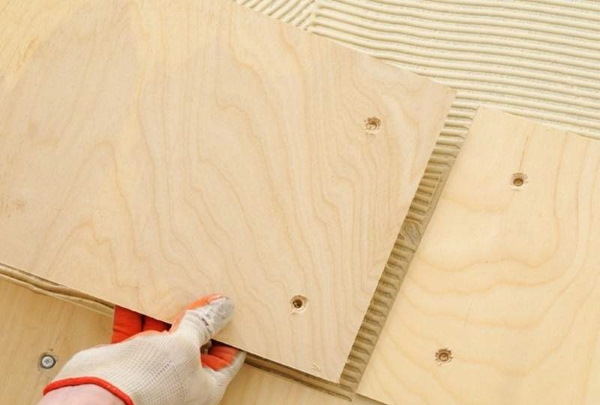
If you don’t have a special board for work, you can use a wooden board or a wide plastic palette.
Other materials
In addition to plasticine, you will need additional materials that will help improve the appearance of the finished figurines and make them more similar to real clay Dymkovo toys.
Such materials include:
- paints;
- primer;
- protective varnish.
Master classes
Once the materials are prepared, you can choose any version of the toy and make it, following the instructions.
Rooster
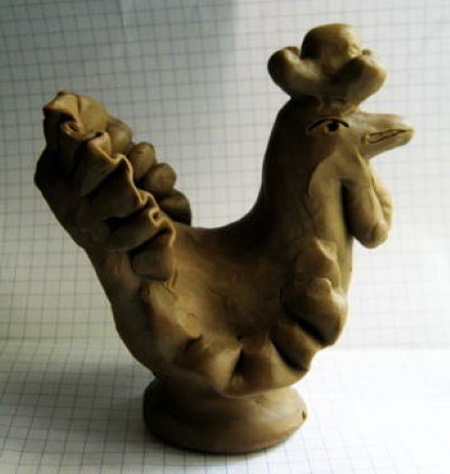
The Dymkovo plasticine toy can be represented by a bird figurine. The most striking example is a rooster.
To make such a figure you need to follow these steps:
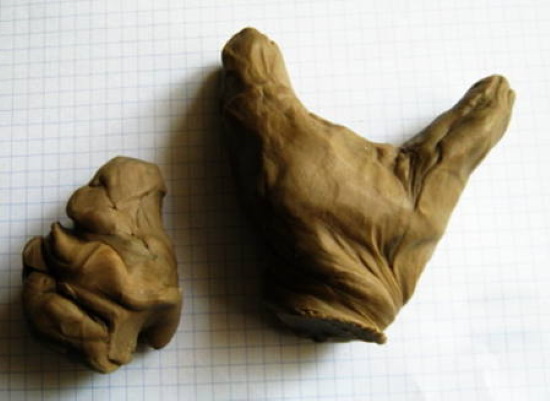
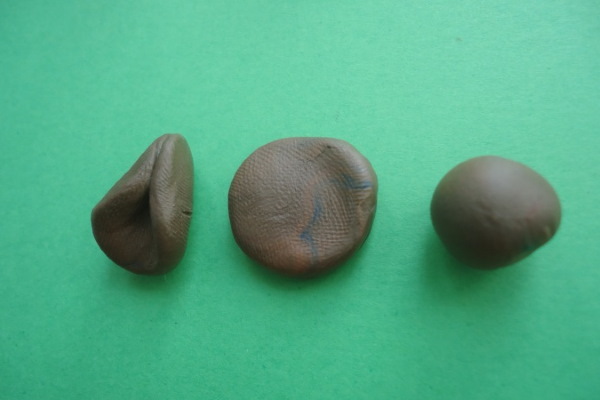
| Stage | Description |
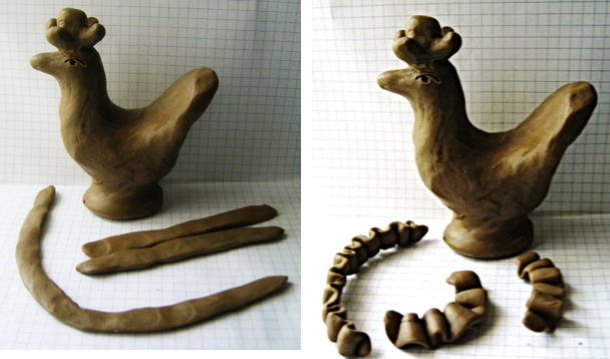
| 1 | Take a white piece of plasticine and knead it thoroughly in your palms. When the material becomes soft enough, you can shape it into a rooster. This is easy if you have an example in front of you. You need to make 3 figures of different sizes and connect them:
|
| 2 | Take red plasticine and mold wings from it. The rooster has 2 of them, so the available red piece of plasticine must be divided in half. First, each of the resulting pieces is shaped into balls, and then they are both rolled out so that blanks are formed in the form of ovals, but not straight ones, but slightly curved ones |
| 3 | Along the top edge of the parts obtained in the previous step, create small folds and attach them in this form to the main white part of the toy.
|
| 4 | Make the most beautiful part of the rooster's head - the comb. Red plasticine is used for this.
The process of making a scallop is as follows:
|
| 5 | Form and attach the beak to the front of the head, and also attach a pair of eyes:
|

Duck
Another domestic bird that is often made in the Dymkovo toy style.
The work on creating the duck will take place in the following stages:
- From a yellow piece of plasticine, mold 2 figures: a fairly voluminous oval for the body of the waterfowl and a small ball, which will eventually turn into the head. Both parts must be carefully connected to each other.
- Take a piece of brown plasticine and mold duck legs from it. From the brown mass you take, pinch off a small number of small pieces. They are twisted into thin threads, and then the resulting elements are attached to the yellow form prepared in stage 1.
- Similarly to brown plasticine, use red to create the beak. This part should have the shape of a small cone.

- Using white and black pieces of plasticine, make eyes for the bird.
- After connecting all the elements into a single toy, take bright paints and, using a thin brush, apply them to the surface to create simple patterns.
You can make a plasticine duck without paws. However, without them the bird will lose its stability. Therefore, instead of them you will have to make a small stand from a brown piece of plasticine and attach it to the bottom of the main figure.
Turkey
Dymkovo toy makers cannot ignore this bird. Gorgeous turkey tails can be made from clay with subsequent application of bright colors. For beginners, plasticine is suitable. The result will be a beautiful product.
The Dymkovo plasticine toy in the form of a turkey will go through the following stages:
| Stage | Description |
| 1 | Form the base using white plasticine. |
| 2 | Form the main parts from well-kneaded plasticine mass. There will be 5 of them in total:
When creating the 5 main parts of the turkey, it is important to remember that both wings and the tail should have a rounded pattern along the edges. |
| 3 | Make a comb and beard. Red plasticine is used for this. At this stage, another small but very important detail of the head is created – the beak. It should be made of yellow plasticine. |
| 4 | Proceed to painting. Using blue, yellow and red paints, you can create a beautiful pattern. When applying paints to the surface of the turkey's body, remember that the patterns you create should not be too complex. You should try to make them simpler. This way, the product will look more like a Dymkovo toy.
Often the tail and both wings are covered with brightly colored designs. |
| 5 | Treat the product with a transparent protective varnish. This will give the toy a beautiful shine. |
Young lady
When collecting Dymkovo toys, it is rare to do without a young lady, presented in a fluffy skirt. At first, it may seem that such a product is more difficult to make than the birds discussed above. However, in reality, making a young lady is a simple job. The main thing is to follow the recommendations of those who have experience in molding Dymkovo toys from plasticine.
The work takes place in the following stages:
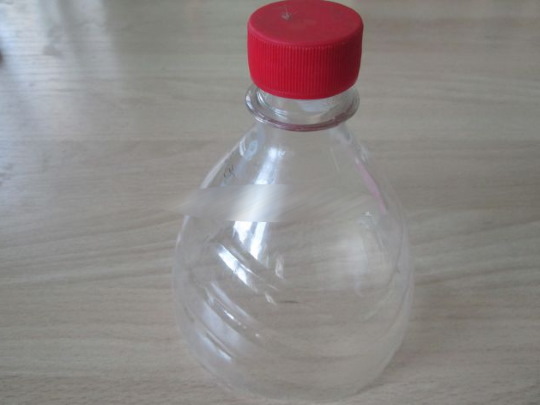
- Start with making the skirt, because it is the largest part of the entire product. To make the lady's skirt beautiful and neat, experienced craftsmen advise using a frame, which can be the upper part of an ordinary plastic bottle.
- You need to stick plasticine on this frame, and the layer thickness should be small - a few millimeters. As a result, the lady's body is formed. This detail can also act as a support for attaching the following elements.
- Prepare the next element – the head, which is formed in the form of a ball from white plasticine. In other words, the head is simply installed on the neck of a bottle covered with plasticine.
- Proceed to making the arms. The arms should be long, rolled out and slightly rounded pieces of plasticine. They are attached to the upper part of the body.

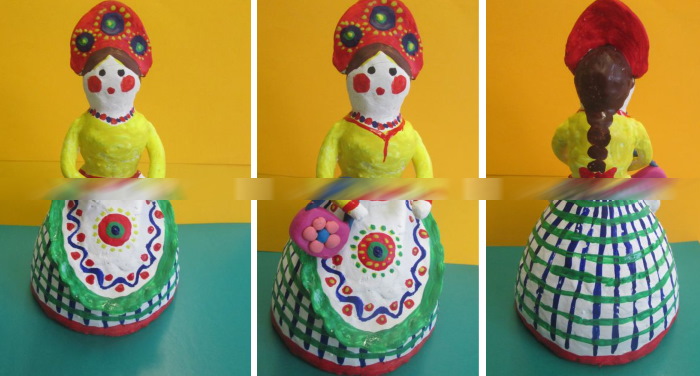
- Create hair and headdress. Hair is a braid made from 2 pieces of plasticine rolled into long strands. It should encircle the entire head.
- The headdress, which should be located above the braid, is made as follows: a crescent is made from plasticine, then this part is slightly bent so that it becomes slightly wavy. The resulting kokoshnik is pressed to the woman's head. All the joints must be carefully ironed with fingers and ultimately form volume.
- Start painting. In most cases, 2-3 bright colors will be enough. They are applied to a fluffy skirt, creating beautiful but simple patterns.
- It is important to remember the order of applying the paint: from top to bottom (the only exception is the headdress). First, the hair is designed, then the eyebrows, eyes, cheeks, mouth. After that, you can add color to the headdress. Then the drawing is applied to the clothes.
- If necessary, complement the figure. This can be some object in the woman's hands. For example, a wide plate with pastries, as if demonstrating the generosity of the soul and hospitality of the Russian woman. Also, the peasant woman can have buckets or a small child in her hands.
- Cover the finished product with primer.
Horse
Horses often appear in Dymkovo compositions. Therefore, anyone who has decided to devote some of their time to making such toys should consider it their duty to create a horse. The statuette that will result from these efforts will delight with its beauty.
The work takes place in the following stages:
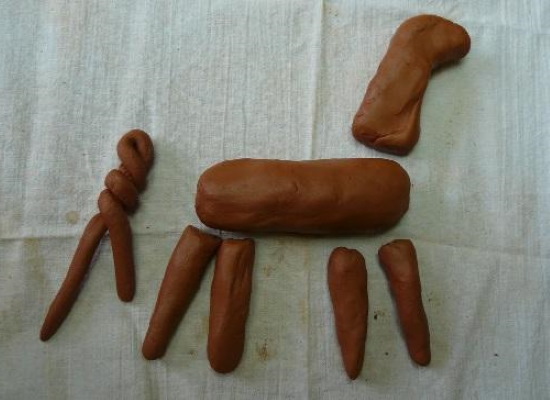
- Prepare the base. In this case, it will be white. The piece of plasticine should be divided into 7 parts of different sizes.
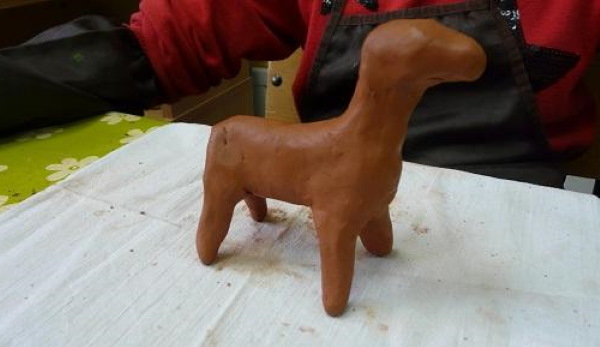
- The largest part will be cylindrical and will represent the animal's body. Four limbs of the same size should be attached to it. Each of them should be shaped like a cone, the width of which increases downwards. And 2 more parts - the head and neck. They should be shaped like cones. It is best to mold them from a bent strip of plasticine.
- Create the ears, which should also have a conical shape.
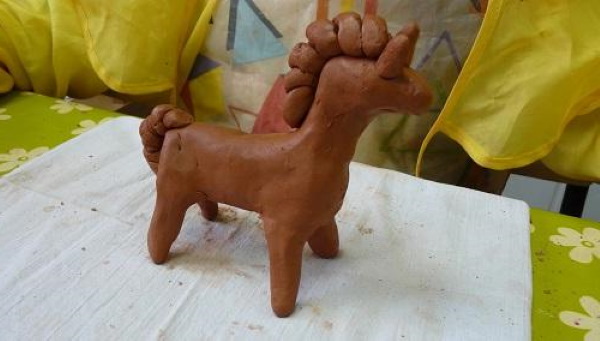
- Take brown plasticine and make a mane. It will consist of 2 intertwined strands. They need to be connected into a single closed ring and attached to a white base.
- From brown plasticine create a tail that will look like a curved pyramid.
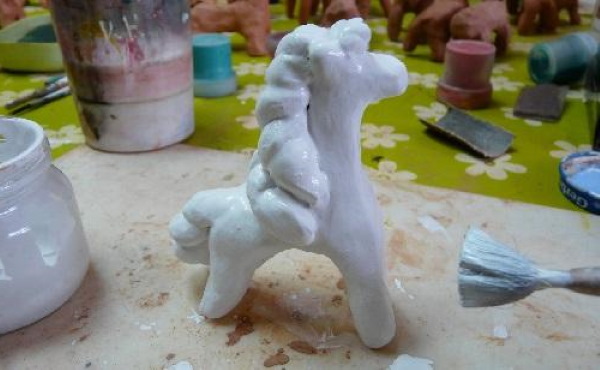
- When the horse figure itself is done, you can start painting it, using gouache. The paint should be white. It should first be diluted with PVA glue in a 1:1 ratio.
- After treating the toy with paint, you need to wait until the applied layer dries completely. Then start applying patterns with acrylic compounds. It is important to remember the main rule that applies to all Dymkovo toys: the elements of the applied patterns should be bright, but simple.
- It will be enough to use simple circles, diamonds, dots. As for the color of paint, yellow, orange, red, golden will be best.
- After finishing the work with paints, apply a transparent varnish to the surface of the finished product to protect it. It will perform not only a practical but also an aesthetic function, giving the toy a shine.
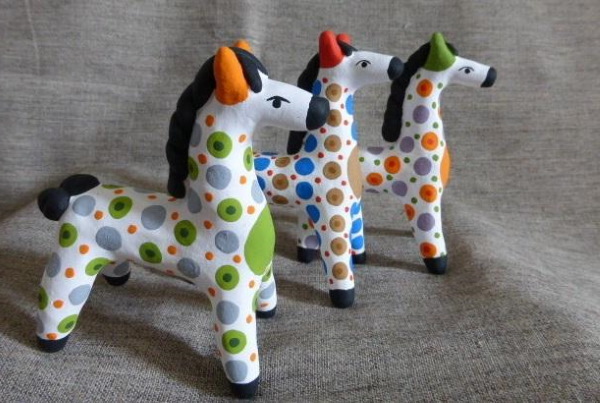
Goat
The Dymkovo plasticine toy in the form of a goat is created similarly to the previous versions.
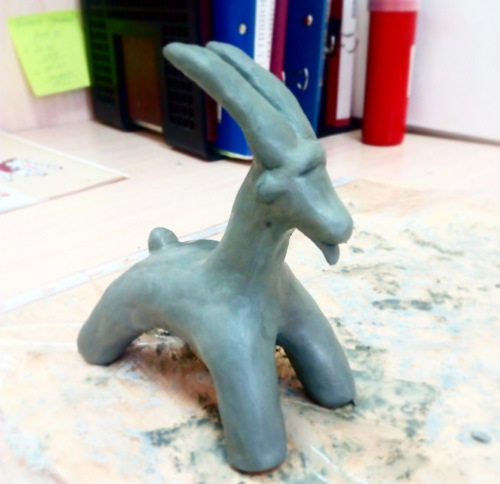
The stages of creation are as follows:
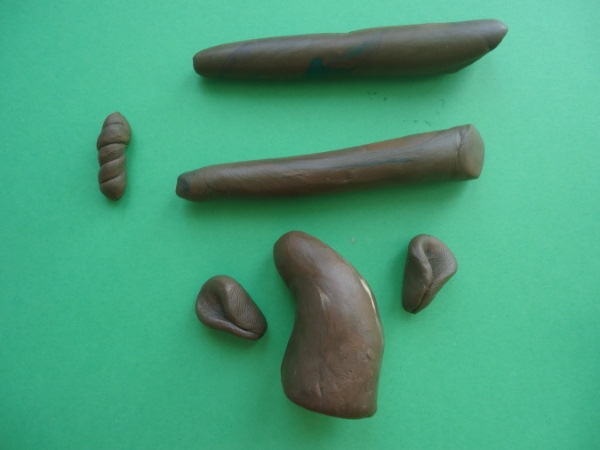
- Take white plasticine and knead it thoroughly, then form several basic parts from the soft plasticine piece: a body, 4 limbs, a head and a pair of horns for it.
If desired, the horns can be made from a yellow piece of plasticine. When creating them, it is necessary to take into account that they should be twisted into 2 bundles and have the same dimensions. Each of them is slightly bent at one end.
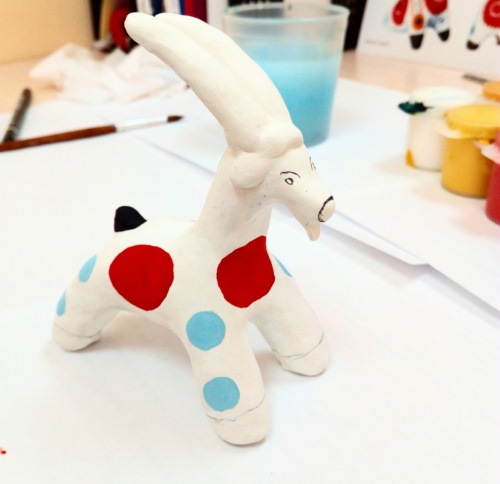
- Make eyes for the goat from black plasticine. Make thin ears and hooves from it as well.
- Combine all prepared parts into one craft.
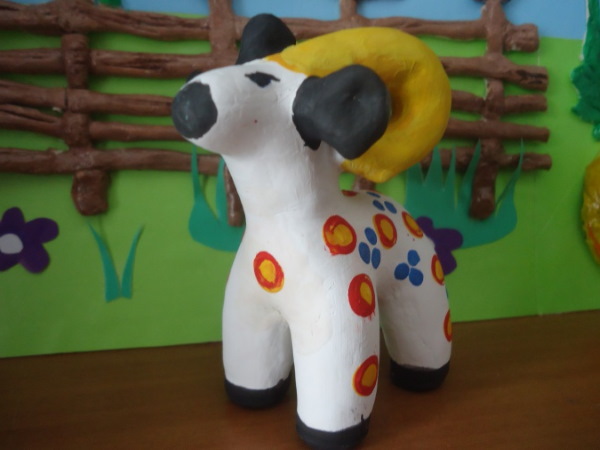
- Start painting the product using acrylic paints. Patterns are usually created on the body and legs.
Ram
The goat can easily be transformed into a ram by replacing its hind legs with a wide stand that will provide stability.
The stages of work will be as follows:
- Make a goat according to the above diagram, then separate its 2 hind legs from the body, and at the same time cone the body downwards (like the tail of a fish).
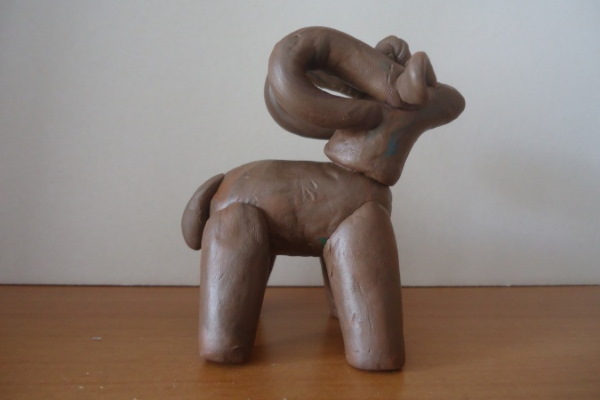
- The plasticine from which the 2 hind limbs were made should be divided into 2 pieces, shaped into cones and each of them should be curled in a steep arc, simultaneously flattening a little in the bend area. The result will be horns, which should be attached to the existing goat horns and the resulting seam should be carefully sealed with your fingers.
- Since the new horns are quite large and heavy, rest their lower bend on the toy's back. This simple technique will prevent them from sagging.
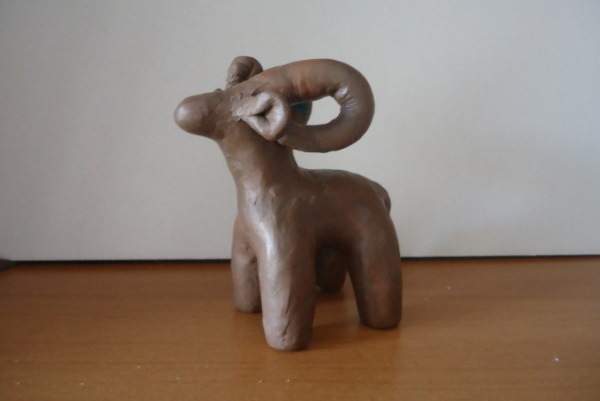
The toy ram with 2 front limbs and a wide back stand is ready. Now you can admire the beautiful Dymkovo toy made of plasticine.
The technology of making Dymkovo toys is quite simple, it is often used for children's creativity. Modeling from plasticine helps develop fine motor skills, and painting helps develop aesthetic taste.
Video about crafts
Dymkovo plasticine toy: