Sunset is considered the simplest and most abstract style of drawing for children. Even those who do not attend art school will be able to depict such a landscape on paper or canvas. The easiest way to do this is with paints, not a pencil.
The master classes describe all the steps in detail and reveal Features of working with each type of paint, and all the nuances are taken into account when creating a gradient. It is important for simulating a sunset.
Sunset over the sea in colors
A sunset can be painted by both a preschooler and a child attending an art school. The level of skill will be different, but the result will be assessed based on the children's skills. The simplest drawing for a child will be an image of a sunset on a whole sheet of paper, and not in a part where only the sky is located.
You will need acrylic paints and brushes for the work. You need to work quickly with such paints, so the drawing will be as simple as possible. It is advisable to buy professional brushes of different sizes for painting. A synthetic brush, kolinsky or squirrel brush will do.
How to make a background
To create a beautiful picture, you should explain to the child that any landscape begins with creating a background.
It's much easier than drawing the sky, clouds, sea and sand separately.
- Draw a line along the horizon with a pencil. This mark will indicate the area of maximum mixing of colors, where at sunset the color of the sky turns into the color of the earth.
- All colors are present on the horizon line, forming a bright, flat trace.
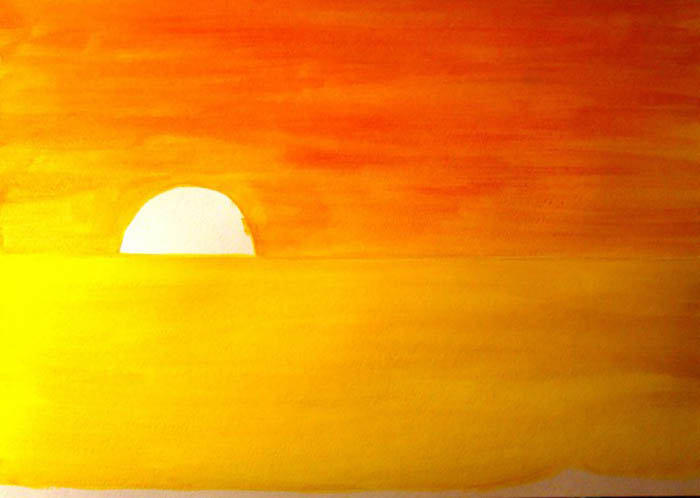
- The sunset begins with the creation of a monochromatic background.
- Take yellow paint and paint the middle of the sheet on the horizon line.
- Paint the area just above and below the horizon with the same color.
- You can apply a second layer of yellow paint in the center of the design to enhance the color rendition.
- The sunset can be bright or dull. Depending on its intensity, you can choose colors of different shades, warm and cold tones.
- In nature, warm and cold shades of bright colors can be combined, so on one side the sunset is brighter, on the other side it is cold, where the sun does not go below the horizon.
- Visually determine where the sun will be. For example, it is half hidden behind the horizon. This means that its rays will illuminate the circumference of the earth more strongly to the right or left.
- The sun shines brighter where it sets, so on the opposite side, even above the horizon, it will be much darker. Color this part orange.
- On the other side, add yellow to show where the sun will set. Let it be the left side of the sunset.
- On the right, where there is still space, add an element of the sun's rays moving away. You need to take the red paint and apply it to the right edge of the sheet.
- Red and orange paints are placed next to each other. Now you need to mix them on paper to get a gradient. This should be done with a simple wrung out rag and a brush.
- You can also stretch the gradient upwards, but after you have picked up a bit of red and orange with your brush. This way the colors will blend better.
When the background color is already formed, you can start drawing the sun. As a rule, children like to leave a clear circle unpainted, imitating a celestial body. But artists draw it by hand.
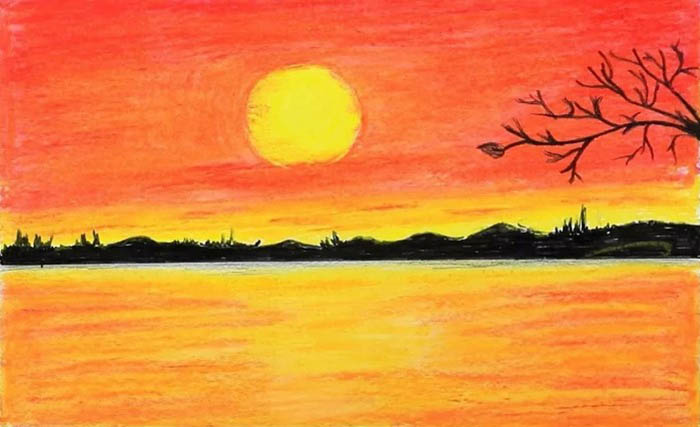
How to draw the sun
Sunset with water-based acrylic paints allows you to create blurred and realistic elements on paper. The sun has no clear boundaries. In nature, it appears bright, with clear contours, of the correct shape. In painting, all landscapes are conveyed by paints, not drawings.
Therefore, the sun will look like this in the picture:
- Where the sun should schematically be on the sheet, it is necessary to make the outline of a circle.
- Draw a circle with white paint and paint it over.
- To avoid sharp edges and make the sun rays look realistic, you need to make dry brush strokes from the edges of the sun. The white paint will mix with yellow and orange.
- Next, use a thin brush to pick up a drop of white acrylic and apply several horizontal lines to show the blurriness and brightness of the sun.
Acrylic paints are easy to mix, but they are also ideal for simulating oil painting. By picking up more material, you can press harder on the brush to leave large marks from the brushstrokes. Since acrylic dries quickly, the landscape will turn out beautiful, expressive, as if painted in oil, but much faster.
Sunset in Watercolor
It is very easy to paint sunsets and sunrises in watercolor. Due to its fluidity and the peculiarity of landscapes in this style, watercolor is able to combine several colors, creating indescribable "blots" on the canvas.
Watercolors that are applied to a wet canvas look more impressive. This results in a more beautiful application of paints. Using the wet-on-wet technique, you can easily and quickly create beautiful landscapes.
English watercolor (wet on wet) - the technique is convenient because it is possible to mix paints to create smooth transitions. Of the minuses - there is a chance of smearing paints, then the drawing will be dirty.
Dry watercolor (Italian) does not allow beautiful mixing of paints to obtain translucent shades and additional colors. However, you can return to work after a break without worrying that the sheet with paints will dry out.
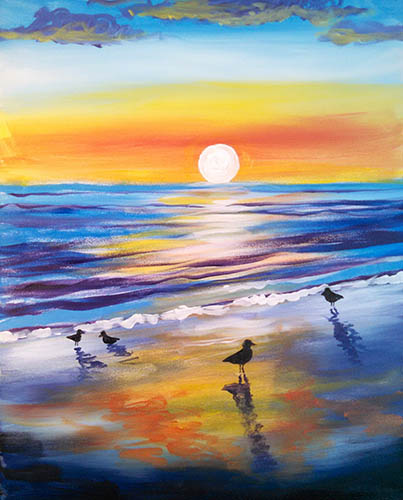
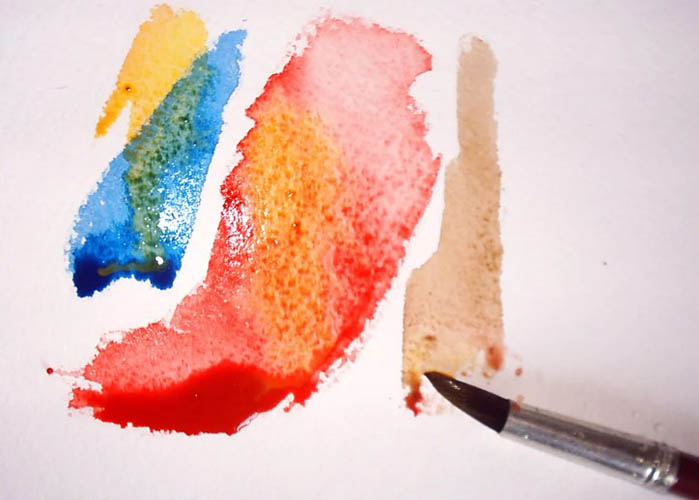
Watercolor "on wet"
To create a beautiful sunset like the one in the photo above, You need to wet the canvas in advance and secure it to the sketchbook tablet so that the work does not move to the side.
- Without clear contours, you need to create a background. To do this, you need to paint the top half of the sheet blue.
- The bottom of the leaf should be colored a darker shade of blue.
- Since watercolor does not always cover other colors with a new layer, you need to paint the canvas in stages.
- Draw a diagonal line under the horizon line, which will show the perspective of the sunset on the seashore.
- Paint the sun light yellow by applying yellow paint, and then immediately white, diluting it with water.
- The sea has several shades - you need to start with the one that is the lightest. You need to paint the water in a blue shade, stretching the watercolor over the entire canvas. The color will not be saturated.
- The sunset should be drawn in yellow, about 2/3 of the way up from the sun.
- Gradually paint the area above the sea and above the sun yellow.
- Next, take the red shade and apply it wet over the yellow on both sides of the sun. This will create a smooth gradient.
- Since there are already three different colors in the sun area, there is no need to add any more shades.
- The blue sky at sunset does not remain so throughout the entire horizon. The highest point is practically not illuminated, and direct rays of the sun do not reach there. Only light reaches the sky, so it needs to be painted blue. Again, this should be done using the wet technique - stretch the paint, creating a gradient.
The sunset still needs some details to be added to it, but the main backgrounds have already been made. Therefore, it is necessary to give the drawing naturalness and color. As you can see, the sunset leaves colors on the surface of the water, and the shore reflects the bright colors of the sky.
Watercolor in the wet technique does not allow you to make clear strokes, so while the canvas is wet, you need to make all possible merging of colors at this stage.
How to mix paints
Since the wet-on-wet technique may seem difficult for beginners, it is recommended to wet the canvas in stages to paint the picture with a break. Do not wet the entire sheet of paper several times; you can use a brush to wet the parts of the sheet on which the artist will paint at the moment. When the painting is finished, you can wait until it dries completely.
It is not difficult to achieve a beautiful gradient and flow of paint to obtain a mixed shade, but it is impossible to control the migration of color. Watercolor is transparent, and when mixing a large number of colors, "mud" may appear instead of a new color.
Therefore, to create waves in the sea and reflect the sunset, you need to work like this:
- While the canvas is still wet, you can reduce the likelihood of "mud" streaks by making a sketch - paint the reflection of the sunset in the water yellow, paint the parts on the sides blue.
- Using a brush dipped in water, pick up some white paint and make random streaks to imitate the reflection of the sun.
- Use purple and dark blue to create wavy strokes to depict the movement of the wave.
- Make the coastline the same color as the reflection of the sunset on the water, except for the white color.
- You can use red to add some light brushstrokes to show the brightness of the sunset.
After applying the main colors, you need to wait for the canvas to dry completely. The final strokes should be done in a dry technique. This way they will be more visible, look brighter against the background of smooth color transitions.
Watercolor on dry
This technique is convenient because it allows you to create clear, neat accents on the finished work. If, for example, you need to show a sea wave, it is better to do this on a dry canvas.
On a wet sheet, the paint will mix with the previous layer, and the natural transparency of the color will not give the desired result.
- Using a dry or slightly damp and soaked rag, pick up some white paint with a brush and draw a few waves along the shoreline.
- Using the same brush, take a grassy shade of green and apply a few strokes to the coast.
- Draw the clouds in the same way - apply swirls of blue-violet, and then green paint on a dry sheet. Each layer needs to dry.
- Lightly dampen the brush and use white to create a gradient on the coast, as if washing away the visible boundaries of the different colors.
Such a composition will be considered finished after the last layer of paint dries. The most difficult moment in these techniques is to understand how much more paint to take, how much to wet the brush, and how intensively to draw lines.
It is acceptable to moisten part of the sheet by taking a wet brush and diluted pigment on a separate palette. For children, it is acceptable to make a drawing with colored watercolor pencils, after which moisten the pigments with a wet brush.
Speed up the process of drawing a sunset
It is also possible to paint a picture quickly with watercolors. But to do this, you need to be confident with the brush.
If your child is attending an art school, he or she will love these tricks:
- The canvas can be moistened under running water to make it dry more slowly.
- All work is done in 1 layer of paint - use a brush to pick up as much pigment as possible, making several long, clear strokes.
- The work takes 1-2 hours if you use brushes of different sizes, simultaneously applying strokes to create a gradient.
- A dry brush can be used to make strokes from wet pigment to create vibrant strokes and blurriness on the canvas.
Even a preschooler can paint a sunset using the wet-on-wet technique with watercolors. It is generally accepted that this technique is the easiest for children, and the child will be able to feel the work of a brush and master the skill of mixing colors.
Sunset in oil paints
It is a mistake to think that oil paints are created for complex landscapes and still lifes. Children find such painting techniques especially easy.
In oil painting, details are not as important as in watercolor. However, it is necessary to adhere to the genre, combine contrasts and maintain the expressiveness of the brushstroke. In oil sunsets, orange and blue tones are bright and distinct. They are considered the main ones.
Working with strokes
To understand how to paint in oil, you need to choose the type of work:
| Name | Features of the technique | Primary colors |
| Expressive technique | Displays energetic weather, bright accents and gusts of wind. Dramatic sunset is expressed by contrast, there are crimson and purple colors. | Warm shades of bright colors |
| Glaze | A painting technique where you apply a thin layer of oil using several long strokes. You can combine colors to create depth. Suitable for painting large pictures with drying of each layer. | Pastel colors |
| Alla Prima | Allows you to paint a picture in several layers without drying. This artistic technique is fraught with the appearance of "dirt", so the second layer can only be applied to minor shades, details, to give the picture a finished look. | Any palette |
| Overlay of smears | Impasto, rough or volumetric, is a method of applying oil paint. The entire part of the painting is divided into strokes, and then they are applied to the canvas with tearing movements. A thick paste-like layer makes the paintings three-dimensional, and if you add textured materials, you get dense, even strokes. | Any palette |
| Dry brush | The technique is considered commercial; artists use it to paint pictures on the streets. Due to the stiffness of the brush bristles, it is possible to create a graphic effect by rubbing oil on the canvas. | Any palette |
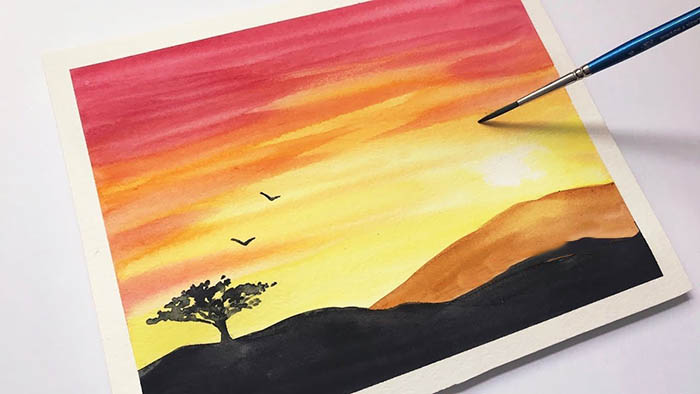
To repeat the picture as in the photo, you can combine several techniques - in the upper part, expressiveness in the technique of applying brushstrokes, going down below to perform glazing, but do all the work in the Alla-Prima technique.
Stages of drawing:
- Outline the sky and the earth with yellow and blue paint. Apply oil chaotically with a hard brush and blend from the center to the edges.
- Use a round brush #4 to underpaint the land near the lake. To do this, apply several long, strong strokes of black.
- Using brush #6, make sharp strokes of blue diluted with white spirit.
- For the horizon, you need to mark the boundaries visually. Apply oil with dark purple and add white above and below the dark strip.
- Azure and titanium white provide a slight gray tint, which is needed to soften the edge of the dark area and the sky.
- The tone of the sky needs to be deepened as you move away from the sun. The further away, the darker the oil will be.
- The yellow sunset should be painted with cadmium yellow diluted with white. Sometimes this is not necessary. In the latter case, use a brush to pick up yellow and red colors. After making several short strokes, add red or orange to the gradient.
- Using a dry brush, apply thick, bold strokes of paint in short strokes to emphasize the layering of the clouds at sunset. For this, you need to take yellow and orange shades.
- The torn diagonals on the sides should be done in purple. You don't have to dilute it.
- The orange that goes over the surface of the blue sky and purple clouds needs to be done with a dry brush as a second layer.
- The shaggy clouds need to be dynamic, so they need a dark color at the base and 2-3 tones lighter on top.
Once the background is formed, you need to start painting the reservoir.
Combining techniques
The sunset should be painted using different techniques to give the painting dynamism and liveliness. Since the sunset is almost painted, it is necessary to work on the pond.
The simplest part of the job will take a little time, but will require more paint and tools:
- From the wet layer of paint on the horizon, make dry strokes with a palette knife. Its side edge should be drawn down the canvas without pressing.
- To make the sides of the drawing crimson, use violet mixed with red. The oil should be applied in broad strokes.
- The illusion of depth is increased by the density of the brushstrokes. Therefore, on the blue background of the lake, you need to show the depth of the violet color. Apply short brushstrokes.
- Shaded areas should be worked with a thin brush or palette knife. Short, light strokes allow for detailed work.
- Reflections on water are not always appropriate in oil painting, but they can be made less sharp. Make vertical strokes with trembling movements. This will make the reflection of the sun's rays visible.
- The darkest parts of the water where the sun does not shine will be those that are "under" the sun's reflection. The surface is illuminated, and the back side remains unaffected.
If desired, the sunset can be dramatized and given character, which is what living nature is. Bright spots made with a hard brush against a monotonous area of the sky will help here. Due to the low horizon line, the picture turns out saturated. The minimum number of strokes in the middle and the expression in the sky are an ideal combination for reflecting romanticism.
Sunset, like other types of landscapes, can be painted with oil, acrylic and watercolor paints. By making a minimum number of strokes, the result is clear, not smeared.
The horizon line affects the character of the painting – the lower it is, the more advantageous the composition looks as a whole. The lack of drawings in the clouds makes the sky less dense, which gives the painting dynamism.
Video about drawing