A boutonniere is an obligatory attribute of a wedding ceremony, decorating the groom's outfit., witnesses or bridesmaids. Made from fresh flowers, satin ribbons or foamiran, such accessories are easy to make, do not require large financial outlays and allow, using your imagination, to make the celebration an unforgettable holiday.
What is a boutonniere?
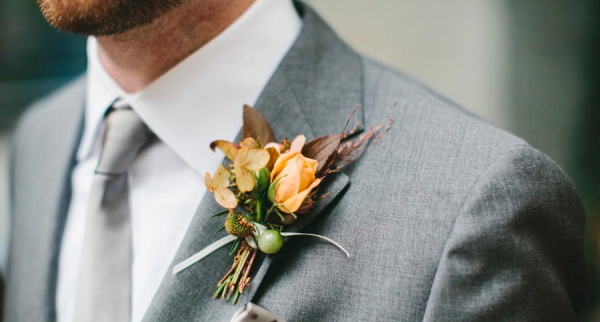
The term "boutonniere" comes from the French "boutonniere", meaning "flower in the buttonhole" and is traditionally used to refer to small flower bouquets used to decorate men's suits. With a long history, the accessory has changed little over time and still consists of one or more flowers gathered together, inserted into a special pocket or pinned to the lapel of a jacket.
The boutonniere became widely popular thanks to Oscar Wilde, who wore a green carnation in his buttonhole, and as a wedding accessory it has been known since the 19th century, when at the solemn wedding of Queen Victoria, Prince Albert, who had taken a flower from the bride's bouquet, decorated his own tuxedo with it.
In modern wedding design, the boutonniere is perceived as an obligatory element of the ceremony, complementing the suit of the groom and witnesses, and its modern version is considered to be a mini-bouquet on the hand, used to decorate the wedding dress or bridesmaids' outfits.
What is it made of?
To decorate the ceremony, stylists advise choosing boutonnieres that harmoniously match the wedding bouquet, thus creating a single composition.
Material used to create accessories:
| Live flowers | They are selected in strict accordance with the floral theme of the celebration and are a smaller copy of the bride’s bouquet. |
| Artificial flowers | Florists consider them to be a practical and economical material for creating boutonnieres in the cold season. Such decoration resembles real flowers in its shape, but at the same time, unlike the former, it retains its original appearance for a long time even under the influence of adverse weather conditions. |
| Foamiran | Soft to the touch, "plastic suede" is used to make bright flower arrangements. Such bouquets are easy to create, hold their shape well and are not afraid of low temperatures and wind. |
| Multicolored ribbons | The kanzashi technique allows you to make floral accessories from satin, rep and brocade ribbons, choosing the most advantageous color combination. |
| Organza or mesh | Floristic material is used to create original boutonnieres, decorated with artificial berries, feathers or beads. |
| Polymer clay | The no-bake material is complemented with durable wire and is used to create artificial flowers. |
| Silk | The thin and bright fabric is gathered into beautiful folds, forming flower buds, and is combined with a variety of decorative elements. |
Boutonnieres can be decorated or embellished with the following decor:
- shells, starfish, coral parts used to decorate outfits in a marine style;
- branches of thuja, fir, pine, cones and red berries - allowing you to create a version of an autumn boutonniere;
- clockwork mechanisms, feathers and flowers – to decorate steampunk outfits;
- wheat ears, dried cotton flowers and sunflowers for a rustic look.
There are several design options:
| Single flowers | The boutonniere is made from one rose, peony or chrysanthemum, complemented by decorative elements. |
| Miniature bouquet | It is assembled from several flowers of the same size, surrounded by floral greenery, berries or unblown flower buds. |
| Brooch | Used instead of a traditional bouquet, it can be shaped like a flower, feather or insect. |
The largest boutonniere is used to decorate the groom's suit. For guests and witnesses, it is recommended to select small floral accessories made in the same wedding style.
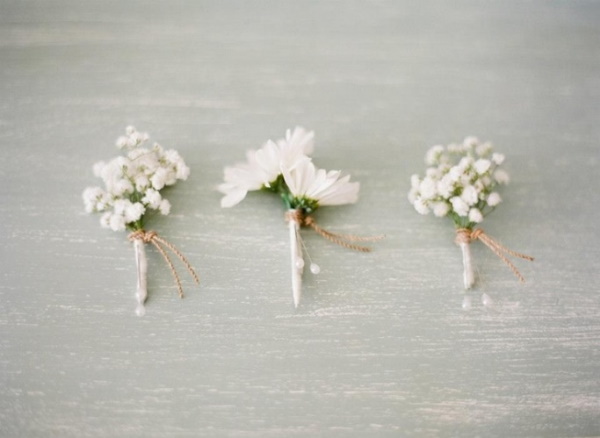
Boutonniere of fresh flowers for the groom
A do-it-yourself boutonniere for the groom is in most cases made from flowers and complemented with decorative greenery. To create a traditional accessory, stylists advise using half-opened rose buds, or giving preference to carnations, peonies and orchids.
The shade of the selected flowers can be any, but must necessarily harmonize with the bride's bouquet. Florists recommend using only strong, freshly cut buds in the work, which are able to retain their original appearance for a long time.
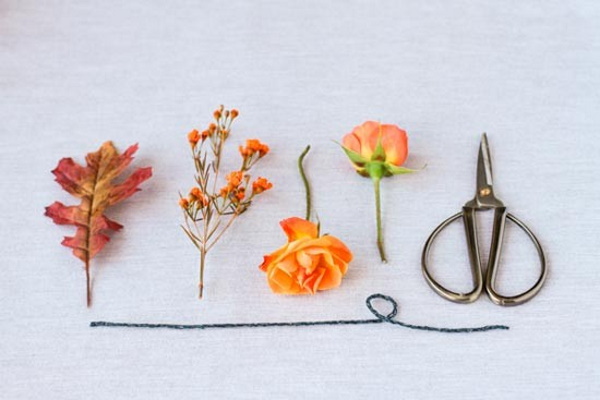
To create the accessory you will need:
- half-opened pink bud;
- decorative greenery;
- black and white tape;
- thin (7 mm) wire;
- floral glue;
- pins, knife and nippers;
When working on a product, you need:
- Cut a 10 cm long flower stem at a 45° angle and place it in a glass of water for 2-2.5 hours.
- After the specified time, take out the flower and coat its cut with glue or melted wax.
- Use wire cutters to split the wire in half and thread it through the stem at the base of the flower bud at a 90 degree angle (crosswise), then bend the ends of the wire down, twist them and secure the flower.
- Divide another piece of wire into 4 equal parts, bend one of the edges into a hook and place green branches on it.
- Connect all parts of the bouquet and secure with tape. Cut off the excess wire.
- Decorate the bottom of the boutonniere with a satin bow and decorative pins (beads or rhinestones).
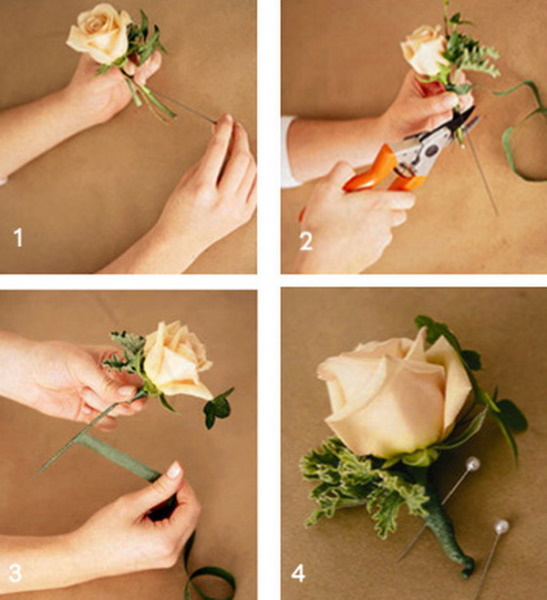
Boutonniere made from fresh flowers, step by step creation. - If desired, additional elements can be added to the product.
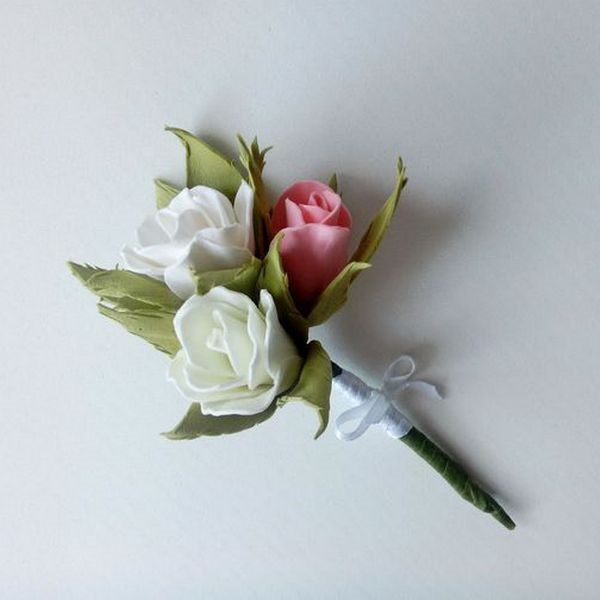
Mini-bouquet boutonniere for the groom from fresh flowers
A mini-bouquet is formed in a similar way, and to create it you need:
- Cut the stems of 3-4 medium-sized flowers, leaving 2.5 cm in length, coat them with special glue or dip them in hot wax.
- Prepare 2 pieces of floral wire, 12.7 cm long, for each flower.
- Taking the flower at the base of the inflorescence, insert both wire pieces into it crosswise so that they form a 90-degree angle, pull the ends through, and then bend them down, securing the flower.
- Using floral tape, wrap the flower at the base, hiding the wire. Spray the petals of the bud with a preservative spray.
- Similarly, strengthen all the flowers, and then collect them together, forming a mini-bouquet and complementing it with branches of decorative greenery (gypsophila, brassicas, solidago).
- Having attached the beginning of the floral tape to the base of the bouquet, you need to carefully wrap it around it, connecting and hiding the flower stems.
- Cut off the remaining tape with pruning shears.
To decorate a mini-bouquet from a satin ribbon, 6-12 mm wide, you need to make a bow.
To do this you need:
- Make a loop from the ribbon, making up 2/3 of the width of the boutonniere, wrap it around the base and secure.
- In a similar manner, make 4-6 loops, gather them in the center, pinch them with your fingers and thread a piece of wire through the center.
- Move the clamped loops upward, twist the ends of the wire, fixing the bow and wrap them with floral tape.
All parts of the boutonniere should be gathered together and wrapped with satin or floral tape. The bouquet can be decorated with decorative floral pins inserted at the base of the stems.
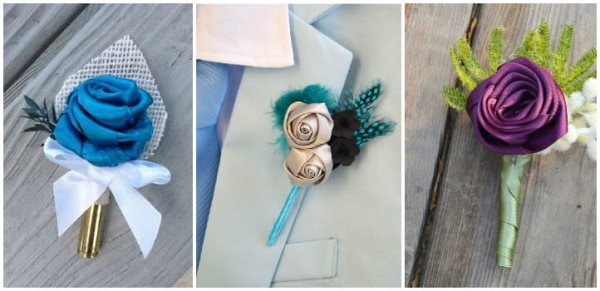
From artificial flowers
A DIY boutonniere made from artificial flowers, according to stylists, has a number of advantages, because:
- Ideal for winter or autumn wedding celebrations, not damaged by low air temperature and cold wind;
- Retains its original appearance for a long time;
- Does not emit pollen that could stain the newlyweds' clothes.
To make the accessory you will need:
- artificial flowers;
- florist wire and ribbon;
- hot melt glue;
- scissors;
- elements for decoration.
When working on a product, you should:
- Clean the selected flower from damaged elements (faded or damaged petals) and cut its stem at a distance of 2.5 cm from the bud. The cut should be made at an angle of 45°.
- Cut a piece of thin wire 20 cm long with wire cutters. Heat one end by holding it over an open flame, insert it at the base of the flower and pull it through to the other side so that 8 cm remain at both ends.
- Bend the ends of the wire down and wrap it with floral tape, slowly rotating the flower. The winding should be pressed tightly to the base of the flower for complete fixation.
- Place branches of artificial decorative greenery around the flower and wrap the boutonniere with floral tape, starting at the base.
- Wrap the bouquet with twine, starting at the base of the flower, and secure it with a bow formed on the stems.

For ease of attachment, the wire of the boutonniere stems should be cut at a distance of 6.8-8 cm.
From satin ribbons
A DIY boutonniere made from satin ribbons is suitable for any time of year.
Experts do not recommend overloading such a product with decorative elements, and to create it you can use:
- multi-colored satin ribbons with a width of 2.5-3 cm;
- sewing accessories;
- with a fabric soldering iron or a lighter;
When creating a product, you should:
- From satin ribbons, make 6 pieces of 9 cm in length, 7 pieces of 12 cm, and 5 pieces of 7 cm. Use a soldering iron to singe their edges to prevent possible crumbling.
- To form a petal, fold a 12-centimeter piece of ribbon in half so that its right edge is at the level of the base, and stitch it.
- Do the same with the remaining petals of the same size, connect them together with a thread, then tighten and secure it, forming a flower.
- Sew flowers from 7-centimeter and 9-centimeter ribbon pieces so that you get 3 parts of the product of different sizes.
- Connect the parts by placing them on top of each other so that the largest flower is located at the base and sew.
- Glue rhinestones or other decorative elements to the center of the boutonniere, and attach a pin to the back of the product.
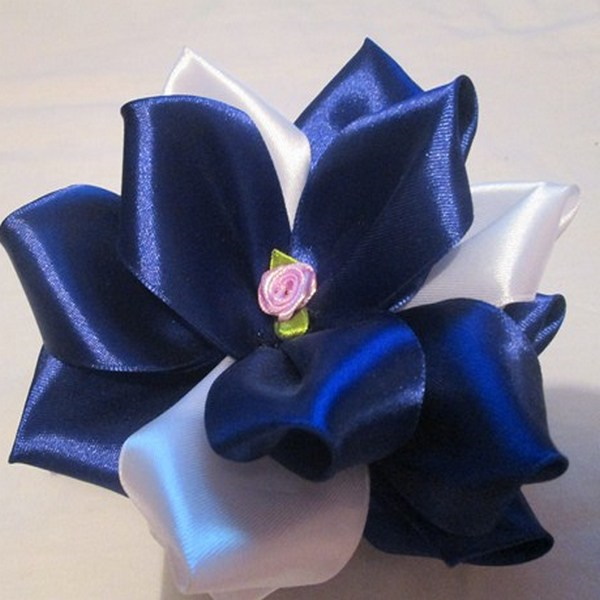
The boutonniere can be decorated with a central satin rose, and to create it you should:
- Bend a small section of tape (2.5-3 cm wide) at a 90 degree angle and secure with a pin.
- By bending the ribbon towards it at an angle, you need to form petals of the desired splendor.
- Once the rose has reached the required size, the remaining tape should be cut off and the resulting flower should be secured by stitching at the base.
- A 20 cm piece of floral wire needs to be singe at one end and pulled along the base of the satin rose so that there are 8-9 cm pieces at both ends.
- Lower the ends of the wire down, twist and wrap tightly with floral tape.
- Attach branches of decorative artificial greenery to the central flower and secure the resulting mini-bouquet with floral tape. To further disguise it, the base of the boutonniere should be wrapped with satin ribbons ending in a small bow.
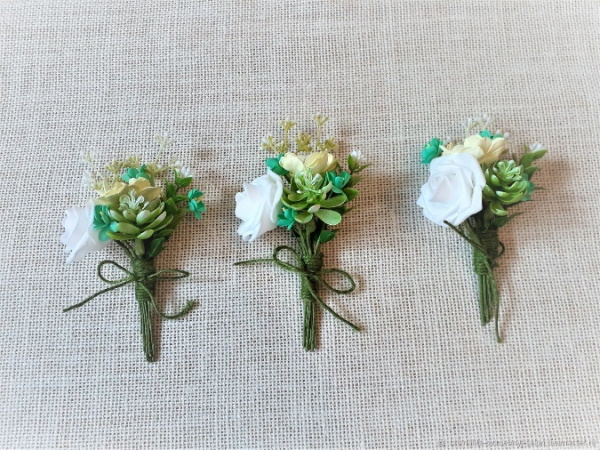
From foamiran
A DIY boutonniere made of foamiran is practically no different from live mini-bouquets. Such decoration is made of a material that easily takes the necessary shape and is resistant to atmospheric influences.
The accessory is made of:
- multi-colored foamiran;
- awl;
- cardboard;
- scissors;
- decorative stamens;
- wires;
- hot melt glue;
- decorative elements.
During work you need to:
- Make flower petal templates from cardboard, place them on foamiran, transfer them to it with a toothpick, and then cut out along the contour. For one flower, you need to make 4 identical petals.
- Place the blanks on a warm iron and twist them at the base to give them the desired shape, then straighten them out a little in the middle.
- Place the petals on the stamen, overlapping them, press them with your fingers at the base and secure with hot glue, forming a flower bud.
- Make the rest of the flowers in a similar manner.
- Using wire cutters, separate 5 pieces of thin wire, 20 cm long, place a bead in the middle of each and twist the ends.
- Glue the flowers together so that one side of the product remains flat, and then attach the beads on the wire to it, slightly rising above the flowers.
- Using a template, cut out and make leaves from green foamiran, attaching them to the finished product.
- Wrap the wire and flowers tightly with floral tape to form a bouquet and decorate with satin ribbons and a bow.
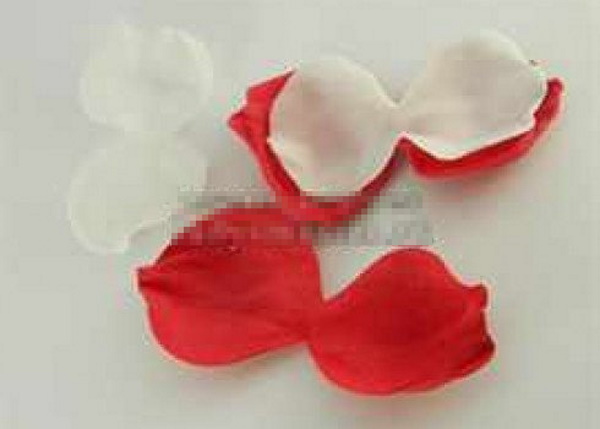
For bridesmaids on the hand from foamiran
A DIY boutonniere to decorate the bridesmaids' wrists is made in the form of a bracelet and can be made from flowers or foamiran.
The creation of such an accessory requires the use of:
- sheets of plastic suede in red and white shades;
- lace ribbon;
- thin wire, large beads or beads;
- hot melt glue;
- decorative stamens;
- an awl, scissors and an iron.
When working on a product, you need:
- Cut out 2 pieces with petals measuring 10 and 8 cm from cardboard, then place them on foamiran and transfer them.
- Using the contours as a guide, cut out 6 petals from the red material folded in half and 3 from the white material.
- Place the resulting blanks on a warm iron and squeeze them with your hands at the base, giving them the desired shape, and then straighten the petals in the middle.
- Place the stamens together and glue.

- In the middle of each double petal, make a hole with an awl and insert the stamens into it, and then, carefully placing the petals on top of each other, form a voluminous flower.

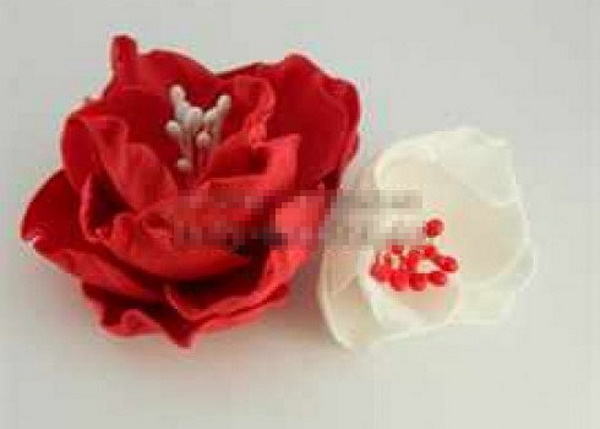
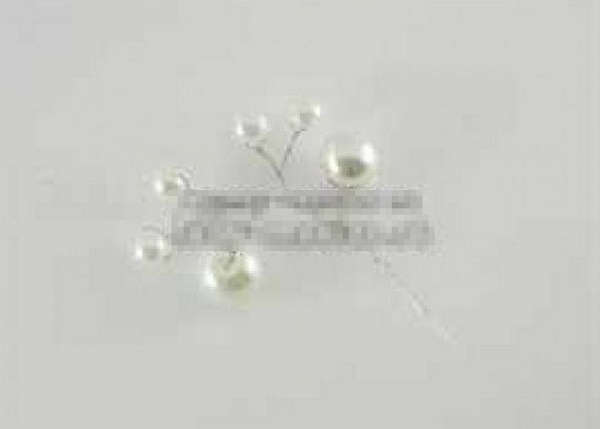
- String large beads one by one onto a thin wire, twisting the ends and forming a decorative branch, then attach it and glue it to the flower buds.

- Cut out 2 additional petals of white and red shades from foamiran and glue them to the top of the bouquet, masking the joints.
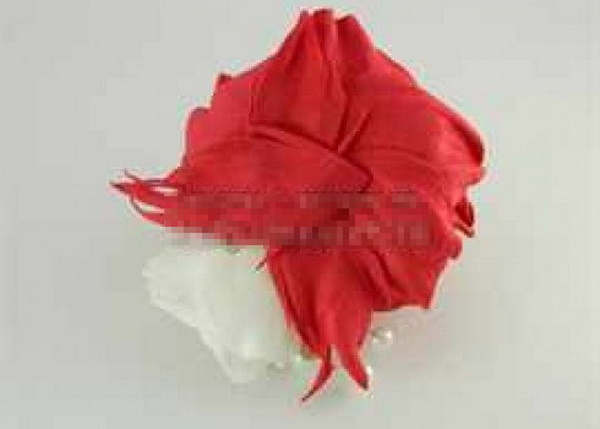
To create the base of the bracelet, measure your wrist, cut a strip of white or red lace to the appropriate size and attach it to the flat side of the bouquet.
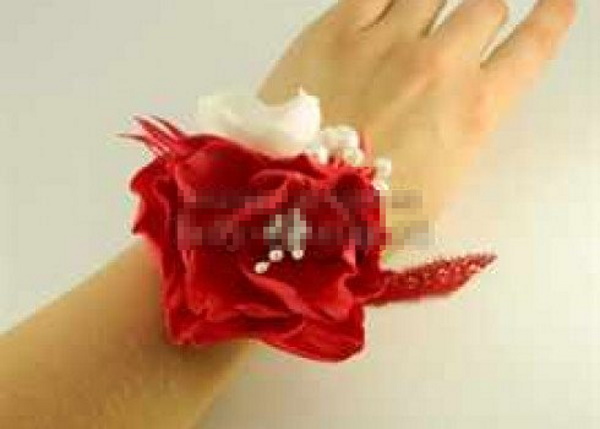
Ready.
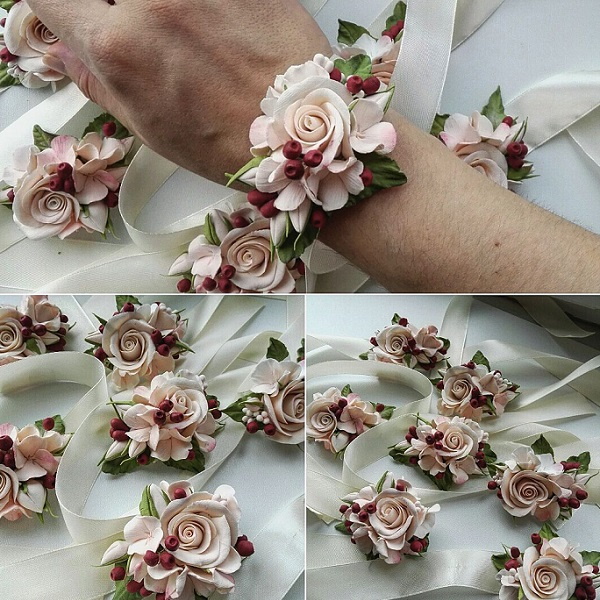
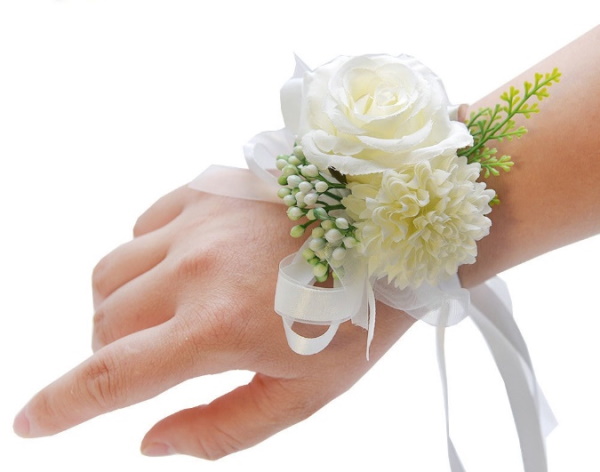
Boutonniere for witnesses on hand from fresh flowers
The boutonniere for witnesses is made from artificial (live) flowers and satin ribbons.
This accessory is attached to the wrist or to clothing (using safety pins), and to create it you will need:
- artificial roses;
- hot glue gun;
- satin ribbons;
- artificial decorative greenery or large beads strung on wire.
When working on a product, you should:
- Cut the flower buds off the stem at a distance of 2.5 cm.
- Use hot glue to attach to them branches of decorative greenery or large beads strung on twisted wire.
- Wrap the connection point with floral tape, masking the joints.
- Measure the circumference of your arm and cut off a piece of satin ribbon that is 10 cm longer.
- Glue a ribbon to the back of the boutonniere and tie the boutonniere on your hand with a beautiful bow.
You can use fresh flowers for the bracelet, but in this case, the accessory should be formed on the day of the celebration, and before starting work, the cut buds should be placed in a glass of water for 1.5-2 hours.
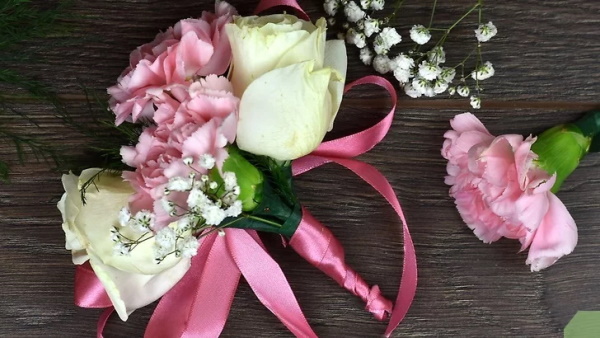
For witnesses on clothes
It is recommended that a bouquet for witnesses attached to clothing be made from carnations, peonies or small rose buds, repeating the bride's bouquet and the groom's boutonniere.
To work you will need:
- 3 dwarf rose or carnation buds;
- florist's tape and wire;
- decorative greenery.
When working on a product, you should:
- Cut the buds at a 45-degree angle at a distance of 3.5-5 cm from the stem.
- Prepare 3-4 pieces of wire (corresponding to the number of flowers), 20 cm each, insert them at the base of the bud, pulling them through it so that 8-9 cm remain on both sides.
- Bend the ends of the wire down and twist, securing the flowers.
- Place the mini-bouquet together, add decorative greenery and wrap tightly in a circle with floral tape, masking the wire and joints.
- Decorate the finished accessory with a satin bow.
Stylists' recommendations
When making boutonnieres yourself, stylists advise remembering that:
- The decoration on the groom's jacket (shirt), the clothes of the witnesses or the dresses of the bridesmaids should harmoniously match the wedding bouquet, creating the unity of the overall wedding composition.
- The design should be selected based on the chosen wedding theme, which in some cases requires the use of additional elements: seashells, pine branches, feathers.
- The floral accessories used should not be very large and overloaded with decorative elements. The recommended size of the boutonniere is no more than 8-10 cm (including the flower stalk).
- Mini-bouquets should be securely attached to a suit or dress with a special pin.
How to fasten
To attach boutonnieres to the jacket (shirt) or clothing of the witnesses, use large safety pins or special clips. The fastening element should be glued as close as possible to the flower heads with hot glue or double-sided tape. The pin is threaded through the buttonhole located on the lapel of the jacket, or is attached to the left side of the vest or shirt with a small indentation from the neckline.
You can also:
- Using a large regular pin, pierce the lapel of the jacket from the inside on the left side, and then pierce it through the heads of the flower buds in the softest place.
- Return the needle to the wrong side, secure the pin and adjust the mini-bouquet.
A boutonniere is a mandatory attribute of a wedding ceremony. Made with your own hands from fresh or artificial flowers, satin or foamiran, it should be in harmony with the wedding bouquet and the chosen theme of the ceremony, not be too voluminous and overloaded with decorative elements and create a single wedding style, emphasizing the solemnity of the wedding.
Video: How to Make a Wedding Boutonniere
DIY boutonniere made from fresh flowers: