A professional artist can draw a dolphin in a matter of minutes, sketching it with a simple pencil. However, if you don’t have enough drawing experience yet, but you really want to draw a mammal, you should use step-by-step instructions. Parents can help children.
Simple drawing
A dolphin (it is better to start a drawing for children with a simple version) can be depicted using:
- A simple pencilWith its help, the outline of the animal and the space around it is created.
- Eraser. It will help to remove extra lines when making mistakes, as well as remove those pencil marks that were used as auxiliary lines;
- Paints, felt-tip pens or colored pencils to color the image.
If you wish, you can leave only the lines of a simple pencil, which looks beautiful.
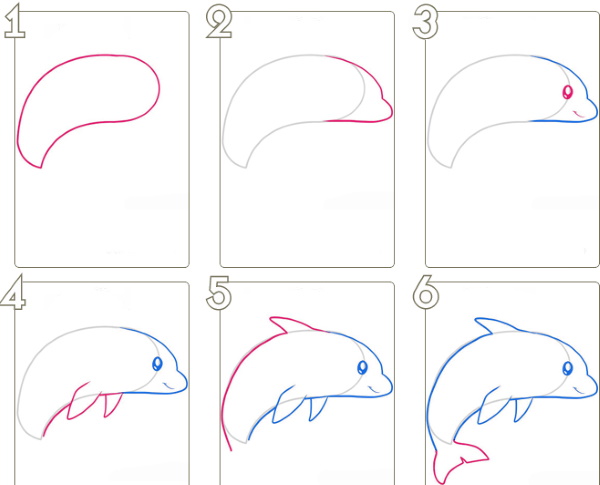
The stages of work are as follows:
| No. | Stage | Description |
| 1 | Drawing the torso | The body is a kind of oval, which is pointed on one side. Therefore, on one side the line will be rounded, and on the other - it will form an acute angle. The part where there is a rounding is the head of the marine mammal, and the pointed part is the tail. At this stage it is enough to draw the body, drawing smooth lines. There is no need to clarify the details. When drawing a line, do not press hard on the pencil, otherwise poorly drawn areas will be difficult to remove. Lines that are formed with light pressure are removed quickly. A properly created sketch of a dolphin's body should look like a large drop of water or a flower petal, such as a daisy. |
| 2 | Outline the head and tail, and also draw some details. | It is important to remember that the dolphin's snout has a peculiar shape, protruding far forward. It is enough to draw a few lines to draw it. On the other side of the body there should be a fin. It is bifurcated and in shape is very similar to a crescent moon |
| 3 | Add details that will make the dolphin more "alive". | These details include the eye and 3 fins. There should be 1 organ of vision, because in this version of the image the dolphin is presented in profile. The eye can be indicated by a small dot located near the nose. The fins should be drawn with smooth lines. They should look like triangles, only their "corners" are rounded. 1 fin is on the back. It is larger than the others in size. It should be something similar to a triangle, the top of which deviates towards the dolphin's tail. 2 other fins, the same size, are located at the bottom of the body. They are smaller than the dorsal fin. |
| 4 | Removing unnecessary parts. | After working with an eraser, you will get an excellent sketch of a dolphin. It can be left unpainted, or you can paint it using shades of gray, blue, turquoise. |
Dolphin in pencil
To draw a dolphin in detail, you will need two tools: a simple pencil and an eraser.
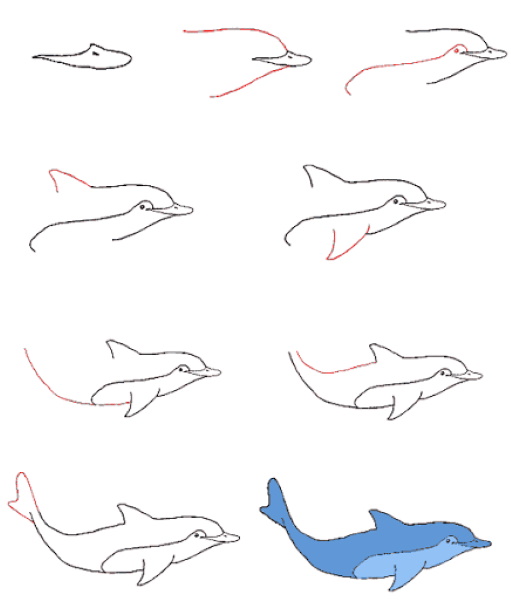
The work takes place in the following stages:
- Draw the muzzle. Here it should look like a cap peak. Before you start drawing, you should immediately imagine how the drawing will be located on the paper sheet. You need to make sure that there is enough space left for the body. The muzzle will be on the right side of the sheet, and the rest of the dolphin - on the left. Therefore, there should be a lot of space on the left.
- Draw the outline of the head. 2 smooth lines should start from the muzzle: one such line goes from above, the other – from below. The first should be more rounded, while both of them should be smooth.
- Draw a line that runs through the middle of the body, separating the belly. It is also smooth and starts directly from the muzzle. At the very beginning, it should be strongly curved, because there should be space for the eye under it. The eye itself, presented as a small dot, is drawn at this stage. It will be 1, because the dolphin is presented here in profile.
- Draw the dorsal fin. It is a shape similar to a triangle, but with smooth lines and rounded corners.
- Draw another fin under the body, symmetrical to the upper one. It should also look like a triangle, but only with rounded corners.
- Continue the line of the body, starting from the lower fin. This line should be an upward arc. This will depict the playful mood of the dolphin: its tail will rise upward.
- Continue the top line of the body. It starts from the upper fin and is an upward arc.
- Draw the tail. Both upward arched lines of the body - the lower and upper ones should connect, and at the place where they connect there is a double fin. This fin is the end of the dolphin's tail.
- Use an eraser to remove unnecessary lines and draw the outline more clearly.
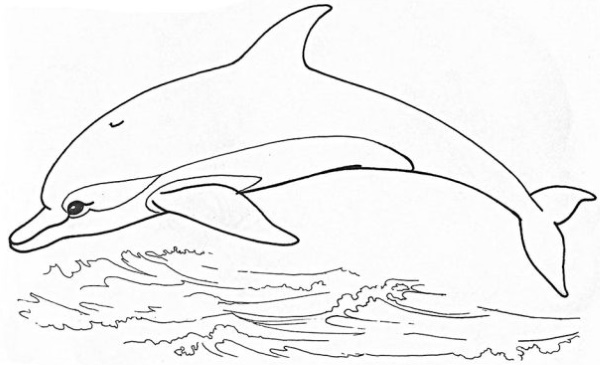
Black and white
A dolphin (a drawing for children can be done in black and white) can be easily depicted by novice artists without coloring.
To create it you will need:
- sheet of paper;
- eraser;
- simple pencil.
It is convenient to divide all the work into the following stages:
- Draw the head. First, draw a circle, then use smooth lines to give it a more elongated shape. At this stage, draw the dolphin's muzzle, which can be called the nose. It should protrude far forward.
- Using simple lines, you need to depict the mouth and draw the forehead.
- Draw the body. It is necessary to immediately calculate the direction so that the highest point of the entire drawing is located on the top line of the head, and the tail should be below. The process of drawing the body is simple: it is enough to draw a couple of arced lines. One of them starts at the top of the head and, rounding, rushes down. The other smoothly goes down, but starts at the bottom of the head.
- Draw the tail, which will be the end point of both body lines drawn in the previous step. The dolphin's tail is a forked fin. Its front part, the one closest to the viewer, is slightly larger than the back part.
- Draw fins on the body, there should be 2 of them. One is on the back, the other is at the bottom of the body. Both of them resemble triangles, but only with smooth lines and rounded corners.
- Add important strokes that will make the drawing more realistic. First, you need to remove unnecessary lines, as well as pencil marks that were left accidentally. Then you need to draw along the contour with a pencil, trying to press harder this time. You can use a softer lead for this.
- Mark the darkened areas on the body. When creating such shadows, the artist will see how the fruit of his creativity becomes more "alive".
- Color the drawing. You won't need any other color except black. You can use a simple pencil or take a black pencil from the color set. The chosen tool shades the body.
To add volume, you can use an eraser to create light spots. The shading should be very soft. You can use a small piece of paper to "rub" the drawing.
By the cells
A dolphin drawing can be obtained by drawing by cells. This is a very simple process that will not cause problems for children of primary or senior school age. It is most convenient to draw by cells in a notebook or notepad, where there is appropriate ruling. As an example, we can give a drawing that will require an area of 80 cells in a notebook. There should be 10 horizontal rows and 8 vertical rows.
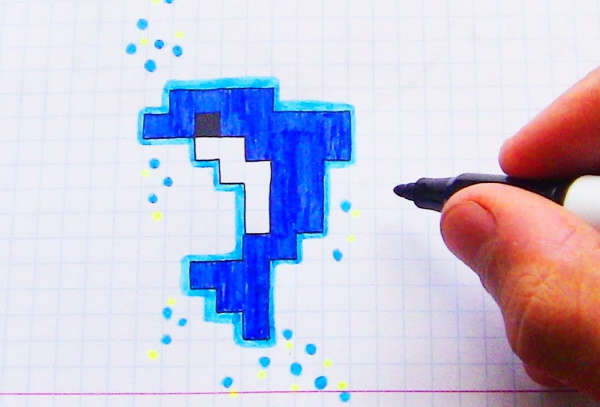
The tools you will need are markers or colored pencils of the following colors:
- black;
- blue;
- blue.
Below is a diagram of how to draw in vertical rows.
Numbering starts from the leftmost row:
| Row | Description |
| 1st | The far left vertical row remains entirely white, only 1 cell is painted blue – the 2nd from the top. |
| 2nd | Two cells are painted blue - the 1st and 2nd above. |
| 3rd | The 1st cell is blue, the 2nd is black, the 3rd is light blue, the 8th is blue. |
| 4th | 1st and 2nd are blue, 3rd and 4th are light blue, 8th and 9th are blue. |
| 5th | 1st, 2nd and 3rd are blue, 4th, 5th and 6th are light blue, 7th, 8th, 9th and 10th are blue. |
| 6th | 2nd, 3rd, 4th, 5th, 6th and 7th are blue. |
| 7th | Lines 2 through 5 are colored blue. |
| 8th | The 2nd and 3rd lines need to be made blue. |
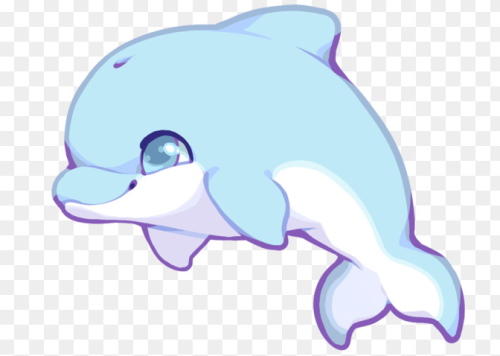
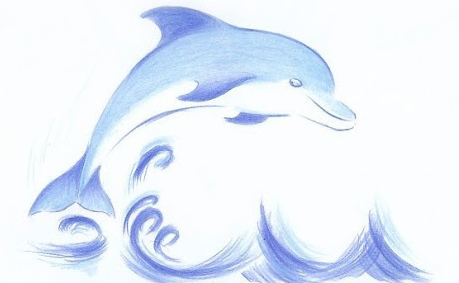
Jumping dolphin
A dolphin (a drawing for children can be in the form of a mammal jumping out of the water) jumping from a sea wave will look dynamic and colorful. And the process of drawing it and the result of creative activity will give a lot of joy.
The work takes place in the following stages:
- Draw a large curved "drop" that will become the dolphin's body. On one side, this "drop" should be wider and rounded, and on the other, narrower and sharper.
- Start to shape the head. On the rounded side of the dolphin's body, draw a protruding muzzle. At the same time, do not make the nose protrude too much.
- Use a short line to draw a smile on the playful dolphin.
Above is the eye, represented by a small dark circle. Approximately in the center of the circle, a white area should be left, this will be a highlight. At first, it may seem that such a small element as a highlight plays an insignificant role in the drawing, but with it, the look of the sea creature becomes more natural, acquires a special shine. - Draw the lower fins. There are 2 of them. Each of them is an elongated triangle. The one that is closer to the viewer should be slightly larger.
- Draw a smooth line for the back and draw the upper fin on it. It, like the pair of lower fins, should be represented by a triangle.
- Draw the tail. This part of the dolphin's body is a double fin.
- Remove all unnecessary lines and make the outline clearer.
If your child wants to make the drawing brighter, you can use colored pencils or paints.
At sunset
The whole picture can be created by adding a background to the drawing. For example, a dolphin jumping out of the sea against the background of a red sun setting over the horizon will look beautiful.
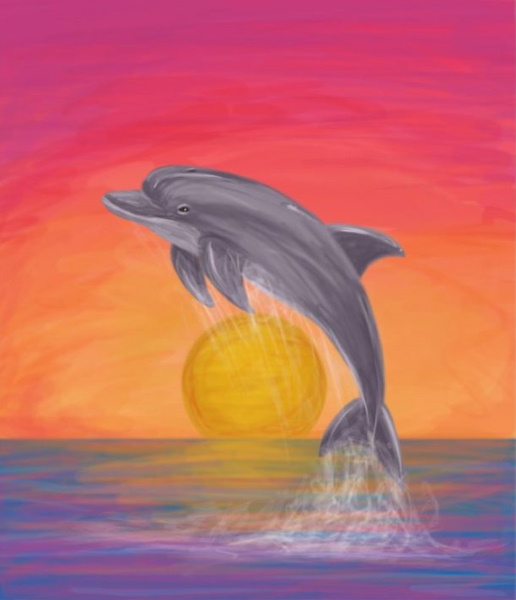
The drawing process is divided into the following stages:
- Draw the outline of the body. The head will be at the top, the tail at the bottom. The outline of the dolphin's muzzle can be marked with a circle.
- Move on to the muzzle itself. Inside the circle, draw the nose, mouth, and eyes. Here, the dolphin will have both eyes visible. Each eye should be represented by 3 small circles. The central circle will be a glare inside the pupil. Accordingly, the middle circle is the pupil, and the largest circle is the outline of the entire eye.
- To make the dolphin look cheerful and smiling, you should not just draw an arced line for the mouth, but also add a small arc under the round eye.
- The pupil should be black. You can just leave it dark.
- Delete the auxiliary circle that was drawn in step 1.
- Draw the fins and tail. There are 2 lower fins, 1 dorsal fin, and the tail is a bifurcated fin.
- Draw an arced line on the body, which will indicate the abdominal area.
- To show the dolphin's playfulness, draw 3 small arcs under its tail. The one closest to the tail is larger in size than the others. Below is a medium-sized arc, and the lowest one is the shortest. It can generally be attached with a small stroke.
- Use the eraser to remove all unnecessary elements.
- Color the finished drawing. You can use colored pencils or paints for this.
In the background, depict a horizon line and a red or orange round sun.
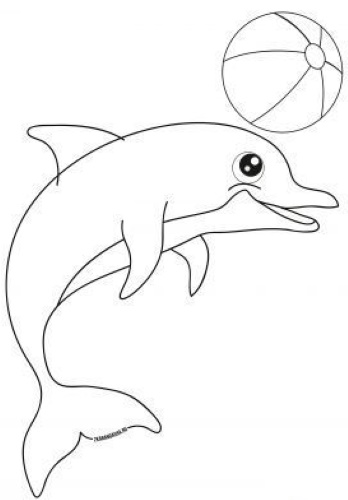
With the ball
A child will definitely like a drawing of a dolphin playing with a ball. In this case, the dolphin itself is drawn first, and then a multi-colored ball is added. It is important that the dolphin's muzzle is slightly raised, and there is a ball on its nose.
The stages of drawing are as follows:
- Draw the dolphin's body. In this case, it may not be horizontal, as in all the examples described above, but, on the contrary, vertical.
- Similar to the previous examples, draw the details of the head.
- Draw the fins and tail.
- Depict a ball adorning the dolphin's nose.
- Colour the drawing. The dolphin itself can be made light blue or blue, and the ball can be painted in many different colours.
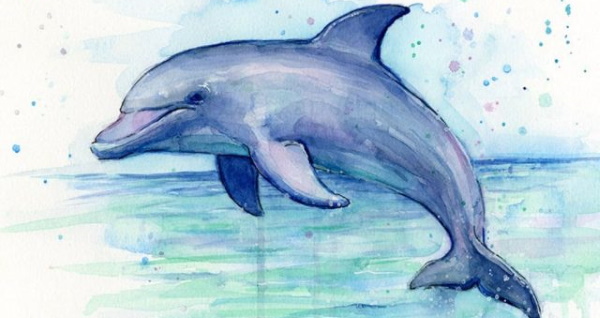
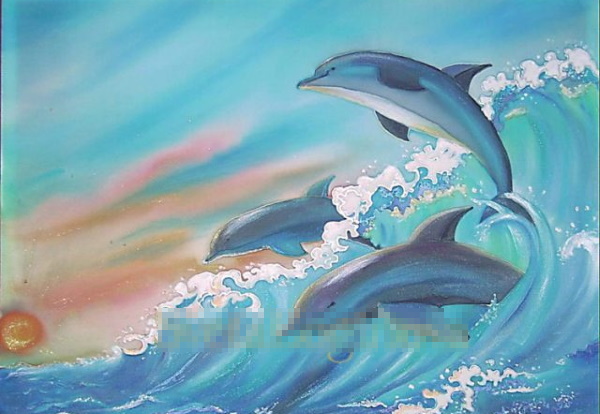
With paints
Dolphin (it is more difficult to draw a picture for children with paints than with a pencil or felt-tip pens) with gouache is a difficult job. However, the texture of the paints gives the image of the mammal and sea waves realism.
The stages of drawing are as follows:
- Secure the canvas to the table using masking tape.
- Proceed directly to work with gouache. Mix blue paint and white. Draw the sky with the resulting color. Gradually adding a new portion of white to the resulting color, it is necessary to make the lower parts of the sky lighter. Each subsequent layer should become lighter as you move down.
- Mix white with yellow paint. Use the resulting color to paint the sun's reflections. After adding orange paint, make a few more strokes. There should be thin highlights all over the sky.
- Draw the sun with orange gouache.
- Using paint obtained by mixing emerald, white and blue, draw a wave. On the left is a thin line, and towards the middle it grows.
- Paint the lower part of the sheet. The strokes should be directed along the movement of the water. There should be reflections along the entire perimeter.
- Blend the paints into the water using a slightly damp brush.
- Use blue paint to make dark reflections on the surface. The result should be shaded.
- Perform similar actions with dark blue, and then with emerald.
- Use white paint to lighten the top of the wave and create subtle highlights.
- Using paint obtained by mixing black, white and blue, draw the silhouettes of dolphins. The shape of these silhouettes should resemble drops.
- Detail the dolphin's face. You should draw the nose.
Fins are also added. - Add white to the paint used to draw the dolphins. It is necessary to mark the light areas on the dolphins' bodies: the edges of the fins, the belly, the upper part of the body.
- For volume, add blue color and black outlines.
Dolphin is a cute sea animal that can be easily drawn with a pencil. The work is so simple that children can easily handle it. Both the drawing process and its result will bring him great pleasure.
Video on how to draw a dolphin
Drawing a beautiful dolphin: