Crafts with children can be made from any available materials. For example, from matchboxes you can build furniture for dolls, birdhouses, puzzles, a mini zoo and even cars. Activities of this kind with younger students not only increase perseverance, but also contribute to the development of imagination and the disclosure of creative potential.
The benefits of DIY crafts for the development of schoolchildren in grades 1-5
Crafts made from matchboxes are not only a pleasant pastime for a child, but also an effective way of his development.
So, the benefits of crafts:
- speech skills improve (due to the development of fine motor skills, which have a positive effect on brain activity, students begin to use more complex phrases in everyday speech and when retelling texts provided for in the school curriculum);
- perseverance increases, which directly affects the quality of information assimilation in lessons;
- a sense of responsibility is instilled (at the age of 7-10 years, the child already consciously carries out the instructions of adults, preparing to receive an assessment of the results of his work);
- creative thinking and imagination develop (helps in adult life to find ways out of even the most difficult situations);
- accuracy is trained (having become accustomed to the fact that accuracy does not imply haste, the child becomes more attentive to doing homework and working at school);
- independence is instilled in schoolchildren, which is necessary for adult life (in particular, children begin to take a responsible attitude towards doing homework, without waiting for reminders from their parents).
Materials and tools for crafts from matchboxes
In order for craft activities with primary school children to be as effective as possible, it is necessary to correctly organize the work process.
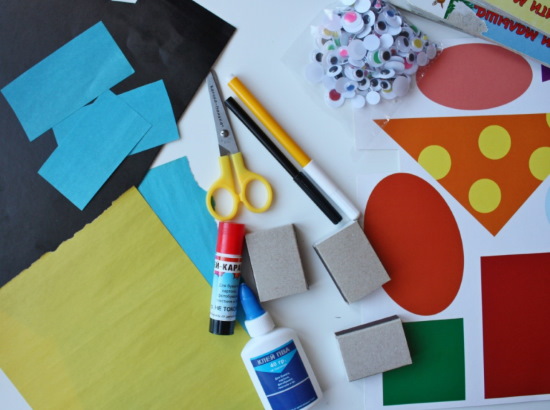
For the child's work it is recommended to provide:
| Working tool | What to look out for |
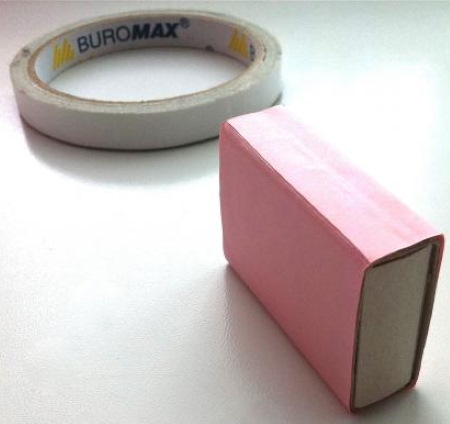
| Matchboxes | The main material needed to create the craft. The specific number of boxes is determined by the craft you plan to make. |
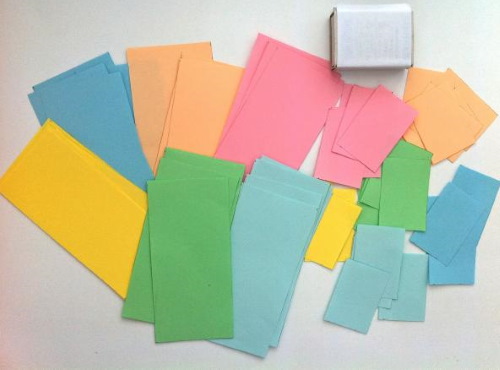
| Colored paper | It is enough to give schoolchildren paper of basic shades – red, blue, green, black, yellow. |
| PVA glue | If students do not know how to work with liquid glue, it is acceptable to use a solid glue stick suitable for bonding cardboard surfaces. |
| Brush for adhesive composition | Necessary if liquid PVA is used. |
| White cardboard | You will need 2-3 sheets, no smaller than A4 format. |
| Multicolored markers | Necessary for adding detail to a craft, for example, to add headlights to a car or to decorate the wall of a cardboard house with painted flowers. |
| Scissors with rounded ends | If you don't have safety scissors, you can use regular ones, but you should supervise the actions of each child cutting out the figures. |
| Paper napkins or soft paper | It can be used to remove excess glue. |
| Cotton swabs | If you don't have any, you can wind a small piece of cotton wool onto the end of a match, and then use it as a cotton swab. |
| Simple pencil | It is necessary for the convenience of adjusting lines in case of errors. |
| Eraser | It should be made of high-quality rubber so as not to leave streaks or marks when removing the pencil from the cardboard surface. |
Matchbox Craft Ideas for Kids
The matchbox craft can be used in future games for both boys and girls, depending on what exactly it is. The specific algorithm of work should be chosen taking into account the child's age, gender, as well as his interests or existing hobbies.
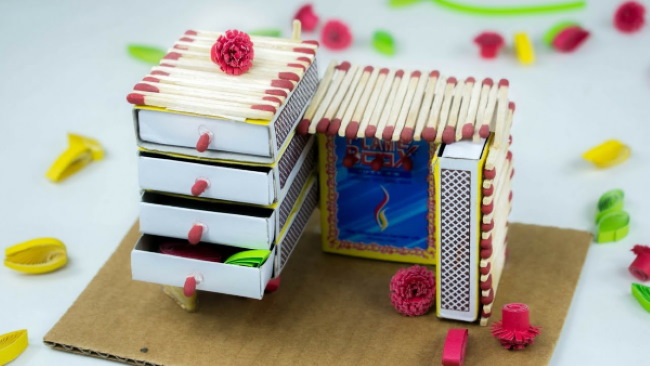
Dollhouse furniture
To make, for example, a chest of drawers for a doll from matchboxes, you need:
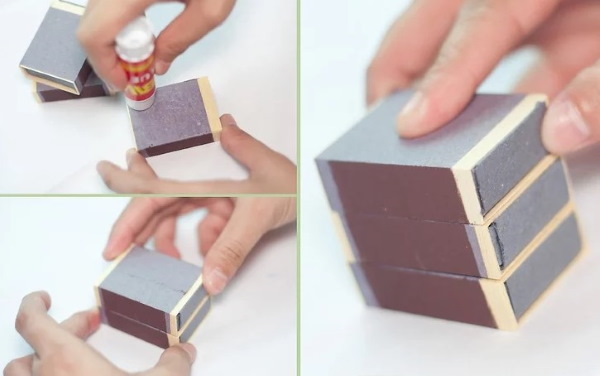
- Remove the moving part from 2 matchboxes.
- Glue them together, placing one of the edges on top of the other. To minimize the risk of the craft frame not fitting tightly, it is recommended to fasten the edges with a clothespin until the fixing compound has completely dried.
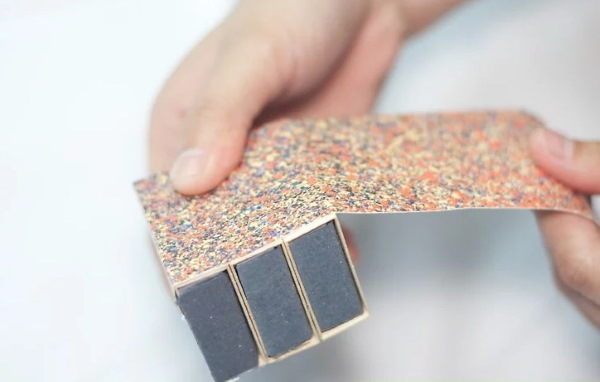
- Cover the outer edges of the boxes with wrapping or colored paper, making them look as similar as possible to part of the chest of drawers.
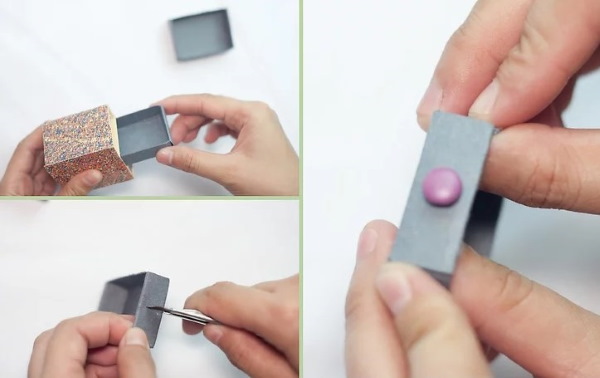
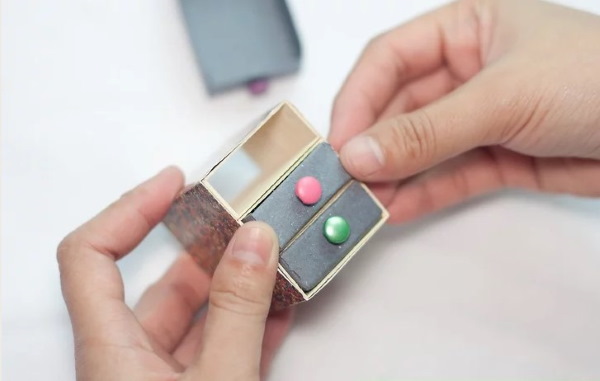
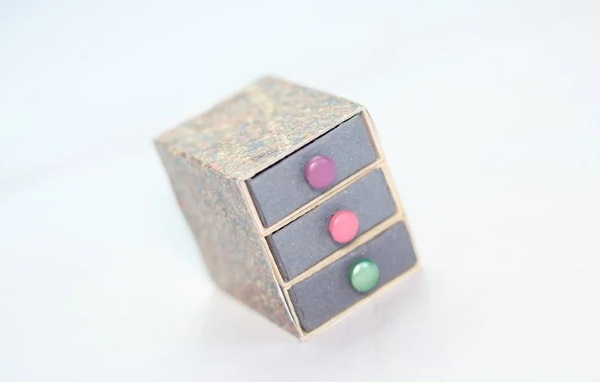
- Glue a small bead to one of the lower sides of the box in each of the 4 corners – the legs of the future furniture.
- Decorate the front of the pull-out parts of the boxes by gluing bows, beads, or coloring them with markers.
- Insert the movable bottom into the corresponding grooves of the box.
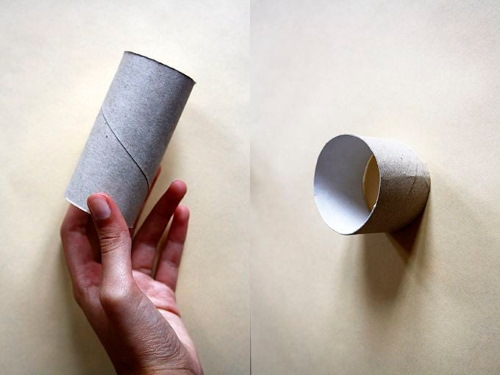
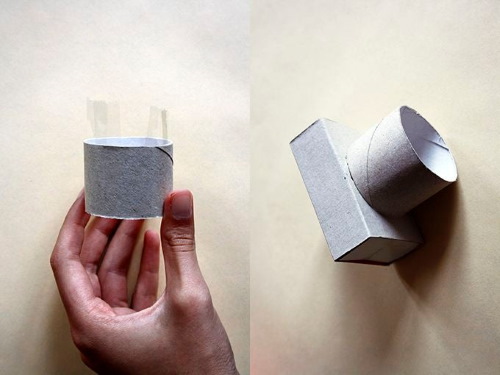
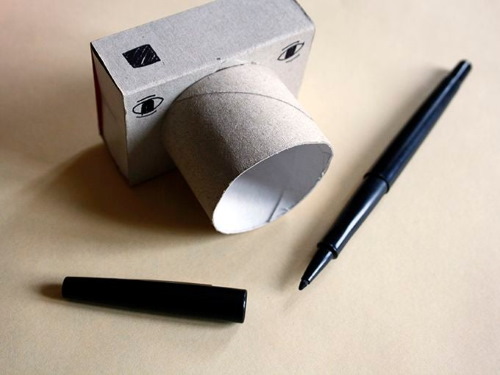
Camera
A craft made from matchboxes in the form of a camera will appeal to children of all ages due to the similarity of the toy with an adult attribute.
The algorithm for constructing a cardboard chamber looks like this:
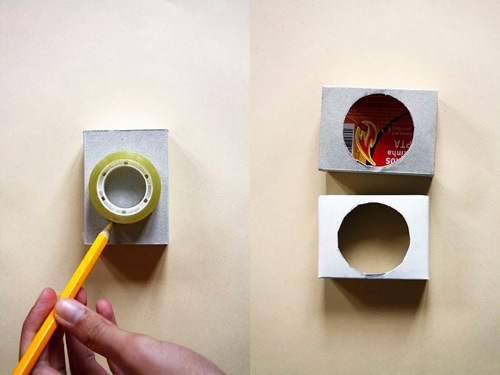
- Using a simple pencil, mark the area on the movable part of the matchbox that will need to be cut out later (this can be either a square or a rectangle).
- Using a utility knife, make a hole along the marked outline.
- Paint the inside of the box black (apply paint or marker in a thick layer).
- Cut a thin line from a plastic bottle and then smooth it out with your fingers.
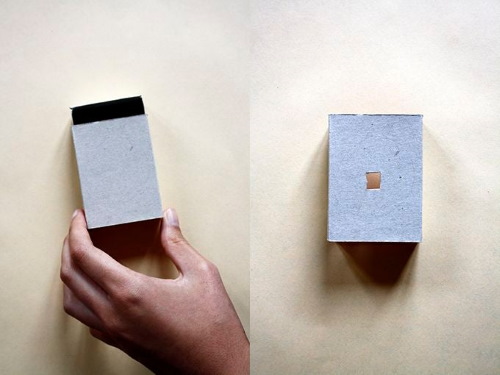
- Use scissors to make one edge of the ribbon sharp.
- Use electrical tape to secure the plastic strip to the film body.
- On the second half of the matchbox, draw a square measuring 8 by 5 mm.
- Cut a 14 x 14 mm square out of a tin can, pierce its center with a thick needle, and then sand the back side.
- Paint all construction parts black.
- Assemble the camera components, securing them together with electrical tape.
Although a toy camera made from matchboxes looks quite safe, it should be handled with extreme caution to avoid breakage and injury (scratches, wounds, punctures of the skin) to the student.
Military equipment
To make a tank from matchboxes, you need:
- Cut the side edge of one of the boxes diagonally.
- Glue 2 matchboxes together, joining them together with their smallest edges so that the cut edge is at the front of the structure.
- Cover the tank body with green colored paper or develop a unique decoration for military equipment.
- Cut the side edge of the second matchbox diagonally as well.
- Secure the box to the main structure from above using tape or glue, sliding it towards the front edge.
- Glue 4 wheels (cut wine corks) to the sides at the bottom.
- Make a small hole in the top box. Insert a plastic lollipop stick into it.
To construct an airplane from matchboxes you need:
- For the wings of the plane, cut out 2 strips equal to the width of a matchbox from colored paper or cardboard of any color, 1 long and narrow strip and 2 narrow short ones.
- Fold the narrow and long strip in half.
- Place it on the box, then secure the edges at the bottom and top of the main part of the structure.
- Glue wide strips to the bottom and top of the box so that it is in the middle.
- By bending the 2 remaining strips equally, construct the tail of the flying device.
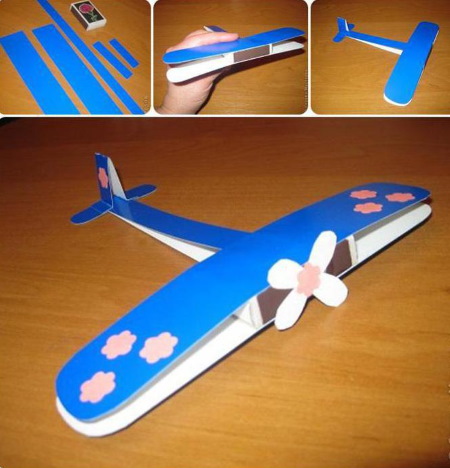
- Cut a small propeller out of white paper and then glue it to the front of the resulting plane.
- Paint or detail military equipment, if desired.
Cars
To make a car, you will need 3 matchboxes:
- Cover each box with colored paper or paint it with paints.
- Connect the 2 boxes from the short edge side, fixing them with glue or double-sided tape.
- Glue the third box on top of the main body of the figure so that the area where the two lower blocks connect is in the middle.
- Cut out 8 circles of different sizes from thick colored cardboard (4 large ones – black tires; 4 smaller ones – gray, brown or white inner part of the wheel).
- Glue the small circles into the center of the large ones.
- Fix the wheels on both sides of the car body using glue or double-sided tape, placing them symmetrically, 2 pieces on each side.

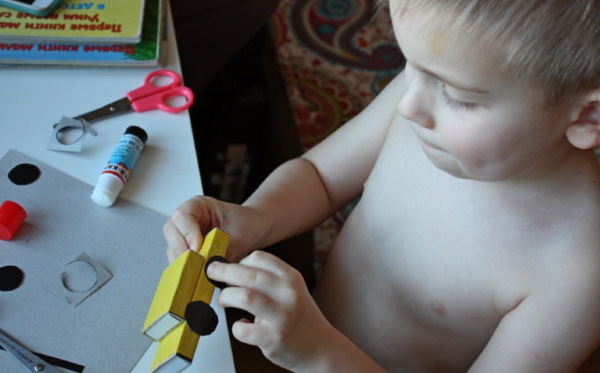
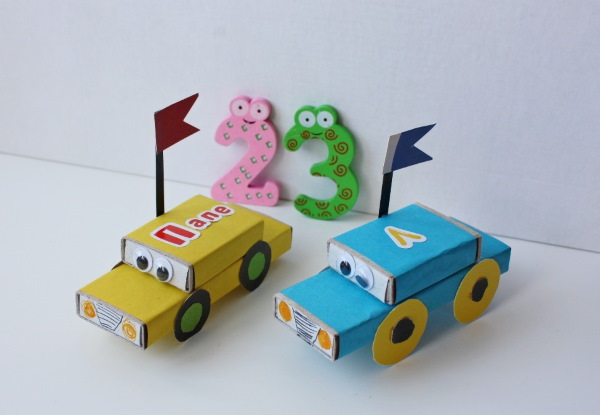
- Detail the front part of the body: glue or draw headlights, depict a radiator grille, glue or draw eyes, giving the car a human appearance.
- Cut a thin, long strip out of black colored cardboard.
- Cut out a flag from thick cardboard in a contrasting color (2 horizontally located identical triangles with a common side edge),
- Glue the flag to the previously cut long strip.
- Attach the flag to the side of the main body of the car, thus creating a racing vehicle.
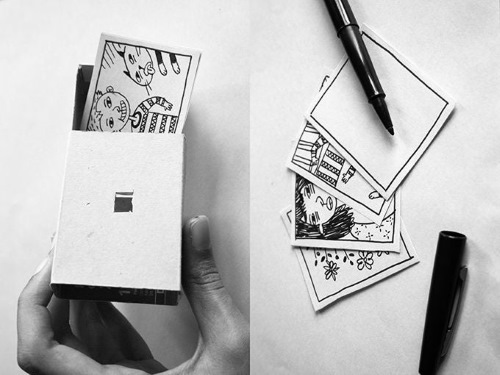
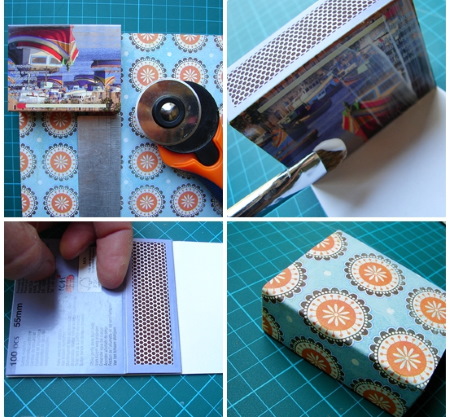
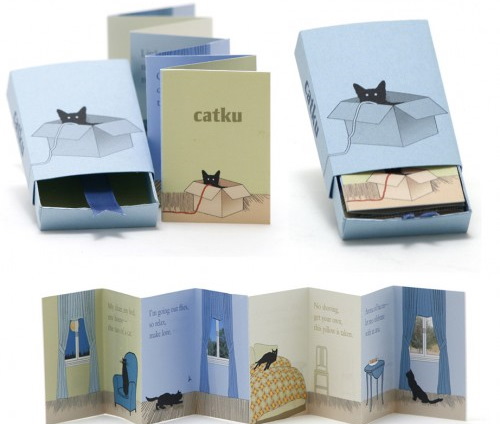
Photo album
Crafts made from matchboxes can be used not only in children's games, but also in everyday life.
For example, to store photos from this material you can make an album:
- Cut a rectangle out of thick cardboard so that its dimensions exceed the size of the side of the matchbox by 2–4 cm on each edge.
- Create a decor for the rectangle so that it looks like an old book.
- Decorate the matchbox using colors similar to the rectangle's decor (paint the box, glue on small details, such as beads, ribbons, etc.).
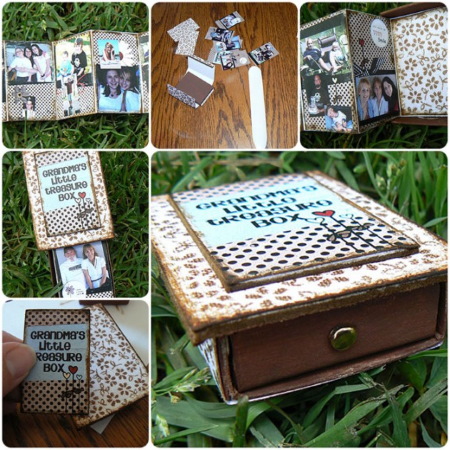
- Glue the rectangle to one side of the matchbox so that there is an equal amount of space on each edge.
- Glue a small round bead (imitation of a handle) to the side of the box.
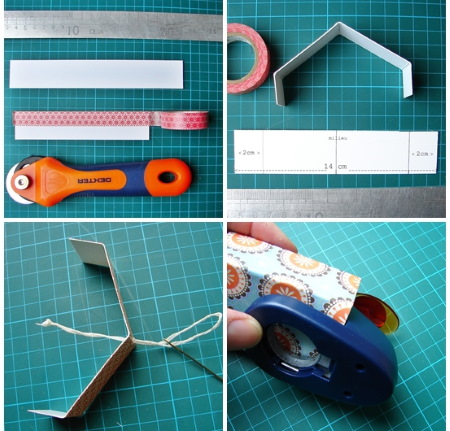
- From paper or thick cardboard you need to cut out a strip 1 cm wider than the size of the matchbox.
- Fold the strip like an accordion, carefully ironing the fold lines.
- Glue a photo of the appropriate size to each part of the accordion located between the 2 fold lines. It is recommended to use double-sided tape to fix the photo, as liquid glue can negatively affect the appearance of the photo.
- Having tightly folded the accordion with the photo, put it away in a matchbox, having first removed its moving part.
Mini Zoo
You can use unlimited resources to create a mini zoo number of matchboxes (the more boxes, the more animals):
- Determine what kind of animals the student will be creating.
- Select a paint (it is preferable to use thick gouache) that matches the color of the skin or hide of the chosen animal. If necessary, it is recommended to mix the paints to obtain the desired shade.
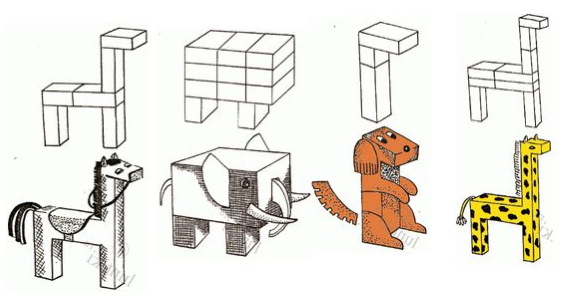
- Apply several layers of gouache to the surface of the matchbox to achieve the most dense color coverage (animal's body).
- On a separate sheet of white cardboard, draw the face of the chosen animal. If the child has no artistic skills, he/she is allowed to create the animal's face using applique (in this case, it is recommended to prepare the details for creating the applique for the child in advance).
- Fix the resulting animal's muzzle on the front side of the matchbox.
- If the chosen animal has a tail, it is necessary to cut out a strip of the appropriate thickness, length and shape from colored cardboard.
- Glue the tail diagonally to the opposite side of the matchbox so that it can be seen when the animal figure is placed directly in front of you.
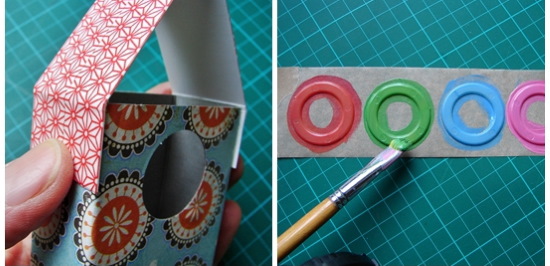
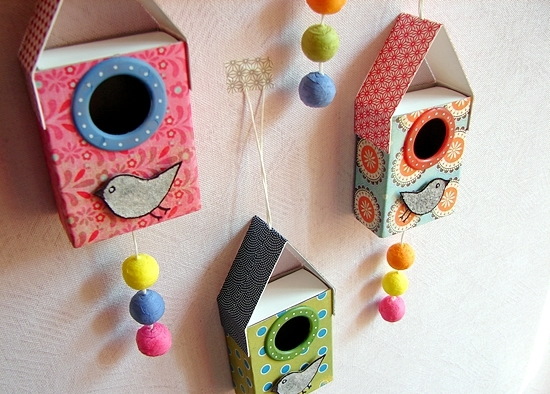
Birdhouses
A craft made from several matchboxes can be used as educational games for natural history or surrounding world lessons:
- Print out an A4 sheet, dividing it into several rectangles equal in size to the matchbox. Each rectangle should contain an image of a birdhouse, feeder or cage that is not similar to the other birdhouses drawn nearby. These pictures can be printed or drawn by hand.
- Print out an A4 sheet, dividing it into several rectangles equal in size to the matchbox. Each rectangle should contain an image of a bird that is not similar to the others drawn nearby. It is recommended to print out the pictures of birds so as not to confuse the student by asking him to identify the bird from a schematically drawn image.
- Paint the matchbox any color you like or cover it with colored paper on all sides.
- Cut both A4 sheets into rectangles.
- Glue the rectangle with the bird house to one side of the matchbox.
- Glue the rectangle with the image of a bird to the bottom of the pull-out part of the box.
- The finished material can be used in various games. For example, you can offer schoolchildren to determine the names of birds "living" in matchbox birdhouses, or train children's memory by asking them to reproduce by memory which bird is in which birdhouse.
Puzzles
To make matchbox puzzles, you need:
- Find a picture on the Internet that matches the interests of a specific age group of children. Enlarge it so that its size in printed form occupies an area equal to the surfaces of 4-10 matchboxes placed in a square, close to each other.
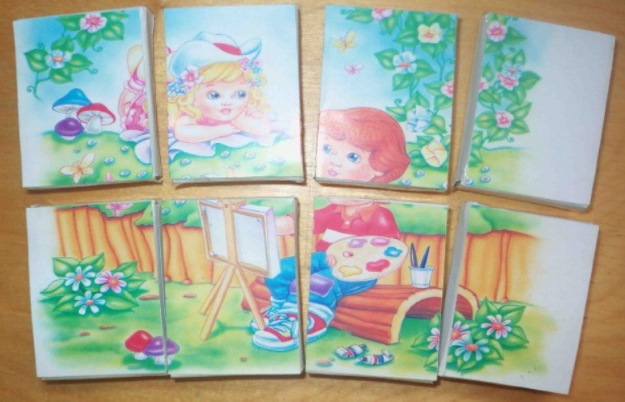
- Print the image. Cut it into 4-10 equal parts (each of these parts should be equal to the side of 1 matchbox).
- Glue all the parts of the image onto the surface of the matchboxes so that when they are placed next to each other, they form the original picture. It is recommended to fix the parts with a glue stick or double-sided tape, since liquid PVA can spoil the appearance of the picture, thus confusing the student when further assembling the puzzle.
Valentines
A matchbox Valentine is a budget gift that evokes additional emotions due to the fact that it was made with your own hands:
- Cover the matchbox on all sides with wrapping paper of the chosen color so that the moving part remains movable.
- You can glue additional decorative items to the top of the box, such as beads or bows. If the student already knows who he will give this Valentine to, then you can also write the addressee on the front of the box (by hand with a marker, glue letters cut out of colored paper, or print the name written in the selected font on the computer).
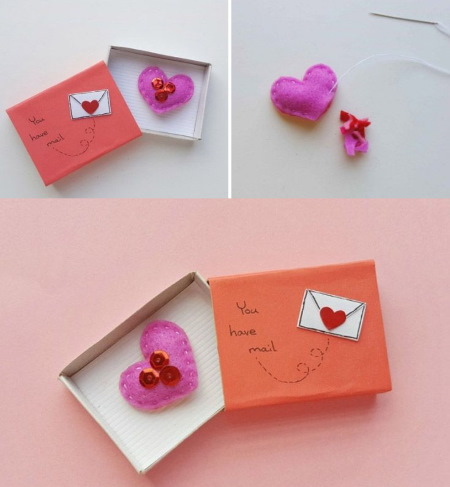
- Glue a small bead (imitation of a handle) to the side of the movable part of the box.
- Put a note in the box with a declaration of feelings or fill the pull-out part of the box with small candies.
Pop-up book
The pop-up book is made using the same scheme as the photo album:
- Determine what content the student plans to work on creating a book.
- Paint the matchbox with a single-color paint (it is recommended to use thick gouache) or cover all its sides with colored or wrapping paper.
- On a white sheet of paper, draw a rectangle corresponding to the size of a matchbox. Cut out the figure.
- On the rectangle, draw a schematic illustration related to the contents of the book, or write its title.
- Cut a strip from thick cardboard, the width of which will be 2 mm less than the height of the matchbox.
- Fold the strip like an accordion, carefully ironing the fold lines.

- On each section of the strip located between the 2 fold lines, write the text of the book or an image related to what was written on the previous section.
- Fold the accordion book, carefully ironing the fold lines.
- Place the accordion into the matchbox that you decorated earlier.
Counting and alphabet
Matchboxes can also be used for general educational games with younger students.
For example, to hone addition and subtraction skills, you can turn matchboxes into a counting aid:
- Divide the A4 sheet into several rectangles equal to the area of the side of a matchbox.
- Inside each rectangle, write a number from 1 to 9 in large letters using a marker.
- Cut out figures with numbers, then glue each of them to the top of the matchbox.
- Place wooden sticks into the pull-out part of the box in a quantity corresponding to the number indicated on the box.
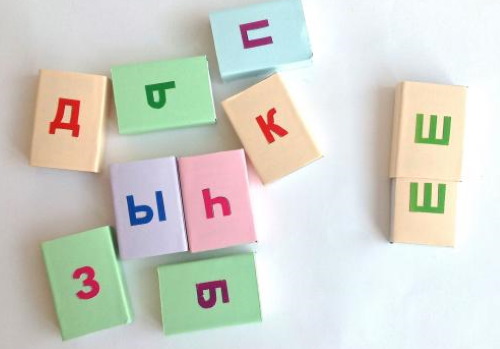
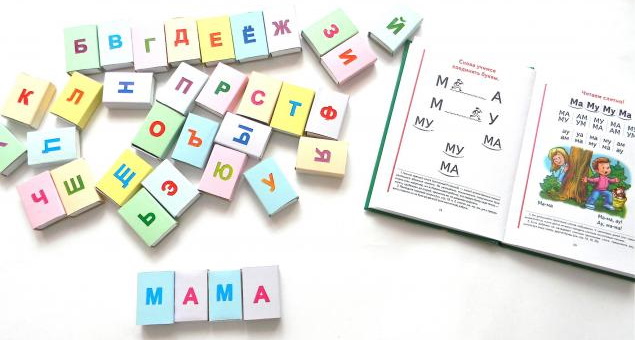
Crafts can also be used to teach a child to spell words correctly. To do this, glue paper rectangles with letters to the surface of matchboxes, and put a picture of objects starting with them in the movable part.
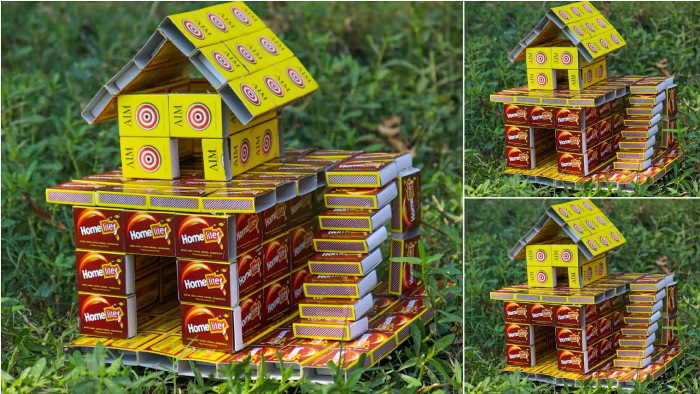
Houses
The simplest option for creating multi-storey houses from matchboxes is:
- Place the required number of matchboxes on top of each other. Fix them with glue (preferably liquid PVA).
- Cover the matchboxes with colored paper in brown, gray or black.
- Draw windows and doors with a marker or glue them on after cutting out shapes from colored paper.
A more complex craft would be to build a castle from matchboxes:
- Glue the matchboxes together with liquid PVA, making sure that the bottom rectangle is 6 by 4 pieces, the middle one is 2 by 2 pieces, and the top one consists of 1 piece.
- Connect the parts together using PVA or double-sided tape.
- Cover the castle on all sides with colored paper in brown, gray or black.
- After cutting out windows and doors from paper in a contrasting color, attach them in the appropriate places.
- Add detail to the craft, for example, by gluing small pieces of cotton wool onto the roof (snow).
Crafts made from scrap materials, such as matchboxes, not only develop students’ imagination, but also allow them to learn perseverance and accuracy.
In addition to the fact that the objects obtained as a result of labor can be used in further games, they will also be useful in the overall development of the child. With their help, it will be possible to improve reading and writing skills, increase the speed of performing mathematical calculations, and also gain new knowledge about the world around you.
Video about crafts from matchboxes
Crafts from matchboxes - 5 interesting ideas: