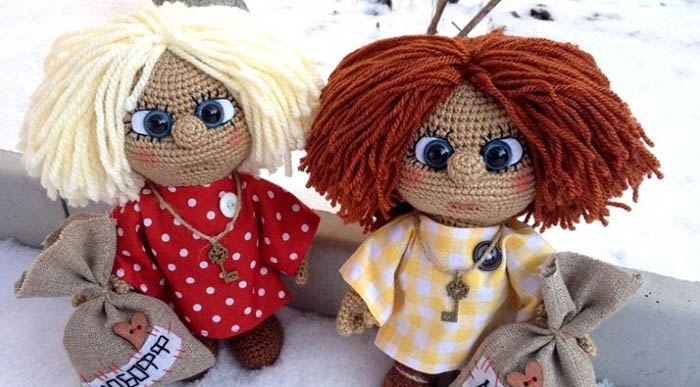
Knitting toys using the amigurumi technique is considered an easy task, even if you have minimal experience with crochet. Animals, fairy-tale heroes and other characters are often created in this style. The cartoon character Kuzya is popular.
Features of knitting toys
The brownie Kuzya is crocheted using the amigurumi technique in a spiral. In this case, you need to make columns without throwing. The knitting density should be high so that the filler does not peek out from the knitted product through the areas between the columns.
In this case, it is recommended to give preference to acrylic threads (the manufacturer can be any). This type of yarn is characterized by a wide range of shades, adequate price and excellent thickness for creating such toys.
When starting work, you first need to create an amigurumi ring. To do this, you need to wind the working yarn twice on your left index finger. After that, the knitting tool must be inserted into 2 rings on the finger to grab and pull the working yarn. After that, you should pick up the working material again to knit the first stitch.
In the future, the amigurumi ring should be crocheted with columns without throwing. To continue the work, knitting should be done counterclockwise.
There are several types of brownies, which will differ from each other in appearance:
- Buba. Presented as a mythical creature with a tail, this brownie is remotely similar to a human.
- Kuzya. He is a red-haired hooligan who looks more like a child.
- Methodius. He is a fairy-tale old man with a beard.
When starting to knit a brownie, you need to take into account the characteristic features of the character, because the parts of the body of these figures should be designed using different patterns.
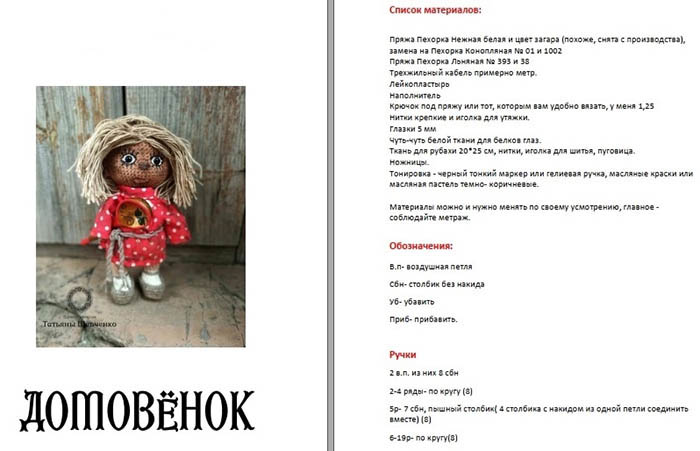
Necessary tools and materials
Both experienced and novice craftsmen can knit the brownie Kuzya, based on simple patterns with detailed descriptions.
To work, you need to prepare not only a hook with thread material, but also other materials and tools:
- tapestry needles to sew the toy parts together;
- marking rings;
- filler;
- scissors.
For knitting, it is recommended to use tool No. 1.5-2. However, often the label of the threads already indicates the optimal size of the tool that is acceptable to use when working with this type of yarn.
To create toys using the amigurumi technique, experienced knitters recommend taking a hook whose size will be slightly smaller than that indicated on the yarn package. This is required to increase the knitting density.
To create a toy, it is best to use soft acrylic threads, which are ideal for knitting.
For different parts of the figure you need to take yarn of different shades:
| Parts of the toy | Optimal color |
| Torso, head, legs, arms | To create the doll, you need to use flesh-colored threads to make the toy look realistic. |
| Bast shoes | It is better to make this part of the toy from brown threads. |
| Shirt | To sew a shirt, you should use red yarn. |
| Hair | The Domovenok's hair should be red, so you need to select threads of the appropriate shade. In this case, the shaggy material "Grass" will do. |
The crocheted brownie Kuzya should be presented as a dense, but moderately soft toy. To stuff the product, synthetic padding, holofiber or synthetic fluff will do. Thanks to these materials, you can achieve the desired effect. Beginner knitters must prepare rings for marking to mark the end of the line.
A tapestry needle with a large eye is suitable for sewing the parts of the figure together. This is necessary so that the acrylic yarn can pass freely through the tool. However, it is advisable to do the work in such a way that in the future it will not be necessary to attach a large number of parts to the body.
Knitting technique
The crocheted brownie Kuzya requires knitting parts that will smoothly flow into each other. Thanks to this, you will not need to sew a large number of parts of the figure. The size of the toy will reach approximately 30 cm.
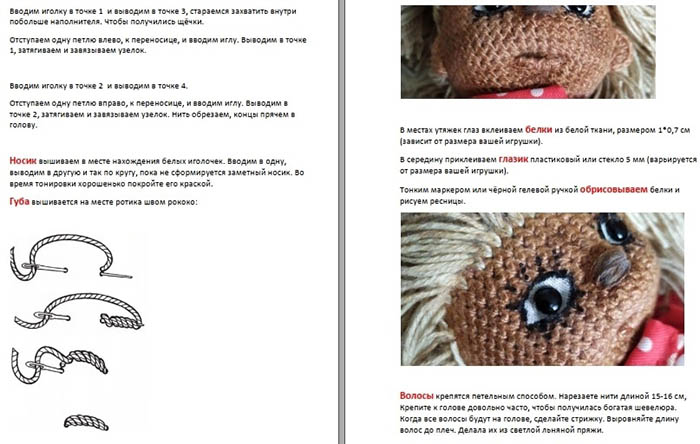
When rounding the head, it is necessary to add filler. The nose of the product must be knitted from 6 stitches of the amigurumi ring. In the 2nd row, it is necessary to make increases through each row to get 12 columns without a yarn over. In the 3-4 rows, you also need to make 12 columns. As a result, the finished nose can be attached to the face of the product.
The eyes can be embroidered, crocheted or glued on, choosing the shade and size. To create the hair, you need to use the "Grass" threads, which need to be cut into pieces of a certain length. Then, with a hook, you need to grab the center of the yarn and pull it through the loops of the head.
The parting should be in the center. Additionally, you can knit a red shirt, which should be put on after sewing all the parts of the figure.
Each diagram contains the following symbols:
| Name | Designation |
| Decrease | You need to knit 2 columns without yarn overs together. |
| Increase | You need to knit 2 columns without yarn over in 1 stitch. |
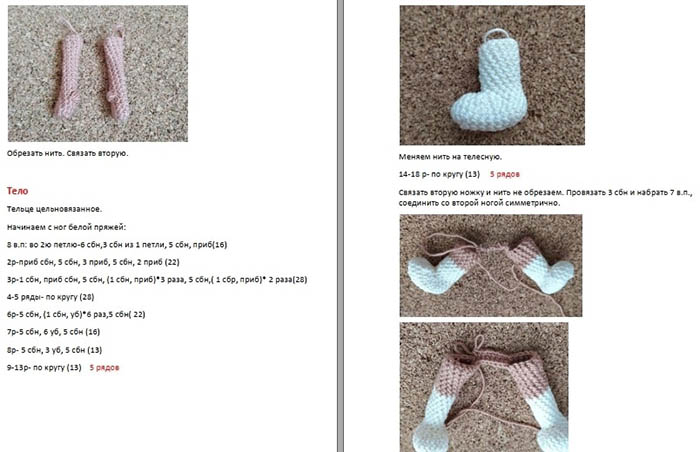
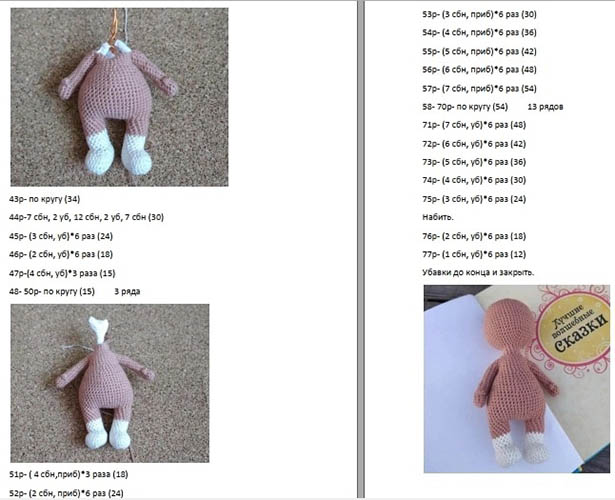
Execution of the torso
Row 1 of the body will be row 20 for the legs. Knitting should be done clockwise, while the knitting should be on the front side. To create the body, you need flesh-colored threads.
Step-by-step description of the scheme:
- 1 row consists of 4 single crochet stitches on the 1st leg, 3 chain stitches, 14 single crochet stitches on the other leg, 3 single crochet stitches on the chain stitch and 9 single crochet stitches.
- Row 2 consists of 4 columns without a throw, 3 columns without a throw between the legs, 14 columns without a throw, 3 columns without a throw between the legs and 9 columns without a throw.
- Row 3 should go without changes.
- Afterwards, make additions, which should be located in the abdomen and buttocks area.
- In the 4th row, 5 times in a row, alternately repeat the pattern of a single crochet and an increase. Then make 6 single crochets and repeat the initial pattern again. At the end, knit 6 single crochets.
- There should be no changes in rows 5-9.
- Row 10 consists of 17 single crochets, 2 decreases, 17 single crochets and 2 decreases.
- Row 11 is the same as row 10, but make 1 decrease.
- In the 12th row, make 16 columns without yarn over, alternating with 1 decrease.
- In the 13th row, knit 15 single crochet stitches, alternating with 1 decrease.
- In the 14th row, repeat the pattern of 14 columns without yarn overs, decreases, 14 columns without yarn overs and decreases.
- Row 15 should remain unchanged.
- In row 16, repeat the pattern of 3 columns without yarn overs or decreases 6 times, alternating.
- Row 17 do not change.
- In the 18th row, repeat the pattern of 6 columns without yarn overs and decreases three times with alternation. Stuff the product a little with filler.
- In row 19, repeat the pattern of 5 columns without yarn overs or decreases 3 times, alternating.
- Row 20 should remain unchanged.
- In row 21, repeat the pattern three times, alternating 4 single crochets with decreases. Fill the body with stuffing.
- In row 22, repeat the pattern three times, alternating 3 single crochets and decreases.
- Save a piece of yarn so that you can sew the body to the head later.
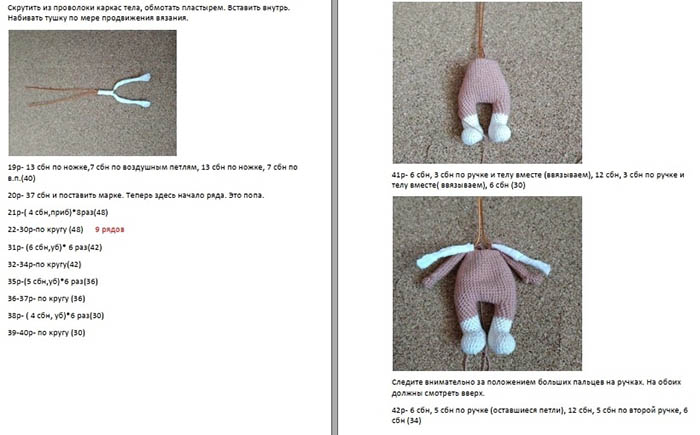
Step by step description of creating hands:
- Initially make 6 fingers, so that there are 3 pieces for each hand. Knit with flesh-colored threads.
- To do this, make 2 air loops and 5 columns without yarn over in the 2nd stitch from the tool.
- 1 row consists of a single crochet with an increase. Alternate the elements to get a total of 7 loops.
- 2-3 lines should go unchanged.
- Then connect the fingers in columns without throwing.
- In the 4th row, make a single crochet and 4 single crochets along the finger. Attach the 3rd finger with a single crochet and knit 6 single crochets again. Then knit 2 circles to get 26 single crochets.
- In the 7th row, decrease on the palm and back, making 2 columns without yarn over only on the edge of the palm. Continue decreasing until you have 11 columns without yarn over.
- The next 10 lines are designed as 11 columns without throwing.
- In the last row, repeat the pattern twice, alternating 2 decreases and a single crochet. Then tighten the yarn. Hide the end of the thread.
Knitting of legs
To knit the legs, you will need white thread material to initially knit 6 air loops. Later, you will also need flesh-colored yarn.
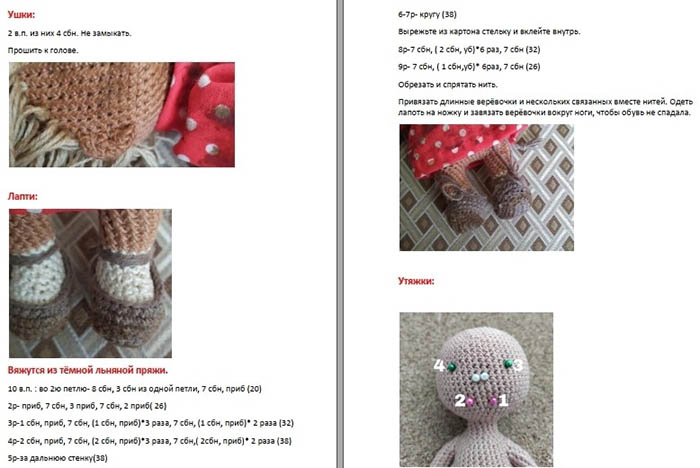
Step-by-step description of the scheme:
- In the 1st row from the 2nd stitch from the tool make 4 columns without a yarn over, then knit 3 columns without a yarn over in the last stitch and turn the fabric clockwise. At the end make 3 columns without a yarn over with an increase.
- Row 2 consists of an increase, 3 columns without a yarn over, 3 increases, 3 columns without a yarn over and 2 increases.
- In the 3rd row, knit columns without yarn over in the amount of 5, 1, 1, 4, 1 respectively. Make increases between them. Start and end the row with an increase.
- Rows 4-6 should remain unchanged.
- Row 7 consists of 6 single crochet stitches, 6 decreases and 6 single crochet stitches. Fill the toe with stuffing.
- Row 8 includes 5 single crochet stitches, 4 decreases and 5 single crochet stitches.
- Rows 9-11 should remain unchanged.
- Change the white thread color to flesh-colored.
- Rows 12-19 should go without changes. Add filling to the product.
- Connect the two legs together. Then you can start to design the body.
How to make a head
Step-by-step description of knitting:
- Using flesh-colored threads, initially cast on 10 air stitches.
- In the 1st row, knit 8 single crochet stitches from the 2nd stitch from the hook. Make 3 single crochet stitches in the outer loop and turn the product clockwise. Then knit 7 single crochet stitches and make an increase.
- In the 2nd row make an increase, 7 columns without a yarn over, 3 increases, 7 columns without a yarn over and 2 increases.
- In the 3rd row, between the increases, knit columns without yarn over in the amount of 1, 8, 1, 1, 8, 1 respectively. The first column should be without yarn over. The row should end with an increase.
- Row 4 includes 2, 9, 2, 2, 9, 2 columns without yarn over. Between these elements, perform an increase. Start the row with a column, end with an increase.
- Row 5 consists of 3 columns without a yarn over, an increase, 10 columns without a yarn over, an increase, 3 columns without a yarn over, an increase, 3 columns without a yarn over, an increase, 10 columns without a yarn over, an increase, 3 columns without a yarn over and an increase.
- In the 6th row, alternately knit single crochets and increases. The number of columns is 4, 11, 4, 4, 11, 4 respectively. Start the row with a single crochet, finish with an increase.
- In rows 7-13, make columns without yarn overs in a circle to get 50 pieces.
- In the 14th row, alternate single crochets with decreases. Sequential knitting of columns - 4 pcs., 11 pcs., 4 pcs., 4 pcs., 11 pcs., 4 pcs. At the beginning of the row, make a single crochet, at the end of the row there should be a decrease.
- In the 15th row, knit 3, 10, 3, 3, 10, 3 columns without yarn over respectively. Make a decrease between them. The row should end with a decrease.
- In the 16th row make 2, 9, 2, 2, 9, 2 columns without yarn over respectively. Between them make 1 decrease. The row should end with a decrease.
- In the 17th row, knit 1, 8, 1, 1, 8, 1 column without yarn over respectively, between which perform 1 decrease.
- Row 18 consists of a decrease, 7 single crochets, 3 decreases, 7 single crochets and 2 decreases.
- In year 19, perform a pattern of a column without yarn over and decreases with alternation in a circle.
- Fill the figure part with stuffing and sew. Fix the edge of the yarn and remove.
Tips and tricks
The crocheted brownie Kuzya requires following some tips and recommendations so that no difficulties arise during work:
- Knitting should be done for 2 walls of the stitch, otherwise the toy will have unsightly scars that should not be there. When knitting only for 1 wall of the loop, the finished product will be thin and more elongated than necessary.
- To obtain a dense knitting, you need to use a tool that is thinner than the thread material. If the yarn label indicates a hook No. 3.5-4, for knitting in the amigurumi technique you need to take a knitting tool No. 1.75-2.
- The wrong side should always be on the inside. In this case, you need to be able to distinguish the wrong side from the right side to prevent the fabric from getting tangled and turning out during knitting.
- The filler should be well hidden so that it is not visible in different places. Before finishing the toy part, it is recommended to leave a small space on top for ease of crocheting. Afterwards, you need to thread the filler through the small hole left using a thin wooden stick.
- When making a decrease, do not skip a stitch. The yarn should be threaded in 2 stitches to knit the elements together. If this is not done, there will be holes in the toy.
- If you make a mistake, it is better to unravel the fabric immediately, otherwise the finished toy will have an unsightly appearance.
- When using low-quality stuffing material in the form of thread skeins, fabric scraps, the filler will soon begin to show through. If you use synthetic padding, this composition is characterized by uneven distribution, as well as the formation of pits and bumps. For filling, it is recommended to choose synthetic fluff or holofiber, which must be cut into pieces.
- When reading amigurumi patterns, beginner knitters often make mistakes with the number of stitches. This process causes many difficulties. To avoid such problems, it is recommended to mark the outer loop of each line. For these purposes, it is permissible to use a contrasting shade of yarn.
- The drawstrings must be uniform and made of the yarn that was used for the work. If the thread is textured and breaks, you can use cotton material of a similar shade.
- After 2-3 lines, you must turn the fabric and start knitting clockwise. In this case, the starting yarn should always be inside the product.
- To prevent the sewn-on legs from looking in different directions, the needle should be inserted slightly below the edge without tightening too much.
When knitting the brownie Kuzya, you can initially start to shape the legs, smoothly moving to the body and head, or act at your own discretion, as is convenient. The main thing is to use high-quality yarn with a hook of the appropriate size so that the knitted toy looks beautiful and neat.
Video about knitting
Master class: crochet Domovenok Kuzya (part 3):