Drawing a comet allows you to diversify the space theme in your creativity. A comet is a celestial body that consists of rocks, dust, and ice. This substance forms the comet's "head" and its "tail".
Comet (the name of the celestial body) comes from the Greek word meaning "long-haired". The main purpose of such an image is to convey a sense of movement and grandeur.
A comet flies through the solar system, approaching and moving away from the Sun. When it is far away, it looks like a luminous point, like a star. But when it approaches the Sun, it begins to heat the surface of the comet, and it begins to shine much brighter.
Necessary materials and tools
To create drawings, various tools and materials are used, which can be divided into several categories.
| Tools and materials | Brief description |
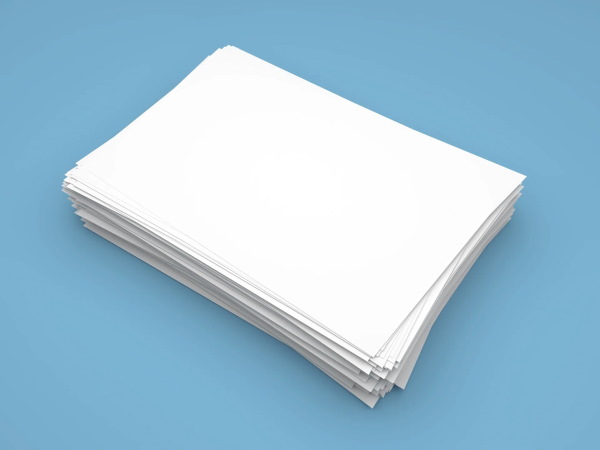
| Paper | Thick or textured paper is suitable for working with charcoal or sanguine, and thin translucent paper is suitable for pencil and watercolor. For non-professional artists, white paper of medium density with a rough surface is suitable. As your skills develop, you need to move on to higher quality types of paper, such as watercolor paper. |
| Graphite pencils | They have different levels of hardness from 9H to 9B, where H is hard and B is soft, and allow you to create lines of different thickness and saturation. |
| Charcoal pencils | Tools made from natural or artificial charcoal allow you to create thin and wide lines, giving the rough drawing volume and texture. Charcoal pencils are usually used for sketches and drafts, and are suitable for portrait painting. |
| Sanguine, sepia, sauce | Sanguine is a reddish-brown soft material. Sepia is a type of brown ink or dye, often used by artists to tone drawings. Sauce is a material similar in composition to sanguine, but differs from it in its greater density and thickness of the paint layer, which allows the artist to apply neat contours. |
| Colored pencils | They can be wax or dry. Wax ones give softer and more saturated colors, dry ones give clearer and thinner lines. There are professional art sets consisting of several dozen or even hundreds of shades, as well as special sets for certain drawing techniques. When buying colored pencils, it is worth paying attention to their hardness (it is marked with a number from 9H (the hardest) to 9B (the softest)) and the strength of the lead. There are watercolor pencils used for drawing in mixed media, and pastel pencils, whose wide lead can be shaded or applied with strokes. |
| Erasers | A tool for correcting errors. The quality of the eraser determines the possible correction of the drawing; depending on the degree of pressure, it can either almost completely erase a line made with a graphite pencil or partially blur it. |
| Klyachki | A tool for shading and softening the lines of a drawing. It can be used to achieve the effect of smooth transitions and softer outlines. The kneading stump is useful when working with charcoal or sanguine. |
| Stencils | These are special templates or shapes that help repeat certain elements or images. They are used to create repeating patterns and make the drawing process easier. |
| Rulers, compasses | A ruler can be straight or curved and is used to measure and create geometric shapes. A compass helps to draw circles of different radii. |
| Sharpeners | Helps sharpen pencils. Depending on the requirements for the thickness of the lead and the quality of sharpening, you can choose different types of sharpeners. |
| Brushes | · May have a rounded tip, allowing you to create smooth lines and soft transitions.
· Brushes with a pointed tip are suitable for working out details and creating clear contours. · Oval flat ones are used for applying paint over a large surface and mixing colors. · Round ones are convenient for precise detailing. · Corner ones are used to create clear contours and lines. · Long, narrow ones can be useful for drawing fine lines. · Flat long ones are suitable for creating wide |
| Gouache | A water-based paint that dries to a thick, opaque layer. Gouache is easy to paint with a brush or other paint application tools. It is ideal for drawing details and adding richness to drawings. |
| Watercolor | When pigments are mixed, watercolor creates a variety of hues, making it a popular choice for creating smooth transitions from light to dark and vice versa. |
| Acrylic | Water-based paint. Unlike watercolor, acrylic dries quickly, forming a glossy layer that retains color saturation. Due to the versatility of acrylic, artists often combine it with other materials to expand their painting options. |
Master classes
The basis of drawing a comet is to create a line with a curve at one end and a long tail directed away from the curve. The tail of the comet is less bright than the nucleus.
In deep space with colors
To make the comet in the picture look like it is in outer space, it will take a few steps:
- Start by sketching the basic contours of the comet on paper. This will help determine the proportions and location of the main elements. Use soft pencils or simple 2H or HB pencils for the sketch. Start with the comet's head so as not to lose the main idea of the drawing.
- The head should be yellow. Apply it with light strokes to give volume and texture. Add white highlights, which will create a glow effect and make the drawing more realistic.
Use whitewash or white paint for this. Apply them in small strokes, avoiding direct painting.
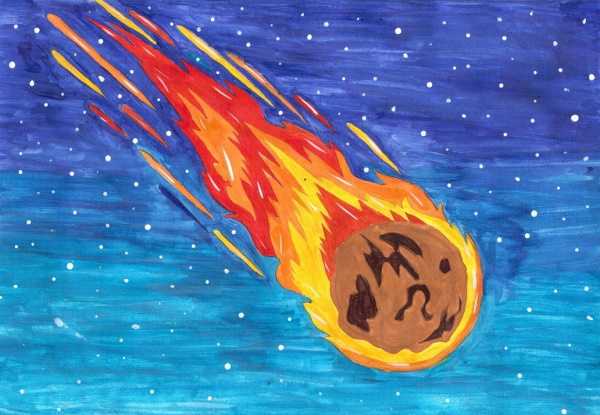
- The comet's tail should be orange-red, which will add brightness and expressiveness to the drawing. It can be created using paint of the appropriate shade and wide strokes.
- Draw a deep space of space using blue and black colors. To create the illusion of depth, use the technique of "glazing", that is, applying thin layers of paint on top of each other to obtain complex shades.
Add some white and blue colors to imitate stars and create a shimmering effect. Use light shades of blue and white paint for this. In outer space, you can add other celestial bodies such as stars or planets, clouds of cosmic dust.
Sketched in pencil
To draw a schematic image of a comet, you can follow a certain algorithm of actions:
- Start by sketching the basic outline of the comet. This will help determine the position of the comet's head and tail, as well as the overall composition of the remaining elements.
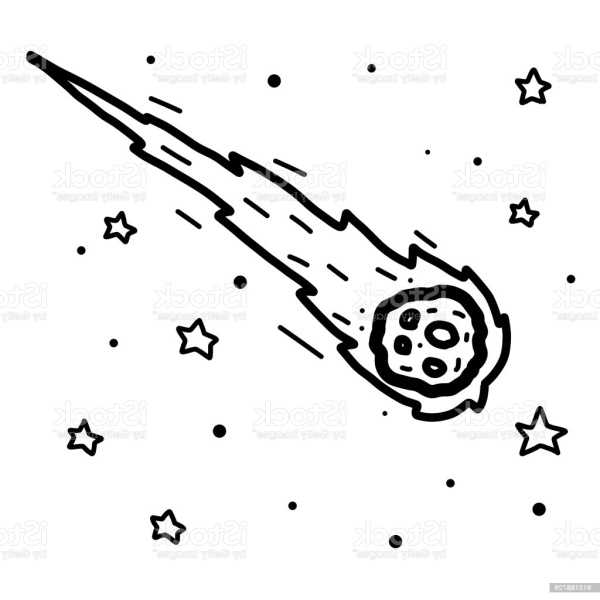
- Draw the comet's head as a 5-pointed star of irregular shape. Make it asymmetrical and unique. Use a pencil to create a clearer outline.
- Add a tail to the comet's head that will be in the shape of an arc or curved line. It should start from the head and widen towards the end. This will give the comet a more recognizable appearance.
- Place stars around the comet in various shapes and sizes. You can use circles, dashes, diamonds, crosses and other geometric shapes to create a starry environment around the comet.
Their location relative to the tail and head of the comet should be taken into account to achieve a harmonious pattern.
Adviсe:
- Pay attention to the proportions of the comet's head and tail: the head should be smaller than the tail.
- When drawing stars, you need to remember about volume: place them in such a way that they look like separate points, far from each other. Do not create too dense a cluster of stars.
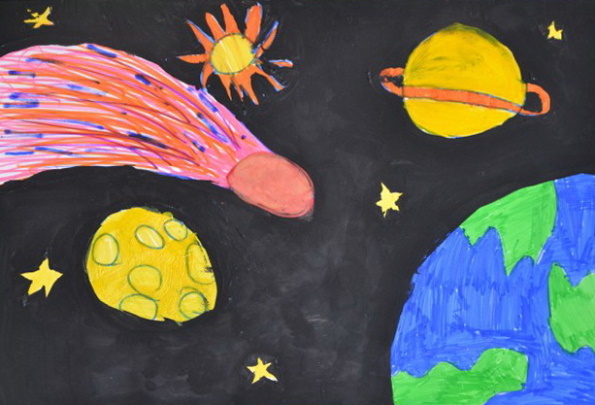
2 comets against the background of planets
The comet in the picture can be depicted by following the algorithm presented below:
- Draw the general outline of the future image, indicate the location of the elements.
- Create the outline of the planet in the lower left corner and its relief. Use gray and blue shades to create the effect of depth and volume. Draw the details and texture of the surface.
- Place a small planet above the previous one. It should be smaller in size so as not to visually merge with the first one. Draw the surface of the planet so that it differs from the previous one.

- Create a comet in the center of the sheet. Use white paint or special gouache for this. Give the comet a shape using thin lines. Detail the comet's tail, making it longer. The tail should look as if it is fluttering.
- Create a 2nd comet above the 1st, position it further from the center. This will give the composition depth and perspective.
- Draw a galaxy spiral at the top of the paper using dark shades of blue and purple. It should start at the tail of the larger comet and diverge at the corner. Each turn of the spiral should be the same shape and size.
- Add stars to the sky around the comets. They should be of different sizes and brightness. Place the brightest stars closer to the comet, and the less bright ones further away. To make them look realistic, use different shades of yellow, red and white.
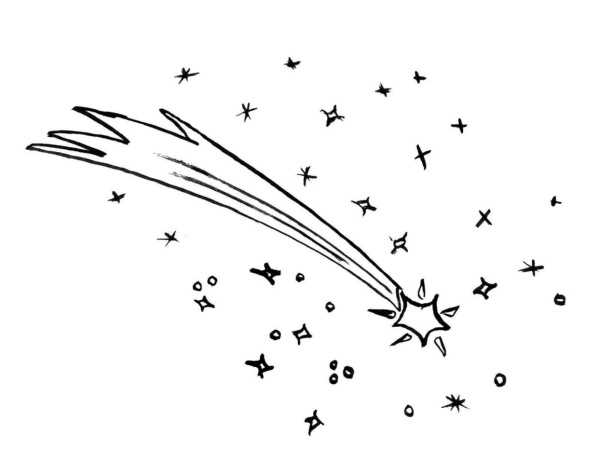
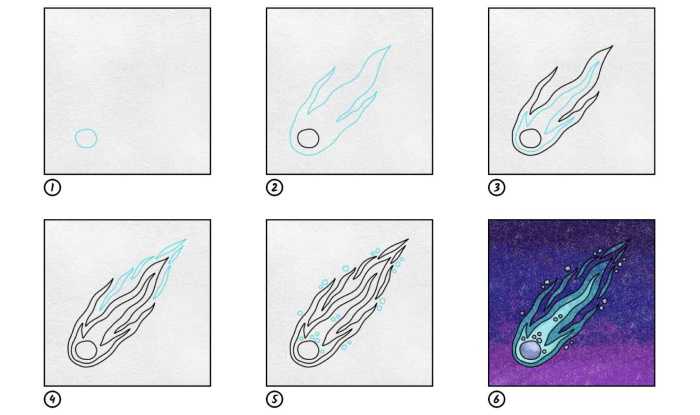
In cartoon style
The comet in the picture can be depicted using a master class in a cartoon style without complex details and unnecessary elements. You can use these tips and draw your own comet, which will be different from others.
Step by step:
- Draw a small circle at the top of the sheet. This will be a sketch of the comet's head.
- Inside the circle, draw a 5-pointed star with sharp corners. It should be large enough to comfortably draw eyes and a mouth on it.
- Draw a long curved line from the comet's head to the bottom of the sheet. It should start from one of the star's corners and gradually taper toward the end of the tail. The tail can be directed up or down.
- Draw 2 small circles inside the star, which will be the comet's eyes. They should be symmetrical and located on both sides of the star's center.
- Draw a smiling mouth as a curved line between the eyes. It should be wide and open, as if the comet were laughing.
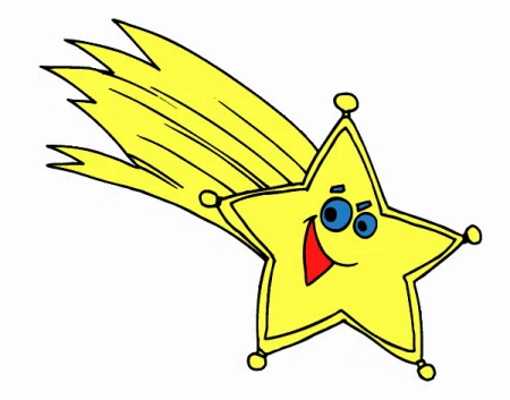
- Draw several small 5-pointed stars around the comet's head. They will represent the space that surrounds the comet.
- Choose colors and color the cartoon comet with colored pencils. The tail can be made darker so that it stands out against the background of the sheet.
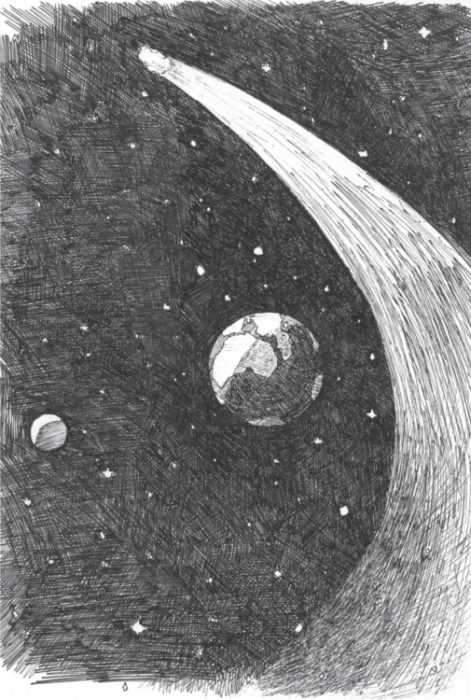
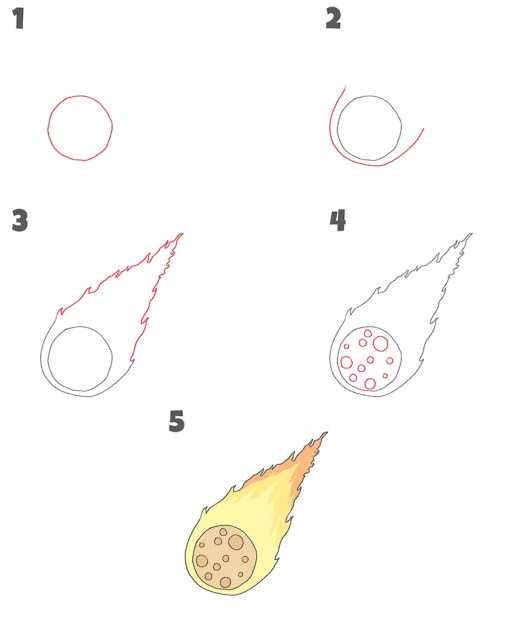
Flying towards the Earth
The comet in the picture is depicted using the following step-by-step master class:
- Start by sketching the basic contours of the comet in pencil: the comet's head (nucleus) and tail. The head can be round or oval, and the tail can be wide or narrow. Estimate the size of the comet relative to the Earth and its position in the drawing.
You can do this approximately to maintain creative freedom.
- Draw the comet's nucleus in more detail, giving it a shape similar to a ball or a drop. The nucleus should be dark or gray. It will look like a spot in the center of the comet's head. Add details to the surface of the nucleus to give it volume and texture.
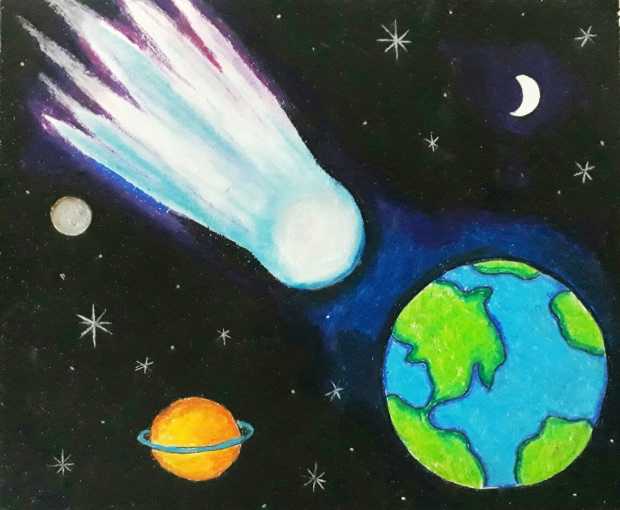
For volume, use shadows or a gradient from dark to light. Along the edge of the core, add bright or glowing lines to emphasize its contour.
- The comet's tail is directed away from the nucleus in the direction opposite to the comet's movement toward Earth. Draw curved lines of the tail, extending from the comet's head and widening toward the end. Highlight the tip of the tail, making it bright and saturated.
Use different colors for the comet's tail to create a glowing effect and to emphasize the contrast with the background of the starry sky.
- Draw the Earth as a ball that will be under the comet's trajectory. Leave space for the comet in space. Use different shades of blue and green to create a realistic look of the planet.
Add details such as oceans, continents and clouds to make the planet look natural.
- Add a background of starry sky and other space objects. Place stars around the comet and Earth, creating a sense of depth and space. You can add small nebulae or galaxies for variety.
Use light and dark shades of blue and purple to create a starry glow effect.
Black and white drawing with paints
Basic steps and recommendations to help you create a painting with a comet on a dark background:
- Start by creating a sketch. Draw the outline of the future comet with a simple pencil. Determine the position and shape of comets and other celestial bodies.
- Paint the entire sheet evenly with black paint. Maintain a balance between dark and light areas to achieve contrast and expressiveness. Using black as a background allows you to highlight light elements, creating an effect of depth and space.
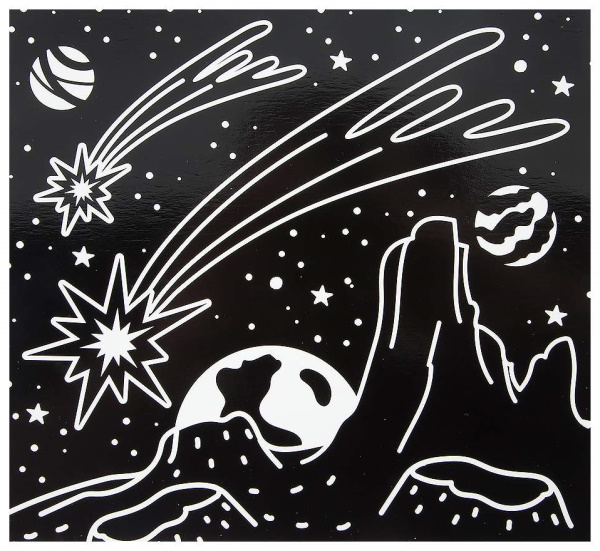
- Using white paint, add details to the bottom of the drawing. Draw craters and mountains using different techniques and strokes. Create surface texture and shadows to give volume and realism.
To create the effect of craters, use short and chaotic strokes, and for mountain ranges - long and directed. This will help to emphasize the features of the relief.
- Paint a planet with white paint, partially hidden by craters. Use curved lines and shapes to create the outline of the planet. You can do a soft underpainting with a light tone, so that the shadows look more natural later.
- Using white paint, create the outline of the comet. Draw the curved shape of the comet's body, and then add the tail. To create volume and shadow, you can add small strokes inside the comet's outline. The comet's tail should be directed away from the body.
Place the comet over the planet's surface or craters to create the impression of movement in space. To give the comet's tail texture and volume, use a soft-bristled brush and add short strokes.
- Draw a 2nd smaller comet above the main comet. It can be slightly shifted to the right or left relative to the main comet. This will add dynamics and interest to the composition. It should be smaller than the 1st, but noticeable enough.
Use contrasting colors to create the effect of presence in space. To prevent the 2nd comet from merging with the background, add a few thin lines imitating a tail.
- Draw 2 small satellites next to the main comet. They can be located at different distances from the comet and have different sizes. The satellites should be made using the same technique as the comets.
- Add stars. Use white paint to create dots, circles, and 5-pointed stars around the comet and on the black background.
Recommendations:
- The drawing needs to dry before moving on to the next stage of depicting the comet.

- You can add additional details and effects, such as creating shadows or using darker shades of white to highlight certain elements.
Tips for Beginners
There are a variety of creative approaches that can be used to create an artistic image of a comet in space.
Recommendations that will help to achieve this task.
- You need to choose a drawing style that matches your idea: a detailed space landscape with a comet or an abstract artistic image. In the process of drawing from details to abstraction and from abstraction to details, you can make changes to your drawing and use different approaches.
- It is necessary to think through the composition: determine the location of the comet on the sheet and its interaction with space. Decide on the viewing angle and lighting. If you need to add detail, it is recommended to make several preliminary sketches.
- It is advisable to make a sketch of the comet's contours.
- Astronauts see them as sparkling bright colors such as blue, green, purple, and red. You can use these shades in combination with each other to create intricate tonal transitions, or use 1 color for a monochromatic effect.
- It is necessary to work out the dynamics: outline a wide elliptical contour of the comet with a lush tail and draw in detail the area of its head with smooth and long lines.
- You can work with the details of the comet's tail, adding swirls, additional lines, imitating a nebula, emphasizing the trajectory of the tail and making it uneven.
For this, it is acceptable to use different drawing techniques, for example, for the shadow of the tail, you can use shading, and for highlights, drawing “dot by dot”.
- It is important to pay attention not only to the general shape of the comet, but also to the details of the surface of the nucleus. You can mark irregularities, craters, traces of the cloud layer. This will help make the image more realistic.
- You need to draw shadows to create a sense of 3-dimensionality of the comet. The light on the comet should fall from the left (if it flies to the left).
- You can add nebulae, spatial structures or other cosmic elements. You should think about the balance between the main figure (comet) and the background.
It is necessary to pay attention to creating the texture of the outer space around the comet, using different pencil strokes or small brush strokes.
- You can add additional stars and galaxies as a background.
- To create a space atmosphere, the background should be black or dark blue, indicating the space around the comet.
Drawing a comet in space can be a fun way to explore the infinity and beauty of the universe. It can be an experience that helps develop creativity and improve artistic skills.
Video about drawing
Comet - drawing: