The curriculum of all art schools necessarily includes a subject called academic drawing. Lessons from scratch train the artist's ability to transfer the volume and texture of an object to a flat surface using chiaroscuro.
What is academic drawing
Academic drawing (lessons from scratch are necessary for a beginning artist) is a long work, which takes place in several sessions. The main goal pursued by the artist is to master the basics of visual literacy. As a rule, a certain object or subject is drawn.
The main objectives pursued in academic drawing are mastering painting techniques and studying various forms. The finished work conveys the external characteristics of the objects being drawn with maximum precision. The angle of incidence of light and the surrounding environment are always taken into account.
Academic drawing is a subject in the art education system, it is structured from the easiest to the most difficult:
| Stage | Description |
| 1 | Image of simple flat ornaments |
| 2 | Drawing geometric shapes |
| 3 | Still life and interior images |
| 4 | Drawing plaster heads and their parts |
| 5 | Creating portraits |
| 6 | Image of anatomical models |
| 7 | Drawing a human figure |
Academic drawing (lessons from scratch include a professional approach) is created only from life, without the use of photography or video. One of the main principles is the study of nature in its original form. In such a drawing, the manifestation of creative techniques and attempts to experiment are unacceptable.
Distinctive features
Works by artists who have studied such a subject as academic drawing can be immediately distinguished from others. Their main feature is that they look professional.
While amateur artists can only copy their surroundings, professionals can depict an object from any angle.
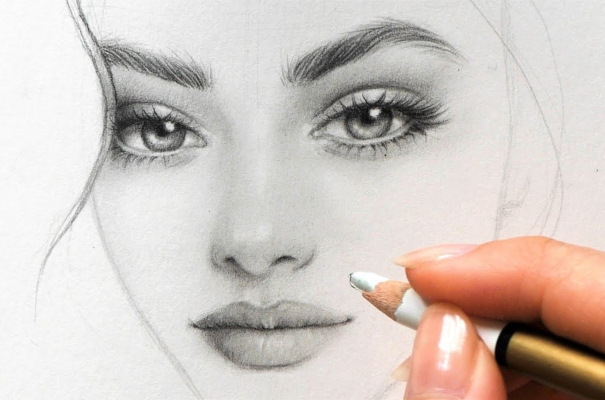
By mastering the basics of academic drawing, the artist learns artistic literacy. This training helps develop important abilities and, in particular, confidently reflecting what is conceived on paper.
During the lessons, the budding artist:
- learns about the laws of perspective and how to observe them in your work;
- acquire skills in arranging objects on a sheet of paper;
- learn to correctly reflect all the proportions of objects on a sheet of paper;
- will master the art of placing light and shadow and conveying the texture of objects.
Tools and materials for drawing
Anyone who decides to take up drawing must thoroughly prepare for the creative process. The most important stage of preparation will be the right attitude: it is necessary to show a desire not only to engage in artistic activity, but also to constantly learn new techniques.
Once you have firmly decided to start training, you can move on to the next stage - purchasing the materials and tools that will be needed for this work.
For academic drawing, as for any drawing, you need:
- paper;
- pencil;
- eraser;
- sharpener.
You will also need additional devices that will simplify the work and help make the finished drawing better quality.
Pencil
The main tool of an artist creating academic drawings will be a simple pencil. For construction, it is best to use harder leads. For example, pencils marked 2H, H, HB are good for this. The latter is a kind of "hybrid" of soft and hard pencils.
If you use hard or hard-soft pencils, it will be easier to get a clean base for the subsequent drawing. However, it is better if the base is done with soft pencils, which are marked with a number with the Latin letter "B" next to it (on pencils made in Russia, this may be the Russian letter "M").
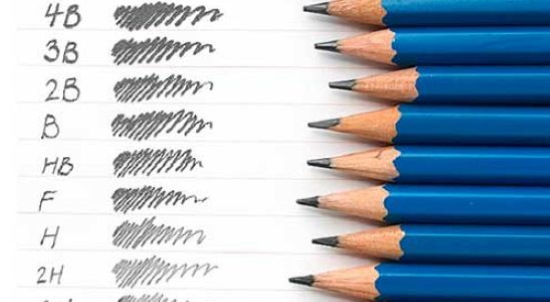
When choosing between hard and soft pencils, it is worth considering that the tonal range decreases with decreasing lead hardness. This is a scale of tones from hard to light. The lighter you press on the pencil, the lighter the tone of the mark it leaves on the paper will be. Accordingly, with increasing pressure, the tone will be darker.
With some practice, the entire drawing can be done with one soft pencil. It is enough to simply change the pressure. When working, the artist will be able to choose the right drawing method for himself or find the optimal combination of such methods.
Paper
Once you have decided on a pencil, you can begin choosing paper. Preference should be given to dense, smooth sheets. You can take, for example, drawing paper or Whatman paper. The main advantage of such paper sheets is that you can correct shortcomings on them many times.
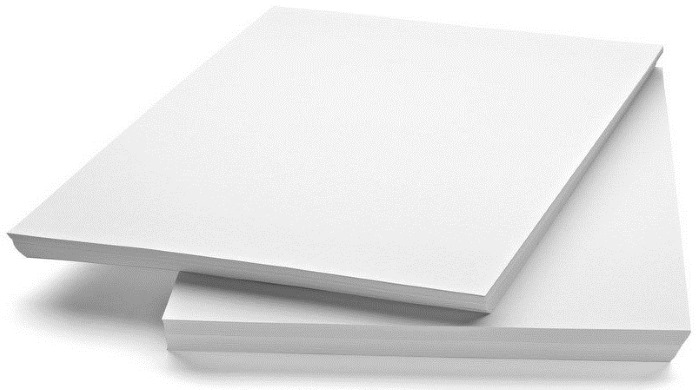
For example, if an extra line is drawn during drawing, it can be easily removed with an eraser. This will cause virtually no harm to the paper. It is especially recommended to give preference to such paper to those who are just beginning to master the basics of fine art.
In the future, with a gradual transition to new stages, such errors will become fewer, and the drawings themselves will turn out better.
Eraser
It is very difficult to carry out artistic activities without this item. It is needed not only by beginners, but even by those who have already achieved considerable success in drawing. Many experienced artists recommend giving preference to Koh-i-noor products, on the surface of which a cute black and white elephant with a curved trunk is adorned.
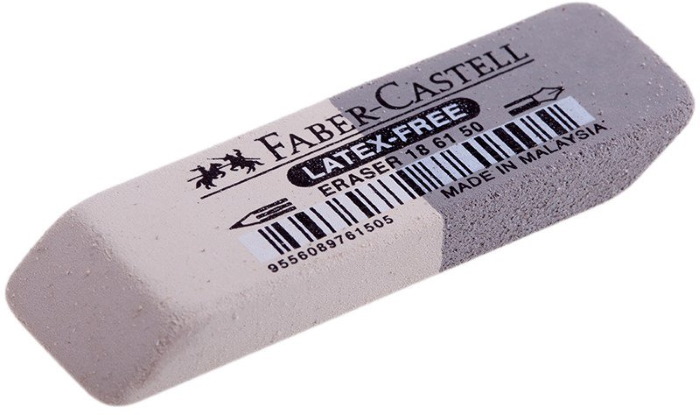
The advantages of these erasers are that they:
- they are soft enough to allow you to carefully remove pencil marks;
- They are not devoid of hardness, so they do not crumble into small pieces when used.
Sharpener or stationery knife
Pencils used for drawing often need to be sharpened. A special sharpener is needed for this. However, many recommend using a utility knife instead. It allows the open area of graphite to be made more elongated and strict.
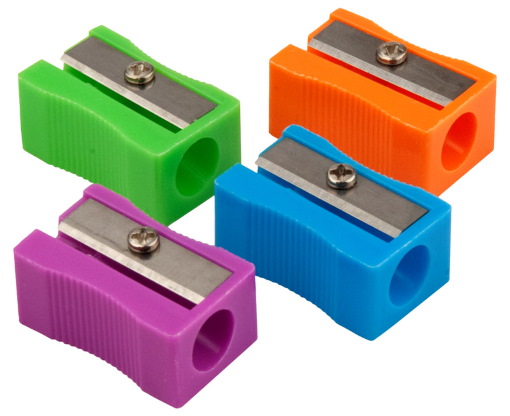
This is impossible with a sharpener, and the sharper and longer the lead, the longer it will wear out and the less often you will need to sharpen the tool.
Nag
A kneading pad is an optional tool, but if used, the work will be much easier and the result will be of higher quality.
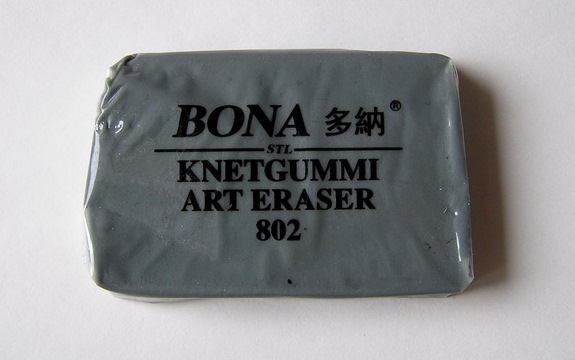
A kneaded eraser is a kind of eraser, but the material it is made of is flexible, so it can be given any shape. For example, you can make it rounded or, on the contrary, sharpened. You can use a kneaded eraser to draw over a shaded area.
Sandpaper
It is recommended to prepare a small piece of fine-grained sandpaper for creative work in academic drawing lessons. It will come in handy when you need to quickly sharpen the tip of a pencil.
Liner
Many artists use a special tool in their work – a liner. This is the name of a type of capillary pen that uses water-based ink.
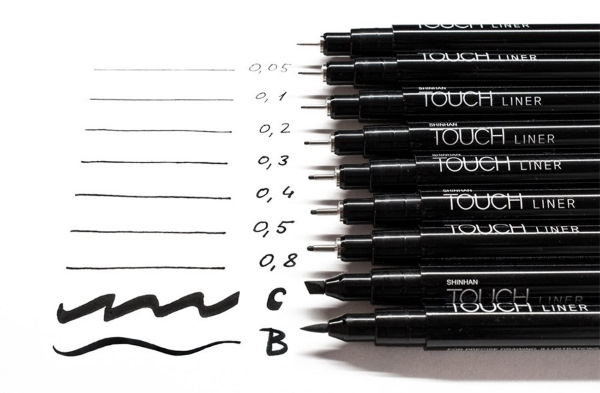
A liner is needed to draw thin lines that are at the same time rich in color.
Colored pencils
If you need to add color to the painting, you can use colored pencils. The artist chooses the colors at his own discretion.
Tablet
It is very convenient to use a tablet for drawing, on which the finished work is fixed with tape.
Master classes
Academic drawing (lessons from scratch begin with the depiction of everyday objects and geometric figures) has a large selection of topics. It depends on the set educational tasks. The most common practice is drawing everyday objects and depicting geometric figures.
Cube
Drawing a cube is the simplest task in depicting three-dimensional objects in space. This lesson lays the foundations for conveying volume. At this stage, beginners make many mistakes and it is important to correct them in a timely manner so that they do not move on to the next lessons.
In educational institutions, a plaster product of the appropriate shape is given to draw a cube. However, if you plan to do the work yourself, you can first make a cube out of cardboard or paper with your own hands.
The object should be prepared for which:
- Place it on a white or grey surface so that the shadow it casts is clearly visible.
- Take care of the correct location of the light source. It should be on top and on the side of the cube. In this case, 2 visible faces will be illuminated.
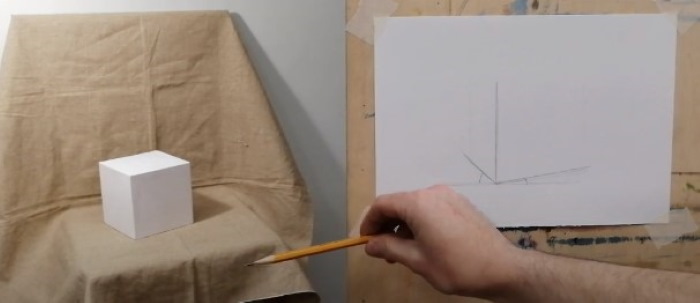

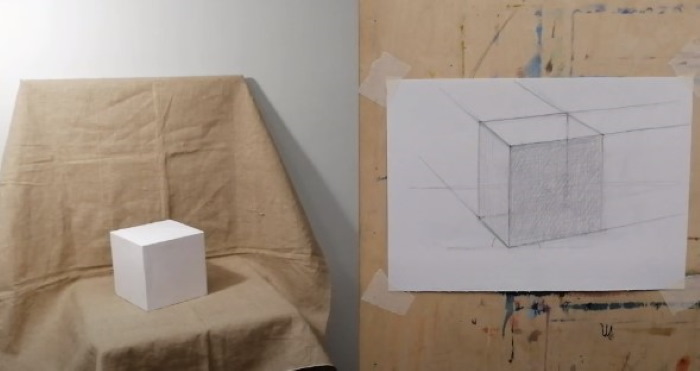

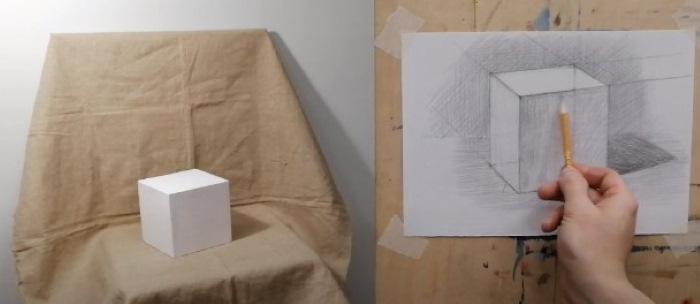
At the same time, the cube itself should be right in front of your eyes, but slightly below, so that in addition to its 2 faces, you can see the 3rd. It is better to give preference to sunlight. You can, for example, place the object on the windowsill.
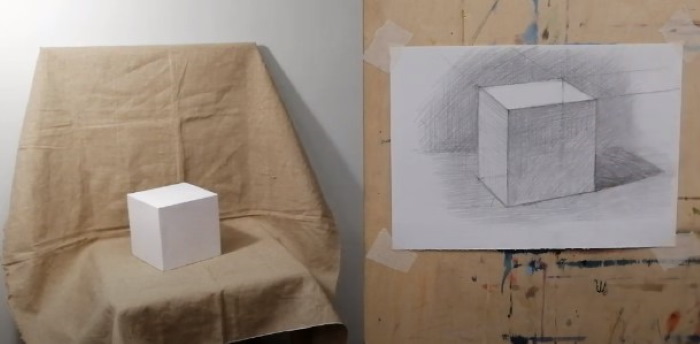
- When drawing, you should sit up straight so that the angle of view remains constant. The optimal distance from the artist to the object being drawn should be considered to be at least twice and at most three times the size of the space being drawn.
It is important to consider not only the cube itself, but also the surface on which it is located. As a result, the distance should be approximately 60 cm.
Once you have completed the preparatory work, you can begin drawing:
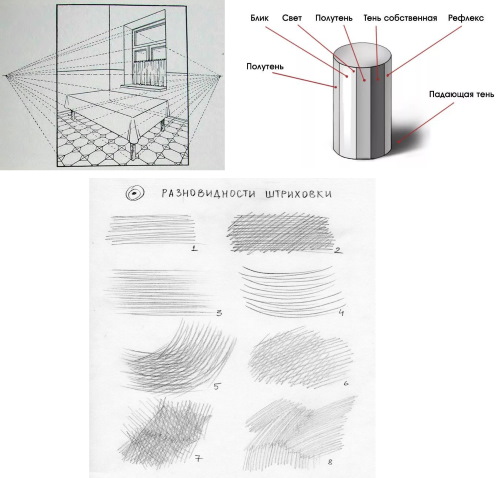
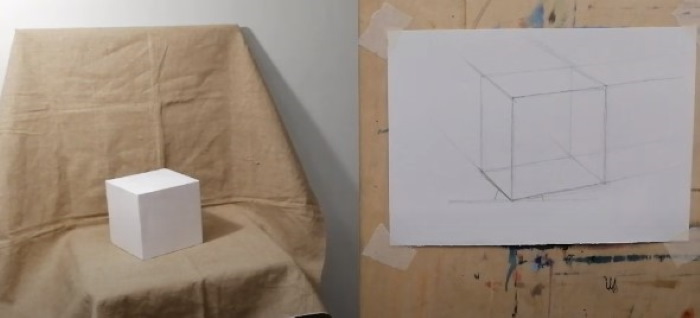
- Draw light lines to indicate the position of the cube on the paper sheet. It should be located in the center together with the shadow. First, draw the edges with thin lines. It should be remembered that they are parallel in this geometric figure. However, according to the laws of perspective, all parallel lines should connect at a single point on the horizon.
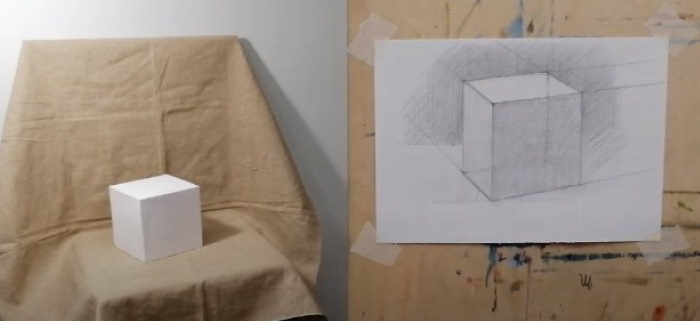
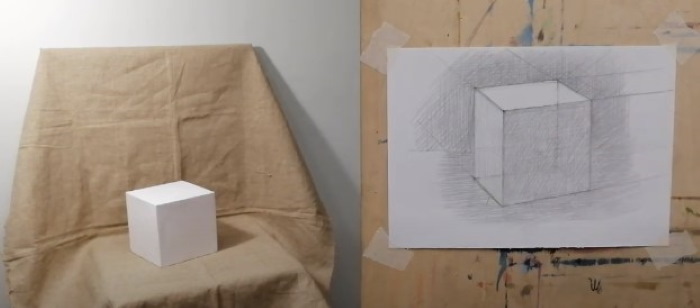
- According to the laws of perspective, it is necessary to depict not 12 edges, but 8. Moreover, 4 of them will be directed to the left and 4 to the right. All lines converge at one point located on the horizon, and it is at the eye level of the person drawing.
You can imagine that there is no wall behind the cube, and, accordingly, you can see how the sky and the earth converge; and then mentally translate the lines of the edges to the horizon.
- Since the artist sees the cube slightly from above, in perspective the verticals can also converge into a single point. But in academic drawing this is not provided. Therefore, the verticals should be parallel. It is also important to consider that the more the face is turned towards the viewer, the less the distance between the faces is reduced in perspective.
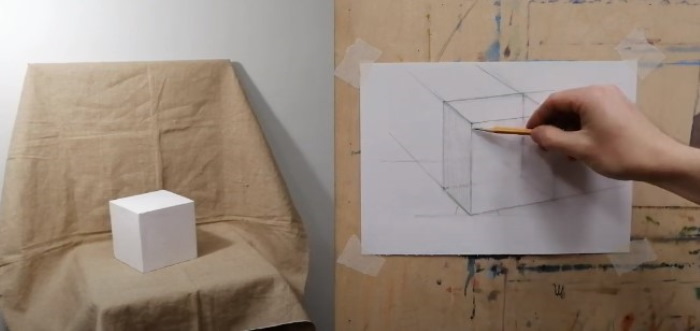
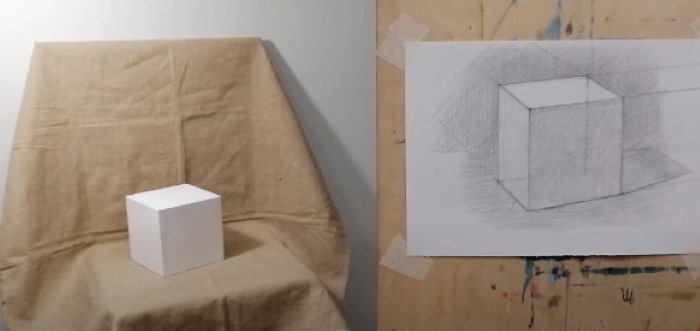
- When starting to work with the shadow, highlight the nearest sides of the cube more boldly. It will become noticeable that from this highlight alone the sides will "approach" the viewer.
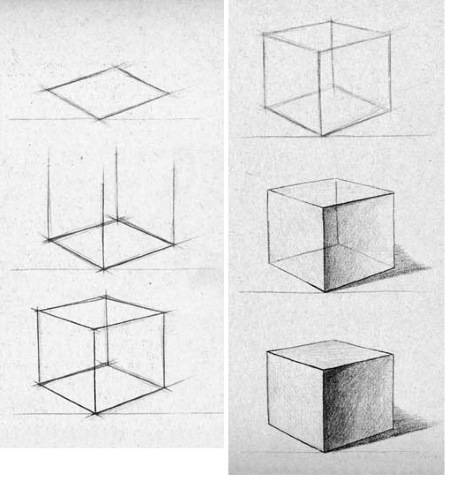
- This is a vivid example of one of the most important principles of conveying volume and space on a plane. The essence of this technique is that as the viewer approaches, the colors become more contrasting.
- The tone is gradually gained. First, a hard pencil is used for this, and then you can add strokes with soft graphite. It is recommended to create light and shadow on the entire picture at once to avoid mistakes with the tone. In this case, mistakes can be identified already at one of the very first stages of work.
- When drawing the left edge, use vertical strokes. For the top and right edges, diagonal strokes are best.
- Add contrast to the front edge of the cube.
Can
Lessons from scratch in the discipline of academic drawing, set the task - to depict a can, which is similar to an ordinary cylinder. Both objects have a single pattern of form construction. The only exception is a truncated cone, which is a connecting link between 2 cylinders of different widths in the upper part of the can.

The can consists of 3 geometric figures: 2 cylinders and 1 cone. All 3 figures have a single axis of rotation.
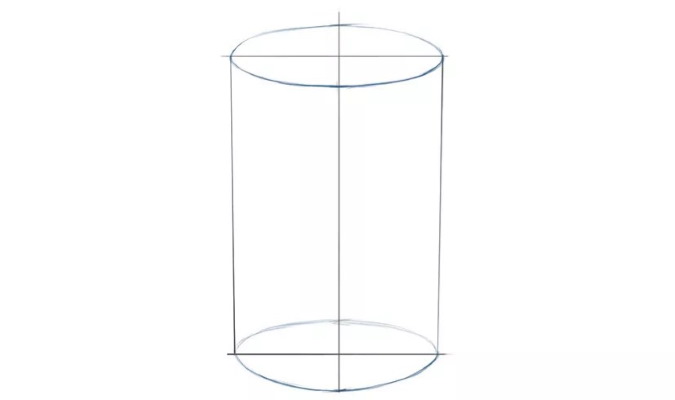
To build a can design on paper, you need to do the following:
- The drawing of the can begins with the general shape, determining the height and location of the top.
- Draw the axis of rotation in the center. Mark the height on this line.
- Determine the width of the can, which should be related to its height. You need to start from the bottom and top, putting off the radius from the axis.
- Proceed to working with proportions.
- Mark the radius of the vessel neck, the height of the upper surface and its side contours.
- Proceed to the transfer of volumetric-spatial form. If the object is in a normal perspective, then the construction of volume can be done freely.
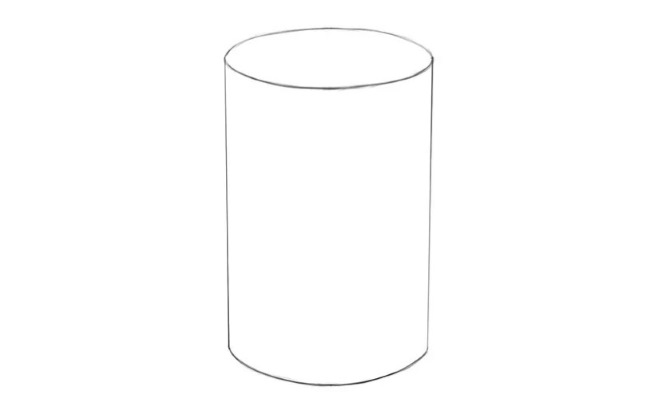
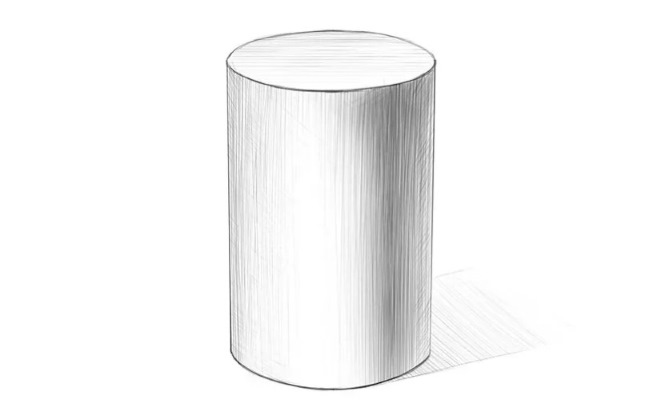
It is best to start with constructing ellipses. Their total number in this case is 4. The edge of the neck edge should be excluded. The ellipse, which will designate the lower base, should be wider than the upper one, which will become the top of the can.
- When the image of the three-dimensional shape of the can is ready, start to specify the details of the object. First, work on its handles. For this purpose, a straight line is drawn on the ellipse through the point of the main axis, which should correspond to the position of the handle on the object, which acts as a full-scale model.
From the resulting intersection points of this line with the ellipse, verticals should be drawn downwards, thereby determining the place where the handle will be attached. It is worth remembering that the wooden handle of the vessel being drawn also has the shape of a cylinder.
- Here you need to build another ellipse, taking into account its protrusion from the surface. At the same time, the thickness of the rolling should not be violated.
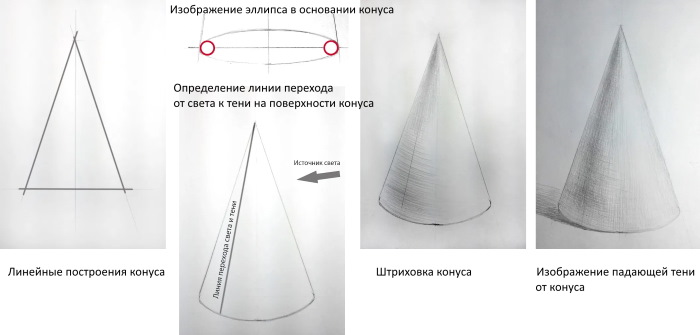
Cone
Academic drawing (lessons from scratch in artistic disciplines always begin with the preparation of materials and tools) of a cone begins with the image of a simple geometric figure in space.
The creation of a three-dimensional image will consist of the following stages:
- Draw a circle that will become the base. This work is done in perspective.
- Determine at what point the vertex of this geometric figure is located. Draw a vertical line from the center of the base upwards. This will become the axis of rotation.
- Mark the apex of the cone with a point on the axis of rotation.
- On the circle, which is the base, symmetrically mark the spatial points of the generator and connect them with the vertex.
Teaching academic drawing is based on studying nature, the patterns of structure of forms created by nature and transferring the drawing to a plane. Even in the Middle Ages, professional painters claimed that the best teacher is drawing objects from nature.
In this case, the artist learns to observe and consciously perceive the surrounding reality.
Practical experience shows that strict adherence to the sequence of works in lessons from scratch allows you to successfully complete the tasks of academic drawing. However, if you violate any stage, errors will inevitably occur and the quality of the finished work will noticeably decrease.
Video about drawing
Academic drawing lessons from scratch: