A plasticine craft is a great way to keep a child busy. A hedgehog is a cute little animal, easy to mold. Add a handful of seeds instead of spines and you'll get a "cartoon" character. Creating simple figures develops attention, imagination, and perseverance. When a child is overly playful, it's time to engage him in creativity.
Advice: if your child is capricious and doesn’t want to make things, you can try a trick.
Say, for example, that dad has announced a competition at work for the best plasticine hedgehog. The winner will receive a prize (a chocolate bar, a movie ticket, a toy). The figurine options can be completely different, both easy and difficult to make. The kid will definitely be busy for 20-30 minutes. The main thing is to calm down and focus on completing the “important” task.
There are several options for making a hedgehog from plasticine and seeds:
- on a sheet of paper in the form of a picture;
- volumetric figurine;
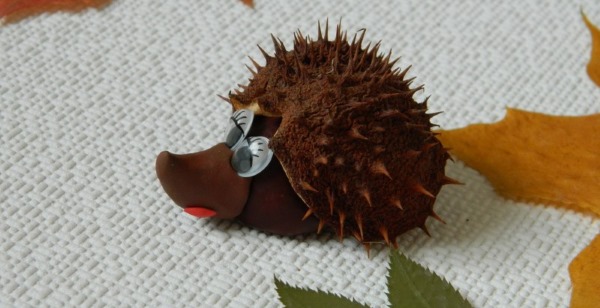
- from nutshells.
What kind of plasticine to buy
A hedgehog made of plasticine and seeds is a craft for children aged 3-7, so it is better to choose soft materials.
Craft stores sell special kits:
- "Soft";
- "Baby";
- "Wax";
- "Extra - soft";
- "For the pictures."
You can use multi-colored modeling dough, it is flexible and does not stick to your hands.
If you have regular one, soften it by heating it:
- place on the radiator for 10 minutes;
- place in a sealed bag in warm (not hot!) water for 5 minutes;
- Before sculpting, knead the piece well with your hands.
How to make plasticine in 5 minutes with your own hands
If you don’t have any modeling material at hand, it’s easy to make from food products.
You will need:
- water 1 glass;
- vegetable oil 1 tbsp;
- food coloring 2 tsp (optional);
- flour 1 cup;
- 1/3 cup salt (fine).
Mix everything well. Put the dough in the microwave for 30 seconds, mix and put it back to heat. Repeat 3-4 times. Let the dough cool down and you can start creating.
Advice: if you don't have food coloring, no problem. Make it from this dough. You can paint the craft with gouache at the end.
Let's sculpt a volumetric hedgehog
The hedgehog made of plasticine and seeds consists of a simple base - a bun, which children begin to mold in kindergarten at 1.5-2 years old.
Tools:
- Plasticine. You can choose a color other than brown. Allow your child to choose any color he likes (remember, the hedgehog in "Smeshariki" is generally pink);
- A handful of seeds (beautiful needles come from white and striped seeds);
- Glass, board.
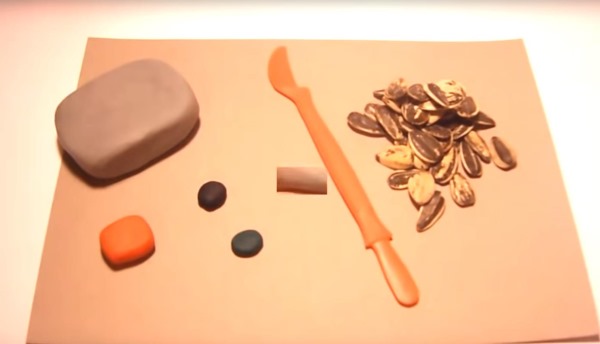
What can be used instead:
- Plasticine can be replaced with modeling dough. After making, the dough will harden and the craft will last for a long time;
- The seeds can be replaced with small vermicelli, watermelon seeds, toothpicks, buckwheat, matches, sequins, or cut into cocktail tubes.
- Instead of eyes, you can use peppercorns, match heads, or buy ready-made eyes for crafts in the store in advance.
Making a hedgehog step by step
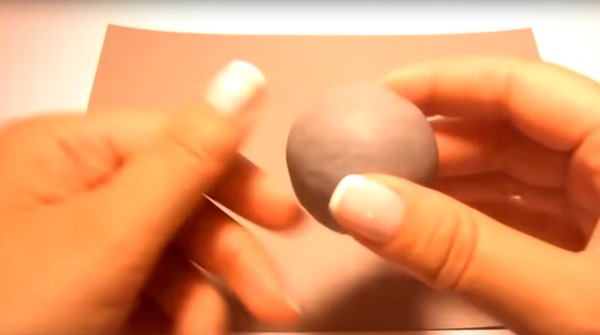
Take a palm-sized lump of plasticine. The first plasticine craft in kindergarten is a bun. So, let's make a bun.
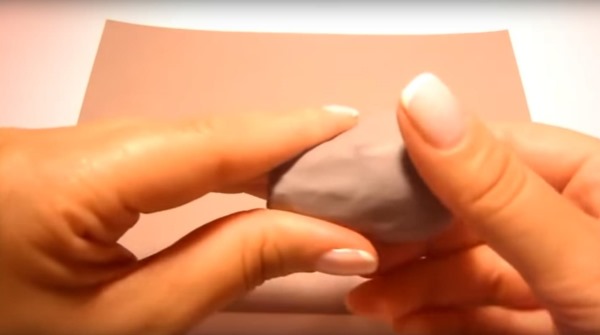
Pull out part of the bun to form a drop. This will be the muzzle and nose.
Make a nose and eyes out of small black balls. If you decide to make it out of dough, then paint the nose with gouache.
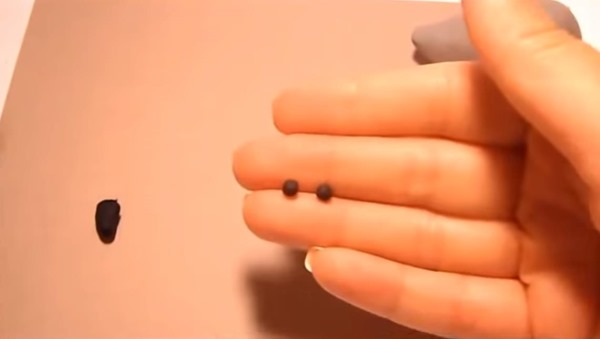
Here, help your child a little with small details. Use a stack to squeeze out a mouth on the muzzle.
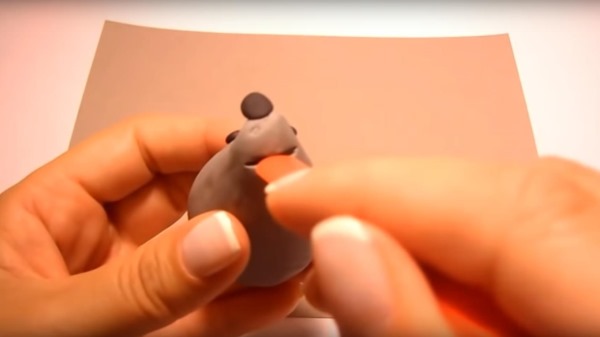
The base of the hedgehog is ready. Now comes the most interesting part – the needles.
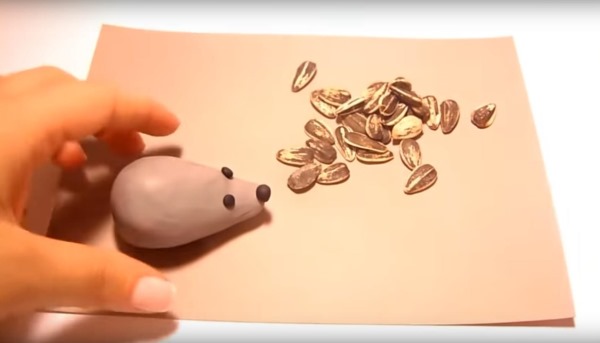
Start from the muzzle. Insert the seeds into the body with the thick base.
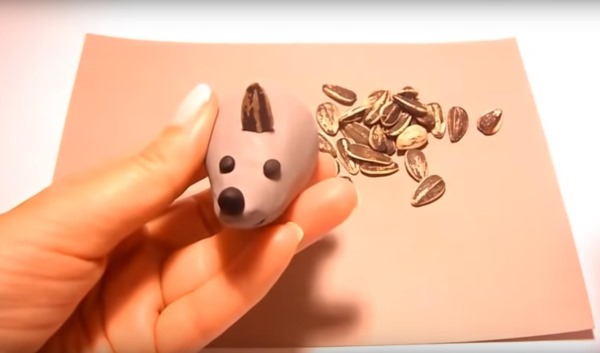
Spread the seeds all over the back in this way. Form a small lump from the red color. Stick a drop of green on top. You will get an apple. The prickly beast is ready. Decorate the animal with leaves, mushrooms, grass.
Hedgehog made of plasticine on cardboard
Plasticine applique on cardboard is a fascinating hobby. There are many directions: from paintings to creating cartoons. Thanks to the finished drawing, the hedgehog will turn out neat, it can be hung as a picture.
What you will need:
- Ready-made drawing. The template can be found on the Internet and printed out;
- Hard cardboard. Use a thicker material so that it does not bend under the weight of the applique;
- Plasticine;
- Seeds;
- PVA glue for composition;
- Colored cardboard to add grass, trees, etc. to the picture.
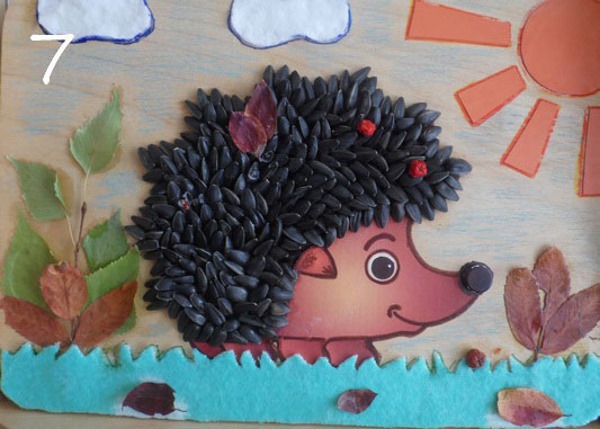
Instead of colored cardboard, use any scraps of fabric, beads, matches... A variety of textures will make the work more interesting.
Step by step instructions
When choosing a pattern for modeling, focus on the child's age. The younger, the simpler the template.
Tip: Before sculpting, place the plasticine on a radiator for 10 minutes.
The material will become pliable and the work will go faster:
- Transfer the drawing onto cardboard.
- Visually divide the hedgehog into two parts - the back and the head.
- Take brown plasticine and gradually cover the tummy. Take a layer of about 0.5-1 cm. Tear off small pieces and roll them on cardboard, without going beyond the hedgehog's back.
- Now comes the most important part, which only a small master can do. The seeds are inserted into the plasticine with the base and should "look" in one direction.
- Blind the eyes, nose, and mouth.
- Add grass, sun, trees. Stick mushrooms and apples on the needles.
Tip: multi-colored sausages can make the picture even more interesting.
Instead of one color for the back, roll strips of different colors to make a rainbow.
Second version of the application
If the child is fidgety, it will be difficult to sit still for one activity. You can simplify the craft like this: paint the animal completely with a pencil, and glue the plasticine with sausages. You get an original craft that will take a little time. Stick on the strips. They should resemble needles. You get an unusual combination.
Interesting ideas for composition
So, the main character is ready. It's time to add a composition to the picture. The final stage of the craft can be even more exciting. By adding new elements, the child develops creative and spatial thinking. Learns to be resourceful and creative.
You can use anything that your imagination approves:
- any dry products and spices that you find in the kitchen: bay leaf, peppercorns, dried herbs, cereals;
- find decorative elements outside: leaves, dry grass, twigs;
- Take a look in the sewing box: buttons, beads, sequins, pieces of fabric.
How to make a forest for a hedgehog figurine from plasticine:
Take the top of a shoe box. You will get a convenient stand. Glue dry leaves to the bottom and put the animal on it. The space can be filled with dry rowan berries, “planted” trees from twigs on plasticine. Don’t be afraid to combine everything together. It’s fun! The process of finding the elements of the composition will appeal to the kid.
Simple figurine made of plasticine and walnut
The technique is similar to the previous options. This method is suitable if there is little material for modeling. The hedgehog is also made of plasticine based on walnut shells. Instead of needles - seeds. Take half a walnut shell as a ready-made template. Cover it completely with plasticine. Roll the lump to get a nose.
Stick seeds or other suitable material on top. Add eyes, a nose, paws. To make the figure stable, attach it to a platform made of cardboard and green plasticine in the form of grass.
Hedgehog made of coffee beans
A fragrant hedgehog made of coffee will bring a lot of pleasure during the making. There is another pleasant moment. All mothers eventually notice that children's crafts do not live long. But you will not want to throw away such a fragrant animal.
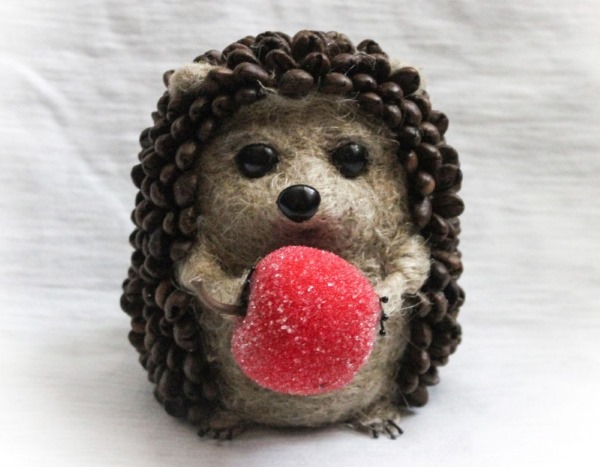
It will bring positive emotions into the house:
- coffee aroma neutralizes unpleasant odors;
- creates a cozy atmosphere;
- According to popular belief, hedgehogs are good protectors of the family from gossip and attacks, so it will be an excellent amulet.
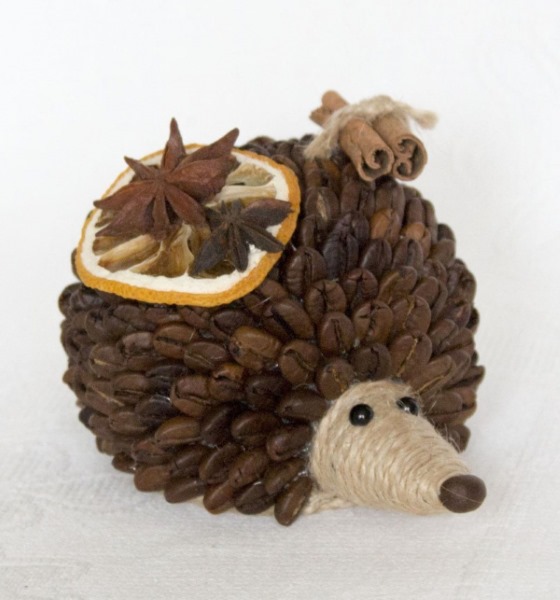
Materials for crafts:
- a small plastic ball;
- whole coffee beans;
- brown or black plasticine;
- hard cardboard;
- Moment glue or hot glue gun;
- eyes and nose (ready-made, buttons or beads);
- for the muzzle: apply glue to a cone-shaped piece of foam plastic and wind it with household thread (twine);
- for the composition: whole cloves, 2 cinnamon sticks, star anise, dried rowan berries (choose to your taste).
How to make a scented hedgehog
- Cut the ball in half. Trace the half onto the cardboard with a pencil to create the base. Cut out the circle and glue it to the plastic using a hot glue gun or glue. Let dry.
- Make a small cone out of foam plastic – this will be the muzzle. Coat it with glue and wind a tight ring of thread. Glue the cone to the workpiece, closer to the base.
- Glue on the eyes and nose.
- Cover the semicircle with plasticine 0.5-0.7 mm thick.
- Now carefully insert the grains, imitating needles, as tightly as possible.
- The hedgehog is almost ready. All that's left is to add spices to the composition so that the hedgehog not only smells delicious, but also brings prey into the house.
Place a hedgehog figurine in the kitchen for aroma or in the hallway as a symbol of home protection.
Crafts made with your own hands always attract attention and lift your spirits. Here, a simple craft made of plasticine and seeds can turn into an exciting activity for the whole family.
Author: Colina Olga
Article formatting: Anna Vinnitskaya
Video about fakes from plasticine
Hedgehogs from seeds:

fart fart class I can't do it