Drawing animals – an interesting and simple activity that will appeal to both children and adults. Not everyone can depict a horse as it appears in paintings created by real artists, only a true master can. However, if you show a little patience and persistence, you can achieve good success in depicting a rider on a horse.
Drawing tools
Rider on horseback (drawing requires art supplies before starting) can be depicted on paper with the following tools and materials:
| Materials | Description |
| Paper | This could be a sheet of paper from a sketchbook. Regardless of whether you are working on drawing an animal, a landscape or a person, you need paper that will not deteriorate under the pressure of a pencil and other tools. If you plan to use watercolors to color a drawing, you should choose watercolor paper specially designed for this purpose. Its main feature is the smoothness of the surface |
| Simple pencil | They will create the outlines of the drawing. When choosing this tool, remember that it can be soft or hard. On pencils made abroad, hardness and softness are indicated by the letters "H" and "B", in Russia - "M" and "T".
Along with the letters, numbers are used that indicate the degree of hardness and softness. Hard pencils are better suited for creating clear contours. If you need to shade areas, it is better to do this with a soft lead. |
| Coloring tools | You will need paints, felt-tip pens or colored pencils. It is better to give preference to the latter if a small child intends to draw, because it will be more difficult for him to work with paint. However, thanks to paint, you can make drawings more realistic. For professional artists, the main tool is always watercolor paint. With its help, you can get a lot of results. Such paints are often sold dry.
You will need brushes for the paints. Different types of brushes are used to create different effects. First of all, you need to pay attention to the shape and size of the brushes. |
| Eraser | When drawing with a simple pencil on a sheet of paper, extra lines will inevitably appear. Professional artists draw them intentionally to simplify the work. When these lines have fulfilled their role, they are removed |
Master classes
A rider on a horse (the drawing is created using pencils, paints or felt-tip pens) can be depicted in various ways. When all the materials and tools necessary for creative activity are prepared, you can start drawing.
If you follow the instructions below, this process will not cause any problems even for those who have never tried to draw in their life.
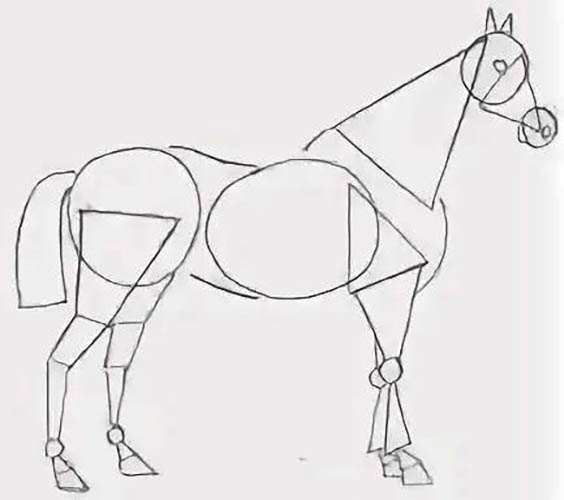
Simple drawing of a horse based on geometric shapes
This is one of the simplest examples of drawing a horse.
To create it, you need to complete the following steps:
- Place the sheet of paper horizontally. The initial contours will be simple geometric figures. Draw a rectangle in the middle. This will be the horse's body.
- Draw a triangle above the upper left corner of the rectangle you just drew. It will act as the neck.
- Draw another triangle under each of the two lower corners of the triangle. These will be the horse's limbs.
- Draw a tail that will have a triangular shape. It starts in the upper right corner of the rectangle and runs diagonally downwards and to the right at the same time.
- Draw the first figure without corners. This will be an oval. It is located to the left of the upper part of the triangle, which plays the role of the horse's neck. In turn, the oval itself will become the muzzle. At this stage, the creation of the general sketch is completed.
- Make sure that all proportions are exactly observed. If there are any errors, they should be corrected. If you are completely sure that the drawing is done correctly, you can move on to the next stages.
- Draw the contours of the body. In the upper part of the rectangle, which plays the role of the body (under its upper side), you need to draw an arc line. It will indicate the location of the saddle for the rider.
- Proceed to drawing the hind limb. To do this, draw another arc line in the right part of the rectangle. This will be the thigh of the left hind leg - the one that is visible to the viewer. It is also important to draw the joint and hoof correctly. The joint is a small bulge on the leg on the right side approximately in the middle, and the hoof is the end of the leg. It can be depicted as a small trapezoid.
- Make the belly line rounded. To do this, draw another arc line under the bottom side of the rectangle. It should be under the back arc line.
- Start drawing the front limb. It should also have a hoof at the bottom in the form of a small trapezoid.
- Draw the horse's right legs in the same way. It is important to remember that they are not fully visible, as they are partially covered by the left legs. You can make one of the legs bent to show that the horse seems to be moving. It is important not to forget where the joint is located.
- Draw the chest and neck. To do this, draw a wavy line. It should start from the horse's front leg, smoothly curve upwards, and end near the muzzle, which is represented by an oval.
- Detail the head. At the very top of the head is a pair of ears, each of which is a small triangle. The rest of the oval is made more distinct.
- Finish drawing the tail. To do this, in the triangle, which is the initial prototype of the tail, randomly draw many lines running along the tail. The more such lines there are, the fluffier the tail will be.
- Color each of the 4 hooves with a simple pencil. They should be black or gray, depending on the color of the pencil lead used.
- Use smooth lines to depict the mane and bangs.
- Add small but significant details. This is one eye, the other is on the back of the head and therefore not visible to the viewer. The eye is a small stroke running along the head and located at its top. Do not forget that the horse must have nostrils. They are also drawn with strokes, but shorter. As in the case of the eyes, only one nostril will be visible. It is located at the bottom of the muzzle.
- The drawing is almost done, but so far it has many extra lines that played the role of auxiliary elements. These are geometric figures, with which the work began. They have successfully fulfilled their role, and are no longer required. You can take an eraser and begin to carefully remove them, trying not to touch the lines that are needed. Only smooth transitions should remain.
- Look at the painting again carefully and look for possible flaws. If there is a mistake or something is not quite straight, it needs to be corrected.
- Take colored pencils or markers and start coloring. You can also use colored chalk for coloring. As for the color, it can be any: horses can be white, black, gray. However, if the child wants to use brighter colors (for example, pink, yellow, red), do not forbid him to do so. In the end, the horse can turn into a pink pony or a fairy-tale pegasus with wings.
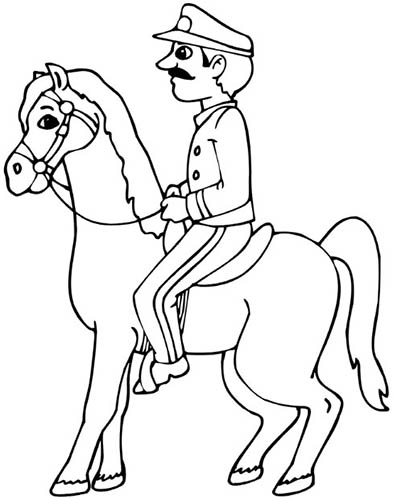
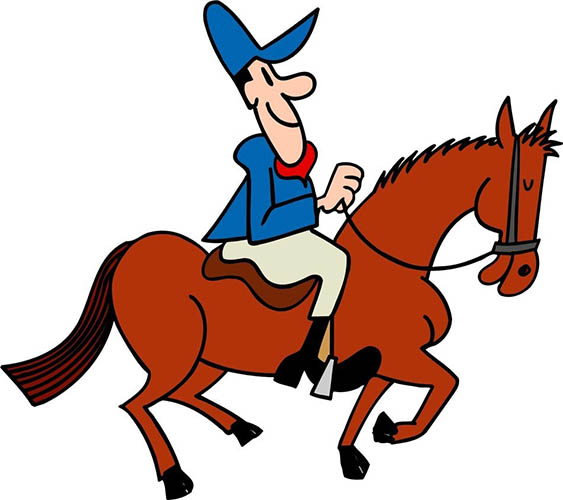
Rider on horseback
The rider on the horse (the drawing can be both simple and complex) is done according to the same principle as the previous drawing. However, the principle of drawing the animal itself remains the same here.
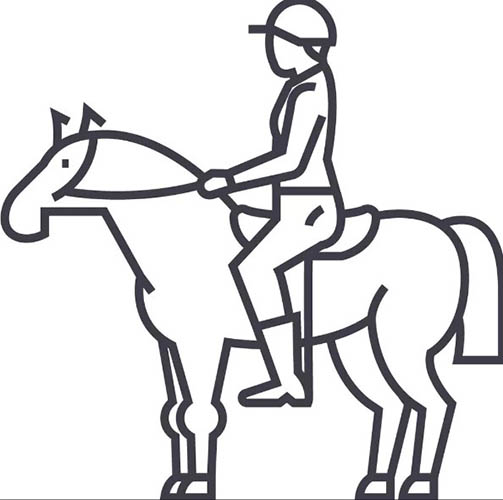
The main difficulty in this work is due not only to the fact that a new character appears here, but also to the fact that the artist must maintain the proportions of both the rider and the horse. However, in the end, the result will be a picture that will not leave anyone indifferent.
The drawing of a rider on a horse will be done in the following stages:
| Stage No. | Description |
| 1 | As in the example above with the riderless horse, it is best to start with simple geometric shapes - quadrangles, triangles and ovals. The basis of the drawing will be the rectangle depicted in the center of the sheet. This will be the horse's body. |
| 2 | Draw the head, this time not an oval, but a small rectangle. It should be located at the top left above the main rectangle, which plays the role of the body. It should be depicted diagonally, because the horse's head is tilted. |
| 3 | Connect both figures to form a neck. |
| 4 | Move on to working on the limbs. They will be more realistic if you first study photographs of horses or drawings made by professionals. Horse legs should not be perfectly straight. Remember about the joints and that, like a human, the upper part is wider than the lower part.
The picture will look great if the horse lifts its front leg, slightly bending it. The back legs are better depicted slightly apart. |
| 5 | Draw the tail, which, as in the example above, consists of many uneven lines. |
| 6 | Detail the drawing: add eyes, nostrils and correct any imperfections |
| 7 | Draw a rider sitting proudly on the horse's back. To do this, draw a vertically positioned rectangle. It should be closer to the middle of the horse's body. |
| 8 | Draw a small oval above the rectangle, which will become the head. |
| 9 | Proceed to drawing the upper limbs of the rider himself. First, it is better to depict the right hand, which is stretched to the left. The other hand should be half-bent, with its palm clenched into a fist. You need to try to make sure that the fist is between the body and the neck of the horse |
| 10 | Draw the legs of a person sitting on a horse. In this drawing, the rider is sitting in profile, so you don't have to draw both legs. However, the only leg that is visible should be slightly bent at the knee. |
| 11 | Start working on the details: the eyes on the face are oval-shaped, framed at the top by short but thick eyebrows; the nose is represented by a wavy line, and the mouth is a small arc line. The image will be perfectly complemented by facial hair |
| 12 | Since the rider is a brave warrior, he should be “dressed” in chain mail and a helmet. The base of the helmet is a triangle, the continuation of which reaches the chin, while covering the side of the head. The chain mail should have a distinct geometric shape. The armor that covers the lower limbs is drawn in steps. The rider has large gloves on his hands. |
| 13 | Draw the harness (saddle, reins, stirrups), and in the warrior's hand - a sword |
| 14 | If you are not satisfied with the black and white drawing, you can add brightness to it with colored pencils |
It is better to start drawing a picture of a "rider on a horse" from the horse. The main thing here is to observe the proportions of the animal's body. Then the person himself is drawn. If you follow the instructions, then no serious problems will arise in this creative work.
Video about drawing
Master class on drawing a pixel drawing "rider on a horse":