The drawing of grapes for children may differ depending on their age or drawing skill. These step-by-step lessons are useful both for young children to develop an interest in this culture as a product, and for older children to develop their creativity.
There are over 70 varieties of grapes in the world, and each of them has its own characteristics. To depict a bunch of grapes in a familiar and well-known form, geometric figures are used, to which new strokes and auxiliary lines are gradually added.
The following tools are used in the process:
| What you will need | For what |
| Paper | The thickness of the paper is chosen depending on what the finished drawing is painted with. Thicker sheets are used for paints. |
| Eraser | To remove unnecessary lines from the finished contour. |
| Simple pencil | A hard pencil is used for simple pencil drawings and when creating a sketch that is then colored with paints. A soft pencil is used to create shadows and penumbra. |
| Colored pencils or paints | Black, purple, lilac, burgundy, green and light green colors. |
| Black pen or liner | To create a clear outline. |
Simple pencil drawing step by step
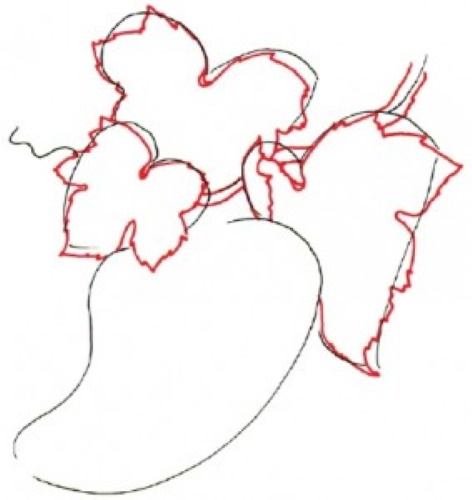
Drawing of grapes for children is done on a sheet of paper, unfolded horizontally. Start with the image of the main berries, gradually adding other berries of the bunch.
Then add the branches of the bunch and leaves:
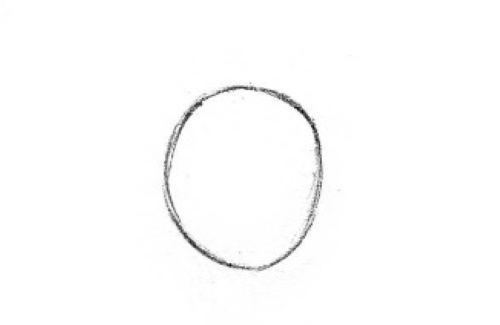
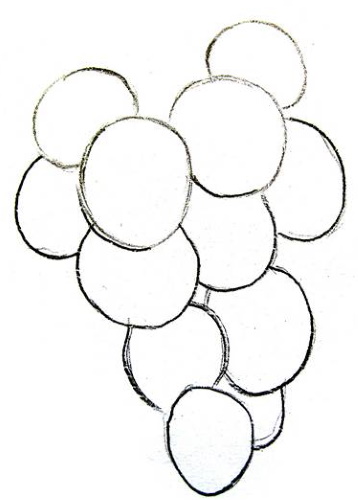
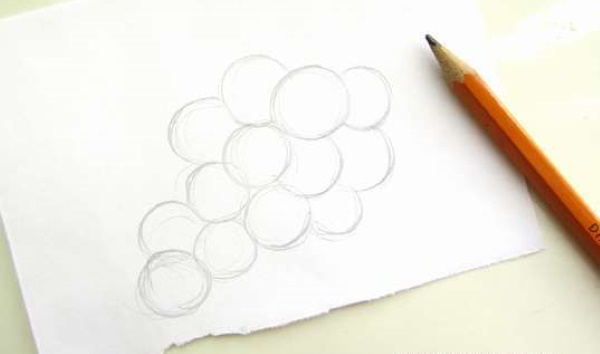
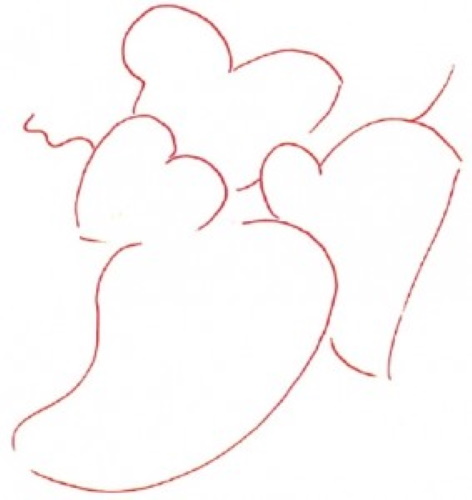
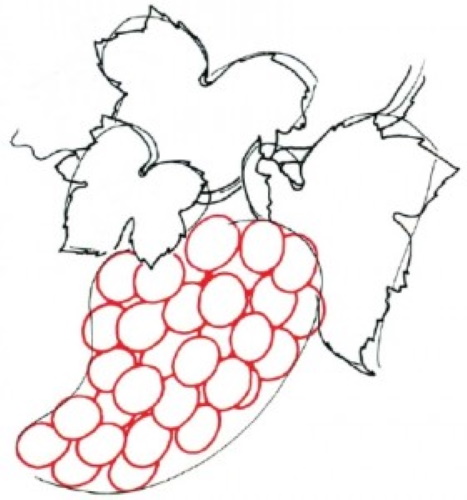
- In the center, draw the first berry in the form of a vertical oval.
- On each side, 1 and 2 berries are drawn. Each subsequent year is located behind, so it is not fully visible.
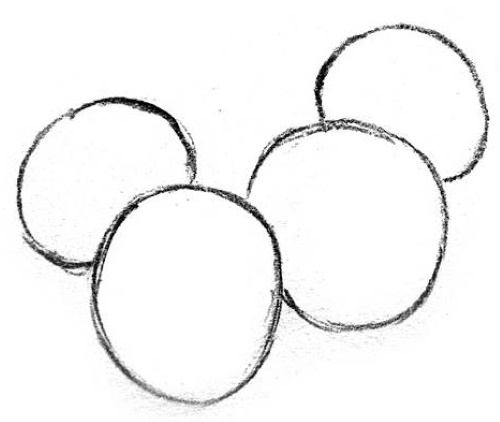
- At the bottom, add another row of 4 berries, repeating the grapes already drawn.
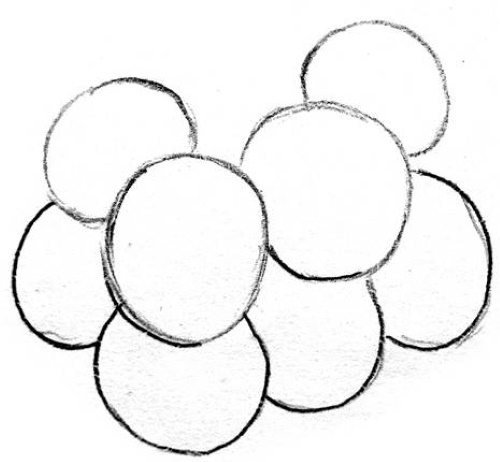
- Below, draw 2 more rows of 2 berries. These berries peek out from behind each other and taper downwards, completing the bunch.
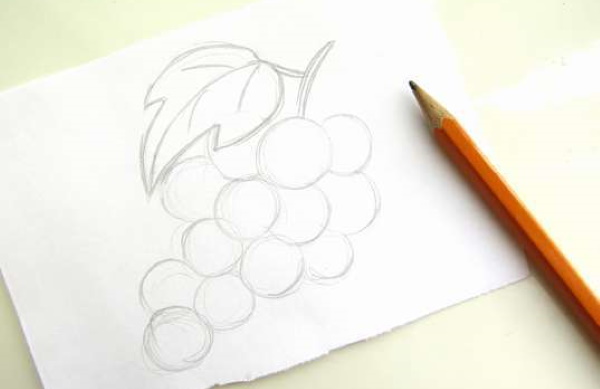
- Above the top row of berries, draw several branches connected into one. Use uneven lines to show the bends of the grapevine branches.

- To the left of the branch, draw the outline of the leaf. It is hidden behind the branches, so only part of it is visible. The leaf has 5 branches, each of which ends in rounded lines.
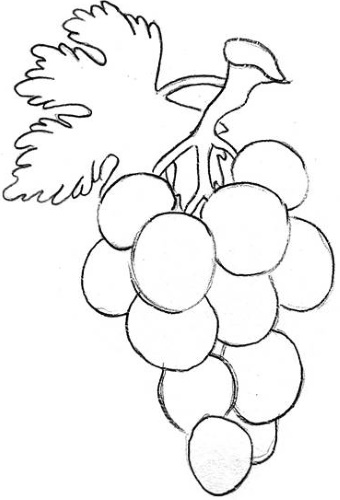
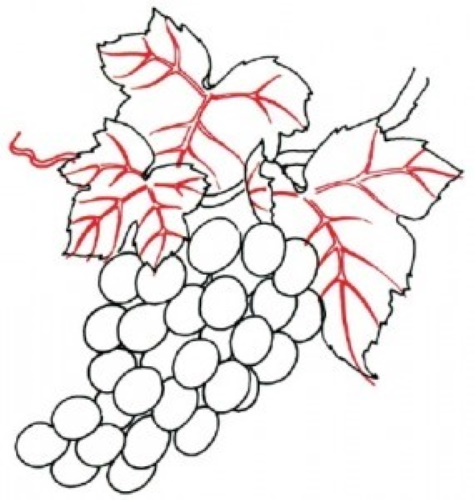
- In the center of the leaf, draw the central and branched veins with thin lines.
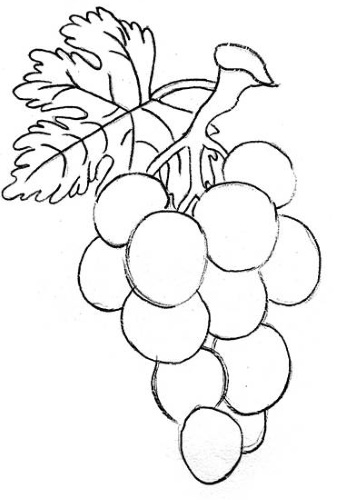
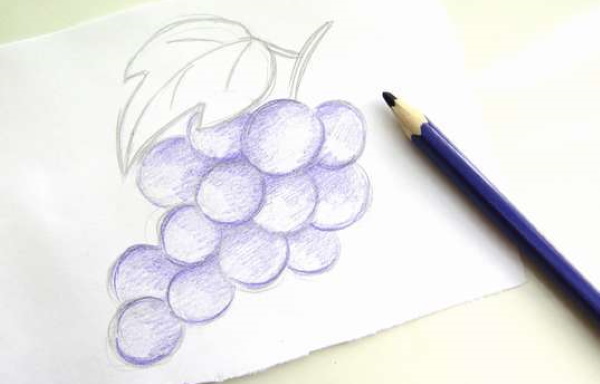
- The finished outline is outlined with a pen, marker or liner. The extra lines are erased with an eraser.
- Color the finished drawing with colored pencils.
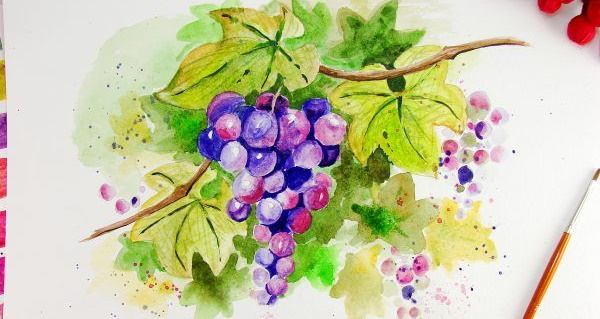
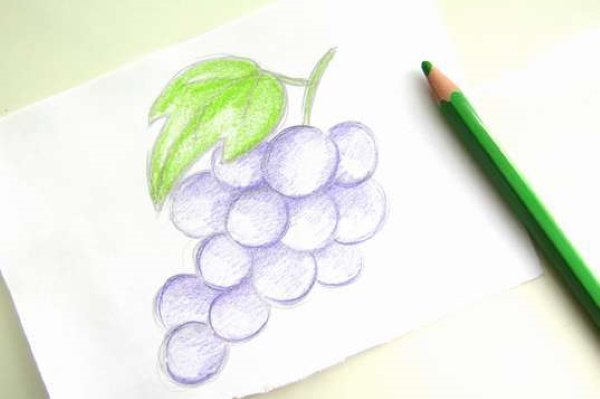
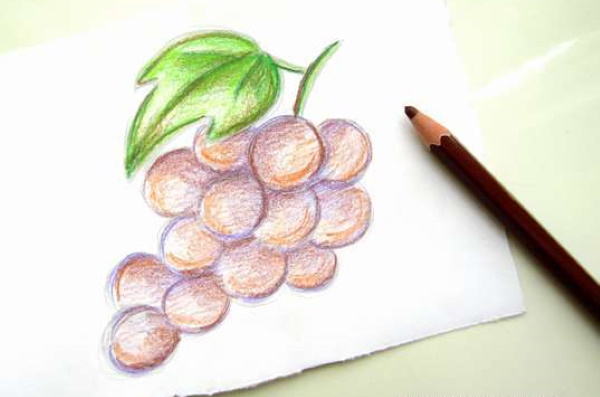
The central part of the leaf and branches are colored with a light green or light green pencil. The area of the leaf and branches closer to the outline is colored with green. The berries are shaded with violet. A more saturated violet is added and the sides of the berries are shaded, creating the effect of light and shadow.
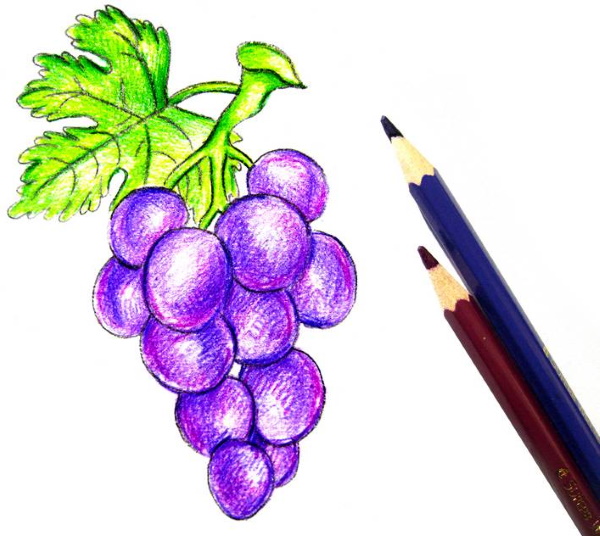
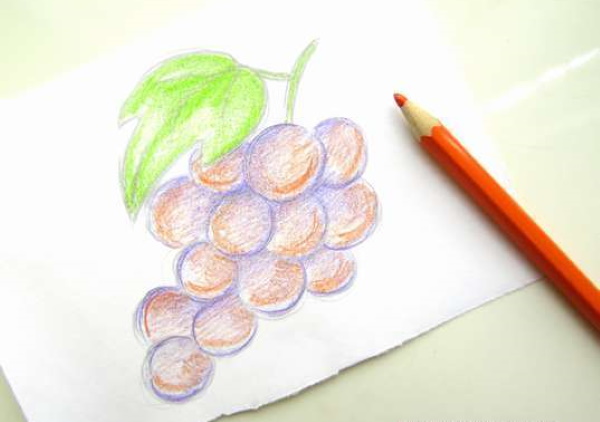
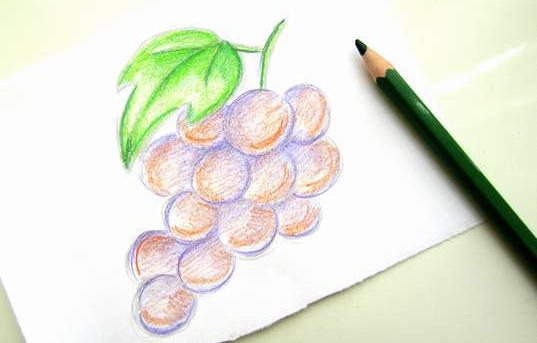
Burgundy colors show the shadow areas on the berries.
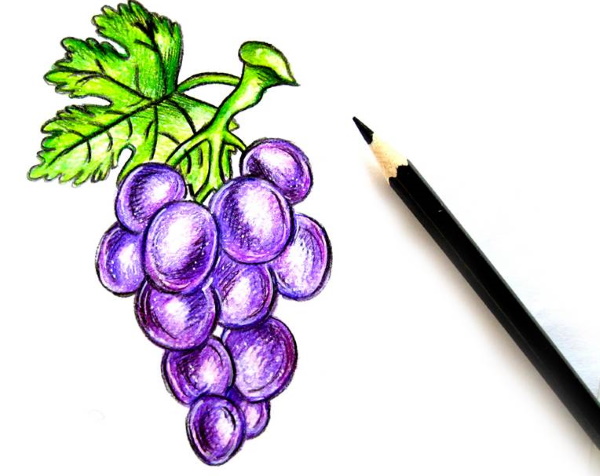
The white color shows highlights and light spots on the berries and leaves. The black color enhances the effect of a three-dimensional figure.
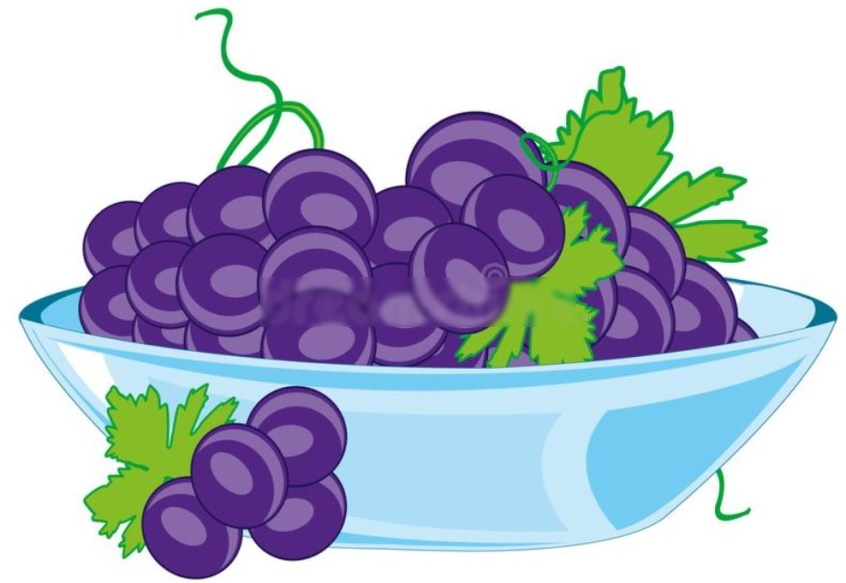
Grapes on a plate
Grapes (a drawing of this fruit for children can be done not in the usual form of a bunch) can be drawn as a dish on a table. If desired, the drawing is done as a still life and then a table and other products on it are added or a plot of the image is invented.
The sheet is placed horizontally and from the center they begin to draw the dish, and then the grapes in it:
- A plate or dish is drawn schematically in the center of the table. The bottom edge of the dish is made flat, the top is depicted with a slight inward bend to show the volume of the dish.
- A little higher from the edge of the dish, draw the first grape in the form of a vertical oval. After it, add another berry.
- With a small indent to the left, draw 4 rows of berries with 3-4 berries. Each row to the left repeats the previous one, but becomes slightly smaller to create the appearance of a narrowing of the bunch.
- On the side of the right grapes add 2 openwork vine leaves. They are not fully visible, so it is not necessary to draw every bend.
- Add more berries into the remaining space between the grapes and the leaves. The berries can be in front or behind each other.
- If desired, draw a few berries with a grape leaf next to the plate to create a still life composition.
- The berry vine has spiral tendrils that are often left unbroken. You can ask children to depict these tendrils in several places on the dish.
- The finished outline is outlined with a pen or liner. The extra lines of the drawing are erased with an eraser.
- If you want to add other objects to the drawing, do so at this stage.
- The finished image is colored with colored pencils or paints. The berries are colored with different shades of purple, the tendrils and leaves are filled with green. The dish is painted in any color.
- Use darker tones near the main outline and lighter tones closer to the center of each figure to show the volume of the figure and highlights. All highlights should be in one direction of light.
- The dish is painted darker on one edge and lighter on the other, showing the direction of the light and the convexity of the shape.
Grapes with graphite pencil
Grapes (a drawing for children can be done in black and white) can be depicted using the following tools:
- drawing paper;
- eraser;
- graphite pencil, hard-soft;
- soft graphite pencil.
Using pencils of different levels of softness, create shadow and penumbra, giving the bunch of grapes a realistic look. The type of paper for drawing is chosen at your discretion.
Place the sheet vertically and start drawing from the center of the sheet:
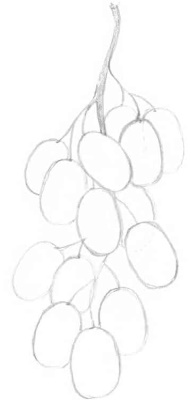
- In the center of the sheet, using a hard-soft pencil, begin to draw the base of the grape bunch in the form of the main and additional branches. The main branch is drawn with a wavy line, and additional branches gradually diverge from it. There can be 1 or more grapes on such branches.
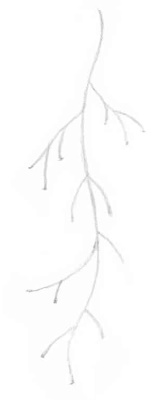
- The main stem is thickened to show that it is denser than the secondary branches. At the end of each branch, grapes are drawn in the form of elongated ovals. To make it easier, the berries that are closer to the viewer are drawn first. They can peek out from behind each other, so they are not fully visible.
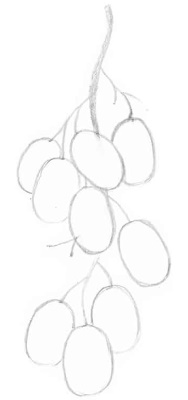
- After the main berries, the rest are drawn, which are visible to the viewer last. The number of berries may differ from the example - there may be more or less of them.
- Using a soft pencil, begin to create the volume of each berry. To do this, make hatching in one direction along the contour of the grapes. To create a shadow effect, make cross hatching of the main lines. In the center, leave an unshaded area to create a glare effect.
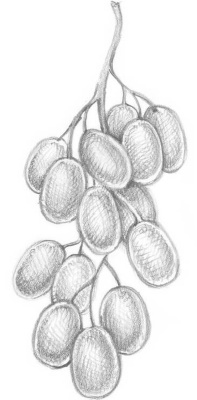
- If desired, add shading with a hard-soft pencil and additionally outline the outline for a more realistic look. Erase excess fragments and lines with an eraser.
Grapes with colored pencils
Grapes (a drawing for children using colored pencils is suitable for children of primary and secondary school age, since it requires drawing skills) begin to be done with simple graphic figures, then use soft shading with pencils to create the effect of light and shadow.
The process uses:
- album sheet;
- colored pencils;
- eraser;
- hard-soft graphite pencil.
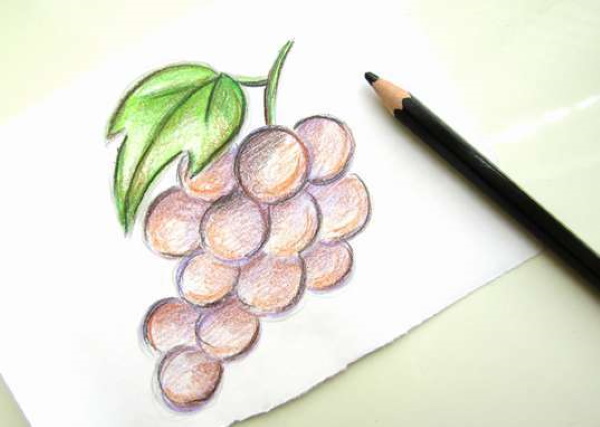
Draw a bunch of grapes on a horizontally placed album sheet. Start from the center, where the berries closest to the viewer are depicted. Then add the remaining grapes and a vine leaf. The leaf and branches are colored with green pencils.
The berries are colored with red, burgundy, and blue pencils. The colors can be replaced with purple and pink. Shadows are added with black, blue, and dark purple.
Highlights on the berries and leaf are created with a white pencil or pen:
- In the center, draw a berry in the form of an elongated oval. On both sides of it, draw another berry, peeking out from behind the central grape. The berries can be of different sizes.

- Add the remaining berries, gradually moving downwards. The bunch gradually narrows and there are fewer and fewer berries in the rows. The berries can stick out forward or remain behind the previous ones. It is better to alternate the berries by their location to the viewer so that the bunch looks realistic.
- At the top of the bunch, draw a branch and a grape leaf. The veins on the leaf are shown with lines.
- They begin to color the drawing with colored pencils. Each berry is colored with blue or purple lightly. The shading should be in one direction. They determine the place where the berries are shaded and shade this area more strongly along the contour.
- The main part of the leaf and branches are painted light green.
- Add red or orange color to the grapes. Paint the area opposite the shadow with this color to create the effect of glow and volume of the image.
- Using a dark green pencil, highlight the veins on the leaf, the branch, and the outline of the leaf. Using light shading, add shadows near the veins.
- Add a shadow on the outline of the berries with a dark brown or burgundy shade. Make highlights on the berries themselves by drawing semicircular lines with light pressure.
- In some places, outline the berries with black and add light shading where shadows fall on the berries and the leaf of the bunch.
- Use an eraser to erase extra lines, optionally add some color shading or add highlights where the light falls with a white pencil or pen.
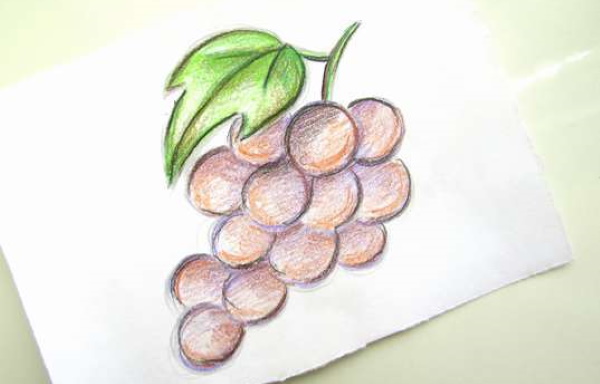
Ready.
Grape bunch step by step
Grapes (a drawing for children can be depicted simply, drawing small details in general sketches) begin to draw with a rough sketch and gradually move on to drawing precise details.
Children do not have to exactly re-draw every detail of the example; it is enough to focus on the drawing and repeat the idea of the image:
- The sheet is placed vertically and the borders of the bunch and grape leaves are schematically drawn in the center. The image of the stems of the bunch is added with lines and wavy lines.
- The leaves of the bunch are drawn in more detail. They have 5 pointed ends, they are shown with frequent jagged lines. The leaves do not have to be depicted completely - on the bunch, the leaves can peek out from behind the berries or each other. On the right side, the contour of the branch is depicted with lines.
- The area that marks the borders of the bunch is gradually filled with berries. They are oval in shape and tightly fit together in uneven rows in the bunch. The bunch gradually narrows in cilantro and there are fewer berries in each row. First, several berries are depicted in different areas that are in the foreground to the viewer, then the rest.
- On each leaf of the bunch, draw a line that crosses the leaf in half and from it symmetrical veins diverging in different directions. More carefully draw the outline of the stems and branches of the bunch.
- The pencil is used to make hatching in one direction in places where the shadow falls - on the berries and leaves. To do this, imagine a light source and make a darkening in the opposite place. The edges of the contour and the lower part of the berries are hatched with short lines. The grapes that remain in the background are hatched more often and with longer lines.
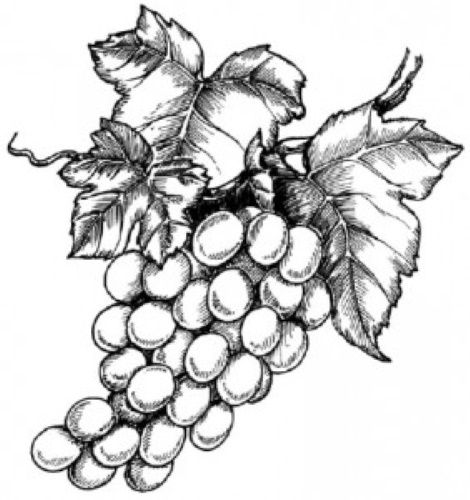
- Erase the extra lines with an eraser. Use a pen or liner to outline the resulting contour and shadow hatching. Use colored pencils or paints to color the finished drawing. Add white color to the places where the light falls to depict glare on the surface of the berries and leaves.
Useful tips and recommendations
Drawing grapes for children can be simplified in the process or made more interesting for the child if you know a few tips:
- It is advisable to create a background for the drawing to highlight the grapes.
- To create highlights on the grapes, use a white pen or thick paint that looks brighter against the background of the overall design (gouache, acrylic).
- To make the bunch look realistic, the berries are alternated and the exact rows in the bunch are not observed.
- If it is not possible to imagine a light source to depict a shadow, the berries and grape leaves are painted a tone darker along the contour.
- You can ask children to depict grapes as a plot and independently come up with other objects in the picture. This could be a plot from history or a still life. By thinking up fragments of the picture, children train their imagination.
- You can color the finished drawing with pencils, paints or pastels. If desired, the drawing can be left in black and white, colored with graphite pencils of different hardness or adding elements of shadow with a pen.
Video about drawing grapes
How to draw grapes for kids easily: