You can make a top hat with your own hands. To do this, you need to know how to take measurements correctly, what materials and tools you need to prepare for work, and you should also consider step-by-step master classes on making a hat from paper and fabric to choose the right option for yourself.
Features of paper hats
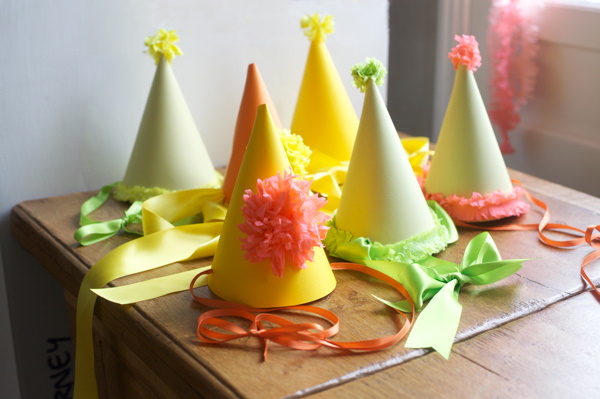
Paper hats are a great way to decorate your costume.
Where can you wear such hats:
- New Year and Christmas carnivals;
- theme parties (hen parties, stag parties, corporate events);
- festive evenings (Halloween, birthday);
- children's matinees.
Hats can be worn when spending leisure time together with children. Another feature of such headwear is the ability to securely attach them to hair and headbands with hairpins, which is very convenient for children's events and active games.
It is also easy to make paper hats with your own hands, even if the finished product looks complicated.
Necessary materials and tools
A top hat (you can make it yourself from thin colored cardboard) does not require much time or a large amount of materials to make.
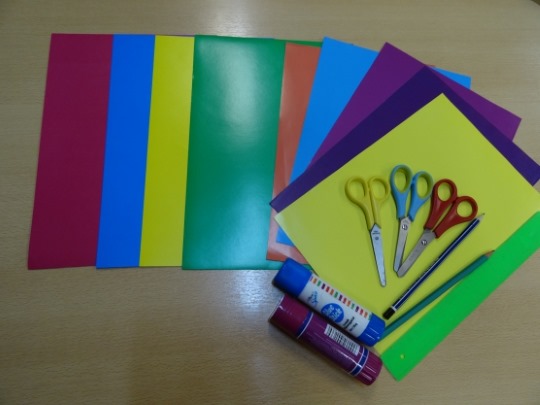
What you need to prepare:
- measuring tape;
- thick paper (drawing paper or Whatman paper will do);
- simple pencil;
- eraser;
- compass;
- ruler;
- scissors;
- stationery knife;
- PVA glue;
- double-sided tape;
- stapler;
- thin elastic band;
- paint and brushes for painting;
- materials for decoration.
You can decorate the finished product with satin and velvet ribbons, glitter, rhinestones and buttons. You can also use colored paper, glitter tape and scrapbooking sheets.
Taking measurements and pattern
The top hat (you can make a pattern only after taking measurements) should fit the person in size. A top hat that is too big will cover the eyes, and a small one will not fit on the head.
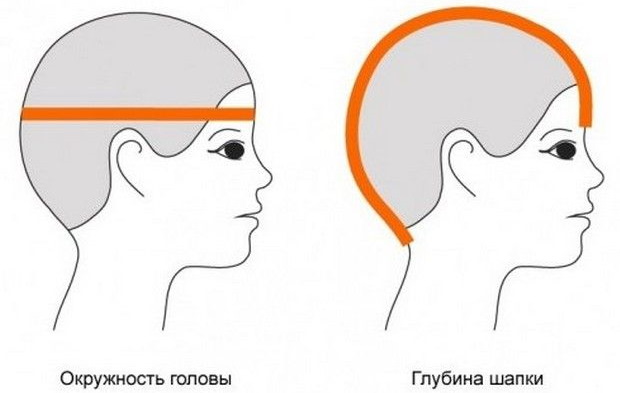
How to take measurements correctly:
- Place the ribbon behind the back of the head.
- Find the most prominent point of the head at the back. Apply the tape to this point.
- Pull both ends of the ribbon over the ears.
- Bring the ends of the tape together at a point on the forehead, just above the eyebrows. Do not pull the tape too tightly.
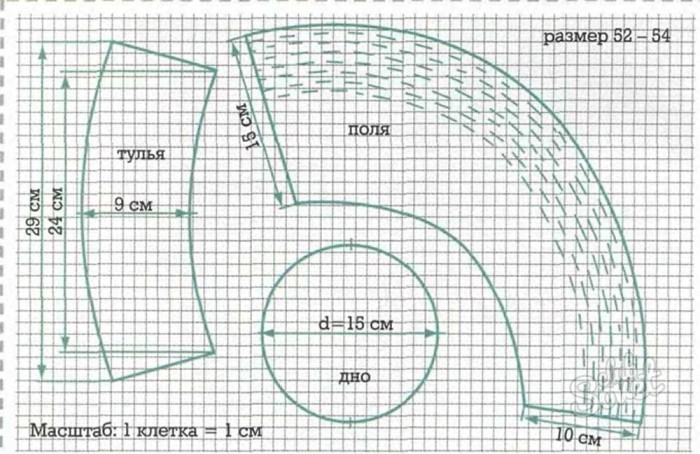
Based on the obtained result, you need to build a pattern. Next, for example, the average volume of a person's head will be taken as the result - 56 cm.
Procedure:
- First you need to determine the height of the future hat, for example, 24 cm.
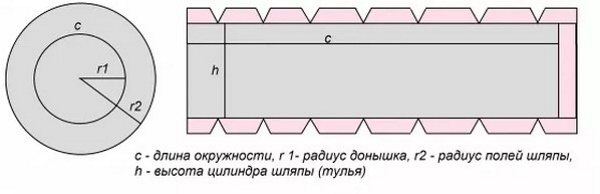
- Draw a rectangle, the width of which will be equal to the circumference of the head - 56 cm. The height of the rectangle is equal to the height of the hat - 24 cm.
- Step back 1.5 cm from the top corners of the rectangle. Draw a straight line connecting these points. This strip will be the "seam allowances", as in sewing. Later, the paper in these places will need to be glued.
- Draw the same stripe at the bottom and on the right edge of the rectangle.
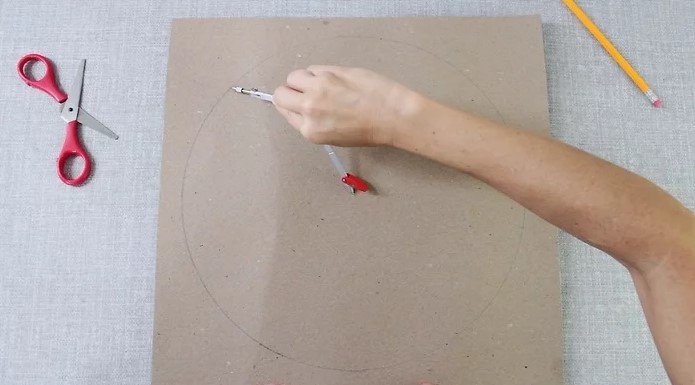
- Using a compass, draw a circle equal to the size of the head – 56 cm.

- Determine how wide the fields will be, for example, 7 cm. Draw another circle so that the small circle is in its center. The diameter of the large circle: 56 + 7 = 63 cm.
- It remains to draw the top of the hat. With a compass you need to make a circle equal to the volume of the head 56 cm.
- Add 1 cm to the circumference. These are the “allowances” that will be used to attach the top of the hat to its base.
- The same “allowances” need to be drawn inside the small circle of the brim detail.
Wherever there are spare strips for gluing parts, you need to draw teeth, 1 cm wide. They are needed to make the edges of the product more flexible. Straight strips will be difficult to roll into a neat round shape.
How to make a paper top hat
A top hat (you can make a paper one in 1 hour) is made using a simple algorithm.
 Procedure:
- Take measurements and record the results.
- Calculate the height of the hat and the width of its brim.
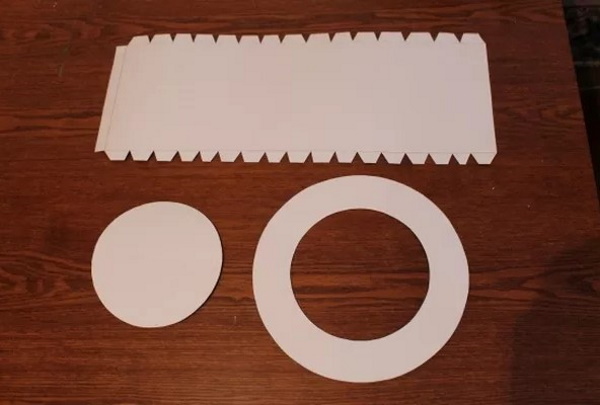
- Draw 3 pattern elements: brim, base, top.
- Add gluing areas to the pattern.
- Cut out the blanks.
- Glue the parts together.
- Try on a hat.
- Insert an elastic band that will hold the accessory on your head.
Paint the hat and decorate it.
Assembly and painting of the product
It is not difficult to make a top hat with your own hands.
Procedure:
- Cut out all the blanks together with spare strips for gluing.
- Cut out all the teeth on the additional strips.
- The rectangle, which is the base, must be tried on again to ensure that the pattern is constructed correctly.
If after wrapping the paper around the head there is a large free edge left, then it needs to be cut off, not forgetting to leave space for gluing. If the length of the rectangle is not enough to wrap the head, the pattern will have to be redone, taking measurements again.
- Carefully roll the rectangle into a wide tube.
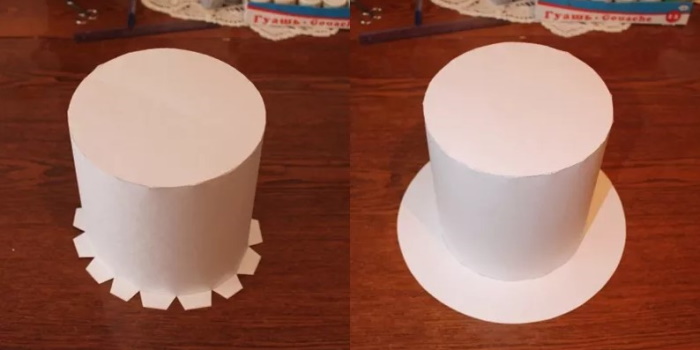
- Apply glue to the teeth that will hold the edges of the paper on the front side.
- Carefully, 1 by 1, press the teeth to the back of the paper from the other edge. Hold the paper until it sticks together. Leave the base until the glue dries completely. You can put a weight inside the paper tube, for example, glass cups, to press the glued parts of the paper.
- Take the brim blank. Bend all the teeth upwards.
- Carefully coat the teeth with glue.
- Glue each prong to the back of the hat base.
- Leave the 2 parts to dry completely.
- Bend the teeth on the top of the hat base down.
- Coat each tooth with glue and glue them to the back of the top of the hat.
- Leave the hat until completely dry.
- Cut about 20 cm of elastic tape.
- Use a utility knife to make holes in the bottom of the hat base. They should be parallel to each other.
- Singe the edges of the elastic band.
- Insert the edges of the ribbon from the inside of the hat.
- Tie each end in a knot to prevent the ribbon from slipping out.

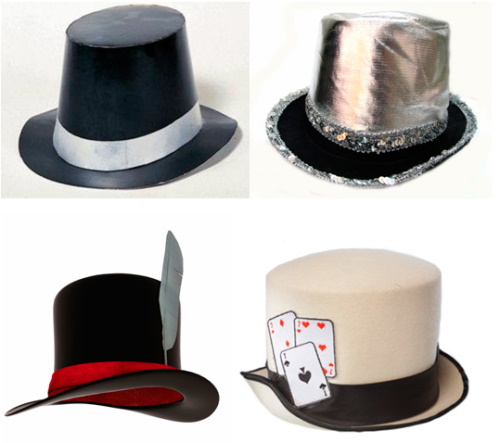
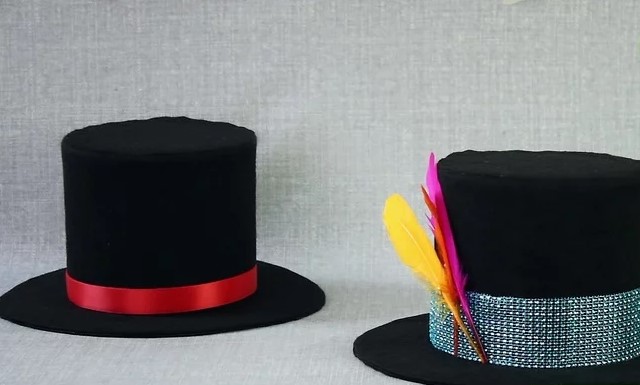
In the classic version, the top hat is black. Therefore, you can color a paper sketch with black gouache or artist's ink. The paint should be applied in 2 layers using a large brush with soft bristles.
The bottom of the hat (brim) should be painted on both sides. If the headdress needs to be removed during a party or performance, it should be painted from the inside. For this purpose, you can use bright, burgundy paint to imitate velvet fabric.
You can decorate the hat with satin of any color. It should be wrapped, hiding the place where the bottom of the base and the brim of the hat are glued together. Carefully trim off the excess tape, and singe the edges with a lighter so that they do not unravel. Having selected threads of a suitable color, sew the edges of the tape.
Design ideas
There are many ways to decorate a hat. The style of decoration depends on the concept of the event where the headdress will be worn.
The table shows several design examples.
| What event is the hat suitable for? | Type of decoration | Materials you will need |
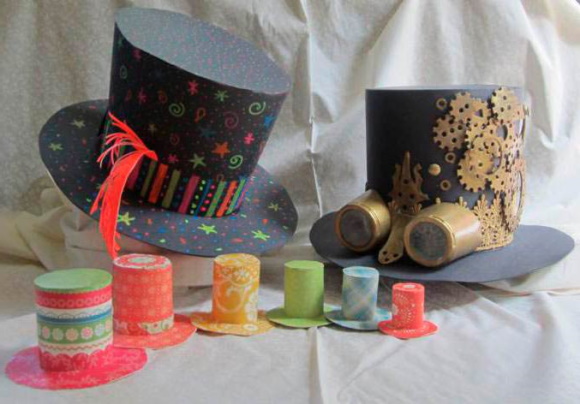
| Children's party | Painted hat with patterns and pictures. | Paints, brushes, stickers and magazine cutouts. |
| Hat with colored mosaic. | Scraps of colored paper, PVA glue. | |
| Play | Bright neon colored hat. | Brightly colored acrylic paint, brush. |
| A hussar's hat with a visor. | Red and black gouache (for coloring), yellow acrylic paint, a set of art brushes. | |
| Bachelor party/birthday | Shiny hat | Gift wrapping paper, holographic tape, glue stick. |
| Hat with patterns | PVA glue, scrapbooking paper. | |
| Tricks | Magic hat with shiny stones. | PVA glue, hot glue, flat rhinestones, glitter, dark blue gouache (for coloring). |
| Hat with stars | Blue gouache, hot glue, plastic fluorescent stars. | |
| Halloween Party | Hat with glowing spiders. | Black gouache, white fluorescent paint, art brushes. |
| Pumpkin Hat | Black gouache, orange paper, PVA glue, black marker. | |
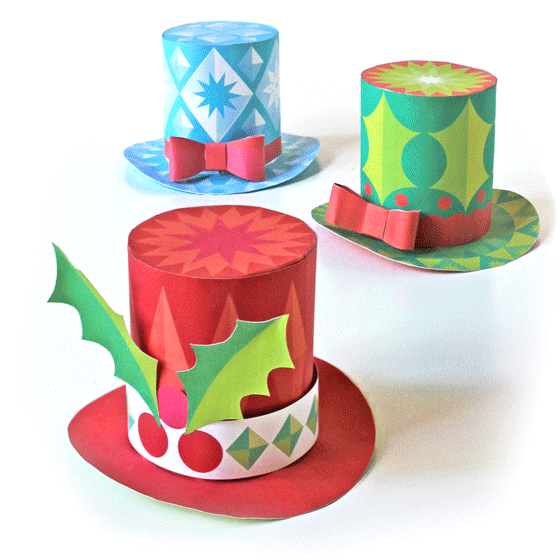
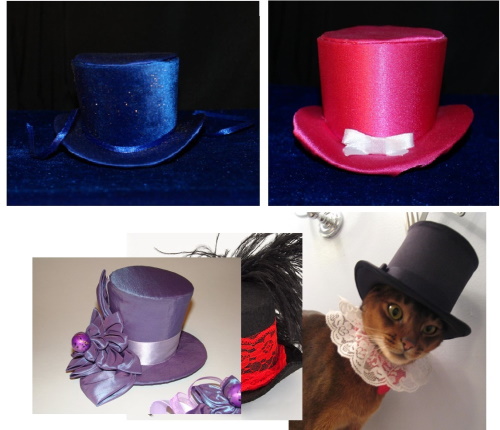
| New Year's Carnival | Hat with snowflakes | Dark blue gouache, plastic white snowflakes, hot glue, PVA glue, dark blue glitter. |
| Hat with tinsel | Tinsel should be glued on instead of ribbon using hot glue. | |
| Bachelorette party | Pink hat with lace | Fuchsia gouache, art brushes, white lace ribbon, PVA glue, gold glitter. |
| White hat with mesh | Hot glue, red mesh (glued to the brim of the hat), red satin ribbon. | |
| Gothic party | Hat with lace | Black gouache, hot glue, fabric strips with eyelets (matching the color of the hat base), leather cord, black lace ribbon. |
| Hat with dried flowers | Brown gouache, hot glue, gold satin ribbon, dried flowers. | |
| Masquerade | Elegant hat with feathers | Black gouache, red lace ribbon, black boa (it needs to be cut and glued to the back of the hat). |
| Mad Hatter's headdress (from Alice in Wonderland). | Black gouache, gold glitter, wide brown satin ribbon, PVA glue. |
After painting with gouache and using glitter, it is advisable to spray the hat with strong hold hairspray. This will prevent the glitter from falling off and the dried paint will not stain your hands.
How to sew a top hat
A top hat (the headdress can be made from any thick fabric), sewn from beautiful fabric, will look expensive and impressive.
What materials can be used to sew a carnival hat:
- velvet;
- velours;
- jacquard;
- felt;
- fleece;
- silk;
- atlas;
- satin;
- plush.
The fabric can be any color. Metallic shades will look beautiful, as well as dark ones: purple, black, dark blue, burgundy. The sewing algorithm is similar to that used to create a paper hat. First, you need to take measurements and make a similar drawing. This time, "seam allowances" are not needed.
What you will need for work:
- cardboard;
- stationery knife;
- simple pencil;
- long ruler;
- scissors;
- fabric (cut about 1x2 m);
- chalk or a piece of soap;
- pins;
- sewing needle and threads of matching colors;
- satin ribbon;
- lighter;
- hot glue;
- fabric glue.
Procedure:
- Transfer the drawing to cardboard. You need to create a frame from it. Without a solid base, the hat will not hold its shape.
- Cut out the blanks using a utility knife.
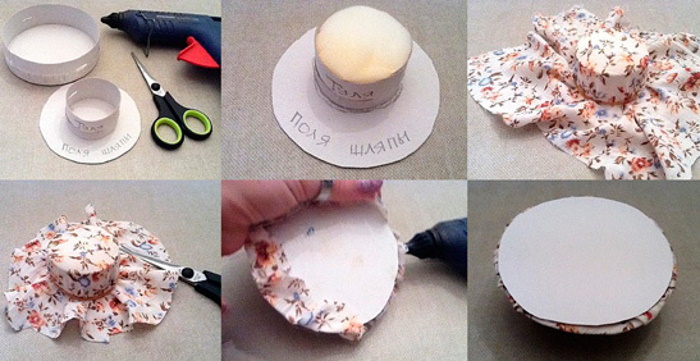
- Cut out 2 pieces of the brim, base and top of the hat from the fabric. It is necessary to add 1.5 cm to the pieces. This will be the material for hemming the fabric.
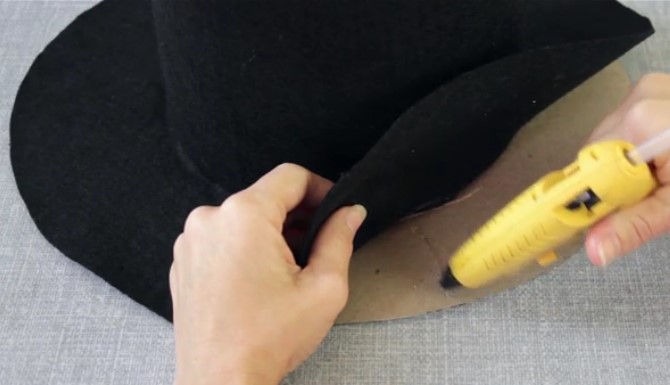
- Place 1 of the hat brim pieces on the table with the wrong side facing up.
- Place a cardboard blank on top.
- Grease the edges of the workpiece with fabric glue. Fold the material upward. Wait until the glue dries. Glue the fabric inside the circle in the same way.
- Cover part 2 with the blank, placing the fabric with the right side up. Fold the edges of the material inward. Carefully sew the blank to the fabric located below, using a blind stitch.
- Sew the top of the hat in the same way.
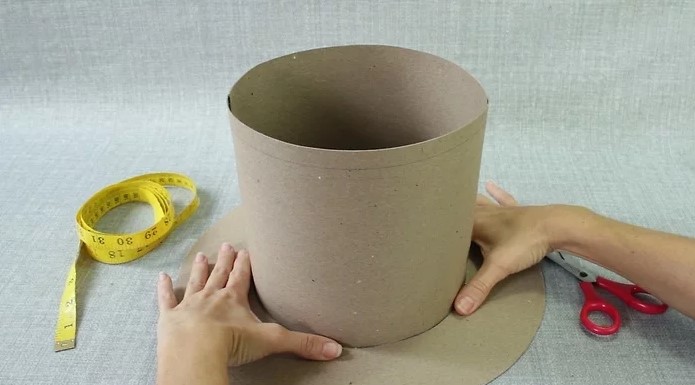
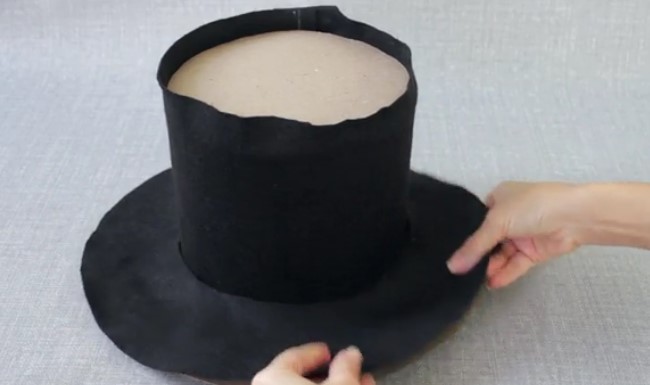
- The cardboard base of the hat should be placed horizontally on the table.
- Place a ruler on the top of the cardboard and make marks every 2 cm.
- Make the same marks at the bottom. All points should be parallel to each other.
- Connect the dots.
- Using the back of the scissors and a ruler, press the cardboard along the marked line.
- Bend the sheet of cardboard along the indented lines to create a straight tube.
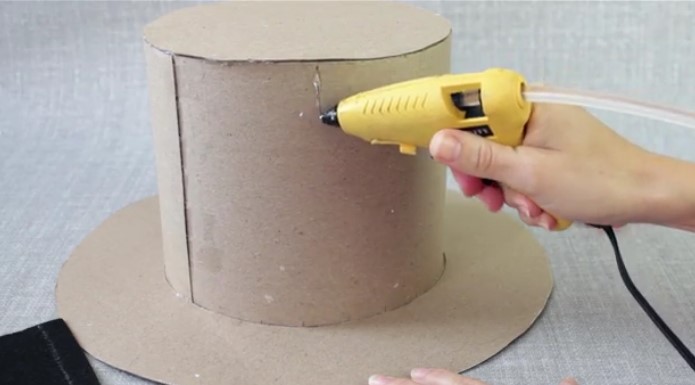
- Connect the ends of the pipe with hot glue.
- Place the fabric rectangles on top of each other with the right sides facing inward.
- Sew 1 long edge of the workpiece.
- Unfold the sewn material. Place it on the table with the wrong side up.
- Stretch the fabric over the cardboard tube. The seam should be located at the bottom.
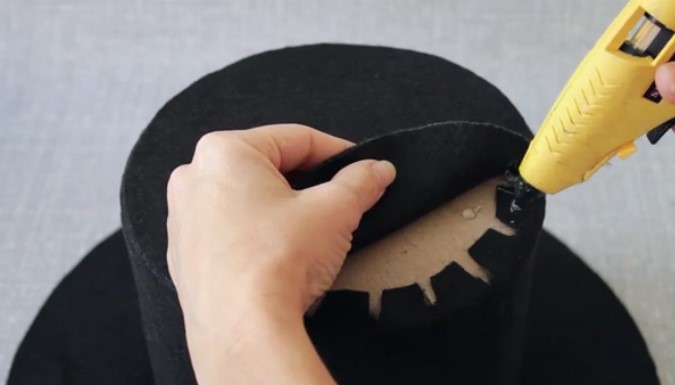
- Fold the fabric at the top into the cylinder and secure with fabric glue.
- Fold the fabric inside and sew it to the glued edges of the material using a blind stitch
- Sew the side edges of the material with a blind stitch. The fabric should fit tightly around the cardboard.
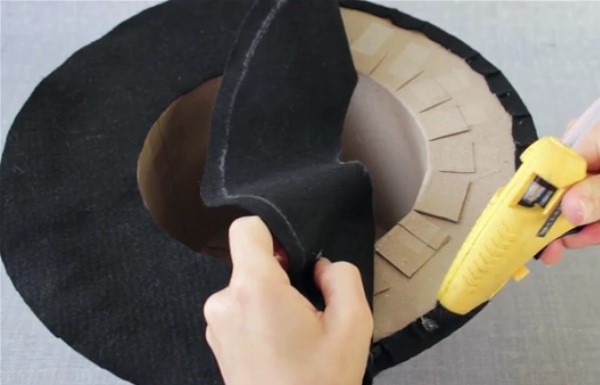
- Pin the brim of the hat to its base. The fabric should be lifted carefully so as not to deform it.
- Sew the brim to the hat using blind stitches, inserting the needle under both layers of fabric.
- Sew the top of the hat in the same way.
- Measure the circumference of the hat at the brim. Cut the satin ribbon to the desired length.
- Singe the edges of the tape with a lighter.
- Wrap the ribbon around the hat, covering the seam between the base and the brim.
- Sew the ends of the ribbon.
The fabric hat is ready to use. It can be decorated with stripes, plastic beads, rhinestones and buttons.
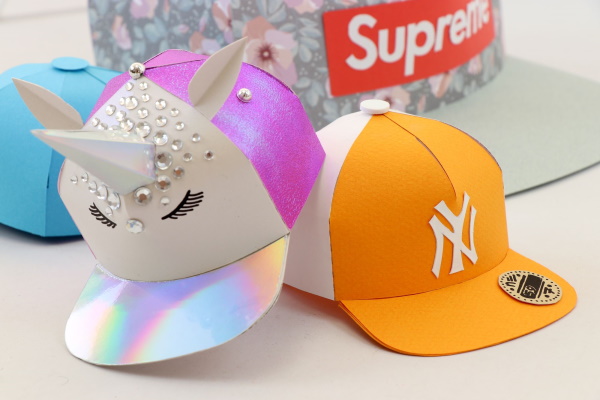
If you use eco-leather instead of fabric, you will get an unusual gothic hat. The inside of such a headdress can be trimmed with bright red leatherette, and instead of a satin ribbon, use a rough leather belt with a gold buckle. You will get an excellent prop for magic tricks.
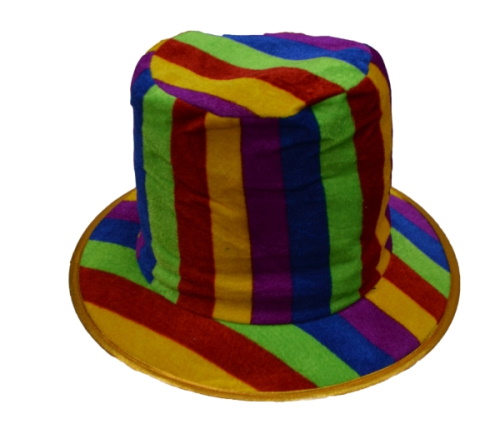
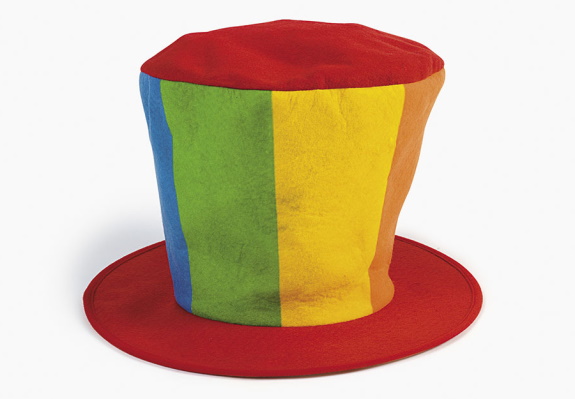
You can make a voluminous hat from colored fleece, which will perfectly complement the clown image. The creation of the pattern and cardboard frame follows the algorithm described earlier.
How to proceed further:
- You will need to make the same blanks from foam rubber, 3 cm thick.
- Attach the foam rubber to the blanks using glue.
- Then cover the parts with bright fabric. The material should be cut taking into account seam allowances and the thickness of the foam rubber.
- After the trimming, you need to make markings on the edges of the main part of the hat. Put dots with chalk at a distance of 5-7 cm from each other.
- Connect the top and bottom points by pulling the threads through them. Tie the ends of the threads into knots and carefully cut off the excess. The tension of the threads will create indentations on the foam rubber. The main part of the hat will acquire a “puffy” and funny look.
- In the same way, drag the brim of the hat.
- Sew the top of the hat to the base.
- Sew on the brim of the hat.
- Tie a bright wide ribbon around the hat, covering the seams. Tie the ends into a lush bow.
- Cut the fabric scraps into strips 14 cm long.
- Stack multiple strips on top of each other.
- Tie the bundle in the middle with a thread.
- Fold the strips in half.
- Tie the bottom end with a thread again. You will get a fluffy pompom. It needs to be sewn on the top of the hat.
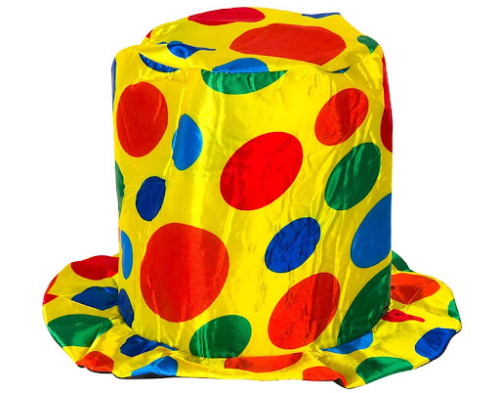
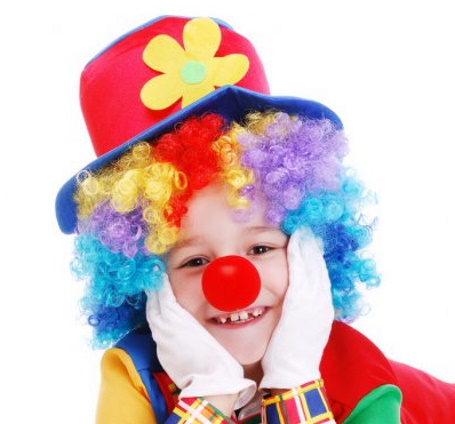
The bright clown headdress is ready. Clowns often have bright hair. You can put a wig under the hat, but then the top hat will constantly slide down. You can solve this problem by sewing artificial hair to the bottom of the hat base in separate strands.
In addition, hair can be made multi-colored. For this you will need old colored wigs. The necessary bunch of hair is cut off, one of the ends of the strand is glued with hot glue, then the bunches are sewn to the hat using threads of any color. The glued sections of hair should be on the inside of the hat.
Making a top hat with your own hands is not difficult. The main thing is to correctly measure the head size of the person who will wear it, and also choose a decor that matches the theme of the upcoming event.
It is advisable to make children's hats with ties or an elastic band at the bottom so that the baby does not lose his headwear during active games.
Video about making a hat
Top hat - paper hat: