You can knit a youth women's sweater with knitting needles using different patterns - from a simple herringbone or elastic to complex jacquard patterns with interlacing elements. The assembly process itself has common steps that may differ slightly in some details. For example, cuff elements, fastening joints, knitting a common fabric or with a seam, etc.
Youth models of women's sweaters
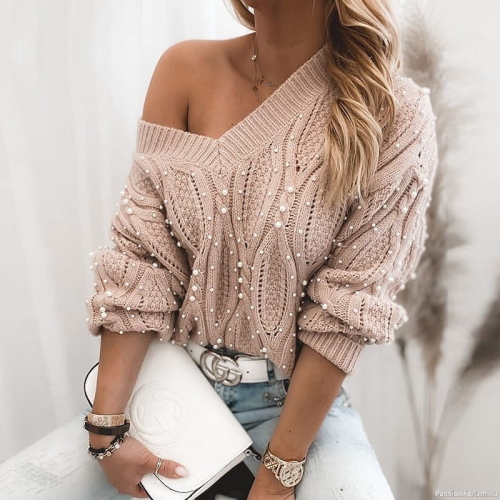
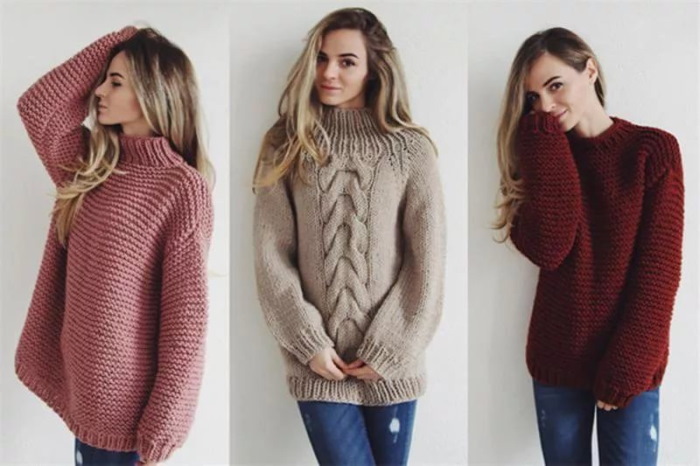
Among the fashionable models for young girls there are different options of women's youth sweaters.
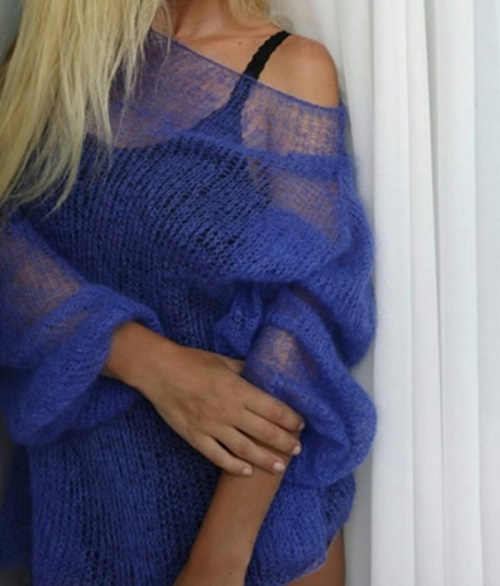
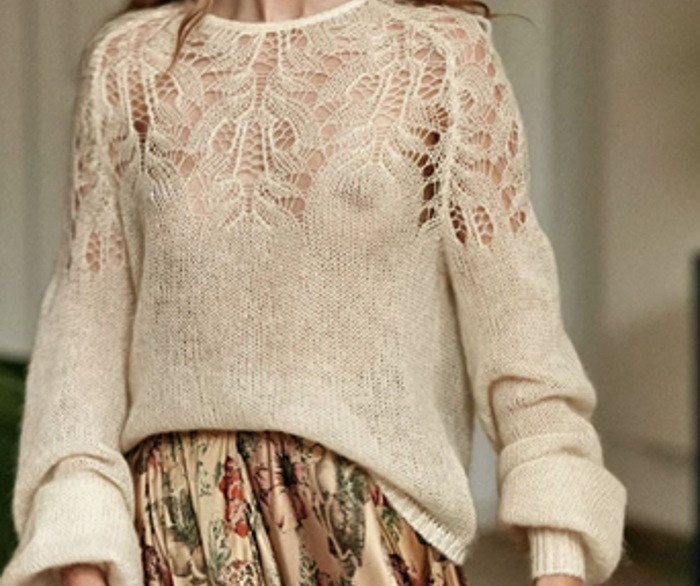
 Youthful women's sweater with decor.
Necessary tools and materials
Before knitting women's sweater knitting needles, they try to choose the necessary and high-quality materials for work.
First, decide what kind of knitting needles you will need for the job:
- A pair of straight knitting needles will be needed to make the straight piece – the back and front of the sweater.
- Circular short needles on a cord (sometimes a fishing line) can be used for knitting in a circle, creating sleeves, a collar. These same elements can be made with straight needles, but using a different knitting technique.
- Depending on the pattern you choose, you may need additional short knitting needles to knit the pieces.
The thickness of the knitting needles for work is selected based on your experience. Beginner knitters follow the advice of masters, who recommend following the general rule of selecting the thickness of the knitting needles by 1 unit more than the thickness of the yarn. They can also pay attention to the recommendations for selecting tools on the yarn packaging, where the number of the knitting needles corresponds to the thickness in mm.
Sometimes they may deliberately choose needles 2-3 mm thicker than the yarn to make the fabric more airy. If the needles are too thin in relation to the yarn, the fabric will be too tight.
Long needles are chosen for working with wide fabrics. The material of the needles depends on the type of yarn chosen.
- Metal for wool and acrylic.
- Bamboo and wood for working with silk and viscose. Also good for beginner knitters because of their light weight.
- Plastic ones are suitable for any work, and are especially often chosen when working with large canvases.
The type of yarn is chosen for a specific product, where the composition determines how warm the item turns out to be. Beginners are advised to give preference to simple homogeneous threads.
Selecting the type of yarn
| Yarn | What it is suitable for, nuances. |
| Mixed fibres (melange) | Suitable for beginners due to the variegated coloring, which masks imperfections in the work. |
| Wool (any) | For warm sweaters. Does not let the cold in. Fluffy yarn (mohair) can get tangled when working. The composition with a high percentage of wool is prickly. It can cause allergies and shrink when washed. |
| Wool and acrylic (mixture in different proportions) | For sweaters.
Less warm yarn, even if it looks bulky. |
| Acrylic | For children's sweaters.
Less warm items than those containing wool. May become electrified. They do not cause allergies, do not shrink when washed, and are not damaged by moths. |
| Cotton and linen | For summer jumpers, capes.
Plant origin, absorbs moisture well, does not cause allergies. Things are comfortable to wear in hot weather. |
| Viscose (metallic sheen in threads) | For summer or decorative jumpers. |
| Microfiber | Summer or children's jumpers.
The material dries quickly, is soft and comfortable in hot weather. |
To calculate the amount of yarn needed for a product, look at the conventional thickness - this indicator of the number of grams of threads in 1 skein. Yarn manufacturers always indicate this data. The longer the length, the thinner the thread and the higher the consumption. The average indicator is considered to be 250-300 m per 100 g.
Before starting work, check the threads for color quality. Cut off a little from the skein, soak the thread in warm water and dry on a white cloth. If the yarn is shedding, the color may start to come off already in the water or during the drying process.
Schemes with description of works for beginners
The knitting of a women's youth sweater begins in parts - first the back is knitted, then the front and sleeves. At the end, all parts are connected.
The product is assembled from the back, since the size of the product can be selected based on the chest and shoulder width. In the process, each detail can be made with different patterns, creating a unique product.
Before starting work, take measurements from the model to determine the size of the sweater. This size determines how many loops need to be cast on for all parts.

The main measurement for making a sweater is the chest circumference. It is measured with a centimeter tape or a tape, which is then applied to a ruler. Measurements are taken in a bra so that the measurements are accurate.
The measuring tape is placed under the armpits at a horizontal level. The model should stand straight and not take deep breaths.
The back is knitted in the following sequence:
- Cast on the required number of stitches onto the knitting needles to create the width of the back part, not forgetting about the side stitches.
- Knit the required number of rows, forming the desired pattern of the fragment.
- The back is formed at the height of the shoulder line, not reaching 3 cm. Beginners are not recommended to form armholes at this stage, since this process can be complicated and confusing. The first products are recommended to be made with dropped sleeves.
- Having reached the level of the shoulders, they begin to knit the neck.
When the back is ready, they begin to knit the front part of the product, making it a little wider if necessary (if the chest is larger than size C).
The front part is knitted similarly to the back, but 5 cm are not knitted to the edge of the shoulders. Then the neck is formed, but the calculation of the loops may change slightly for the desired notch.
When knitting dropped sleeves, close the loops at the end of the work. Cast on the required number of loops for the width of the sleeve, knit 7-9 rows with a rib pattern to form a cuff.
Then move on to knitting the main pattern, increasing the loops in each front row if necessary. Knit the entire height of the sleeve and close the loops. Do the same for the second sleeve.
The final stage of making a sweater or jumper is to gather all the parts together. They are pre-soaked in water and dried on a towel so that all the parts are formed correctly.
Then connect in any convenient way, first sewing the shoulder seams, then attaching the sleeves, and lastly doing the side seams. Iron all the seams.
On the finished sweater, knit the neck with circular knitting needles, starting from the middle of the back. Knit the binding with a rib, as for the cuff. The number of loops is not reduced, since such a rib is elastic.
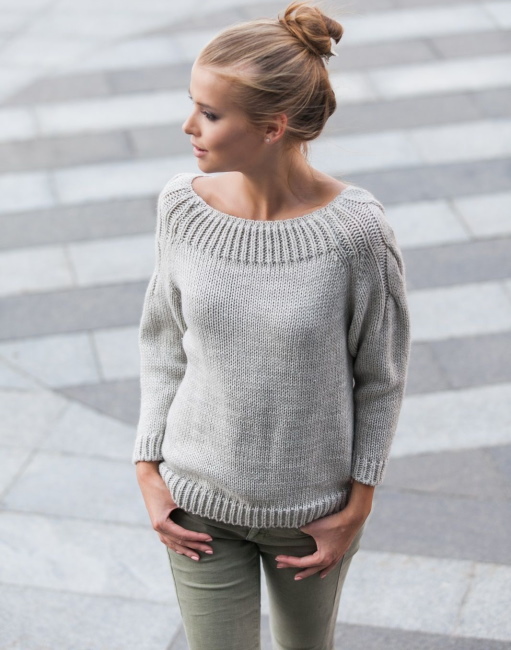
Stockinette stitch sweater with elastic cuff
A knitted women's youth sweater is knitted with 2 different patterns for the main part of the product and for the sleeves, the neck is formed last and then all the parts are connected along the seam. The main process of making the product is described above for the general scheme of work.
The back and front of the sweater are knitted with a stocking stitch, with a pattern in one direction. To do this, cast on the required number of loops according to the calculation described above, then form the pattern step by step.
For convenience, the loops in the diagram are indicated by abbreviations (front loops - k, back loops - i, yarn over - n, remove the loop without knitting - s).
| Row | Description of actions |
| 1 | All - l. |
| 2 | That's all. |
| 3 | Repeat actions until the end. |
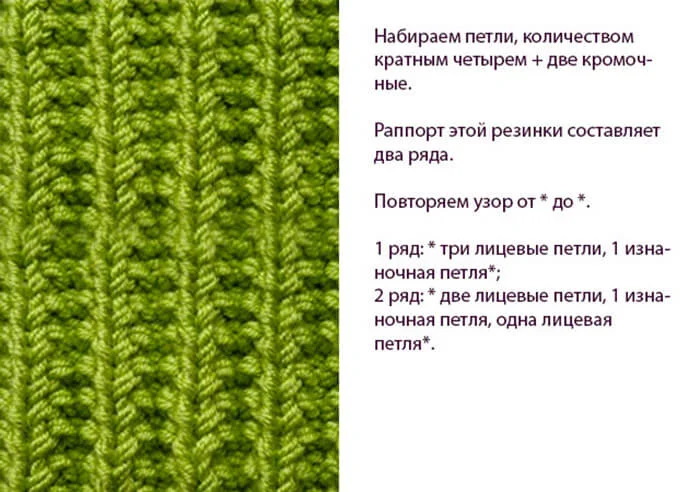
The sleeves are also knitted with a stocking stitch, but the cuffs and collar are made with a more elastic pattern - English rib (1 * 1). This is a double-sided pattern that looks the same on the front and back sides.
For cuffs or collars, cast on the required odd number of stitches and begin to form the pattern.
| Row | Description of actions |
| 1 | *1l, n, 1s* (* — repeat to the end of the row), 1l. |
| 2 and further | n before each i, i - remove and do not knit. |
To knit the neck, start knitting as for a wide double-sided elastic band (similar to cuffs), but knit the front and back loops alternately.
When the last 4 rows are formed, they switch to thinner knitting needles. In this case, in circular knitting, in each row they remove the front loop, as in the front method, and pull it through the loop. Purl loops are knitted as purl. All loops of the last row are secured with a needle.
Mohair sweater
The spider web sweater in this example is made from kid mohair merino yarn. For a women's youth product of Russian size 42, about 80 g of yarn is used, while the product is a free size and can even fit a size 48.
In the process, use circular knitting needles No. 5 and work from the bottom up.
The work is carried out in the following order:
- Cast on 180 stitches, knit with stocking stitch to the desired height of 30 cm to the armpit level. Set this part of the knitting aside.
- To make sleeves, cast on 60 stitches on circular knitting needles and knit the tubes to the armpits.
- The sleeves and the main part are assembled on one knitting needle and knitted in the following order: at the joints (there should be 4 of them), the loops are decreased - 2 together, 1 front, 2 together. In each row, the required height is decreased according to this pattern.
- Sharply begin to reduce the loops, forming the shoulders: 2 together, 2 front, 2 together.
- The loops that remain after all the reductions are knitted with the front stitch for another 15-20 cm in height, forming a collar.
- To form the cuffs on the sleeves, crochet 3 rows of single crochet stitches using 2 strands of yarn.
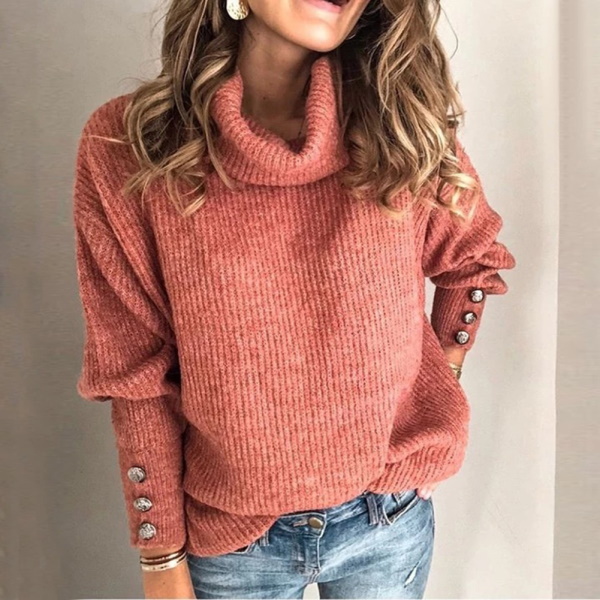
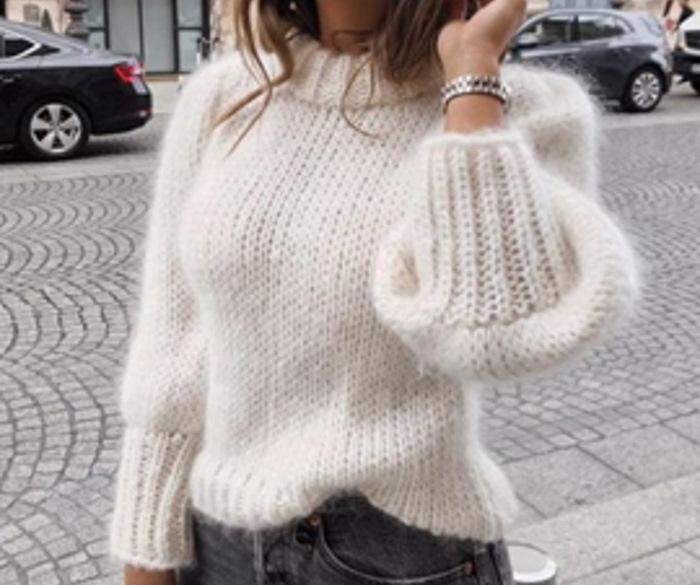
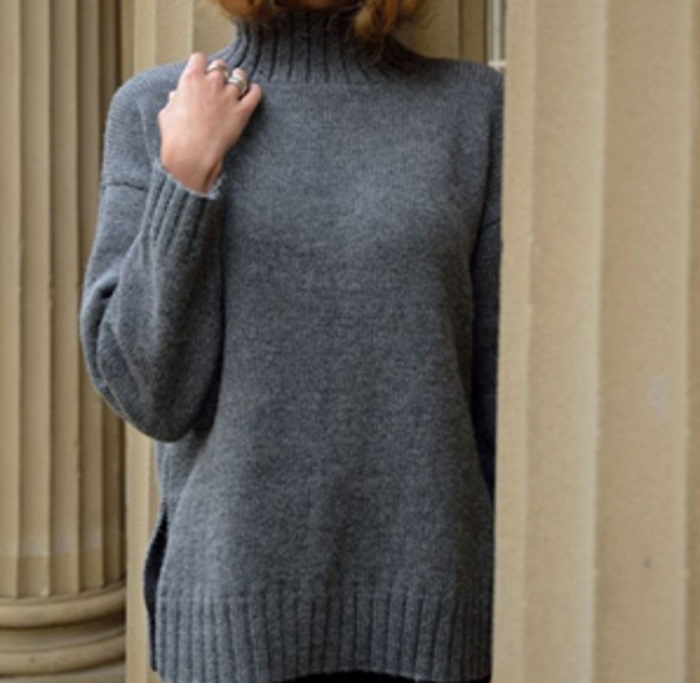
Sweater with a turtleneck and cuffs
A knitted women's youth sweater can be made with a denser knit to create a warm everyday item for the cold season. A dense stand-up neck and the addition of cuffs make the product more original in appearance.
This method is more suitable for craftswomen with little knitting experience.
In this example, we worked with alpaca yarn 11 by 50 g on straight knitting needles No. 4 and No. 3.25. Yarn calculation for size 42.
They start working with making up the back, for this they cast on 139 loops (for sizes 44, 46, 48, 50 the corresponding number of loops is 149, 154, 164, 169). Then they start forming the pattern.
For convenience, the loops in the diagram are indicated by abbreviations (front loops - knit, back loops - purl, 2 loops together front loop - 2ВмЛ, yarn over - n).
| Row | Description of actions |
| 1 (front side) work with knitting needles No. 3, 25 | 2l, *1i, 1l* (* — repeat 3 times), 3l, *2i, 3l* (* — repeat to last 8 loops, *1l, 1i* (* — repeat 3 times), 2l. |
| 2 | 2 l, *1i, 1l* (* — repeat 3 times), 3i, *2l, 3i* (* — repeat to last 8 loops), *1l, 1i* (* — repeat 3 times), 2l. |
| Next 25 rows | Repeat the previous algorithm, ending with a front row. |
| 28 (wrong side) | 2L, *1i, 1L* (* — repeat 3 times), 2i, *2L, 3i* (* — repeat 1 time for larger sizes), *2VmL, 3i* (* — repeat 22 times, for larger sizes — add 26, 25, 29, 30 each time), *1L, 1i* (* — repeat 3 times), 2L. |
| 29 work with needles №4 | 2l, *1i, 1l* (* — repeat 3 times), l – to the last 8 loops, *1l, 1i* (* — repeat 3 times), 2l. |
| 30 | 2l, *1i, 1l* (* — repeat 3 times), and – to the last 8 loops, *1l,1i* (* — repeat 3 times, 2l. |
| Set 20 cm | Repeat the algorithm of the last 2 rows. Add 1 loop at the end of each row. |
Markers are placed at the ends of the row to mark the top from the side slit. Then from the front row, stocking stitch is knitted to a back height of 39 cm (for a larger size product, add 1 cm). According to the general pattern, the shoulders and neck are formed, and the front side of the product is knitted separately.
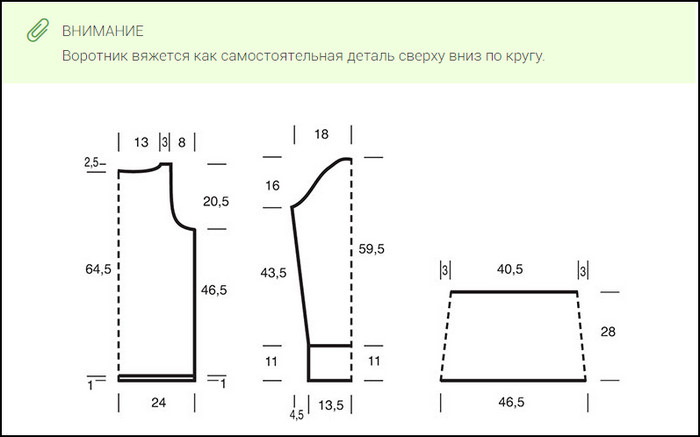
Start forming the sleeves - cast on 66 stitches on knitting needles No. 3.25 (add 2 cm for a larger size). Then work according to the diagram below.
| Row | Description of actions |
| 1 | 2l, *2i, 3l* (* - repeat to the last 4 loops), 2i, 2l. |
| 2 | 2i, *2l, 3i* (* — repeat to the last 4 loops), 2l, 2i. |
| Next 19 rows | Knit to form the elastic band of the cuff. |
| 22 | 2 and, *2BmL, 3 and* (* — repeat to the last 4 loops), 2BmL, 2 and. |
| 23, 24 | Stockinet. |
| 25 | 3l, n, l – to the last 3 loops, n, 3l. Continue knitting rows, adding 1 loop at the end in each 4th and 5th row until you get 85 loops in a row. Then until you get 97 loops in the 6th row. |
| The sleeves grow to 45 cm in height. | Similar scheme. |
| Form the top of the sleeve | Close 7 loops at the beginning of the row.
Then 6 loops at the beginning of the next 12 rows. Close the remaining (25) loops. |
Proceed to assembling the product. To do this, steam all the parts through damp gauze and connect the parts with a backstitch.
To form the collar, knit 14 stitches down the left side of the front neck, 29 stitches down the length of the front neck, 14 stitches up the right side of the front neck, and 44 stitches from the back.
Then work according to the scheme:
| Row | Description of actions |
| 1 | 2 and, *increase in next loop, 3 and* (* — repeat to last 3 loops), increase in next loop, 2 and. |
| 2 | 2 l, *2i, 3l* (* - repeat to the last 4 loops), 2i, 2l. |
| 3 | 2i, *2l, 3i* (* — repeat to the last 4 loops), 2l, 3i. |
Cast on 9 cm this way and close all the loops on the elastic. Then connect the left shoulder and the seam from the collar. Sew all the seams on the side part, the sleeve seams and leave 2.5 cm along the top edge. Sew the sleeves into the resulting armholes.
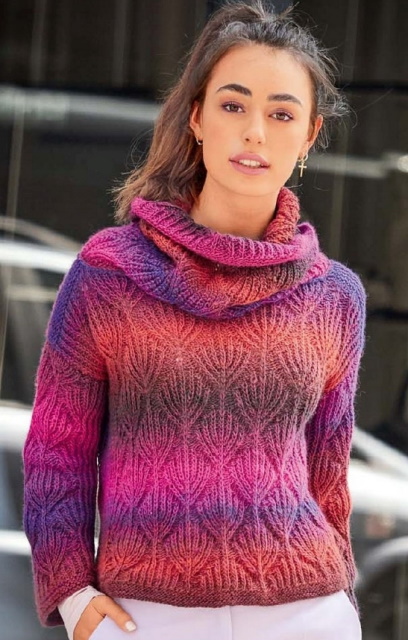
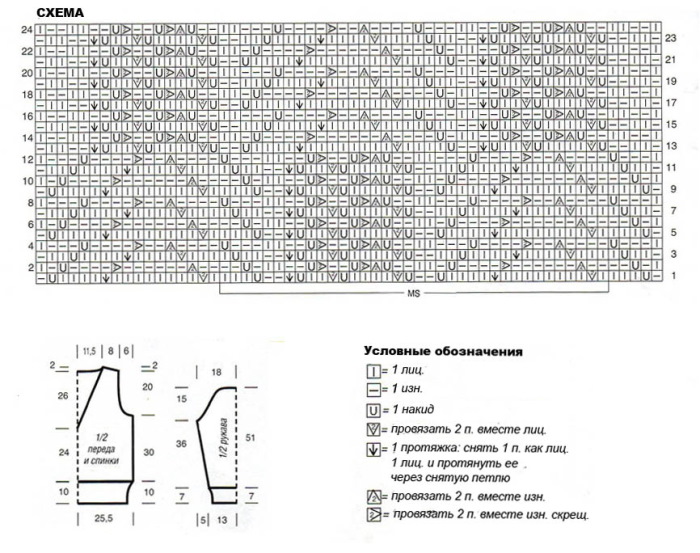
Knitted pullover with a pattern "Bear paws"
A knitted women's youth sweater in a free openwork style is made according to the classic pattern, with special attention paid to the formation of the pattern.
In this example, loops are added in each row closer to the bottom of the back and front, as well as on the sleeves, closer to the cuffs, to make the product look more voluminous. If desired, these elements can be made straight, without additions.
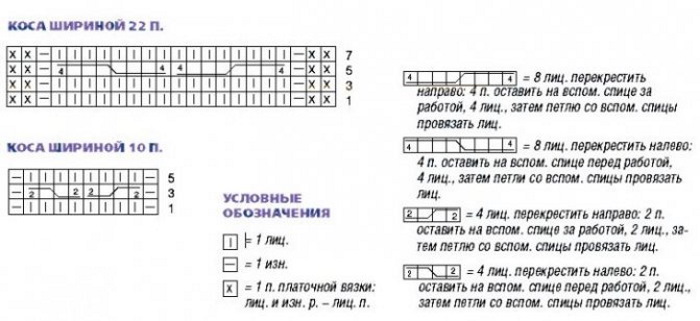
The pattern is made by repeating 24 rows and 18 loops. The number of such raglans is calculated for the entire product, or inserted only into part of the sweater, for example, only in the front or only as a belting element on the chest and back.
For convenience, the elements in the diagram are indicated by abbreviations (front loops - k, back loops - i, yarn over - n, 2 loops together front loop - 2ВмЛ, 2 loops together back loop - 2ВмИ).
| Row | Description of actions |
| 1 | 5l, 2VmL, 6l, 2VmL, 5l. |
| 2 | 6i, 2VmI, 4i, 2VmI, 6i. |
| 3 | 7l, 2Vml, 2l, 2Vml, 7l. |
| 4 | 8i, 2BmI 2BmI, 8i. |
| 5, 9 | n, 4l, 2Vml, 6l, 2Vml, 4l, n. |
| 6, 10 | n, 5i, 2BmI, 4i, 2BmI, 5i, n. |
| 7 | n, 6l, 2Vml, 2l, 2Vml, 6l, n. |
| 8, 12 | n, 7i, 2BmI, 2BmI, 7i, n. |
| 11 | n, 6l, 2Vml, 2l, 2Vml, 6l, n. |
| 13, 15 | n, 6l, 2Vml, n, 8l, n. |
| 14, 16 | n, 8i, n, 2VmI, 6i, n. |
| 17 | 7l, 2Vml, n, 9l. |
| 18 | 9i, n, 2BmI, 7i. |
| 19, 21, 23 | 3l, *2vml, n* (* — repeat 3 times), 5l. |
| 20, 22, 24 | 5i, *n, 2BmI, 2i* (* - repeat 3 times), and. |
Secrets for Beginners
Knitting a youth sweater can be easier if you follow a few simple tips from experienced craftsmen:
- Before starting work, carefully study the knitting pattern and the connection of all parts, since the usual descriptions of a particular source may differ. If you do not take this point into account before starting knitting, then the work will have to be redone.
- If the description contains several recommendations for different size grids, then the required fragment is highlighted with a marker so as not to be distracted by unnecessary information during the work process.
- To calculate the required number of loops and rows, knit a small square in advance (approximately 10 * 10 cm). Using this example, calculate how many squares are needed for 1 product. Also compare the number of loops in the example and in the diagram. If there are more loops, then try to knit tighter, or use smaller knitting needles. If there are fewer loops in the sample, then use larger knitting needles.
- If you are making a sweater for the first time, you should try to choose a looser style, and move on to more complex models when you have experience making even loops.
- Marking rings or pins are used to mark places where stitches are increased, decreased, or other important points. At the end of the work, these markers are easy to remove from the fabric without damaging it.
- Use knitting needles with stoppers or make them yourself so that the loops do not slip during knitting.
- To make it easier to count rows when making complex patterns, use a row counter.
- When working with circular knitting needles, you can soften the line or cord by dipping it in boiling water.
- A white cloth placed under the work helps to pour out the loops on the dark yarn.
- Working with circular needles takes the strain off your arms.
- A crochet hook or pin is convenient for hiding the ends of the threads at the end of knitting a youth sweater for women.
Video on how to knit a women's youth sweater
Women's sweater with large knitting needles.