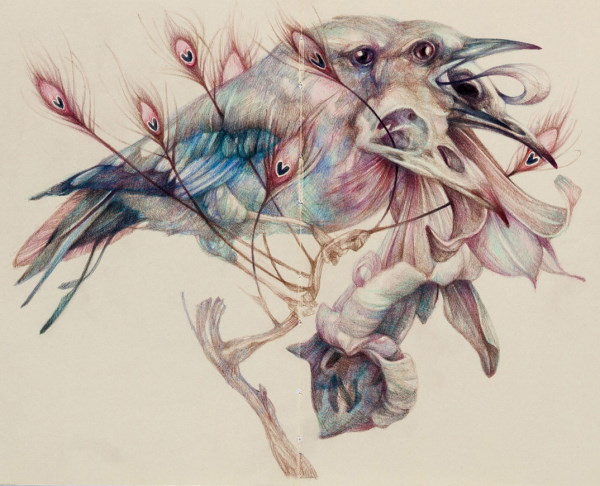
The drawings can be called strange, where the plot resembles fantasy, fairy tales or even horror. The characters in such paintings may bear little resemblance to people or earthly animals. When drawing 1 object, you can supplement it with parts from other, completely incompatible objects. Detailed master classes and pictures that can be used for copying will help beginning artists.
Drawing tools
The main drawing tools are listed in the table:
| Simple pencil | To draw sketches you need a pencil with a hard lead. |
| Eraser | Required to remove auxiliary lines. |
| Set of artistic brushes | You should have brushes of different sizes and hardness on hand. |
| Container with water | Needed for washing brushes. |
| Palette | For mixing paints. You can use a plastic palette, a ceramic saucer or a piece of glossy white cardboard. |
| Black gel pen | It is required for drawing small details and outlining the outline of the drawing. |
What can you use to color the pictures:
- gouache;
- with watercolor paint;
- colored (watercolor or regular) pencils;
- gel pens;
- with felt-tip pens.
To create black and white drawings, you need a set of simple pencils with different degrees of graphite hardness. The hardness of the lead is indicated by letters and numbers on the side of the pencil.
A beginner artist only needs a set of 4 tools:
- hard – T;
- soft – M;
- hard-soft (medium) – TM;
- very soft – M4 or M6.
 When buying pencils, it is advisable to pay attention to the country of manufacture. Experienced artists do not recommend buying Chinese tools. Such pencils leave very pale lines that are difficult to shade, and the core crumbles a lot. It is better to give preference to Russian pencils of the "Constructor" brand or buy Japanese-made tools.
All pencils should be sharp. It is impossible to draw fine lines with a blunt lead. To avoid the debris left after sharpening from getting in the way of your workspace, you can buy a sharpener with a removable container to collect the shavings.
To draw with paints, you need a sketchbook with thick pages. The paper should not deform when exposed to moisture. In craft stores, you can find notebooks with pages made of watercolor paper. It has a rough surface, absorbs paint well and does not allow it to spread.
Master classes
Further in the article you can look at descriptions of different ideas for creating strange drawings, as well as read step-by-step instructions on drawing.
Rose girl
Strange drawings (you can use a silhouette of a girl in any pose for copying) can consist of combining 2 or more objects that in real life can never become a single whole. The picture described in this master class shows a girl's body in a sitting position (side view). She has tucked her legs under herself, her arms are slightly extended forward. Instead of a head, she has a huge rosebud, and her body has thorns, just like a real flower.
To create such a drawing you will need 4 simple pencils of varying degrees of hardness.
How to draw:
- Place the sheet of paper vertically.
- Using a hard pencil, sketch out the position of the rosebud.
- Draw the neck.
- Mark the position of the girl's body.
- Use lines to show the location of the arms and legs.
- Draw the shape of the chest.
- Make the curve of your back smoother.
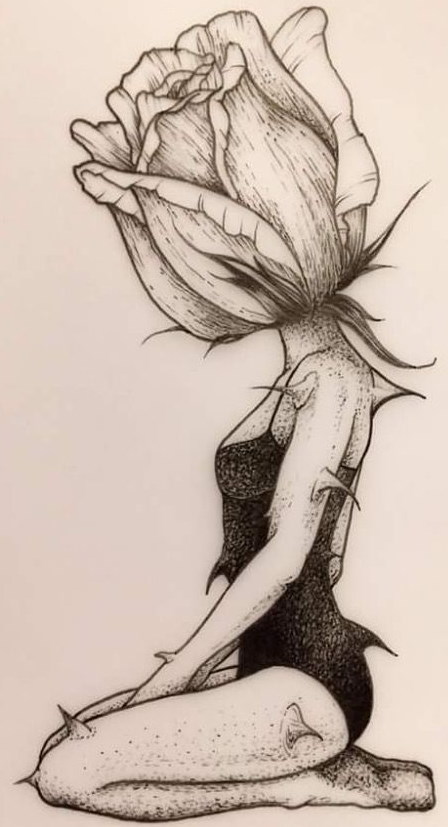
- Draw the hips, ankles and feet.
- Draw the shoulders and arms to the end. The fingers will not be visible. The girl lowered her hands between her legs.
- Highlight the curves of the waist. It is better to draw the shape of the chest.
- Use an eraser to erase all additional strokes.
- Draw a swimsuit with thin straps for a girl.
- Add 2 large, curved downwards spikes to the spine.
- Draw spikes on the legs, arms and shoulders.
- Draw the petals on the rosebud. Start from the middle, gradually moving to the edges. The last petals should be depicted slightly twisted.
- Add the sepals. They should consist of pointed, thin and slightly curled leaves.
- Use an eraser to erase the sketch lines inside the bud.
- Using a pencil with a hard-soft lead, draw the veins on the flower petals, as well as on the sepals.
- Add volume to the spikes by darkening their base.
- Highlight the dark areas between the flower petals. Paint the sepal leaves. Blend these areas.
- Darken the armpit area. Show the shadow where the legs are bent.
- Paint the girl's feet. Blend the strokes.
- Fill in the swimsuit thickly. Blend the shading.
- Using a soft pencil, highlight all the shadows more clearly. There is no need to apply strokes here. The image should be filled with color using dots. In those areas where the drawing should be darker, more dots should be placed. In the light parts - less.
- Darken the entire swimsuit.
- Draw the veins on the sepal leaves.
- Highlight the large veins on the rose petals.
- Show the shadow on the lower part of the girl's left leg.
- Paint the lower parts of the spikes, highlighting the sharp tips.
- Using a pencil with a very soft lead (M6), show the shadows on the swimsuit: under the arms, on the buttocks, on the stomach.
- Outline the picture, darken the tips of the leaves near the sepals.
Use an eraser to clean the background. Erase any stains or shading that may have accidentally gone beyond the contours.
Space in the head
Strange drawings for copying, as well as author's works, can reflect the inner world of a person in a very unusual way. The picture described in this master class depicts a neck and half of a woman's head. Colored planets, stars and comets fly out of the head.
To draw you will need a simple hard pencil, as well as a large set of colored pencils (at least 12 colors) and a black felt-tip pen.
How to draw:
- Place a sheet of paper vertically on the table.
- Draw an oval head using a simple pencil.
- Add neck.
- Mark the approximate location of the eyes, nose and lips.
- From the middle of the cheek on the left side, draw a line across the face to the right, to the outer corner of the eye.
- Use an eraser to erase the top of the head.
- To draw the nose, you need to draw 3 small circles: 2 on the sides and 1 above them.
- Connect the lower parts of the circles with a smooth line.
- Draw the wings of the nose, its tip and the bridge of the nose.
- Erase the circles with an eraser.
- Draw plump lips.
- Highlight the cheekbone line.
- Clearly outline the shape of the chin.
- Use an eraser to erase the sketch lines.
- Draw a large circle above the head. It should be positioned so that the lower part of the figure is hidden behind the woman's head.
- Draw rings around this circle, like the planet Saturn.
- Draw another circle of a smaller diameter a little higher.
- Draw a small circle between them. Draw a tail for it, like a comet.
- Draw small circles, dots and stars between the planets.
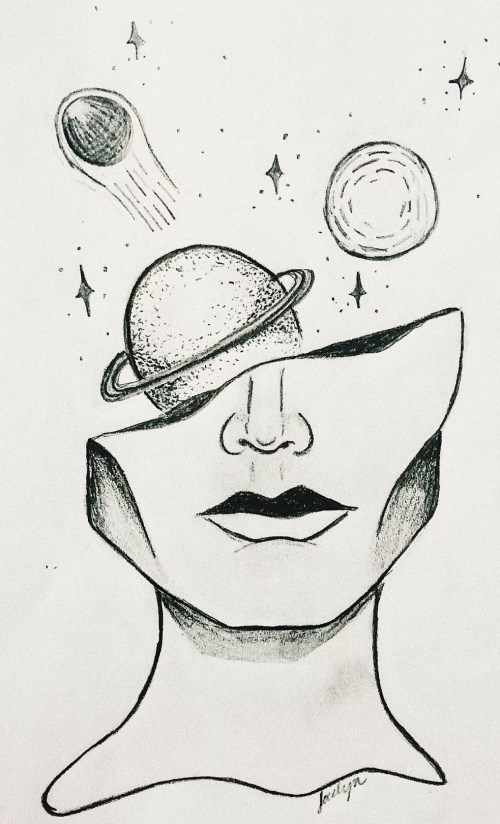
- Use a beige pencil (you can use light pink) to color the woman's face and neck. The shading should be dense.
- Use orange to highlight the shadows on the cheekbones and under the chin.
- Darken the line that divides the face into 2 halves.
- Color your lips with a red pencil.
- Use brown to darken the corners of the lips, as well as the line where they meet.
- The planets can be painted in any colors.
- Shade the stars with yellow and orange pencil.
- Use a black marker to outline the drawing.
- Highlight the lips and nose.
- Draw the cheekbone line.
- Circle all the planets and stars.
On a large planet, the shadow of the rings can be seen as dots.
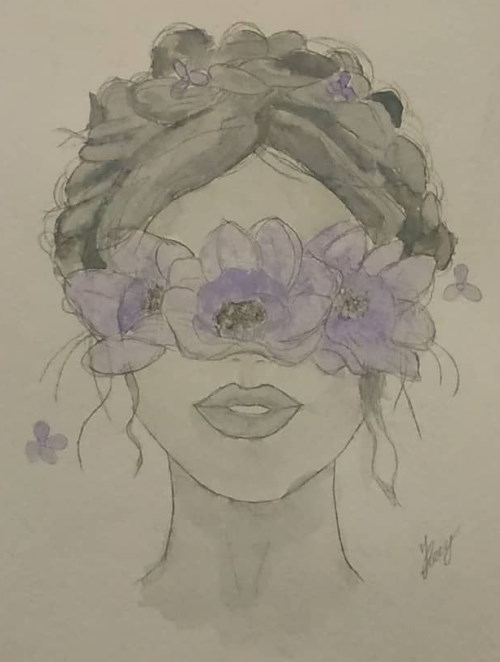
Flowers-eyes
Strange drawings (you can use the works of more experienced artists for copying), which combine parts of the human body and parts of a plant - a popular plot in the style of abstractionism. The picture described in this master class depicts flowers that have balls with human eyes inside instead of buds.
To draw you will need a simple pencil, watercolor paints and a black gel pen.
How to draw:
- Place the sheet of paper vertically.
- Using a hard-lead pencil, draw a large circle in the center of the sheet.
- On the sides, just below the first circle, draw 2 more circles of a smaller diameter.
- Add stems to the circles, like real flowers. They should be slightly curved.
- Draw 3-4 leaves on the stems.
- Highlight the veins on the leaves.
- Find the center of the large circle. Divide the figure into 2 halves with a thin horizontal line.
- Connect the dots with an arc where the center line touches the edges of the circle.
- Draw an inverted arc at the bottom.
- Use an eraser to erase the central horizontal line.
- Repeat steps 7 through 10 to draw the shape of the eyes in the remaining circles.
- In each eye, depict an iris and a pupil. The upper eyelid should slightly cover part of the iris in all colors.
- Divide all the irises into sectors by drawing straight lines in a circle, from the pupil to the border of the 2nd circle.
- In those places where the stems connect to the circles, you need to increase their thickness.
- Draw parallel arcs at a small distance under the line of the lower eyelids. This will make the eyelids look more voluminous.
- In each pupil, highlight the highlights in the form of ovals.
- Mix red watercolor with white in equal parts.
- Using a soft-bristled brush (medium size), paint the flower drawn on the left. You need to paint everything: the leaves, the stem, the ball. The eye with the pupil and iris should remain untouched.
- Mix blue watercolor with white in equal parts. Paint the right flower.
- Mix green paint with white in equal parts. Paint the central flower.
- Dry the drawing.
- Mix red with white in a 3:1 ratio. Paint the iris in the pink flower's eye and highlight the shadow on the lower eyelid.
- Mix blue with white in a 3:1 ratio. Paint the iris of the blue flower. Highlight the shadow on the lower eyelid.
- In the same way, paint the iris and lower eyelid of the green flower, mixing the paints in the same proportions.
- Using a thin brush, paint the pupils of the flowers black, without touching the highlights.
- Mix black with water in equal parts. Highlight the shadows in the corners of each eye, as well as the sepals of the flowers. Darken the middle of the leaves.
- Dry the drawing.
Trace the outline of the picture with a gel pen. Draw the veins on the leaves, outline the irises of the eyes and their sectors. Line the eyelids.
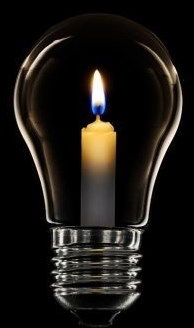
Candle in a lamp
The strange drawing described in this master class consists of 2 objects that give light and heat, but in the picture they are combined into 1 object. This is a wax candle in an incandescent lamp. For copying, you can use a real lamp and a melted candle.
To draw you will need gouache and a simple pencil.
How to draw:
- Place a sheet of paper vertically on the table.
- Using a hard lead pencil, draw a circle at the top of the sheet of paper.
- Draw another circle immediately below it, which will be 2 times smaller.
- Connect the circles with smooth lines.
- Draw the shape of the base.
- Use an eraser to erase the circles inside the lamp.
- Draw a thread on the base.
- Inside the lamp, schematically depict the shape of the candle. Draw the wick.
- On the candle, depict drops of wax, streaks and a depression under the wick.
- Draw a flame.
- Add smoke. It can be depicted as 2 smooth, parallel lines that will twist into a spiral.
- Mix yellow gouache with white in a 1:2 ratio. Paint the candle.
- Add another 1 part yellow to this shade. Using a thin brush, paint the depression on the top of the candle, as well as the wax drops and drips.
- Paint the flames with yellow paint.
- Paint the edges of the fire orange. Blend the strokes well.
- Use red paint to highlight the base of the flame.
- Using a thin brush, outline the outline of the lamp with blue.
- Dry the drawing.
- Using a thin brush with short bristles, pick up black paint. Paint the protrusion on the bulb base. Carefully draw the thread.
- Mix black color with water in a ratio of 1:3.
- Paint over the smoke.
You can outline the candle and flame with a black gel pen to make the drawing look clearer.
Unusual tree and aliens
Strange drawings (illustrations from books are suitable for copying) can be created based on surreal, fantasy and science fiction stories. The drawing described in this master class depicts an alien tree of an unusual shape and a pair of aliens that vaguely resemble hares. They have long hare ears sticking up.
To draw you will need a simple hard pencil, a black gel pen, and blue and purple watercolors.
How to draw:
- Place a sheet of paper vertically on the table.
- Using a simple pencil, draw a small hillock in the form of an arched line at the bottom of the sheet.
- Now we need to draw the tree trunk. It should be hook-shaped. Its base will be thick and the top very thin. The hook should be slightly tilted to the right and strongly bent inward, as if the sharp tip is about to start twisting into a spiral.
- Draw 1 line from the mound, then another. It will be parallel to the first at the base of the trunk, and then smoothly connect with it. At the top, both lines should intersect.
- Draw branches on the top, rounded part of the tree. They should look up. Draw small shoots on the tips of all branches. There should be no sharp bends on the branches. All lines should be smooth and rounded.
- Draw an oval under the tree. Draw long ears sticking up like a hare's.
- Use an eraser to erase the lines where the oval and ear borders intersect.
- Draw two large eyes set far apart for the alien. Use dots to represent the pupils.
- Another alien needs to be drawn by analogy. He will sit on the top of the tree.
- Use a black gel pen to outline the outline of the tree trunk.
- Start filling the outline with smooth lines. They should be oblique and go from the right edge of the outline to the left. The strokes should be placed close to each other. There should be very small gaps between them.
- Paint the branches in the same way. Draw smaller branches and shoots.
- Using a damp brush, wet the painted bump under the tree.
- Take blue paint on the tip of the pile and carefully apply it to the upper part of the bump. Blend the strokes, driving the paint from top to bottom.
- Wet the alien's silhouette. Apply paint to the tops of his ears, and paint over them in the same way, without touching the eyes. Paint over the other creature in the same way.
- Dry the picture.
- Take a thin brush with short bristles. Dilute blue paint with water and paint leaves on tree branches. There should be a lot of them. It is enough to wet the brush in paint and press it. The prints will resemble tree leaves in shape.
- Draw dark blue leaves in the same way. You don't need to dilute the paint with water for this.
- Add a few purple leaves. They should be slightly smaller than the rest.
- Dry the drawing.
- Draw fallen leaves on the hillock, under the tree. They need to be drawn by stamping the brush horizontally. It is advisable to use 2 colors of paint.
- Use blue watercolors to paint thin blades of grass near the tree.
- Dry the drawing.
Use a gel pen to draw the pupils of the aliens and outline their bodies. Also outline the blades of grass and the mound under the tree.
You can get inspiration for creating strange drawings by watching movies, reading books and fantasizing. Beginning artists can take the work of more experienced colleagues for copying. Over time, with regular classes, skills will improve, and then you can come up with your own plots for pictures.
Video about strange drawings
Masha draws scary pictures: