Drawings by cells - is a special kind of fine art, where the so-called pixel graphics are used. They can be symmetrical and asymmetrical, when the center of the drawing does not allow creating a duplicate view of the image. You can distinguish between complex and simple drawings, which contain many more dots. And the more of them, the smaller they are.
Such pixel images can be compared to puzzles, where you need to assemble a different number of parts, focusing on colors. In cell graphics, the area and number of dots increases. They need to be painted with appropriate colors so that a realistic image can be seen from a distance.
In the 80s and 90s, not all children had the opportunity to play Mario, although few people know that such animations were not always three-dimensional. Previously, animation was made 8-bit, and the most colorful landscapes were designed based on pixel graphics. The technology of drawing on cells implies the same principle. Often, game developments were created in notebooks in a grid.
Drawing tools
To create simple drawings you will need:
- Black pen – with its help you can create the basic borders of the drawing.
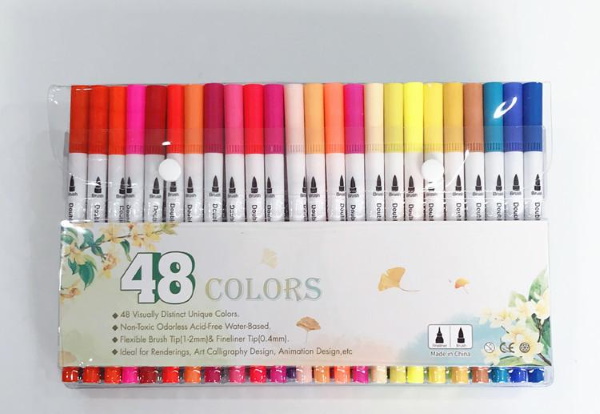
- Felt-tip pens of different colors for coloring the cells.
- A notebook with a grid or A3 drawing sheets with wide, large cells.
- Notebook sheet A5-A6 for making sketches.
To create more complex or asymmetrical designs you will need:
- A sketch or photograph showing a drawing.
- Felt-tip pens or colored pencils for coloring the cells.
- Computer for performing virtual schematic sketches (optional).
- Photo editor Adobe Photoshop.
The difficulty of making asymmetrical drawings is that it is not always possible to center them by eye. You will also need special programs on your computer to create sketches. They may also be needed for further animation. To choose convenient tools, you need to consider the size of the lead, the composition of the colored pencil, and the density of the paper.
Special attention should be paid to ordinary simple pencils:
| Name | Description |
| Mechanical pencils | Pencil technology hasn’t advanced very quickly over the years, but here’s an example of a technical innovation that really matters to an artist. The Uniball brand Kurutoga uses a spring-loaded clutch to gradually twist the graphite as it’s used, creating even wear. So to keep it sharp, the mechanism rotates the lead itself. This means the artist can produce a beautiful, fine line that stays consistent throughout the drawing, with breakage kept to a minimum. |
| "Pentel" 200 | If you're looking for a cheap mechanical pencil that still produces high-quality lines, consider the Pentel 200. These inexpensive pencils may not have any "smart" features, but they get the job done. With a plastic body, ribbed grip, and removable metal pocket clip, these pencils are the best for professional drawing. |
| Rotring Rapid Pro | The mechanical metal drawing pencil is truly one of the best for professionals. It has a hexagonal body and a round metal handle with a transverse “hatch”, as well as a full metal body designed to balance the weight. The point damping mechanism allows the sleeve to slide under pressure, which reduces the risk of lead breakage while writing. The pencil also includes a clip and an eraser with a cover. It is most often used for layout design and typography. |
| "Rembrandt" | A pencil designed for drawings of any complexity, when you need to create a darkening effect. The complete set of Rembrandt Art Design covers 17 grades from 9B to 6H. Each pencil is encased in pure cedar wood and contains an ultra-fine graphite cord, which is also suitable for more rigid technical drawing methods. |
Also, you need to pay attention to the paper, which has different densities. When drawing with felt-tip pens, thin paper will leak, the surface will roll up, and the thickness will become thinner.
The best types are presented below:
- Paper for graphite drawings is smooth Bristol. Many brands can offer smooth and textured canvases. For high-quality professional work, use Cadillac from Bristol.
- Another 500 series has a 4-layer backing made of 100% cotton.
- Strathmore's Bristol Smooth is sold in large, individual sheets. It is an expensive type of paper made from cotton, but it is twice as thick as a sheet of album paper. The density parameters remain the same.
- Double-layer paper contains acids that prevent alcohol-based paper (markers) from dissolving the top layers. Double-sided Bristol from Canson is much more suitable for such sketches.
It is also worth considering the selected tools in relation to the chosen type of paper.
Master classes
Symmetrical drawings on the computer by cells must be done according to a single scheme:
- You need to choose a sketch or photograph – it should be symmetrical and easy to interpret.
- You need to open the picture in the image editor.
- Next, you should select the filters with which the drawing will be reproduced.
- The center points need to be marked on the photo.
- At the top, in the "filter" tab, you need to configure the parameters. To do this, go to the "filter gallery" tab.
- The slider of parameters should be set according to the following scheme: square size – 10, relief – 0.
After that, you need to accept the technical characteristics and use their application to the photo. As a result, the photo is divided into cells - pixels. Each of them has its own color or shade. The drawing can be printed or saved in templates.
This is a simple master class that can be done with the help of modern technologies and software. In order to draw in a notebook or on a sheet, it is necessary to apply artistic technology. It is suitable for other master classes that need to be done by hand.
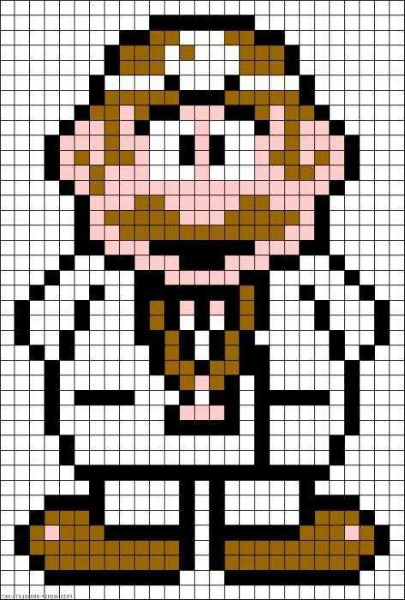
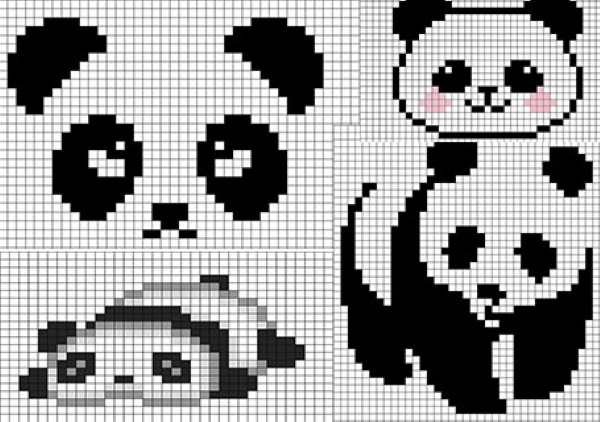
A simple master class for elementary school girls - drawing a person
To draw, you need to select a set of simple tools and prepare paper or a notebook sheet.
To draw a person using the diagram, you need to:
- Mark the center of the drawing with a dot or a cross.
- Next, you need to move up a few cells to mark the top.
- There should be an equal distance to the edges on both sides of the drawing relative to the center.
- The center will be considered a black dot, from which you need to count up and down the cells in order to paint them later.
- It is recommended to perform an identical number of shadings relative to the center of the drawing so that the scheme is symmetrical.
- Next, you need to complete the side parts - from the center, you need to step back to the left and right the same number of points, marking them in black.
- Colored cells should be painted over immediately so that they can guide the artist later.
It is worth noting that the picture shows a symmetrical design, but there are some nuances:
- The mustard-colored field in the area of the human head has an asymmetrical shape. These moments should be done at the end of the drawing.
- There are missing cells in the center of the figure - they can be left white or painted black.
- The same goes for the right and left sides - there are schematically similar asymmetrical cells on both sides. Such pixels help make the image more realistic.
To fill the flowers, you need to use pink and white colors. Relative to the white dots, you need to calculate the distance to the black ones, and paint the area between them with a different color from the previous shades.
If you are doing this type of drawing on a computer, you can use the old graphic editor Paint or Pixel Art.
An alternative could be modern technologies – there are tablets and laptops that are designed for drawing dot pictures.
Colorful drawing for girls using printables
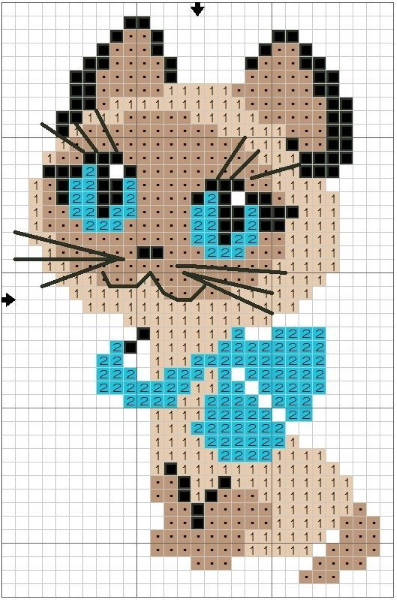
Cellular or pixel graphics are not only found on PCs or notebooks. Cross stitching also involves choosing a pattern to embroider each interpreted cell. If you recall what canvas or a cotton waffle towel looks like, you will understand that the dots are the vertices of the squares that need to be “filled” with color.
The complexity of such a drawing lies in its ambiguity and the lack of a precise scheme. You can arbitrarily outline the outline of the drawing by making a sketch using improvised lines and dots.
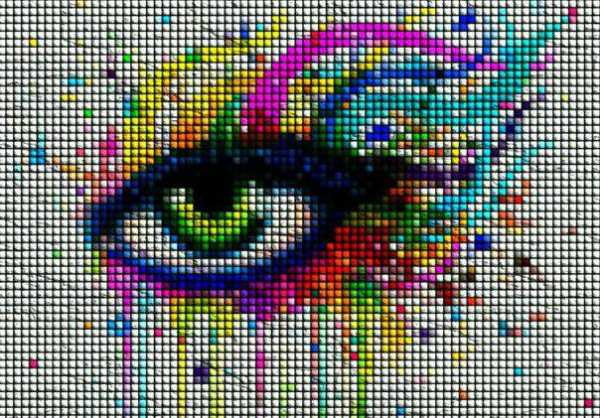
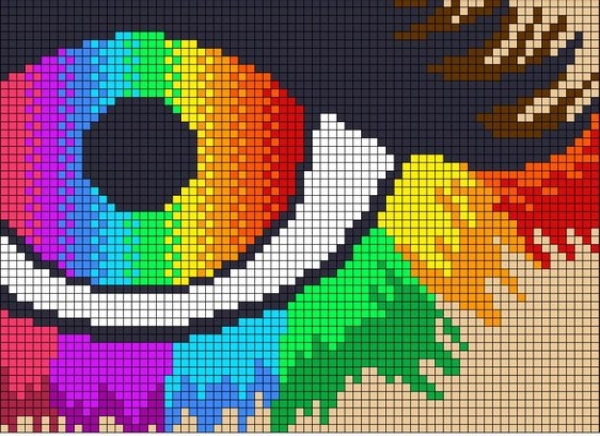
To create a symmetrical outline, you will need to follow a few basic steps:
- The center of the drawing for this image will be located to the left of the center.
- The main emphasis is on the pupil - it looks symmetrical, so it is worth starting from it as the center.
- An equal number of cells must be indented on both sides of the drawn center.
- On the left, you need to draw a border in the form of a ladder, which will serve as a guide for coloring the cells.
- On the right, everything is the other way around, that is, place the center of the corner of the eye opposite the parallel that leads to the center of the drawing (the pupil).
- Then everything depends on your wishes and conditions – the size of the sheet and the amount of paint.
It is important to remember that cross stitching involves counting cells relative to each tier – along lines from top to bottom from the top. Based on such pixel drawings, you can create sketches of future decorations, food or interesting abstract figures.
Drawings for boys
It is quite difficult to choose symmetrical patterns on the cells on the automotive theme, since the scheme of the car looks different on the right and left sides.
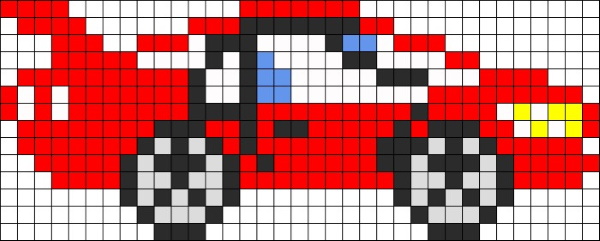
However, you can use the option of centering the car, after which you can calculate the distance from the center to the nearest figure by cells. For example, to the wheel. The latter are made symmetrically, so you can take the white dot above the red stripe as the center and the main reference point.
The most difficult thing about drawing by cells is the interpretation and visualization of the drawing in separated areas. Pixels can have similar shades and even halftones, which are almost indistinguishable from each other from afar. The simplicity of the image is that any cell painted incorrectly relative to the basic figure will look natural. In symmetry, such errors reveal the imperfection of the picture.
Complex symmetrical pattern
Despite the different color palette, the drawing is completely symmetrical up to the eyelash coloring area. Due to the same symmetrical patterns for each color, it seems that the puzzle of cells moves from one range to another. Such patterns are popular not only for drawing pixel pictures in notebooks.
To create a similar sketch, you need to:
- Prepare a set of tools for complex drawings in advance.
- The pupil will be located in the center, and it is advisable to leave the reference point in the center of the sheet.
- Next, you need to count an equal number of cells in each direction so that you get a schematic oval or semicircle.
- And only with color you need to draw verticals, continuing the protrusions to the right and left from the center of the vertical line.
- Each color will successively change in different places equally into a shade different from the previous one.
- From a distance, you can see how the color scheme “performs” a smooth transition.
It is noted that the inner side of the eyelashes is darker, since the light does not fall on it. The light black shade is gray, which is closer to the middle of dark white, if we rely on achromatic colors. Brown is an artistic shade of black, which does not fall on a ray of light. The lower eyelashes have dark and light tones that convey the shadow of the drawing.
Drawings for a personal diary
Symmetrical images for a sketchbook can be made using sketches - it is enough to make sketches using crosses, which can be randomly placed on the sheet. If there are lines in a sketchbook or personal diary, you can supplement them with vertical fields, forming cells.
These designs are more difficult to make because there is no guide, but you can use a printed file of a regular design and give the guide lines angular outlines like the cells.
Some drawings may consist of several symmetrical images. For example, the sketch below shows schematic pictures of animals and insects. The body consists of 2 parts, which are symmetrical in themselves. It was also popular to draw "pigtails" in notebooks in a cage.
To do this you need:
- Draw 3 vertical straight lines at equal distances from each other.
- From the right outer and middle lines, you need to draw diagonals from right to left in the next row of cells.
- From left to right from the leftmost vertical line, you need to draw a broken diagonal line.
- Next, you need to duplicate the pattern again, repeating the actions in 2 rows of cells.
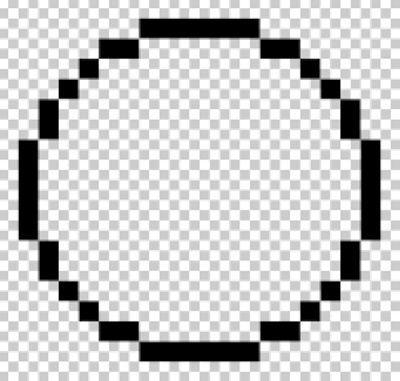
You can also draw pictures on the cells using verticals - a strip of 1 cell wide can reach a length of 8-10 cells. To form a picture, you need to reduce the height of the next line by 1-2 cells. In this way, you can get a circle, oval or a schematic picture, like in the game "mosaic".
Symmetrical drawings on the cells must be complete - this means that there should be no empty cells between the 2 parts of the drawing. If you need to draw a circle, then the side verticals will be connected to the diagonals in the form of cell black dots only by the tops of the squares.
To make the drawing complete, these connection points need to be filled by drawing lines twice as wide, connecting them with free points.
In the figure, the points of the squares of the cells are connected by the vertices of the corners.
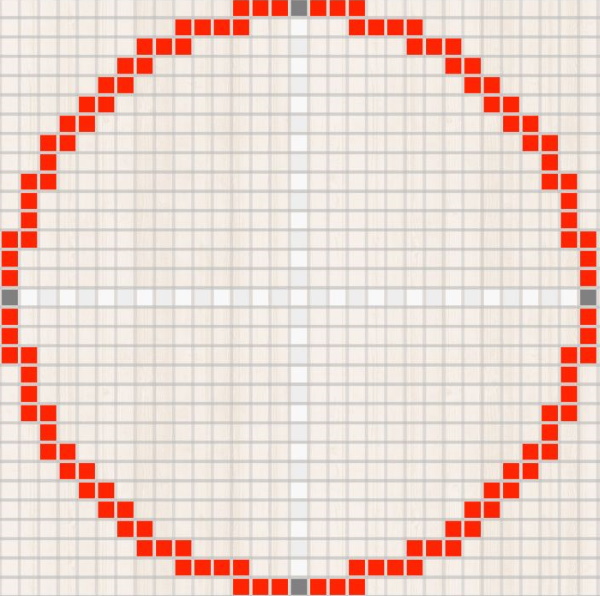
Here on the red circle the side parts should protrude so that the circle takes the correct shape. Such figures are made in the thickness of 2 cells, and there are no empty cells at the junction of the guide diagonal. Pixel graphics also provide for such a drawing option so that from a distance the drawing looks bright without voids.
Complex diagrams and drawings in graphic editors
There are special editors in which you can make individual patterns for embroidery and beadwork. The programs can also be used for further creation of pixel watercolor paintings.
In such a Pattern editor, you can prepare sketches, drawings, marking each cell with a variant of the embroidery ornament. Cross, half-cross, empty cell - there are icons for this. They can be supplemented with paints and shades, so that in the future it will be easier to embroider or paint pixel sketches.
Symmetrical drawings on cells can also be prepared for a personal diary, where there are no special lines. There are old and new programs and applications for smartphones, where in the area of creating graphics it is enough to place a ready-made circle, oval or square, giving it an unusual polygon shape.

With their help, you can draw fruits, vegetables and just 2D animation, which can then be easily transferred to your diary.
This type of graphics is perfect for beginners who want to learn how to draw with paints or pencils. Pixel graphics are amazing because symmetrical and asymmetrical drawings turned out realistic, but with elements of a technical nature. Complex pictures can be made by printing files.
If you try to draw a graphic pattern by hand, you need to use mechanical pencils and pens:
- Use pastels or crayons to mark the boundaries of the darkest area.
- Using a lighter tone of a dark pencil (fat lead), you need to mark the fields that will look like shadows and half-shadows.
- The unpainted area is the one that performs the color inversion. In the natural color segment, it should be the darkest.
The result will be a picture in which the face, as the central and main element, will be made without color expression due to the contrast of the side shadows. It is worth noting that such blanks are rarely used in professional graphics - graphic editors, although they consist of small pixels, but in general form an ideal smooth picture of shade transitions.
If you zoom in on any scanned photo, you can see the pixel resolution of the color solutions. They can be used to navigate at what point in the picture the lens is located. Pixel graphics are often used to change the background, do retouching.
Photoshop also uses similar tools to remove noise and red eyes. This allows photographers to seamlessly remove noise from the surface of a photo, as well as give the image a more natural look.
To draw a symmetrical drawing, it is enough to visualize the center, the sides, having worked out the sketch with simple lines or dots. The cells in this case act as a guide for straight lines, along which you can create only clear lines without circular and oval guides.
Video about creating symmetrical patterns on cells
Symmetrical drawings on cells: