Despite the fact that there is a large selection of children's clothing in stores, mothers continue to sew clothes for their children. Models created using simple patterns for girls become unique, unlike others.
What you will need to create patterns and sew clothes for girls
Before you start sewing children's clothes, you need to prepare the following materials and tools:
- Fabric. Preference should be given to natural fabrics.
- Sewing threads. They should be selected to match the material. It is also advisable to prepare contrasting threads for the overcast stitch.
- A sewing needle and pins for fastening the pieces together.
- Chalk or soap.
- Measuring (centimeter) tape.
- Large scissors for cutting out details on fabric. Small ones can also be useful for unpicking unsuccessful stitches.
- Pattern paper.
- Sewing accessories (buttons, snaps, braid, lace, zippers).
Taking measurements from a girl
In order for the pattern of clothes to be accurate, it is necessary to learn how to correctly take measurements from a child. There are no special rules for measurements for a baby under 3 years old. In some cases, it is even easier to take clothes that fit the girl and take measurements on them.
For older children, during measurements, it is necessary to ensure that the child stands straight, with a straight back and arms down, while the body should be relaxed. Regardless of the age of the girl, before measurements, she should put on tight-fitting underwear.
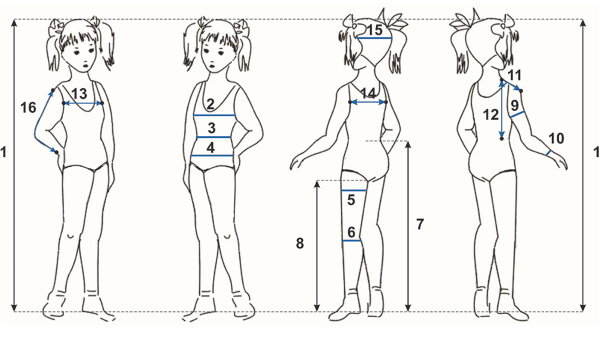
| Type of measurement | Conventional designation | Rules of measurement |
| Neck circumference | Osh | The measuring tape should be placed at the base of the neck and its circumference measured. |
| Chest circumference | Og | The tape should run across the widest part of the chest and the protruding points of the shoulder blades. |
| Waist circumference | From | Babies do not have a clearly defined waist, so to understand its size, you need to tie a tape in the belly area and let the child move. As you move, the tape itself will "stand" in the right place. If the child is plump with a pronounced belly, then the measurement should be taken at the most protruding part of the belly. |
| Hip circumference | About | You need to measure at the protruding points of the buttocks and hips. |
| Chest width | Shg | Using a measuring tape, measure the distance from the beginning of one armpit to the other. |
| Back width | Shs | From the back, use a measuring tape to measure the distance from one armpit to the other, with the tape running along the protruding points of the shoulder blades. |
| Head circumference | Og | Use a measuring tape to measure the circumference at the widest point. |
| Knee circumference | OK | The circumference should be measured through the middle of the knee. |
| Hip circumference | About | The measurement is taken at the widest part of the hip. |
| Wrist circumference | Oz | The circumference should be measured at the point where the hand connects to the arm. |
| Armhole length | DPR | To take a measurement, you need to tie a ribbon or tape in the same place where the Og measurement was taken. After that, you need to use a tape to measure the distance from the base of the neck vertically down to the ribbon indicating Og. |
Transferring the pattern onto the fabric
To transfer the pattern onto the fabric, you can use various devices:
- Soap remnants — soap residues with sharp and thin edges. The soap should not contain fatty impurities, such as cream.
- Chalk. Sewing shops sell special ones, but it is cheaper to use the regular one for school boards. It is only important that it is white, then there will be no problems with its removal.
- Markers for fabric. They can be washable, water-soluble or disappearing.
- Copy roller and carbon paper.
For beginners, it is recommended to use chalk or soap scraps. This is an affordable option that does not require special investments. Professional dressmakers often prefer copying rollers.
Simple ways to transfer a pattern:
- After folding the symmetrical parts in half, you should make copy stitches along the contour line that needs to be transferred. It is important not to tighten the stitches. Then the parts need to be slightly separated from each other and the stitch threads cut with scissors. After that, you can draw the pattern lines along the remains of the threads.
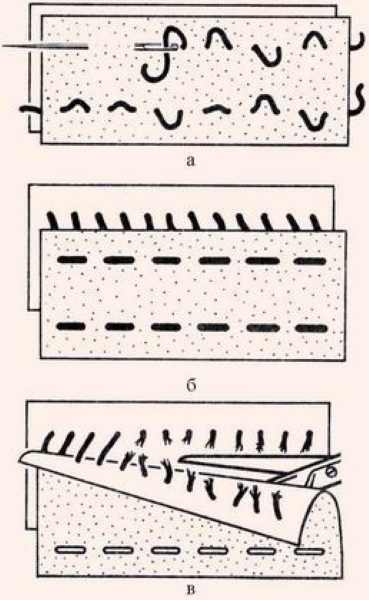
- To transfer a pattern with a piece of soap or chalk, you need to fold two symmetrical parts with the right sides inward. On one of the parts, you need to trace the pattern with a piece of soap. Then the parts are placed together, but with the wrong sides inward. You should tap the drawn lines with your hand, after which they will be transferred to the second part. Chalk will leave a brighter trace. The trace from the soap will be paler.
Cutting and trying on clothes
Children's figures are individual and grow unevenly, so patterns from magazines are not always suitable. It is better to design patterns yourself. You can also use a ready-made pattern for a certain age, but in the process of sewing, adjust it to the child's actual size. It is advisable to make children's clothes spacious. Tight clothes prevent the skin from breathing and restrict movement.
When cutting, you should pay attention to the following points:
- If the fabric contains natural fibers, it may shrink after washing. Therefore, it is recommended to wash and iron it before cutting.
- It is necessary to determine where the material's face is and where the back is. On modern fabrics, this may not be obvious. In extreme cases, the face can be found using the factory edging of the fabric edge.
- When a product is planned to be sewn from fabric with a pile or pattern, it is important that the direction of the pile and pattern match on all parts.
- The cutting must be done from the wrong side of the fabric. In this case, the largest patterns must be placed on the material first, and only then the smaller ones.
- When placing patterns on a piece of fabric, you should consider the need to outline the details with allowances (from 0.5 to 2 cm). The thinner the fabric, the wider the allowances should be.
- If the fabric is thick, then each piece should be cut out separately.
Trying on clothes is an important stage that allows you to see errors in the construction of a pattern or cutting of fabric at the initial stage:
- The item does not need to be stitched for fitting. The parts should be fastened with a basting stitch.
- Blouses, tops and dresses need to be basted along the side and shoulder seams. If the model has sleeves, it is enough to baste only one sleeve.
- The skirt also needs to be swept from the sides. If there is a fastener, it also needs to be prepared.
- For trousers, you need to make side, crotch and center seams. In addition, you need to baste the zipper, if there is one.
- Any marks during the fitting should be made with chalk or soap. If the parts are symmetrical, then after the fitting all changes should be transferred symmetrically.
- There is no need to sew small details. It will be enough to attach them in paper form.
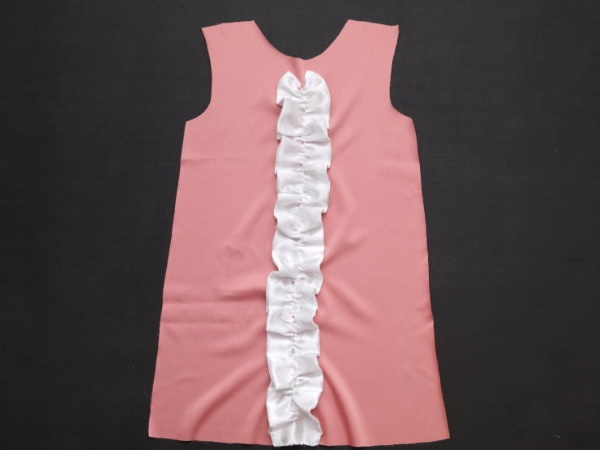
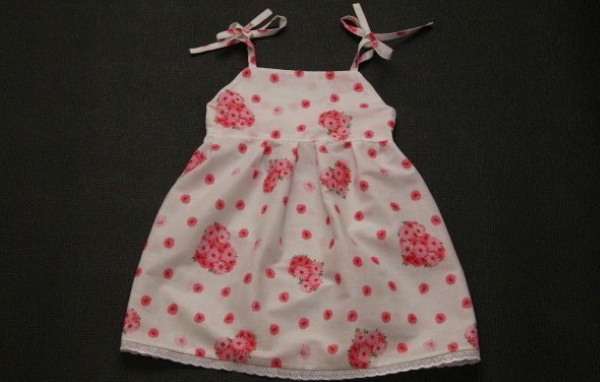
Sewing a festive dress for a girl in kindergarten
A dress for a holiday in a kindergarten can be sewn in 1 evening. The presented pattern is designed for the age category of 5-6 years. If this model is made of thin fabric, it is advisable to make a lining.
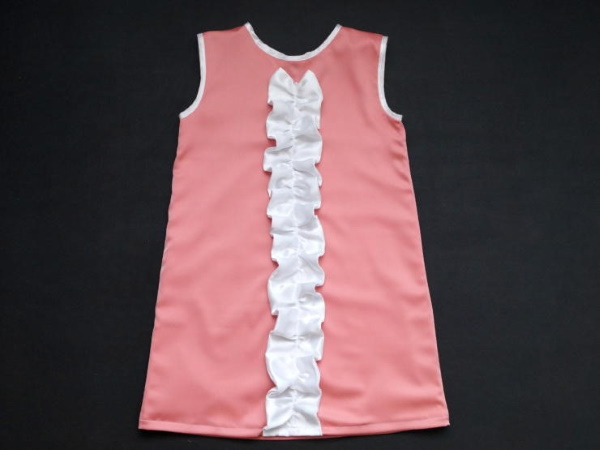
The specified dimensions correspond to the top of the dress. For the lining, all dimensions should be 6 cm smaller. Also, a rectangle measuring 200*11 cm should be cut out of contrasting fabric for the vertical frill.

Stages of work:
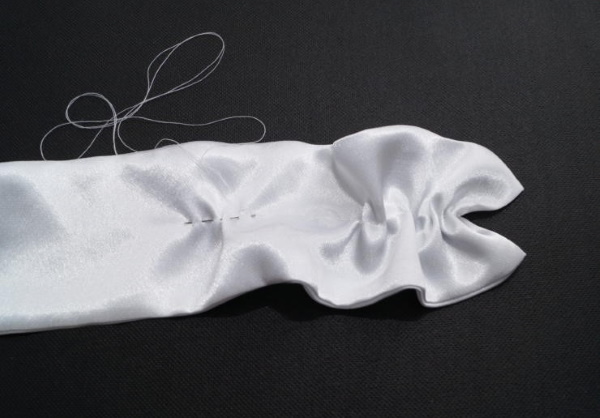
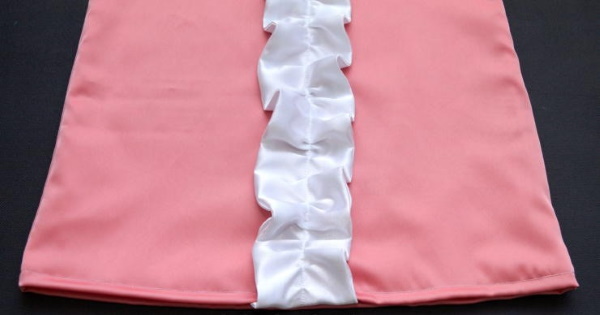
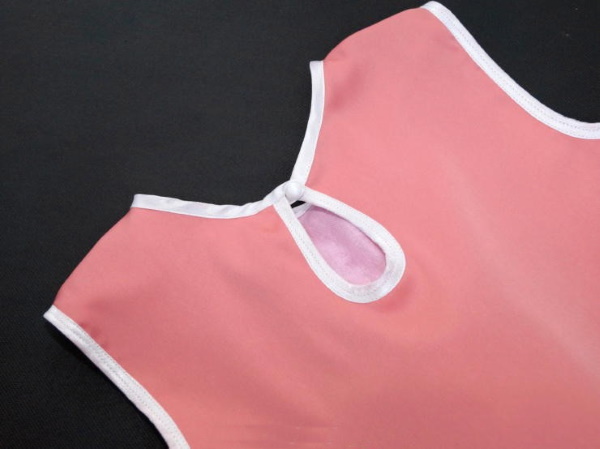
- To make a ruffle, the corresponding part must be folded in half along the entire length and stitched from the inside along the long and one short side, then turned inside out and carefully hand-sewed the second short side with blind stitches. Before making a ruffle, the part must be ironed well and, using a needle and thread, form ruffles of the desired length and splendor.
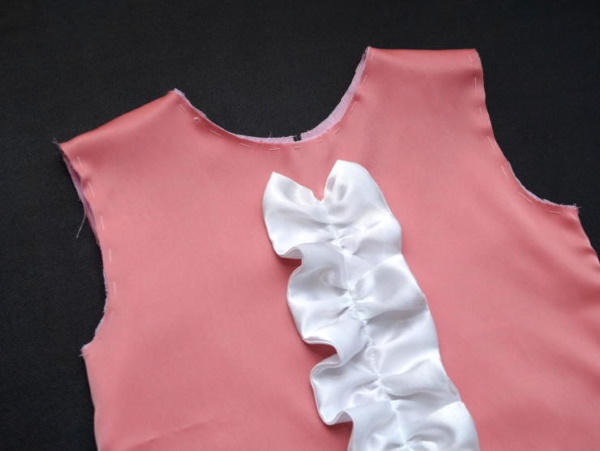
- The next step is to sew the frill to the front piece. Sew from the front.
- The details of the front, back of the dress and the lining on the sides need to be stitched.
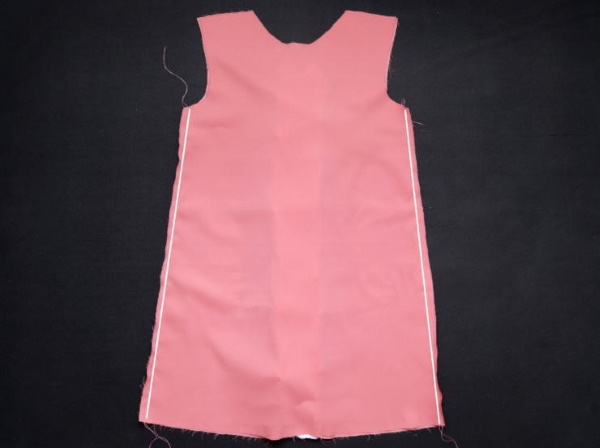
- To sew the lining to the dress, they must be folded with the wrong sides facing each other. First, the bottom of the product is stitched, then the shoulder seams.
- Next, you need to process the armhole with sleeves, sewing on bias tape. It is recommended to secure the parts with regular stitches before sewing the tape, so that the fabric does not slip while working.
- A fastener should be made at the back.
The sarafan is ready.
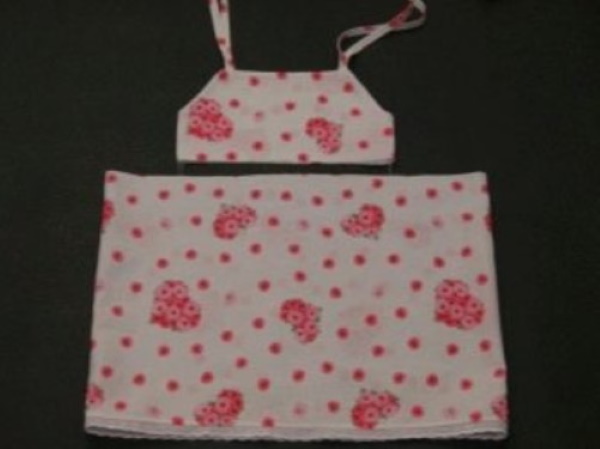
Summer sundress for girls
We sew a sundress for children (for girls, the patterns are designed for 2 years of age) from lightweight fabric in just 2 hours.
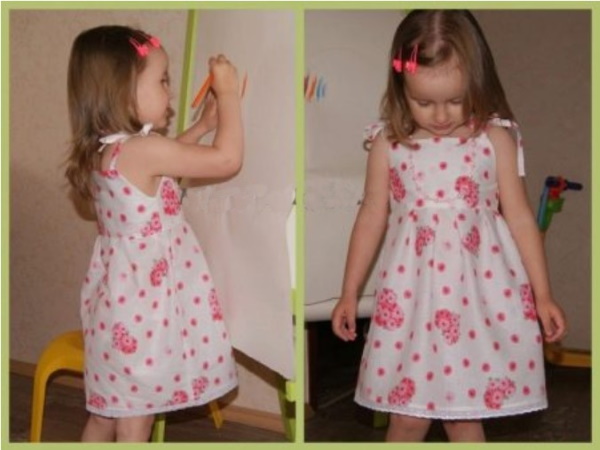
To prepare the pattern, you need to have 2 measurements: chest circumference and the length of the sundress. It should be taken into account that if you do not include an allowance for freedom of fit, then it will be problematic to wear this model. It is recommended to make an allowance of 3.5-4 cm.
Opening:
- The bodice needs to be made double. To do this, cut out 4 rectangular pieces from the fabric, 30 cm long and 16 cm high.
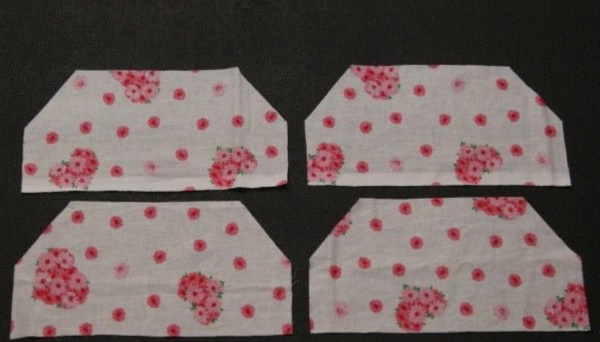
- To calculate the individual length of this part of the sundress, add 4 cm to the chest circumference for ease of fit and divide the resulting length in half.
- In the armhole area, the corners should be cut so that the bevel is 5-7 cm.
- For the skirt you need to cut out 2 rectangles 33*50 cm.
- The tie parts should be 3 cm wide, the length depends on your personal preferences.
Stages of work:
- First of all, you need to sew the ties.
- Then the top pieces of the sarafan need to be folded in pairs – with the right sides of the fabric facing inward. The ends of the straps should be pinned to the upper corners of the armholes.
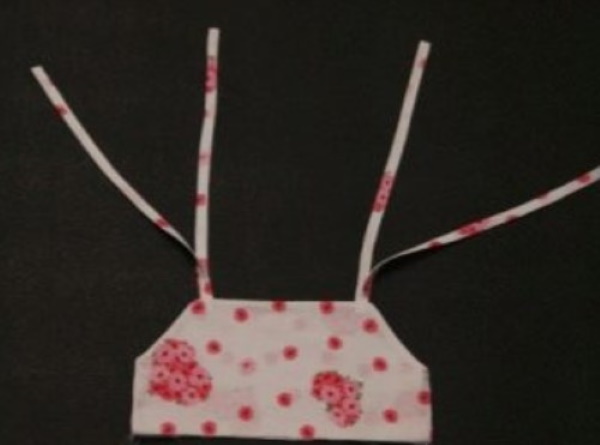
- Next, you need to make the bodice so that the pieces are stitched on 3 sides (side and top seam).
- The rectangular skirt pieces need to be folded face to face and side seams need to be made.
- The bottom needs to be hemmed and trimmed with lace.
- Then you should combine the top and bottom parts of the sarafan. This is best done by combining and pinning the pieces along the side seam.
- Along the circumference of the skirt, maintaining symmetry, it is necessary to make folds, and then sew both parts together.
The sarafan is ready.
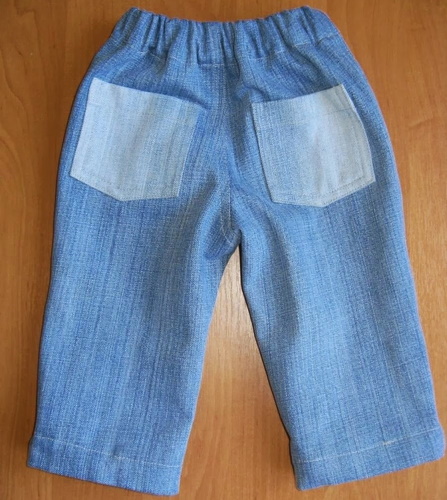
Pants for girls
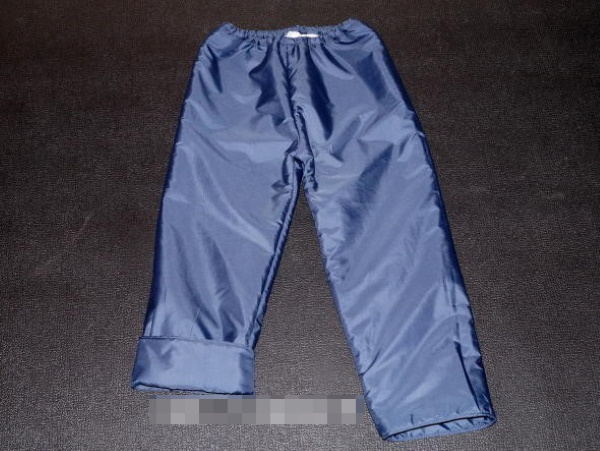
Insulated autumn trousers, it is recommended to sew from fabrics: raincoat (outside) and fleece (lining).
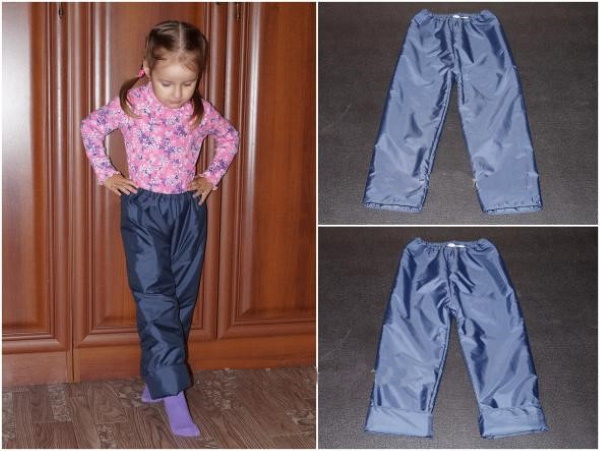
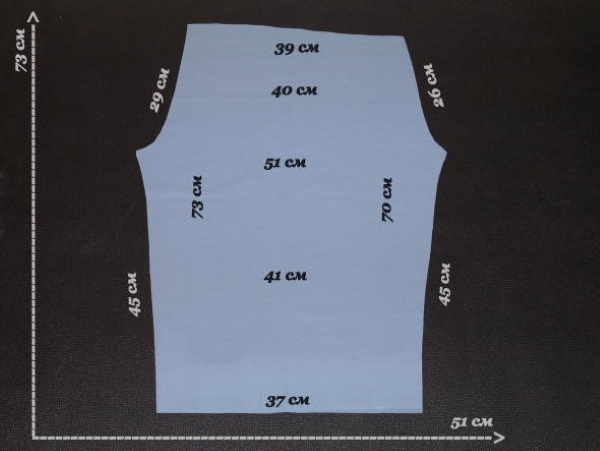
The presented pattern is designed for a height of 110 cm. If you need pants of a different size, the pattern will need to be adjusted in terms of waist and hip circumference, as well as seat height and product length.
Stages of work:
- From the raincoat material, you need to cut out the two presented parts, folding the fabric with the right sides inward.
- For fleece, you need to use the same pattern, but on the sides it needs to be reduced by 5 cm, and on top – by 4.
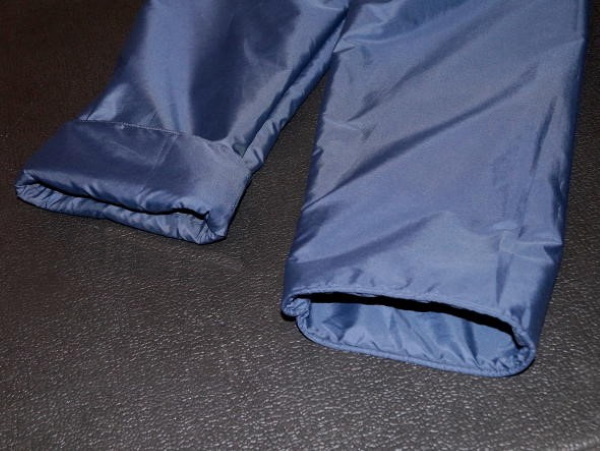
- First of all, you need to sew trousers from raincoat fabric, then fleece lining.
- After this, they need to be inserted one into the other and sewn to each other in the waist area.
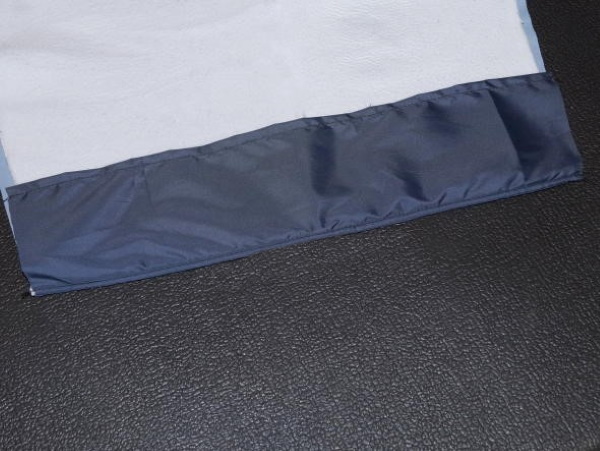
- A strip of raincoat fabric needs to be sewn onto the bottom of the trousers so that they can be rolled up.
- In the waist area, the fabric needs to be folded to the width of the elastic and stitched.
- Lastly, you need to insert the elastic band.
Blouse for a girl
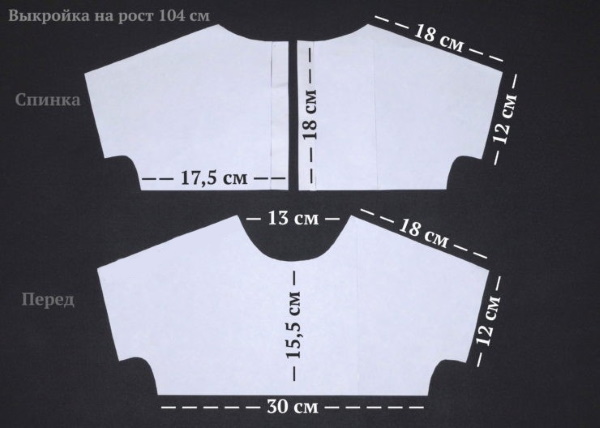
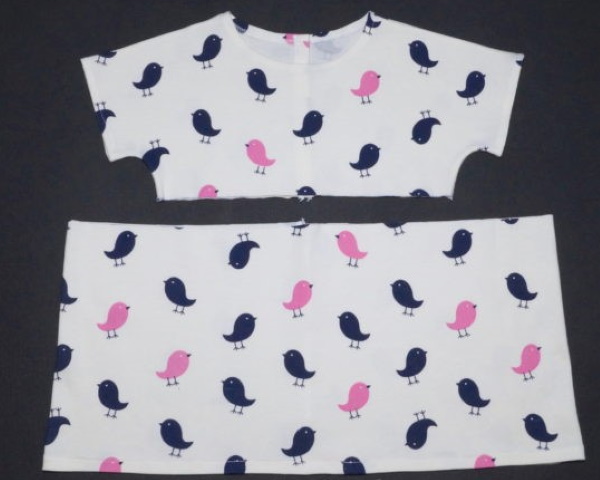
We are sewing a blouse for children from knitted fabric (the given pattern is designed for girls with a height of 104 cm).
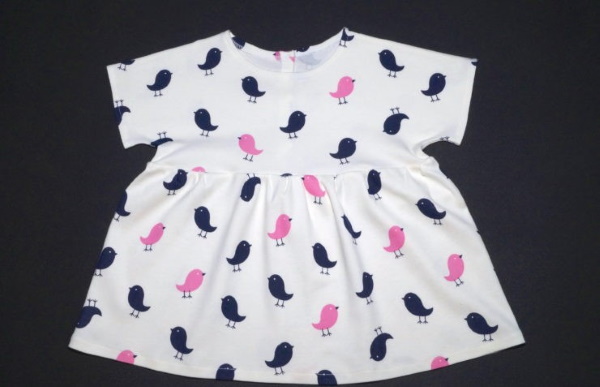
For the blouse, you need to cut out 1 piece for the upper front part, 2 pieces for the upper back part and a rectangle for the lower part (100 cm * 26 cm).
Stages of work:
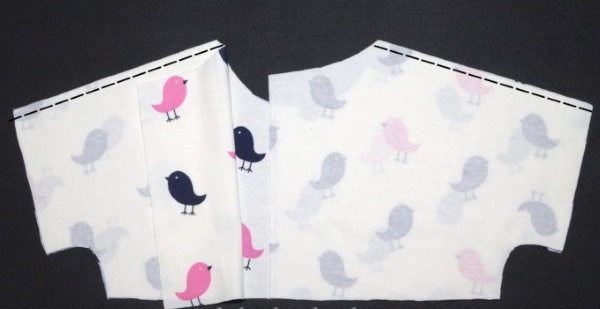
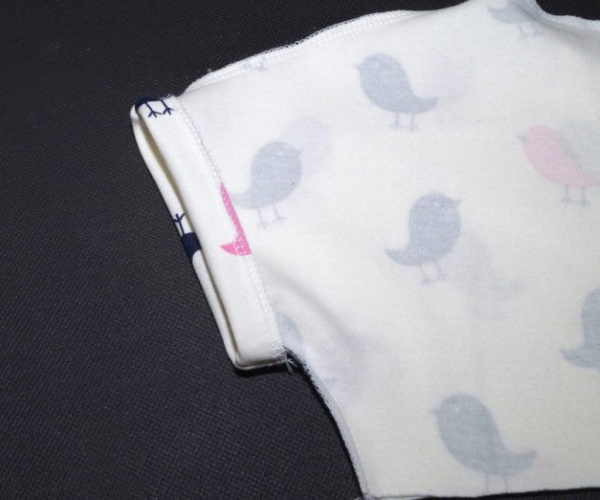
- First, you need to sew the shoulder seams of the product. Since the blouse is sewn from knitwear, it is better to process the seams on an overlock. But you can also do it on a regular sewing machine, using a needle and a special foot for knitwear.
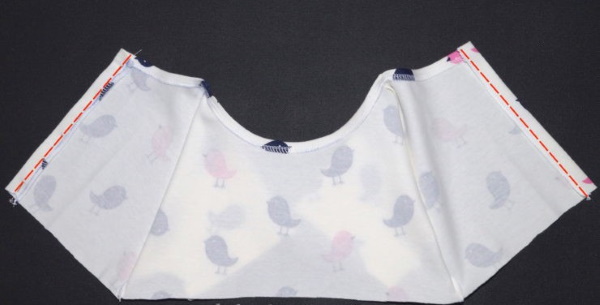
- The next step is to overcast the edges along the dashed lines.
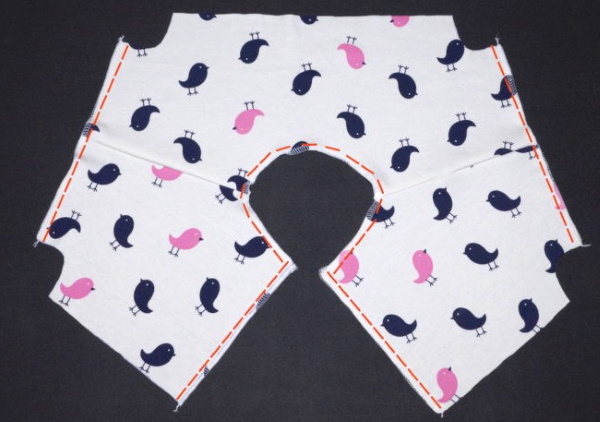
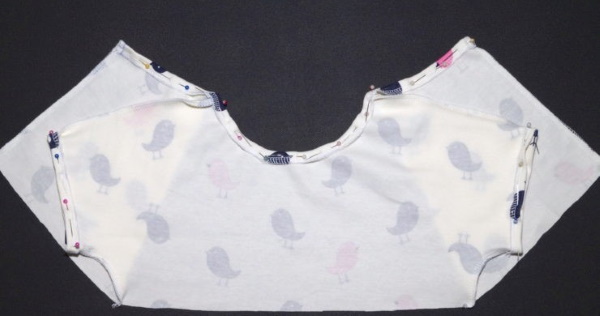
- Next you need to sew the pieces together on the sides.
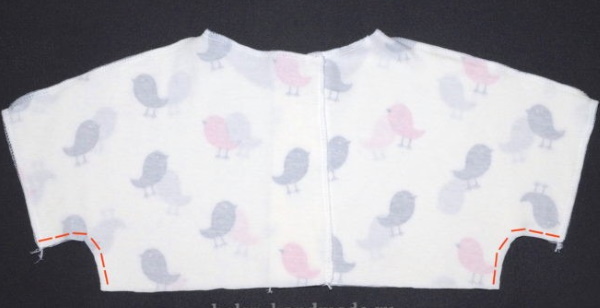
- The sleeves should be turned up by 1 cm and stitched.
- The same needs to be done with the neck.
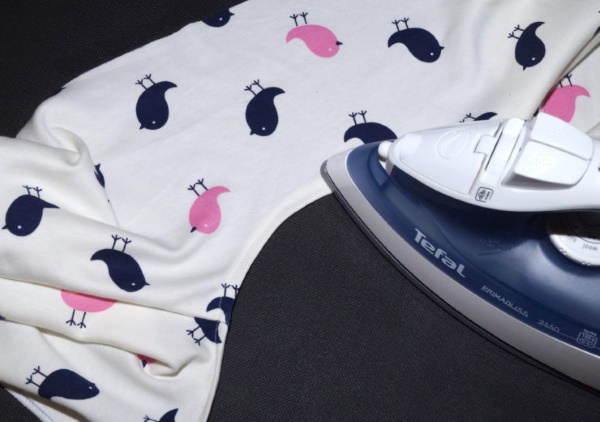
- Then the resulting seams need to be ironed.
- The back piece should be prepared for the future fastener. To do this, the edges should be folded 1.5 cm on each side.
- The rectangular piece for the bottom of the blouse must be stitched along the short side.

- The bottom edge should be folded over and stitched.
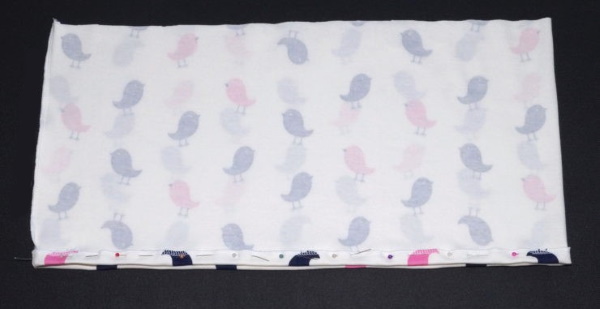
- The top of the frill needs to be gathered to give it some volume.
- Sew to the top of the blouse.
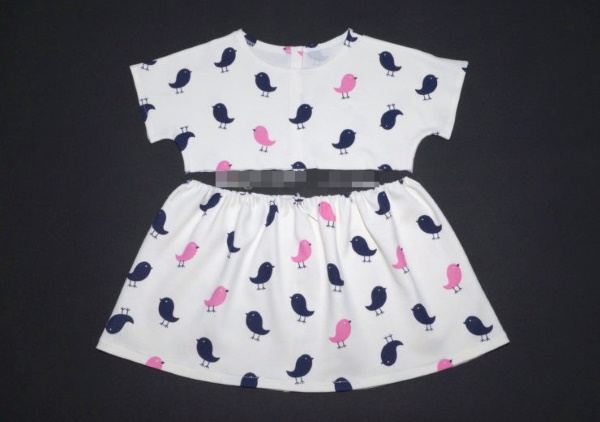
- This model uses buttons as a fastener.

The product is ready
Shorts for girls
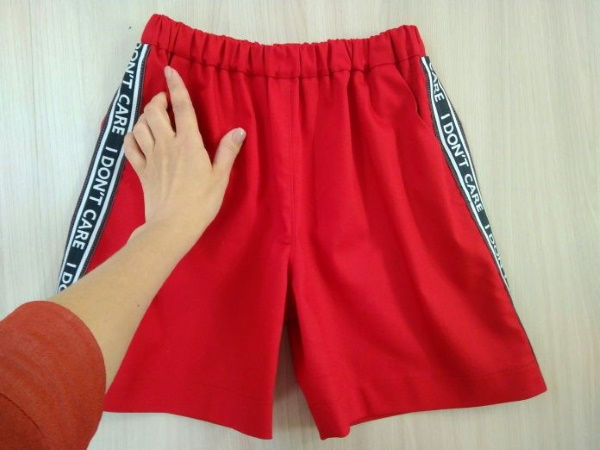
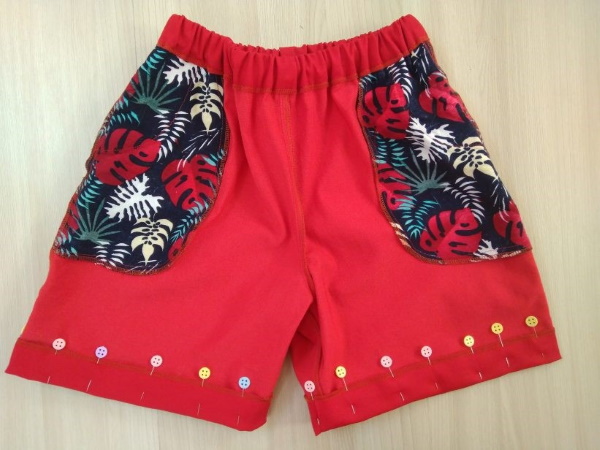
We sew shorts with stripes for children (patterns for girls are designed for size 122) using a pattern that even a novice seamstress can handle.
To construct a pattern, you need to obtain data on the hip circumference (H) and waist (W), as well as the seat height (S). To draw a pattern, you need to construct a grid. Its length L = H/2 + 14 cm, width W = H + 10 cm.
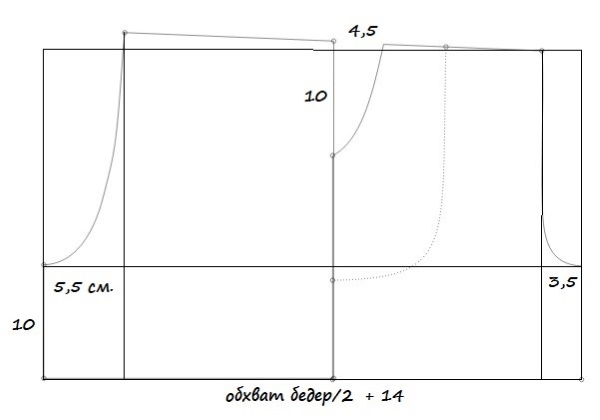
The belt should match the length of the shorts pattern at the front and back. The width of the belt will be equal to the width of the elastic and allowances. The patterns of the inner pockets can be made based on the received pattern of the product. Their depth can be any. Fabric consumption - 80 m of fabric + scraps for pockets (you can use leftover fabric).
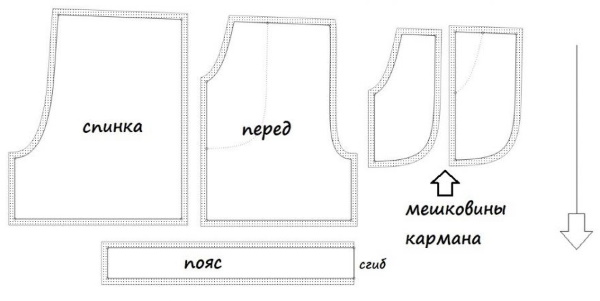
Stages of work:
- After cutting out all the pieces, you need to sew the front and back parts of the shorts along the middle cuts.
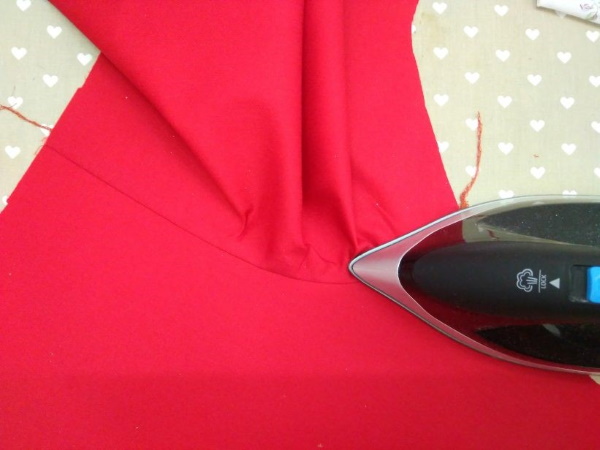
- After which the seam needs to be ironed to one side.
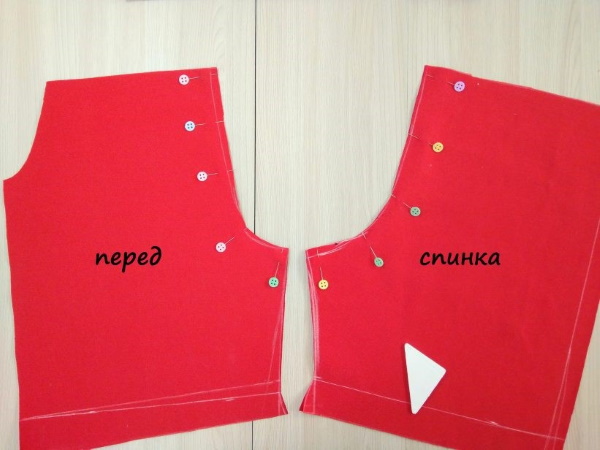
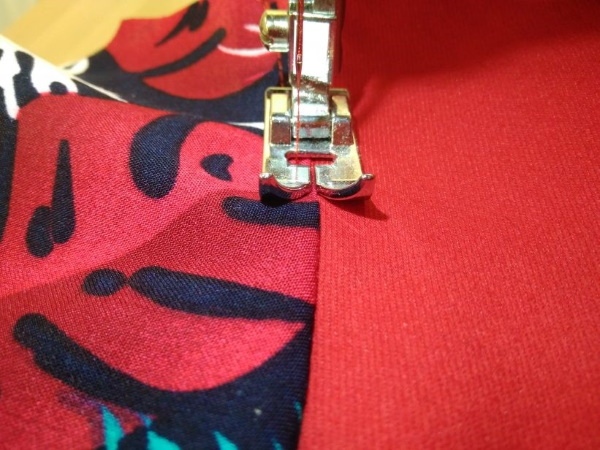
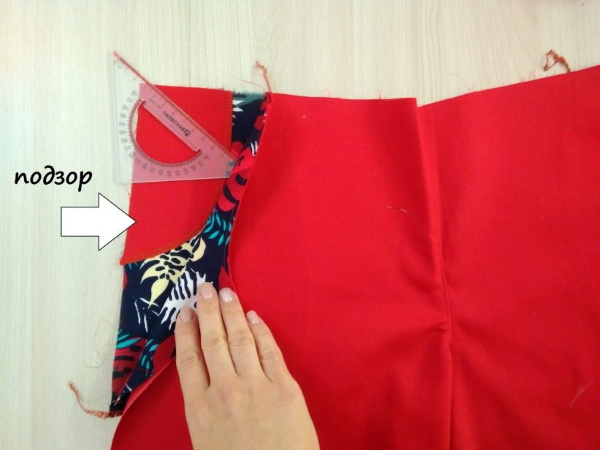
- Pockets should be sewn to the front part of the product. To do this, place the pocket piece face to face on the front part of the shorts and stitch it.
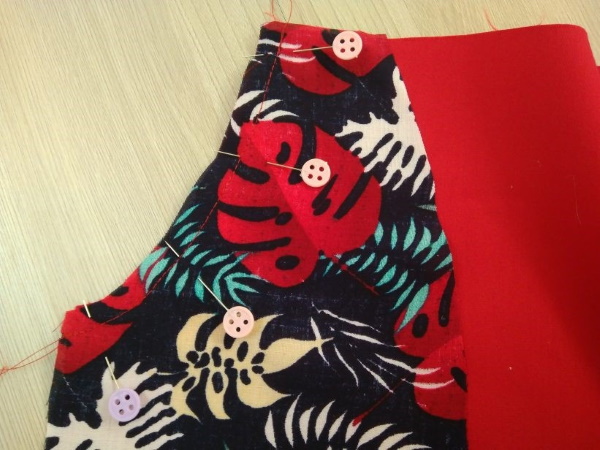
- To prevent the inside of the pockets from “popping out”, the pocket must be stitched 1 mm from the laid line.
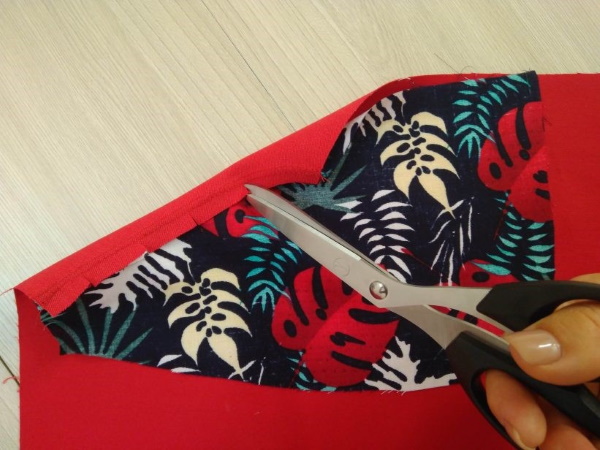
- On the seam allowance, you need to make slits with scissors at intervals of 4 cm.
- The remaining pocket pieces should be placed on top of the already sewn ones, face inwards, and stitched.
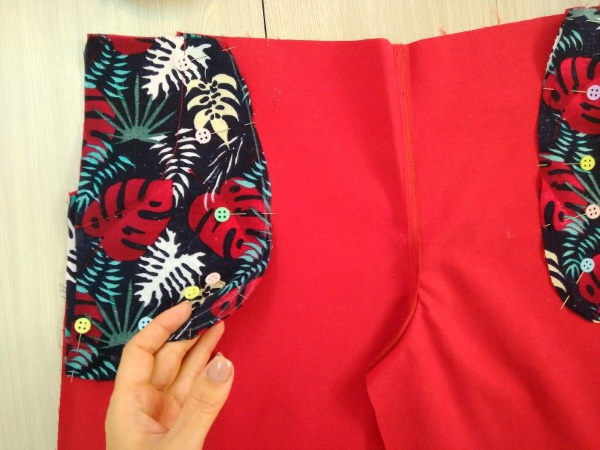
- To make sure that the fabric from which the pocket is made is not visible, a lining made from the main fabric should be sewn onto the visible part of the pocket.
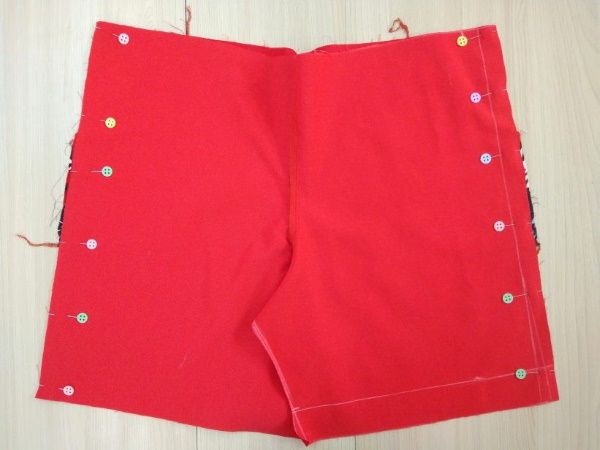
- Next, you should sew the front and back parts of the shorts from the sides and iron the seam allowances on the back part.
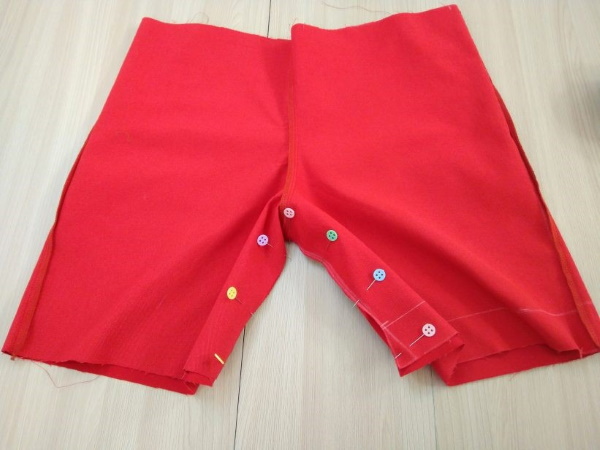
- Then you need to sew the step cut.
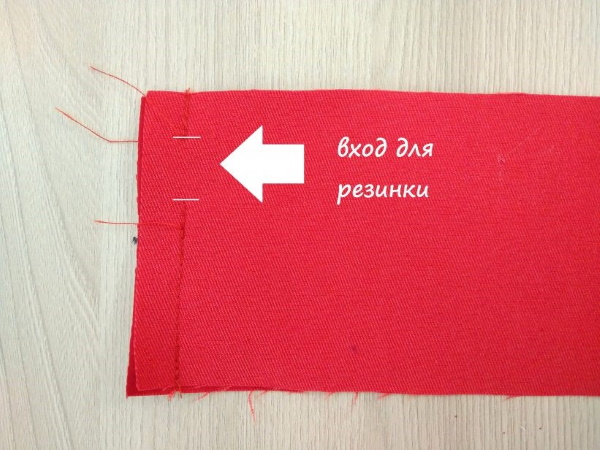
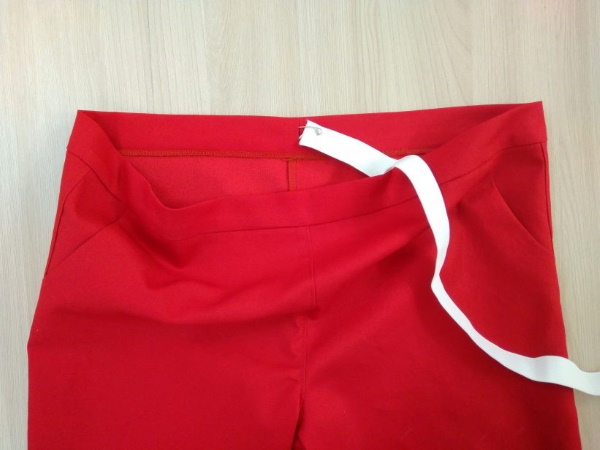
- The strip under the belt needs to be closed into a ring and stitched, leaving a slit for threading the elastic.
- Then you should fold the shorts with the belt with the right sides together and sew.
- Next, the belt needs to be folded inward and sewn from the front in such a way that the new seam runs along the seam with which the belt was originally sewn.
- An elastic band should be threaded through the belt, then its ends should be sewn together.
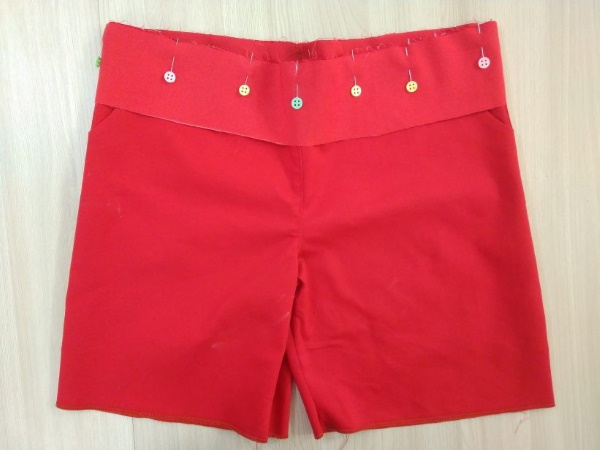
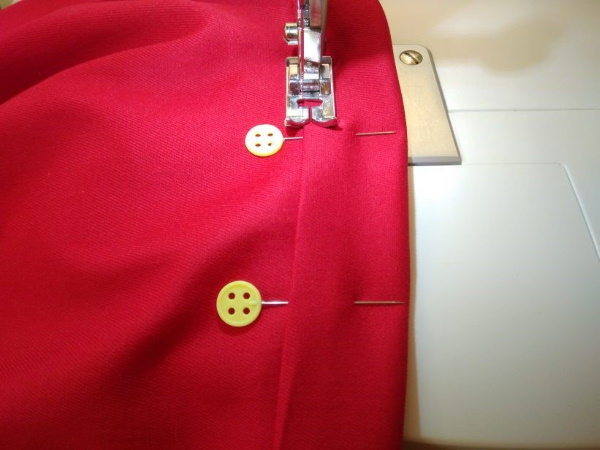
- The bottom of the shorts needs to be folded over and stitched.
You can sew stripes on the sides of the shorts, or leave them as is.
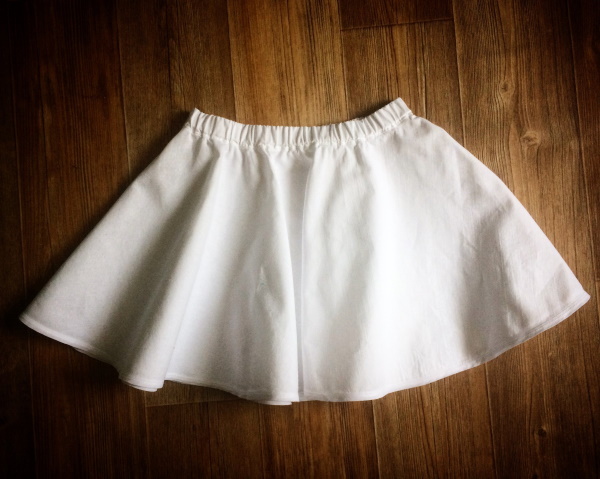
Skirt for a girl
We sew a sun skirt for children (patterns for girls are suitable for any age). The advantage of such a skirt is that it will look different each time depending on the chosen fabric. For a light summer skirt, the following are suitable: cotton, linen, chintz, light denim. For a festive option, you can choose satin, brocade or organza.
To add volume, you need to make a petticoat from organza, lace or mesh using the same patterns. For the skirt, you need to take 2 measurements: waist circumference (Ot) and count the required length (D). To make the skirt have beautiful gathers, it is recommended to increase the waist circumference by 2 times.
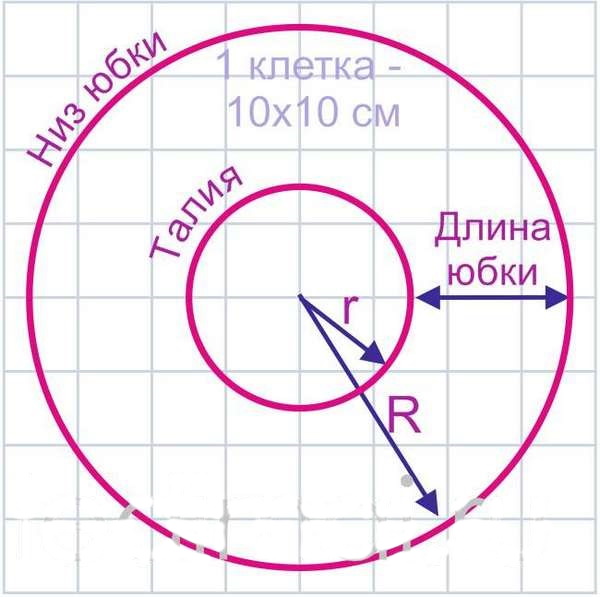
Next you need to calculate 2 radii:
- r – for the waist. Calculation: r = (Ot*2)/6.28. The resulting value should be rounded up to the nearest whole number.
- R – for the bottom. R = r + D.
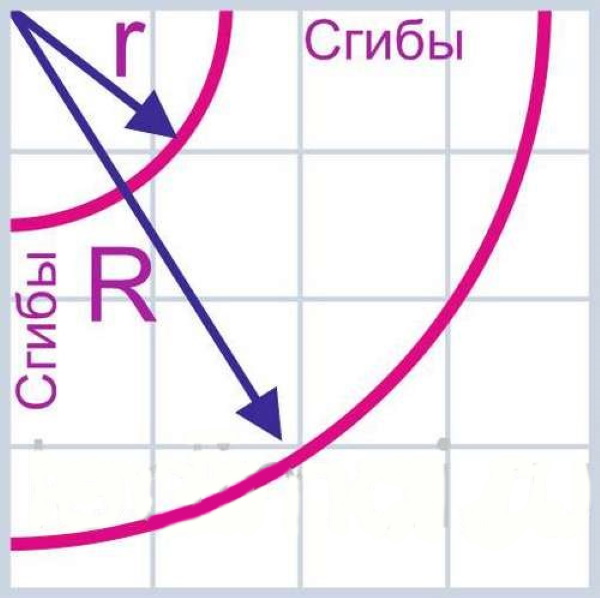
Taking into account the data obtained, you need to make a pattern on paper. To cut out a skirt on fabric, you need to fold the paper pattern in 4 times. Then also fold the fabric flap and transfer the circles onto it. If you plan to make a hem at the bottom of the model, then when cutting, you need to leave allowances from 1 to 2 cm.
In addition, the edge can be finished with tape or lace can be sewn on, then allowances are not needed, or are made minimal. The sun skirt is sewn without seams. Therefore, when choosing fabric, you need to consider that the diameter of the skirt cannot exceed the width of the fabric.
The width of the belt depends on preferences. The main thing is not to forget to lay 2 cm allowances. For beginners, it is better if the length of the belt corresponds to the diameter of the circle on the belt.
Stages of work:
- The belt needs to be stitched to form a ring. At the same time, it is necessary to leave a slit where the elastic will be inserted later.
- Next, this piece should be folded in half and sewn to the skirt.
- The bottom of the product needs to be hemmed or decorated in any desired way - with ribbon, braid, lace.
- At the end of the work, you need to insert an elastic band. It is recommended to take the length of the elastic band 10% shorter than Ot.
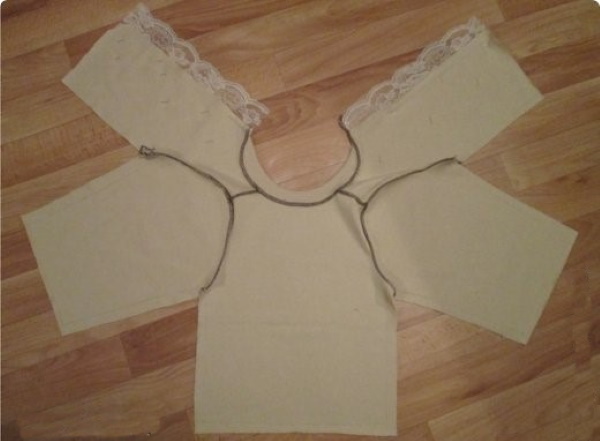
Smart sweater for a girl
It is advisable to sew a knitted blouse using an overlock. If you don't have one, then a little more skill and accuracy will be required from the needlewoman.
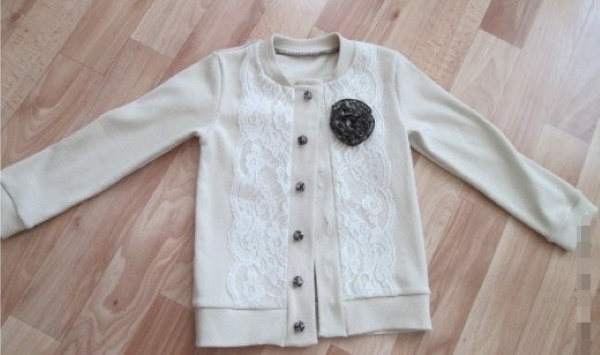
The pattern is suitable for children's size 98. In this case, you will need a piece of 1 m * 1 m of knitwear and 80 cm of wide lace.
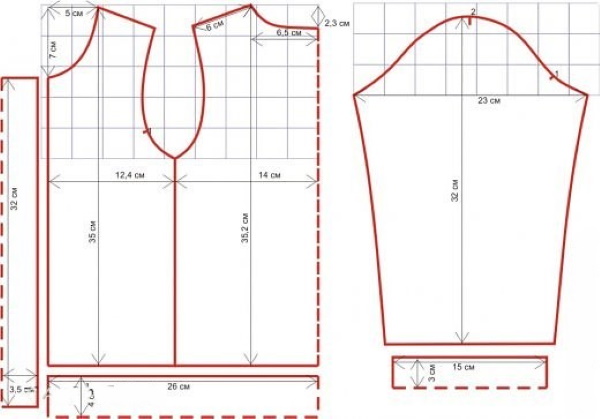
For the collar, use the following pattern. The width of the strip should be 4 cm, and the length 30 cm less than the neck.
Stages of work:
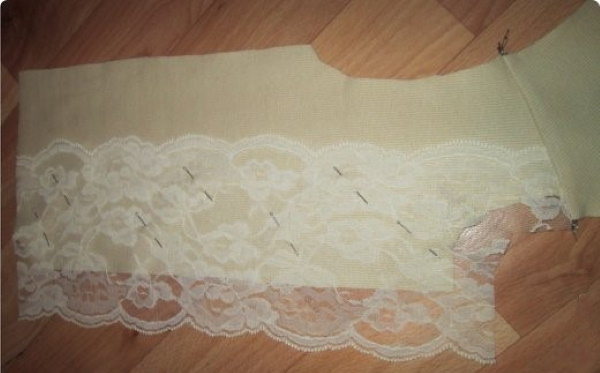
- All the details should be cut out according to the attached pattern. Lace should be placed on the shelves, after which shoulder seams should be made.
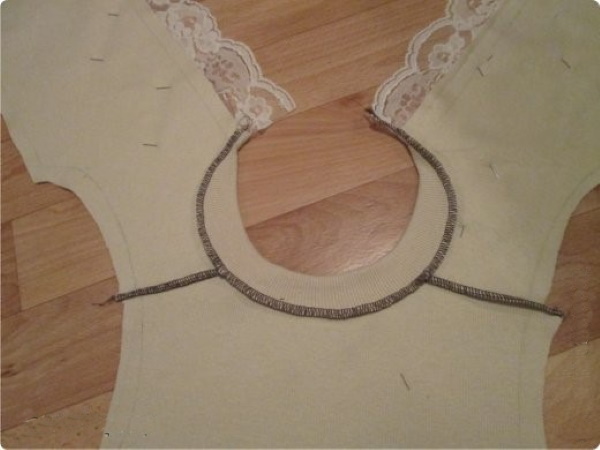
- Next you need to sew on the collar and iron all the seams.
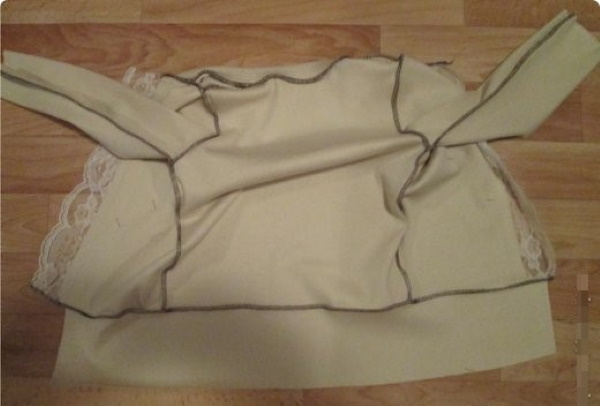
- Then you need to sew the sleeves into the armhole.
- After this, you should sew the sleeve and side seams of the jacket.
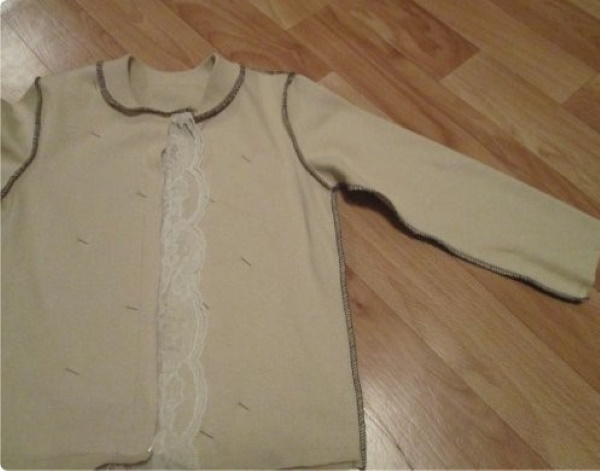
- Next, you need to sew on the belt and iron all the seams.
- You need to make 2 strips for buttons. To do this, fold the strips of fabric in half along the long side, sew them together along the short side, turn them inside out and iron them.
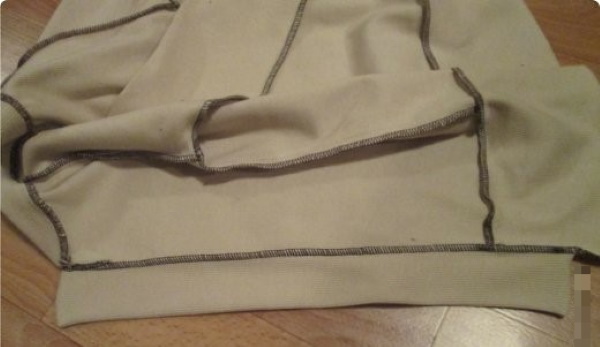
- The belt needs to be folded inward and stitched from the front so that the stitching falls on the place where the belt is stitched to the shelves.
- The cuffs need to be closed into a ring, folded in half with the right sides facing out and sewn to the sleeves.

The product is ready.
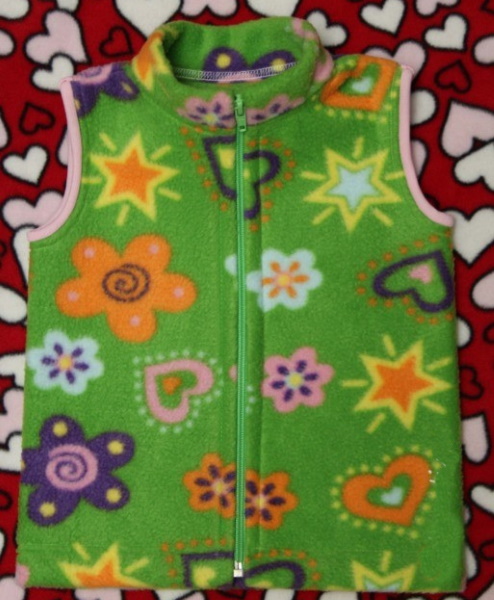
Vest for a girl
We sew a simple fleece vest for children (for girls, patterns can be constructed using a ready-made sweater or jacket). In addition to fleece, you will also need pieces of knitwear for finishing the edges and a zipper. The simplicity of this model is that you do not need to specially calculate the pattern, and the product has a minimum of seams.
Stages of work:
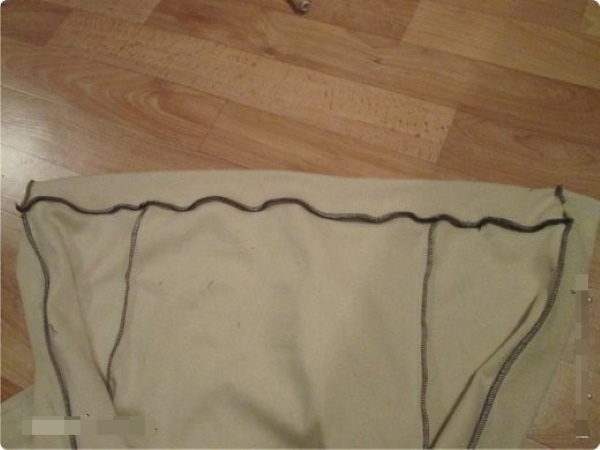
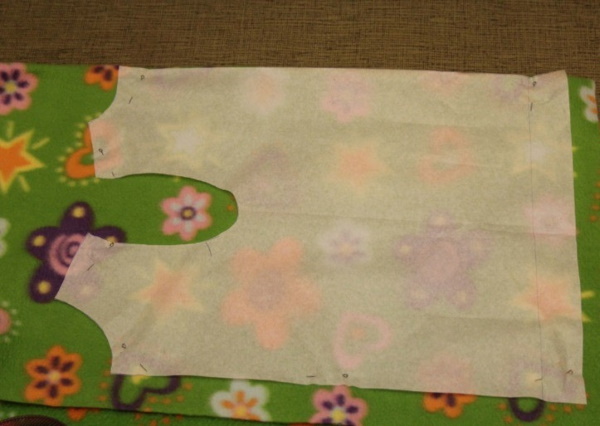
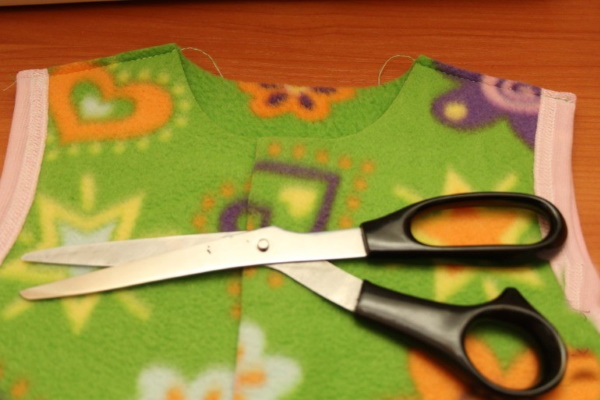
- You need to take the child's sweater and use it as a basis to make paper patterns for 2 fronts and the back, not forgetting about the armholes.
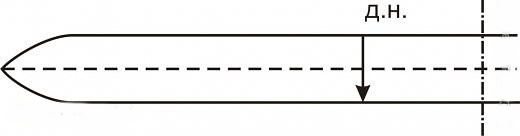
- To make the vest seamless, the fabric needs to be folded in half and the paper pattern placed as shown in the picture. When cutting out the detail, allowances must be taken into account.
- Based on the resulting neck size, you need to cut out a rectangle for the collar.

- From knitwear you need to make 2 blanks for finishing the sleeves.
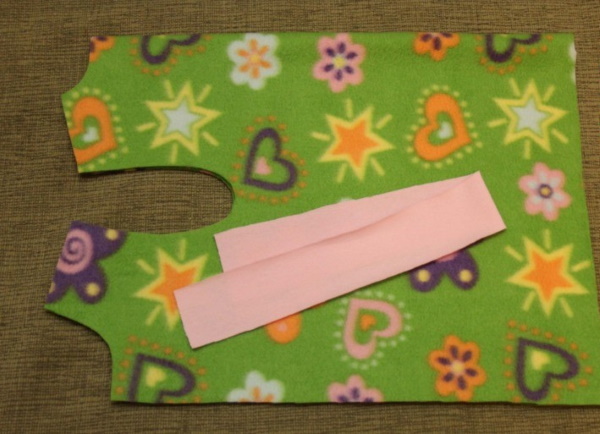
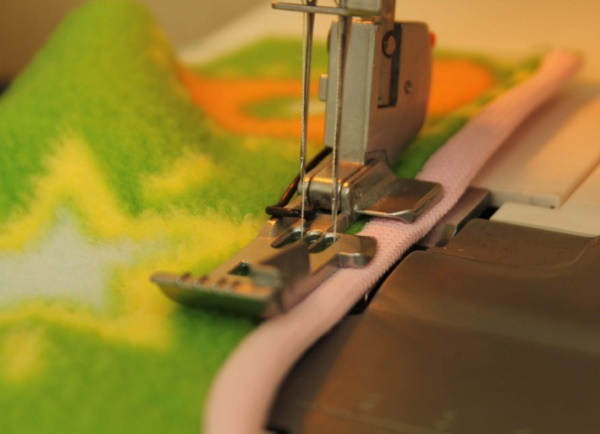
- Next, the knitted strips need to be sewn on. To do this, fold the fleece and knitwear face down and stitch. Then fold the strip to the wrong side and sew on.
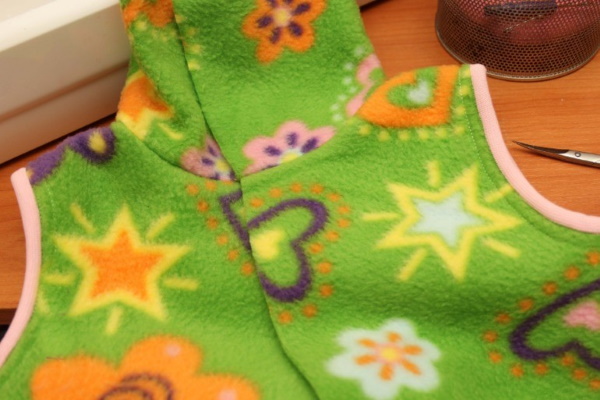
- The next step is to make the shoulder seams.
- The collar strip must be folded with the main product with the right sides facing each other and sewn on.
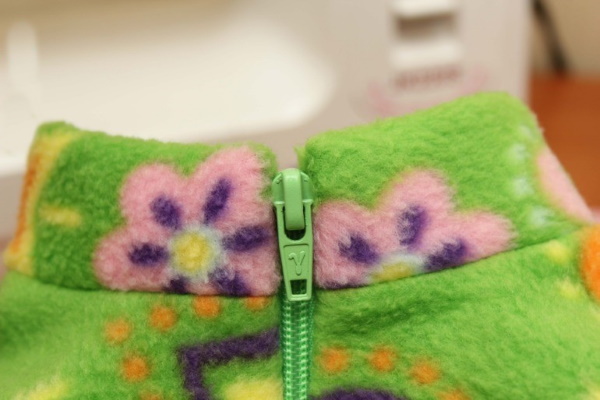
- After this, the zipper should be sewn alternately to one half of the shelf, then to the other.
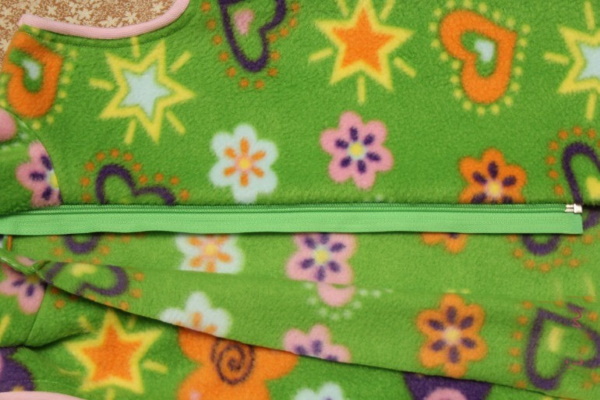
- The bottom edge of the vest needs to be hemmed along with the ends of the zipper.
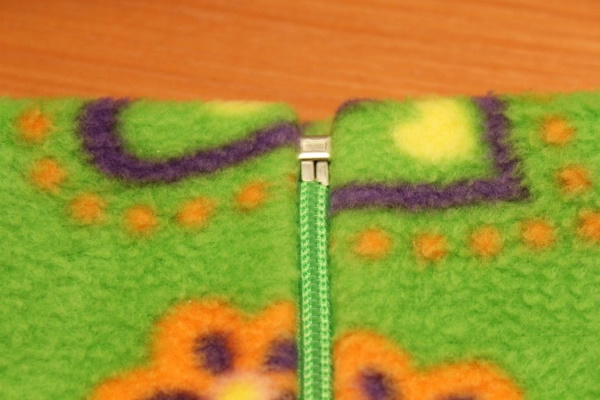
- The collar needs to be folded over and stitched so that it is level with the zipper.
Everything is ready.
What to make from old jeans?
Jeans have long been universal clothing for people all over the world. Denim fabric is very diverse - it differs in composition, thickness, color. Therefore, when jeans wear out, there are many opportunities to give the fabric a "second life".
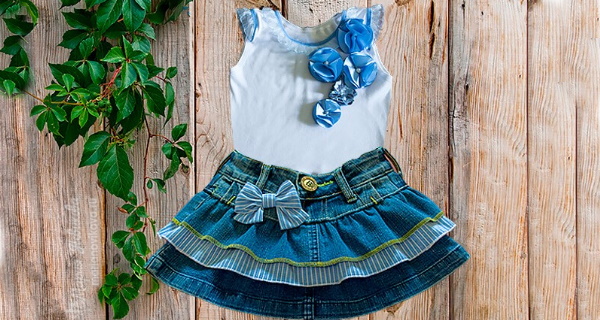
For children, you can sew a skirt, a sundress or a dress from old jeans. Even beginners can sew a denim vest for a child. Adult jeans can be used to make jeans for a child, and maybe even more than one.
Making outerwear will already require sewing skills. Slippers for home are an indispensable thing for kids. Small bags also look cute.

Small pieces of denim make cute toys. Sewing for children does not lose its relevance. Patterns presented in magazines and on the Internet for girls help both beginner needlewomen and experienced craftswomen to dress a child in a modern, beautiful and inexpensive way.
Author: Vorobyova Nadezhda
Article formatting:Lozinsky Oleg
Video on how to sew a skirt for a girl
How to sew a double-sided skirt for a girl:
Thank you very much! Everything is detailed and accessible! More master classes like this!
very pleased!