A drawing for Rescuer's Day can be drawn with simple pencils. To get a beautiful picture, you need to know what tools and materials can be used. Beginner artists should consider several step-by-step master classes, as well as choose an image to copy.
What to consider when drawing on the theme of Rescuer's Day, how to display the idea in the drawing
The drawing for Rescuer Day should reflect the difficulties of working in the Ministry of Emergency Situations. You can draw rescuers during work. People in the picture should be in special equipment: a helmet, a protective suit, with an oxygen tank and respiratory protection. The inscription "EMERCOM" can be made on the clothes.
The rescuer in the picture can put out fires, save drowning people, crawl under rubble to find those in need of help. You can depict rescue equipment, for example, a fire engine or a helicopter that puts out forest fires.
You can draw a poster with inscriptions, or a postcard congratulating all those who risk their lives every day to save others.
What you need for drawing
To draw a beautiful picture, 1 simple pencil is not enough. A beginner artist should have a set of 4 pencils of different degrees of hardness on hand.
| The degree of hardness of a pencil lead | Letter designation | What elements are pencils used for? |
| Solid | T or H | Creating a sketch, shading the light areas of the drawing |
| Hard-soft | TM or HB | Detailing, shading of individual elements |
| Soft | M or B | Selecting shadows |
| Very soft | M6 or B6 | Shading dark areas of the drawing, drawing small elements |
Pencils need to be kept sharp, so you need to buy a sharpener. To keep your work desk free of debris, you can buy a sharpener with a removable container for shavings.
You will also need a high-quality eraser for this work. It should not smear graphite on paper, nor roll off much and turn into rubber crumbs. The best option for a beginner artist is a double-sided rubber eraser.
The paper for drawing with a pencil should be smooth and white. You can use office sheets for the printer, paper for drawing, and sheets for writing. It is not recommended to draw on sheets for watercolors. Their surface is rough, it will be difficult to shade graphite on it.
Step-by-step instructions for drawing on the theme of the Day of the Rescuer of the Ministry of Emergency Situations in pencil
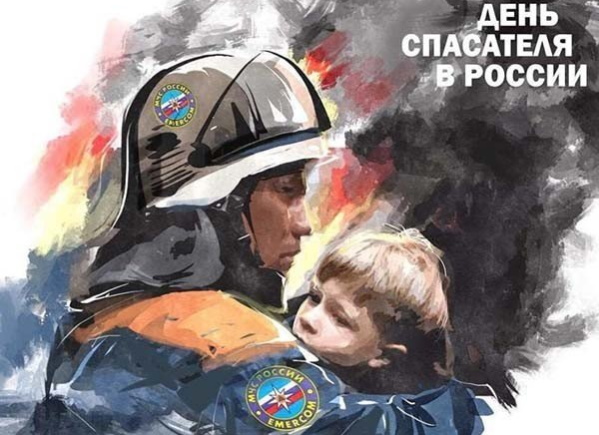
The drawing described in this master class can be used as an illustration for a postcard dedicated to Rescuer's Day. The picture will depict a person in special equipment against a background of flames.
Sketch
To work you will need a hard pencil:
- Place the A4 sheet of paper horizontally on the table.
- Draw an oval human head in the center of the sheet.
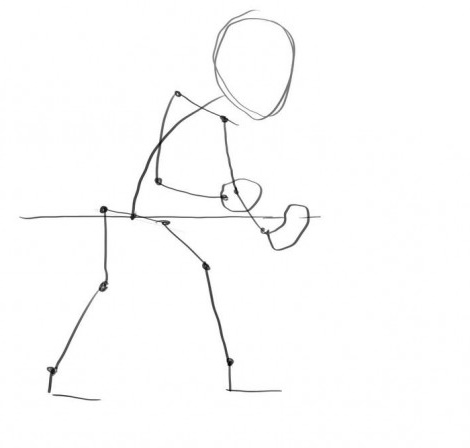
- Draw the body up to the waist.
- Draw a rescuer's hand.
- Draw the shape of the voluminous clothing.
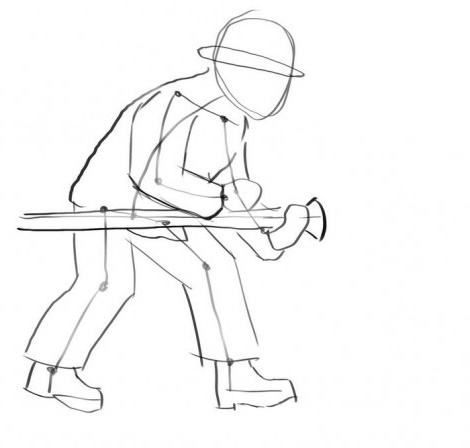
- Mark the position of the helmet on the head.
- Draw the outline of the mask on the face.
- Draw a large axe in your hand.
- Finish drawing the gas mask hose.
- Draw the outline of an oxygen cylinder behind the rescuer.
Use an eraser to remove extra lines.
Detailing
You need to change the pencil to a hard-soft one:
- Draw the shape of the helmet more clearly. Add brim.
- Draw glass on the mask.
- Draw folds on the clothes.
- Mark a stripe on the sleeve.
- Draw a mount and a supporting part on the bottom of the cylinder.
- Finish drawing the straps from the mask and the cylinder.
- Shape the axe. Highlight the blade.
- Draw the valve where the hose attaches to the mask. Highlight the corrugated part of the hose.
Use an eraser to erase all unnecessary lines.
Hatching
To work you will need a full set of pencils:
- Use a hard-soft pencil to shade the rescuer's helmet and clothing. The shading should be dense, but you don't need to press hard on the pencil.
- Shade the axe handle.
- Use a soft pencil to darken the folds on the clothes.
- Highlight the shadows on the helmet.
- Shade the mask and hose of the gas mask.
- Highlight the shadows on the bottle on the side that is closer to the back.
- Select the cylinder mount.
- Using a very soft pencil, show the shadow on the bottom of the mask.
- Paint the axe head.
- Draw all the small details.
- Trace the outline of the drawing.
- Use an eraser to clean the background.
- Use a hard pencil to shade the background. The strokes should be applied in one direction, for example, diagonally.
Using a hard-soft pencil, draw tongues of flame on the shaded background.
Variations of drawings dedicated to the workers of the Ministry of Emergency Situations
A drawing for Rescuer's Day should contain a plot that will reflect the difficulties of the profession. Further in the article you can consider step-by-step master classes on drawing different variations of cardboard with rescuers, made with a simple pencil.
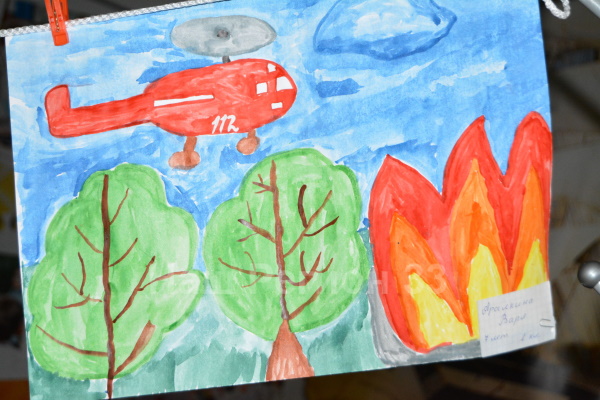
Children's version of the drawing
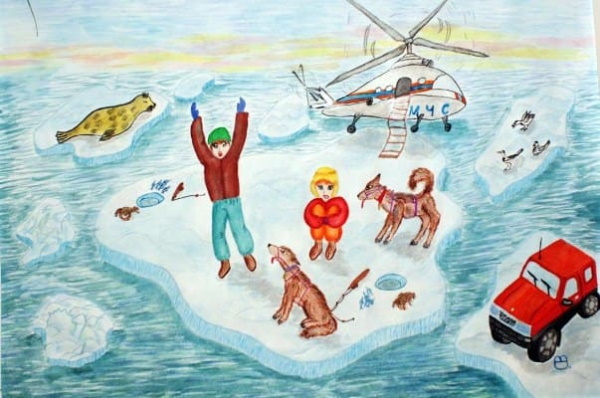
Drawings for Rescuer Day are often made in schools and kindergartens, holding a competition for the best work. Such events help to familiarize children with the profession of rescuers.
The drawing presented in this master class shows a helicopter of the Ministry of Emergency Situations, which arrived to rescue people on a raft, left helpless in the endless sea.
For the work you will need not only pencils, but also black watercolor paint. It will help to make the drawing more saturated.
How to draw:
- Place a sheet of A4 paper horizontally on the table.
- Using a hard pencil, draw a large oval in the center of the sheet. This is the main part of the helicopter.
- Finish drawing the tail of the helicopter, the blades, and also draw the shape of the windows and the open door.
- Draw an oval raft in front of the helicopter.
- Draw 2 people on a raft. Let one of them signal for help by raising his hands up. The other person will lie on the raft.
- Draw a rescuer on the helicopter door.
- Draw a rope ladder that will stretch from the helicopter to the raft.
- Mark the water level behind the helicopter.
- In the background, on the left side, draw the bow of the ship.
- Use an eraser to erase extra lines.
- Using a hard-soft pencil, draw all the details of the helicopter: turbines, windows, stripes and inscriptions.
- Draw small details on the raft.
- Design the clothes of the rescuer and the people on the raft.
- Draw small details of the ship.
- Draw water waves.
- To design people's faces.
- Using a hard pencil, shade the helicopter, the bow of the ship, and the sides of the raft.
- Use a soft pencil to shade smaller details, such as clothing, dark elements of the helicopter, and the opening in the door. The strokes can be applied randomly, or they can be made boundary-like, with small gaps.
- Using a very soft pencil, draw all the small details and outline the drawing.
- Dilute black watercolor with water in equal proportions. Paint the sky in the background of the drawing.
Use paint, without adding water, to highlight the waves on the water.
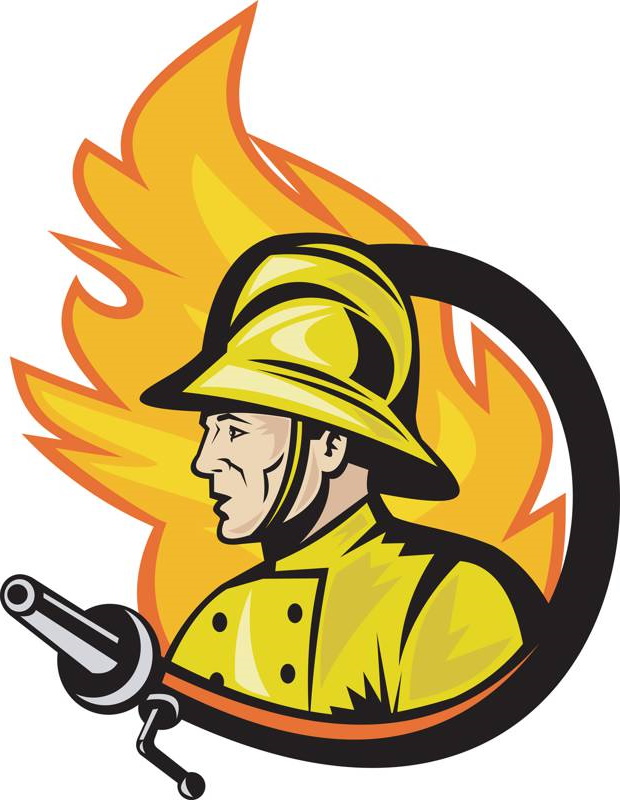
Logo design
You can design a postcard for Rescuer's Day with a logo-shaped drawing. The picture will depict a bust of a rescuer in a helmet, inside a circle of a fire hose. The upper part of the drawing will be decorated with tongues of flame.
How to draw:
- Place a sheet of A4 paper vertically on the table.
- Using a hard pencil, draw an oval firefighter's head.
- Draw the outlines of the clothes and helmet.
- Mark the position of the eyes, nose, ears and mouth.
- Draw a circle from the hose. It should not be completely closed. The fire hose should be drawn at the level of the firefighter's shoulders.


- In the place where the circle opens, draw a flame. Its top should extend beyond the circle.
- Using a hard-soft pencil, draw the shape of the helmet more clearly.
- Draw the rescuer's face.
- Detail the clothes.
- Use an eraser to remove excess lines.
Use a very soft pencil to outline the drawing. Draw all the small details.
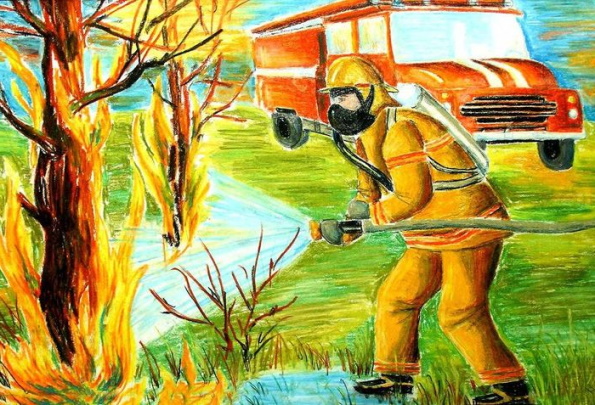
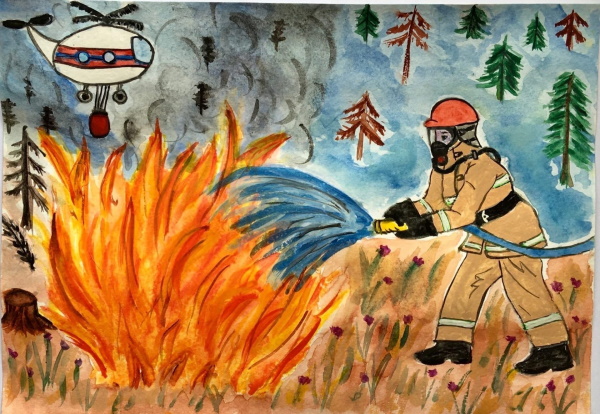
Emergencies Ministry helicopter extinguishes forest fire
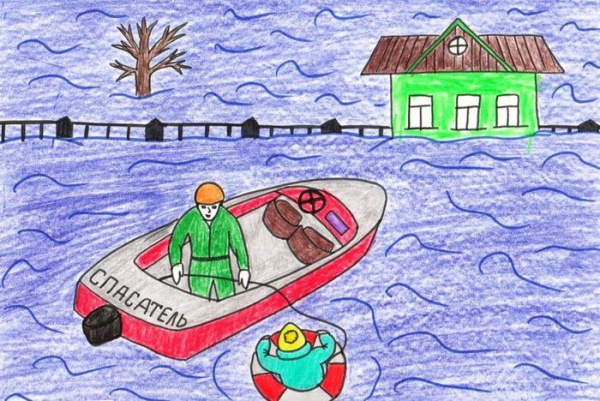
The drawing can depict not only the rescue of people, but also help for nature.
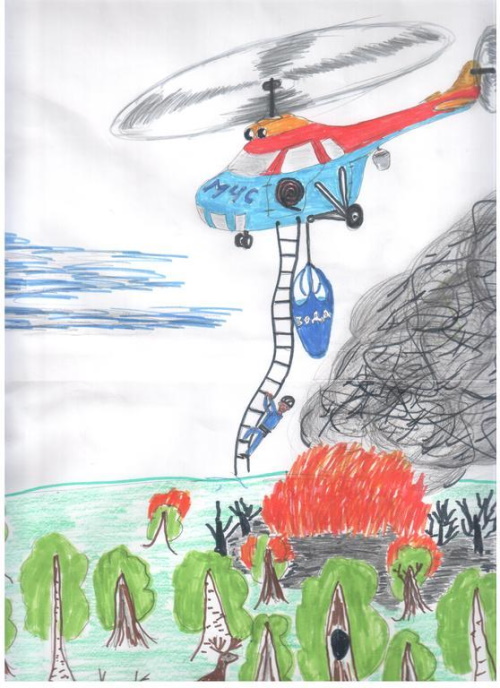
How to draw a helicopter fighting a forest fire:
- Place a sheet of A4 paper vertically on the table.
- Draw an oval at the top of the sheet using a hard pencil. The right end of the figure should be narrower than the left.
- At the bottom of the sheet, depict a clearing with trees. The crowns and trunks of the trees can be depicted schematically. Several plants can be drawn fallen.
- Depict the mixture that the helicopter uses to extinguish the flame.
- Draw the helicopter blades, tail and small details.
- Use an eraser to erase extra lines.
Trace the outline of the drawing with a soft pencil. Draw all the small details.
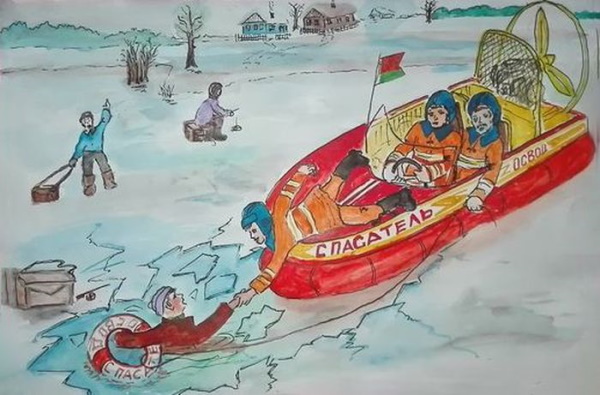
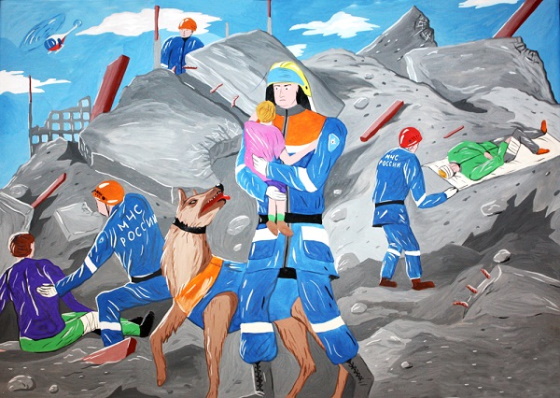
A rescuer makes his way through the rubble
This drawing will depict a rescuer making his way through rubble to save people.
 How to draw:
- Place a sheet of paper horizontally on the table.
- Using a hard pencil, draw an oval head of the rescuer.
- Draw the position of the body. In the picture, the rescuer will be in a semi-sitting position, leaning on his left knee.
- Mark the position of the hands. The right hand is bent and is near the gas mask. The left hand is lowered down. The axe is clenched in the palm.
- Draw the shape of the axe.
- Mark the position of the legs. The right leg is bent at the knee, resting on the foot.
- Draw the shape of the helmet.
- Draw a gas mask.
- Use a hard-soft pencil to draw voluminous clothing and shoes.
- Give a clear shape to the helmet and gas mask. Draw the valve and glass.
- Draw a cylinder with a mount behind the rescuer.
- Highlight the folds of fabric on clothing.
- Draw reflective stripes on the rescuer's jacket.
- Shade the clothes.
- Paint the helmet, cylinder and axe.
- Use a soft pencil to color the shoes and the air tank mounts.
- Shade the mask.
- Draw all the small details with a very soft pencil. Outline the drawing.
Using a hard-soft pencil, shade the background chaotically. Using a soft pencil, draw the relief in the upper part of the drawing so that it is clear that the rescuer is under the rubble.
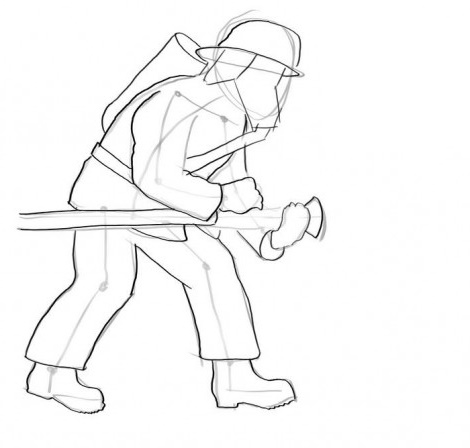
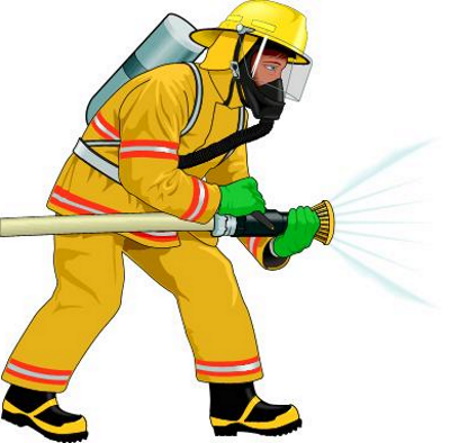
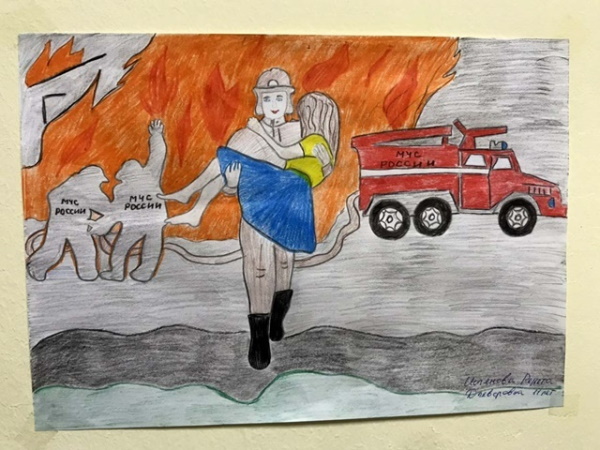
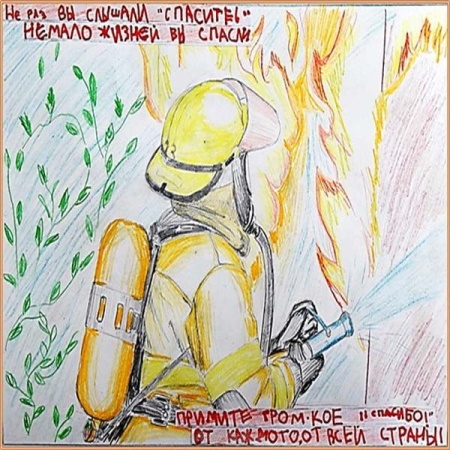
A rescuer puts out a fire
In this drawing, the rescuer will be shown from the back. There will be a flame in front of him, and a fire hose in his hands.
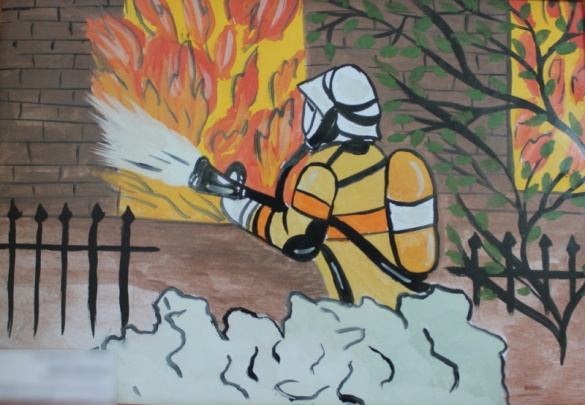
How to draw:
- Use a hard pencil to mark the position of the head.
- Draw the body and arms in voluminous clothing.
- Finish drawing the hose.
- Draw the shape of the helmet more clearly.
- Draw a cylinder behind the rescuer's back.
- Pretend to be a flame in front of the rescuer.
- Draw a stream of water coming out of a fire hose.
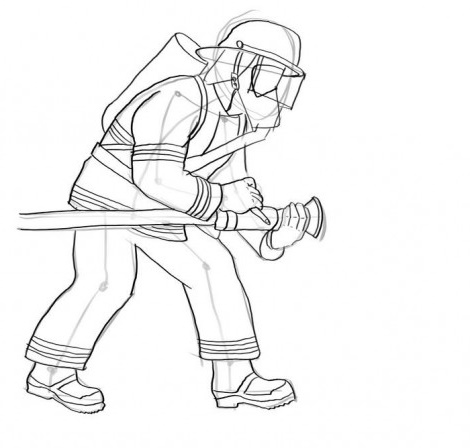
- Use a hard-soft pencil to draw the shape of the helmet more clearly. Draw the transparent face shield slightly raised.
- Draw the gas mask hose. Highlight the valve at the base of the mask.
- Draw a protective collar on the neck.
- Draw folds on the clothes. Highlight reflective stripes.
- Highlight small details on the cylinder mount.
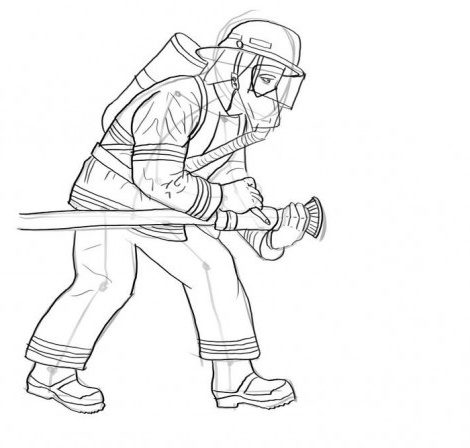
- Shade the flames.
- Paint the helmet and clothes.
- Use a soft pencil to highlight the shadows. Outline the helmet.
- Paint the straps that hold the cylinder.
- Trace the outline of the drawing.
- Shade the background with a hard pencil.
- Using a soft pencil, draw thin branches with leaves on the left side of the drawing. They will cover the empty space on the sheet.
Use a hard-soft pencil to outline the edges of the flames.
Examples of images for copying, tips for beginners
How to make drawings more beautiful:
- You can add an inscription to the picture. Example: "You have heard more than once - SAVIOR, you have saved many lives! Please accept a loud THANK YOU, from everyone, from the whole country!"
- Pencil strokes should be shaded along, not across.
- You can blend the graphite in small parts of the drawing using cotton swabs.
- It is advisable to use cotton swabs for shading, not your fingers. Cotton wool produces soft and neat shading. Fingers can ruin the drawing.
- You can use an eraser to lighten areas of the drawing where you want to show highlights, for example, on the helmet and air tank.
- You need to draw the sketch without pressing on the pencil. Rough and bright lines will be difficult to erase.
- To avoid smearing the already drawn parts of the drawing when painting the background, you need to place a clean sheet of paper under your hand.
- To draw people's faces symmetrically, the outline of the head should be divided into 4 parts by horizontal lines. These lines will serve as a guide for drawing eyebrows, eyes, nose and mouth.
- Pencil drawings should be stored in file folders so that the graphite does not stain other sheets.
You can also spray the design with a fixative spray. These sprays are sold in craft stores. If you can't buy a special product, you can replace it with hairspray with a strong hold.
It is not difficult to make a drawing for Rescuer's Day with your own hands. The main thing is to choose the right materials and tools for the work, as well as choose an interesting plot and think through small details.
Video about drawing
Drawing for Rescuer's Day: