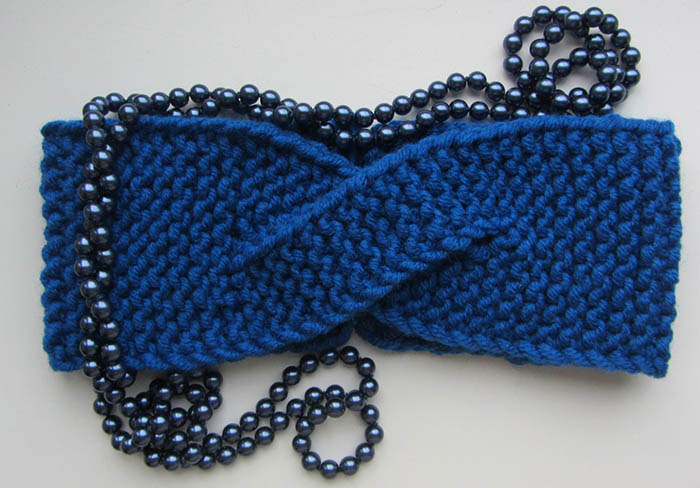
Headband with overlap, knitted with needles, a great idea for the cold season. It will perfectly warm you up and complement any look.
The fashion for head accessories in the form of headbands came to the modern world from ancient times. They were worn by American Indians, Egyptians, Romans and Greeks. Headbands were made of various materials and used in everyday life and celebrations.
Necessary tools and materials
Knitted headband with overlapping needles - easy to knit, so even a beginner needlewoman can knit it. The variety of options and models allows you to find your own fashion accessory, and auxiliary tools and a large selection of yarn - to create a truly unique thing.
Knitting is impossible without some auxiliary tools that allow you to create a product and make the work easier.
| Tool | For what |
| yarn | for knitting fabric |
| spokes | for weaving yarn threads into patterns and forming fabric |
| sewing needle | for connecting parts of a product during assembly |
| scissors | for cutting yarn threads |
| plastic markers | to mark the middle and other necessary parts of the product when knitting |
| fabric tape measure | to measure head circumference and take other measurements necessary for work |
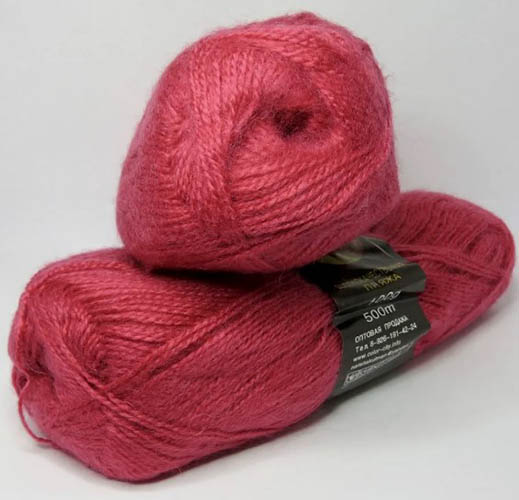
Experts recommend that you carefully select the yarn so that the product is wearable, attractive and seasonal. It should be taken into account that light accessories are best made from simple thin threads, and warm ones from woolen types of material.
For winter types of dressings use:
- alpaca;
- angora;
- cashmere;
- merino;
- mohair.
Threads made from the wool of mountain llamas Alpaca retain heat well, are practically not dirty and allow the body to breathe. This yarn is one of the most popular for knitting headbands, for wearing in cold weather.
In addition, the wool of South American llamas does not cause allergic reactions even on sensitive areas of the skin and does not prick the surface. 100% alpaca thread is very expensive, so it is usually diluted with other components.
Angora yarn, or "angroku" as it is popularly called, is made from the fluff of the Chinese rabbit breed of the same name. This thread is light, warms well and creates volume.
The only drawback of angora is that its pile quickly falls out when the item is actively worn, leaving just a warm but smooth surface of the fabric. 100% angora is also rare because it is expensive and can most often be found in the composition of other fibers.
Cashmere is considered an elite material for its softness, lightness, tenderness and subtle noble shine. Such yarn is made from the wool of a special breed of goats. Cashmere products are warm, light and beautiful, and the only drawback is the rapid rolling of the surface layer of the pile with frequent wear.
Merino is also the name for the material from the sheep from which this type of yarn is collected. Fine-wool animals live in Australia, and the thread from such material is very warm, airy and breathable. The wool of such sheep allows you to retain heat by holding air, and not by tightly fitting to the body. The thinner the merino hair, the warmer the product will be.
Mohair yarn is made from the wool of Turkish goats living in the mountainous areas of the province of Angora. The yarn is distinguished by its elasticity, shine and durability. Products made from this yarn practically do not wear out and, with proper care, can serve more than one generation, being passed down from grandmother to granddaughter or from mother to daughter.
To create decorative head accessories in the form of a headband, the following are suitable:
- viscose;
- flax;
- cotton.
Viscose is also called "artificial silk". This thread is made from recycled cellulose. Items made from this yarn are soft and pleasant to the touch. It absorbs moisture well and easily interacts with dyes, acquiring the necessary colors.
Flax thread is made from the fibers of the stems of the plant of the same name. The unique properties of the yarn are that it allows air to pass through well and is a natural antiseptic. In a linen bandage, your head will not get sweaty in the heat, and your skin will not become irritated from sweat. Also, linen products are long-lasting.
Cotton thread is made from ripe fruits of the plant of the same name. The yarn is environmentally friendly and hypoallergenic. Products made from it allow the body to feel comfortable even at very high temperatures.
To choose the right yarn for your future headband, experts recommend:
- Crumple the skein in your hands.
- Smell the yarn.
- Apply the skein to your face.
- Read the composition.
- Rub the end of the thread between your fingers.
- Pull the free thread gently to the sides.
When choosing yarn for a product, it is recommended to understand how it feels to the touch. To do this, you need to hold the skein in your hands and lightly squeeze it in your palms. This will help determine whether the material is prickly.
Before buying, you need to smell the skein you like. This is done to determine the naturalness of the fibers. If the skein has a barely perceptible chemical smell, then it is better not to take it.
When choosing wool for a bandage, some experts advise applying it to an open area of the face. The test will help you understand how the skin will behave when in contact with the selected material. If there is discomfort, irritation or slight itching at the point of contact, then the material is not suitable for the bandage.
Before buying, you should also read the composition of the threads indicated on the packaging. In addition, the manufacturer describes the density of the thread, its weight and what diameter of knitting needles or crochet hook you can work with it.
Rubbing the end of the thread between your thumb and forefinger can determine whether the material accumulates static electricity. The test will also show how quickly the yarn will lose its shape with frequent wear: the easier and faster the fibers fray, the less practical the material will be.
To understand how much the yarn stretches and how well its threads are twisted, you need to gently pull the free end of the skein with both hands to the sides. For a headband, it is important that the material stretches well and springs back.
After choosing the yarn, you can start selecting knitting needles, which can be separate or circular. The first ones are two separate metal, plastic or wooden tips of the same thickness, while the second ones are connected by the back ends with a fishing line. Separate knitting needles are more often used in needlework than circular ones. At the same time, the product knitted on the latter does not need to be sewn, since it turns out to be one piece.
To correctly select the diameter of the improvised tools in relation to the threads, you need to make a hole in a sheet of paper with a knitting needle and pull the thread through it. If it passes freely, does not clog or sag, then the knitting needles are selected correctly.
Schemes with description of works for beginners
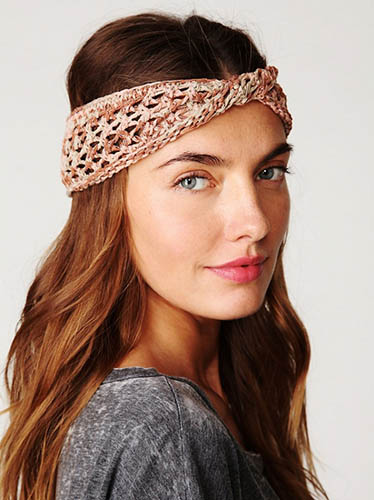
A knitted headband with an overlap will suit any fashionista, the main thing is to choose the right width of the product. For example, those with a square face shape should opt for an asymmetrical product, and those with a triangular face should choose a headband that completely covers the ears and forehead.
For round-faced women, designers recommend models that create volume. Women with an oval face will suit any head accessory.
Historians have established that in ancient Rus', only unmarried girls wore headbands. At the same time, the everyday or festive accessory had to completely cover the forehead, and it was tied at the back under the hair. Married women were forbidden to wear such a headdress, since they had to completely hide their head and hair under a kerchief or other headdress.
In the modern world, headbands of various models are worn by both show business representatives and ordinary citizens. This head accessory can be either double and very warm, or single, made with different types of knitting and decorated with brooches, buttons or other decor.
The top 5 popular models of women's headbands include:
- Double.
- Scythe.
- With a button.
- With a knot.
- Turban.
Some craftswomen, when creating headwear for their daughters or school-age girls, complement the headbands with ears or other interesting details. For an experienced craftswoman, the process of creating a fashionable accessory will take several hours, and beginners will need to spend several free evenings on it.
When creating any bandage with an overlap, use front and back loops, since the fabric is usually knitted with an elastic band with different pitches. To expand the fabric, use a yarn over, and to narrow it, knit several loops together.
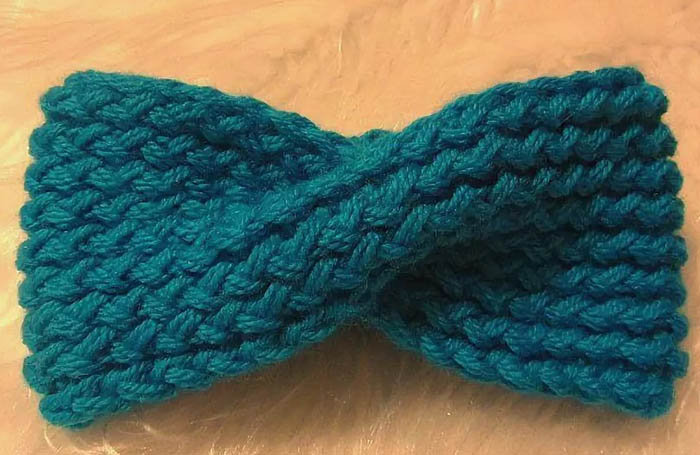
Double
A headband with overlapping knitting needles will help you stay warm in the cold season. A two-layer headdress is warmer than a single-layer one, and it is also not difficult to knit. You will need 0.05 kg of yarn and separate knitting needles of a suitable diameter.
The data is given for size 56-59. To knit a double warm bandage, you need:
- Cast on 32 stitches.
- Knit row 1, slipping the first edge stitch and alternating 1 knit stitch, 1 slip, leaving the thread in front of the work, 1 knit stitch. Repeat the pattern to the end of the row. Purl the last edge stitch.
- Form row 2 by knitting the front stitch - front stitch, and slipping the back stitch without knitting, leaving the thread in front of the work.
- Knit 70 rows of fabric as described in row 2.
- Close the loops at the end of the work.
Sew the bandage, forming an overlap in the front. To do this, divide the fabric in half along the entire length and sew the right end to the left, and vice versa.
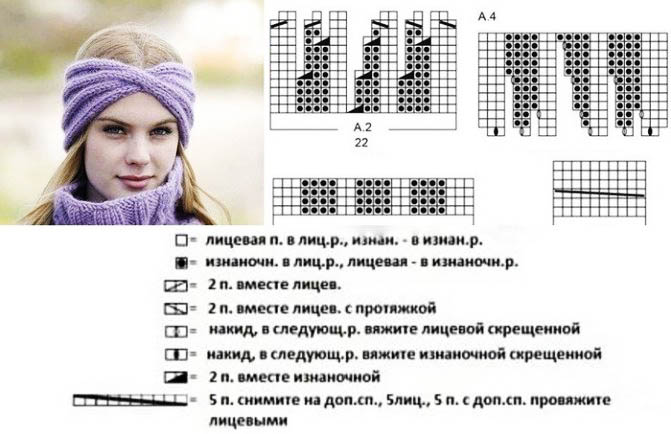
Scythe
The headband with a braided overlap also looks beautiful on the head. The headdress creates volume and attracts attention with its unusualness.
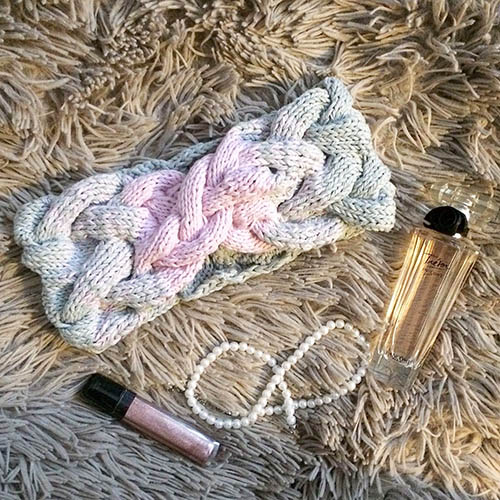
To knit a fashionable accessory, you will need 0.1 kg of wool with acrylic and 0.1 kg of angora threads. The work is done with 3 separate knitting needles of a suitable diameter, and colored plastic marker pins are used for marking. The headdress is formed using garter stitch, where the front ones are always front, and the back ones are purl.
To tie a headband with a braid, you need:
- Cast on 32 stitches on the knitting needles, folding the threads into 3 folds, where 1 is wool with acrylic and 2 are “angora”.
- Knit rows 1 through 6 in garter stitch, forming loops according to the pattern.
- Count 13 stitches from the right side in row 7 and mark them with a marker.
- Form a row by knitting 12 stitches to the mark with the front surface, and the remaining 18 - creating a braid. To do this, you need to remove 6 stitches and leave them behind the work, and knit the next 6. Then knit the set aside 6 front.
- Knit rows 8 through 14 in stockinette stitch.
- Form row 15 by slipping 6 stitches and keeping them in front of the work, and knit the next 6 stitches. Then knit the 6 set aside stitches.
- Knit, repeating the pattern from rows 1 to 15, 61 rows.
- Divide the knitting into 2 parts to get 12 and 20 loops.
- Knit each half separately, following the pattern on the fabric.
- Swap the braid and the fabric, for this the first one should be on the right, and the rest on the left so that the working thread is at the end of the row.
- Combine the halves by knitting a purl row so that you have 12 garter stitch loops and 18 oblique stitch loops.
- Knit another 60 rows in this way.
- Close the working loops.
The number of loops is indicated for a headdress size of 58-60 cm.
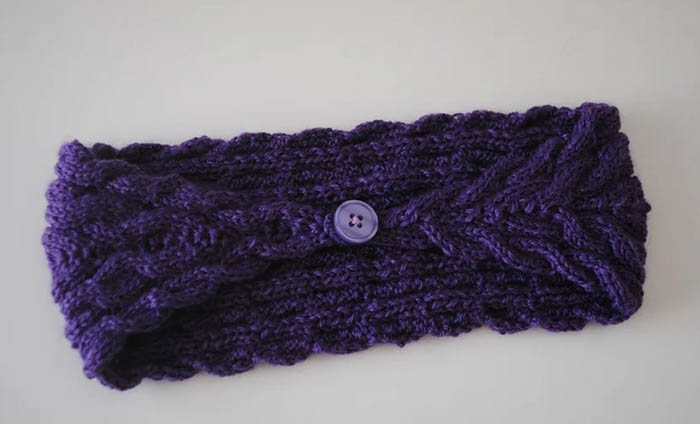
With a button
A headband with overlapping knitting needles can be decorated with a button at the point where the fabric crosses. The headdress will be unusual and spectacular.
For work you will need 0.1 kg of yarn and 3 separate knitting needles.
To knit an accessory with a button, you need:
- Cast on 26 stitches.
- Knit row 1 with a 1 x 1 elastic band, alternating front and back.
- Remove the initial edge stitch without knitting it along the entire length of the work, and make the last one purlwise.
- Knit row 2, following the pattern formed on the fabric.
- Create a 1 x 1 elastic band, following the instructions for creating rows 1 and 2, to create a 21 cm piece.
- Divide the stitches in half, placing the last 12 on a spare needle.
- Knit the 1st strip with a 1 x 1 elastic band for a length of 6 cm and put it on an additional knitting needle.
- Form the fabric of the second part in the same way as in the first.
- Place 2 pieces of fabric on 1 working needle so that they overlap.
- Continue knitting according to the pattern, shifting the pattern in the desired direction so that the elastic looks symmetrical.
- Create, thus, 21 cm of canvas.
- Close the working loops.
The final stage is to assemble the bandage. To do this, sew the ends together, and sew a large button of the selected color onto the front part, where it overlaps.
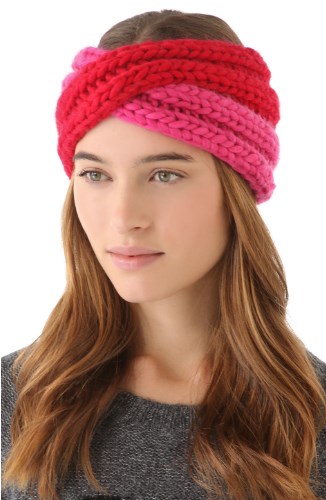
With a knot
The headband is knitted quickly and easily, where the overlap is made with a knot. The product will consist of 2 parts.
To work you will need 0.1 kg of the selected yarn, 2 separate knitting needles, a needle and scissors.
To knit a beautiful headdress, you need:
- Cast on 30 stitches.
- Form row 1 in garter stitch.
- Knit row 2 following the pattern on the fabric.
- Knit, alternating knitting of rows 1 and 2 for 50 cm.
- Close the loops at the end of the work.
- Cast on 8 stitches.
- Knit 6 cm of fabric with a 1 by 1 elastic band, where the front and back stitches alternate.
- Close work.
At the last stage, they begin assembling the product. To do this, the main fabric of the bandage is twisted in the center, forming an overlap, and the ends are sewn. On top, covering the shift of the fabric, a small part is placed and its ends are also sewn. The bandage is ready. Now it can be tried on and washed.
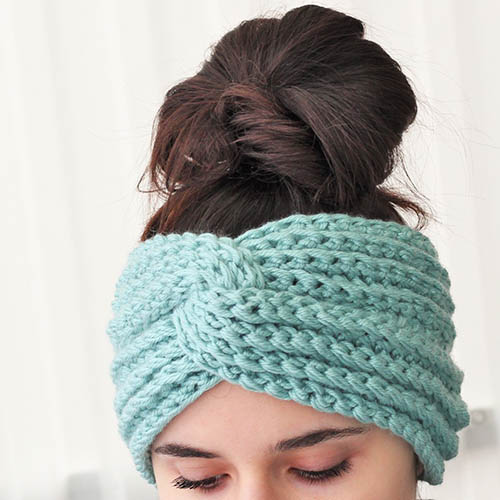
Turban
This fall season, the headband with a front overlap called "Turban" is especially fashionable. The difference from the usual knitted turban in this headdress is that it does not cover the entire head.
To work you will need a skein of thread weighing 0.1 kg, 3 separate knitting needles, a needle and scissors.
To knit a fashionable accessory, you need:
- Cast on 32 stitches.
- Knit row 1 with purl stitches, removing 1 edge stitch and knitting the last one also with purl stitches.
- Start with row 2 and knit the fabric with a 3 x 3 rib pattern, alternating 3 front and 3 back stitches.
- Knit 22 cm of fabric with a rib pattern, following the pattern.
- Divide the work into 2 parts, putting the 2nd half of the loops aside on a spare knitting needle.
- Knit part 1 with a 3 x 3 elastic band to a height of 6 cm and set the strip aside.
- Form part 2 in the same way as part 1.
- Make a front overlap from separate pieces.
- Move the halves onto 1 needle.
- Continue working, forming a 22 cm piece with an elastic band in 3 x 3 increments.
- Close the loops at the end of the work.
The finished fabric is sewn along the free ends.
Secrets for Beginners
A knitted headband with an overlap is a great idea for the winter period 2021-2022. The accessory is popular with many women.
Experts note that in order for knitting to bring pleasure and the result to please, you need to follow several rules, among which are:
- It is better to buy yarn with extra stock.
- Before you start working, you need to knit a sample.
- Before knitting, take measurements from the head.
- Work in good lighting.
- Do not take on a pattern that you have doubts about.
Experienced craftswomen recommend that beginners buy yarn for knitting elastic with a reserve. This is necessary in order to confidently start working and not worry about the fact that some of the threads may be damaged.
At the beginning of any work with knitting needles, you need to knit a small sample of the pattern that you plan. This is done in order to see how the product will look and how many loops will be needed to form a complete pattern.
To correctly calculate the number of loops, you need to take measurements from your head. To do this, simply measure the circumference with a centimeter so that it goes along the forehead and through the back of the head.
Knitting should always be done in good lighting. This minimizes the occurrence of errors in the execution of the pattern and the formation of the fabric.
Experts recommend that novice knitters not take on a pattern that is too complex or one in the precise execution of which there are doubts. This will save time and get the expected result.
Anyone can knit a headband with an overlap. Any pattern you like will do to create a fashionable accessory. This headdress will suit both adult women and little girls.
Video on knitting a headband with an overlap
Knitted headband: master class for beginners: