The train was invented in 1804. This event affected humanity on a global scale: people gained access to the most important territorial areas of the world, which became an impetus for industrial progress. The trains allowed for the rapid redirection of raw materials and finished products.
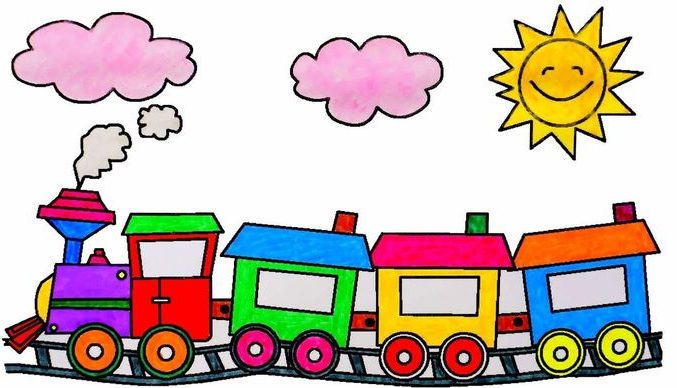
Trains are often depicted in children's cartoons as a means of transporting people or something. Step by step draw a cartoon train and a real locomotive Quite simple.
With a simple pencil
A train (drawing for younger children in pencil) is a coupled train consisting of carriages.
There are several types of wagons: some are used for storage or transportation, while others set the entire group in motion.
Pencils, paper and supplies
To draw a train you will need:
- pencil;
- eraser;
- sharpener;
- a sheet of white paper.
You can also use a ruler or any other available tools to create clearer lines.
Step by step process of execution
The step-by-step process of doing the job is simple:
- First, you need to draw a long horizontal line - it will be the middle of the train.
- Having stepped back a small distance from the top and bottom, you need to draw 2 more horizontal lines.
- The resulting long rectangle will connect all the cars together.
- It is necessary to determine the exact number of carriages for further drawing. In this case - 4, taking into account the driver's cabin.
- Using a ruler, you need to draw 3 rectangles of the same size. The corners of each rectangle need to be rounded.
- The moving carriage must be drawn on the side towards which the train is heading. The driver's cabin will be longer and lower.
- When the base is ready, you need to remove unnecessary elements using an eraser.

- Now you need to draw the wheels. For this, you can use a compass or small round objects.
- The wheels on the moving carriage will be larger, and on the remaining carriages, they will be smaller.
- You need to draw 2 circles on each carriage, and then draw another smaller one inside the larger circle.

- Using geometric shapes, you need to add a roof and a chimney to the driver's carriage.
- You can also show the release of steam using small circles.
- On each subsequent carriage you can draw any arbitrary picture.
The resulting image can be colored with felt-tip pens, pencils or paints. This drawing is suitable for children from 2 to 3 years old.
Step by step process of making cartoon train
Older children can be offered to draw a train in a cartoon style. It will be more realistic than in the previous version.
Step-by-step process of completing the work:
| Stage | Description of the stage | Image |
| 1 | First, you need to mark the border of the drawing - draw a rectangle that will slightly expand to one side. In this case, to the left. Instead of side lines, you need to draw diagonals. It is important that the upper vertical line is shorter than the lower one. The ends of these lines need to be connected with an arc on both sides. | 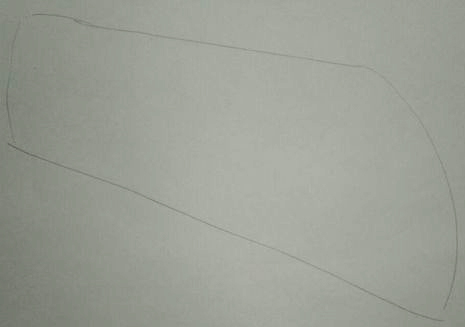 |
| 2 | When the outline is ready, you can start designating the carriages. Schematically, it is necessary to divide the entire train into 3-4 carriages.
For this, rectangles of different sizes are used (depending on the initial size of the train). At the bottom of each rectangle, you need to draw a wheel. On the leading car, you need to draw a pipe (as shown in the picture), from which steam comes out. You don't need rulers or compasses to draw, since the cartoon style doesn't require perfectly straight lines. | 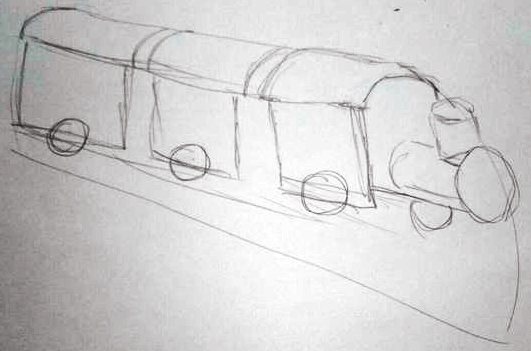 |
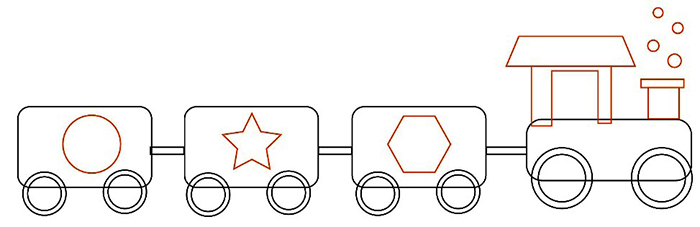
| 3 | The prepared drawing needs to be given some details. Inside each wheel, another small circle needs to be drawn.
Doors or windows need to be drawn on the carriages. It is also necessary to connect the carriages with a thin rectangle. On the front of the moving carriage you need to draw a small window, and also detail the steam pipes. | |
| To make the drawing clean, you need to remove unnecessary elements with an eraser. The outline of all the details needs to be corrected and additionally outlined with a simple pencil. | 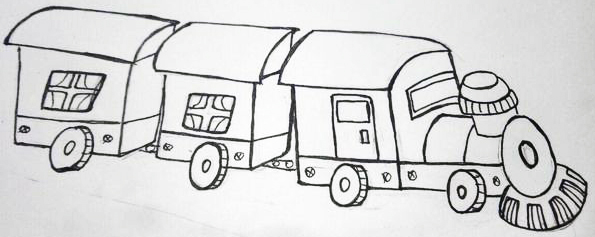 |
To make the drawing brighter, you can use a gel pen or felt-tip pen for tracing.
With colored pencils
The train (a drawing for children with colored pencils) can be drawn not only in profile, but also full face. This option is very easy to perform and does not require drawing a large number of details.
Pencils, paper and supplies
A set of tools required for work:
- simple pencil;
- ruler;
- sharpener;
- eraser;
- colored pencils.
You can choose any pencils. A small classic set will do for a simple train, but a bright cartoon train will require a large number of colors.
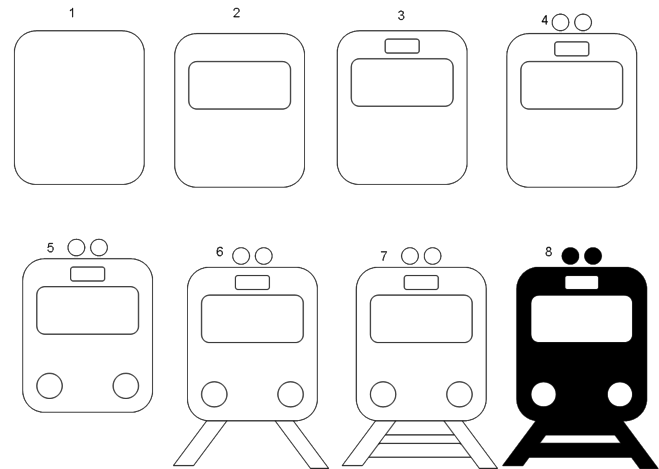
Step by step process of doing train full face
You can draw a train in 7 steps:
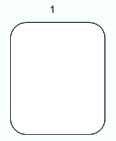
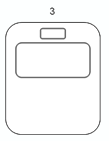
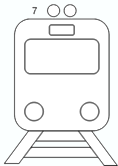
- First, you need to draw a tall rectangle. You can use a ruler for this. You need to smooth the corners of the rectangle manually. The extra elements need to be removed with an eraser.
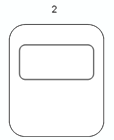
- Visually, you need to mark the middle of the train (vertically). A wide rectangle needs to be drawn slightly above this line so that it does not reach the upper edge of the train. The corners also need to be smoothed out.
- In the middle of the train (horizontally) you need to draw a small rectangle. It should be located above the previously drawn rectangle.
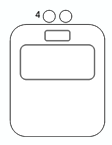
- Above the top edge of the train, you need to draw 2 small circles. They should be located approximately above the small rectangle.
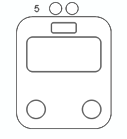
- At the bottom of the largest rectangle, you need to draw circles of the same size. They should be located on both sides of the train.
- When the train is ready, you can start drawing the rails. To do this, you need to draw 2 trapezoid figures in the direction from the train.
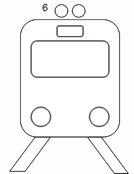
- It is necessary to draw sleepers between the rails. Their number may vary - depending on the selected interval and the length of the rails.
The template is ready, you can start coloring it.
You can color the finished drawing in different ways:
- The cabin can be painted in any color. Most often, black or gray are used.
- The rectangles that are located inside the driver's cabin must be colored with a blue pencil. You can use a blue pencil, pressing lightly on the lead.
- All circles in the picture must be colored with a yellow pencil.
- The rails can be painted a greyish shade. Sleepers are most often made of wood, so it is better to paint them brown.
- To add more naturalness to the drawing, it is necessary to add highlights with a white pencil on the rails, lamps and in the train windows.
The drawing will be clearer if you use felt-tip pens to outline the main details.
Step by step process of making a passenger train
Drawing a passenger train is also quite simple.
For children, the following method is best:
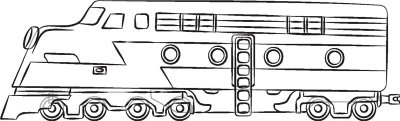
- First, it is necessary to depict the driver's cabin and carriages. A modern passenger train is a device that does not have a special pipe and a separate roof for the driver's cabin.
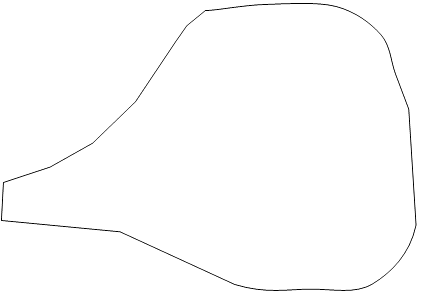
- The outline of the passenger train looks more like an inverted drop. Starting from the edge of the sheet, you need to draw a small vertical line, from which a long, upward-curved line will depart.
- From the bottom part, you also need to draw a line (straight, without bends). These lines must be connected at one point, focusing on the presented image
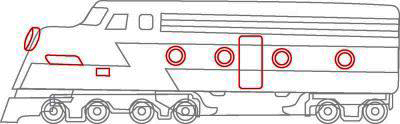
- When the basic shape of the train is ready, it is necessary to define the upper part of the driver's cabin and draw the window. From the inside it will be smooth, and the outside part - slightly rounded.
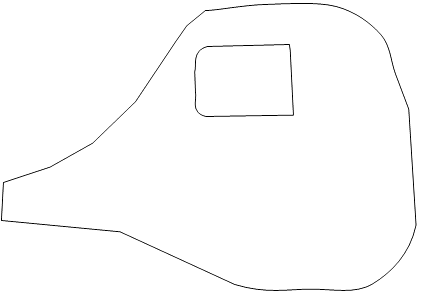
- The driver's cabin has two windows that resemble a wide rectangle with a small partition inside.
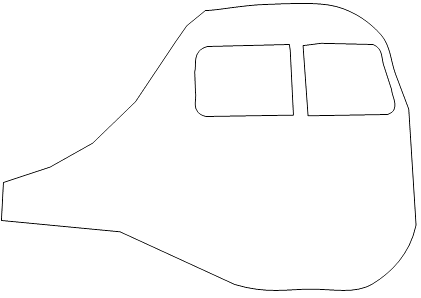
- There is a headlight between the windows. It should be depicted as a small circle. Below, under each window, closer to the bottom of the train, it is also necessary to draw one medium-sized circle.
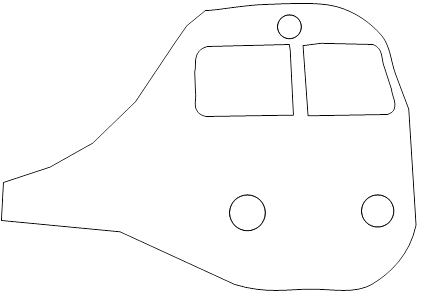
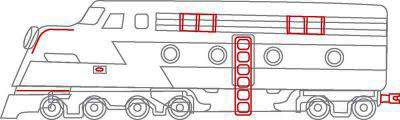
- On the rest of the train, you need to depict the windows as a solid rectangle that gradually expands.
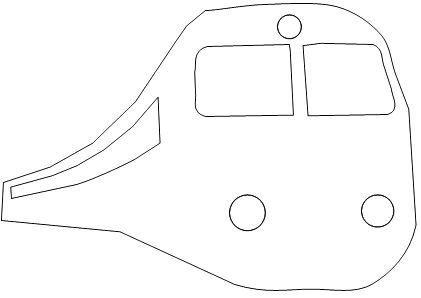
- Below, under the train, you need to draw the rails. They look like small rectangles.

To make it easier to color the drawing, you can outline the main elements with a black marker.
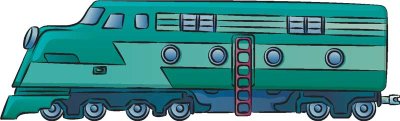
Once the template is ready, you can start coloring the drawing:
- Modern trains are distinguished by their color scheme: mainly gray, bronze and white shades are used. You can also see individual elements of bright colors.
- The driver's cabin and the main part of the train should be painted black. If desired, you can add stripes or other elements that can be painted a different color.
- The train windows need to be filled in with a blue pencil. It is recommended to use straight vertical lines for shading.
- The headlights need to be painted with a yellow pencil.
- The rails under the train can be painted with black and blue pencil, using various shading techniques.
For greater naturalness, you can apply highlights to the surface of the windows, the body of the train, and the headlights.
Gouache
The train (a drawing for children over 6 years old) can be painted using gouache. The paint allows you to create a bright, saturated drawing. When working with gouache, you need to remember the rules and recommendations.
Pencils, paper and supplies
A set of tools that will be required during the work:
- gouache;
- brushes and tools for working with paints;
- palette;
- simple pencil;
- eraser;
- white sheet of paper.
To paint the train you will need a small set of paints, as in the process you can mix several colors and get an individual shade.
Step by step process of making a train with gouache
Step-by-step process of completing the work:
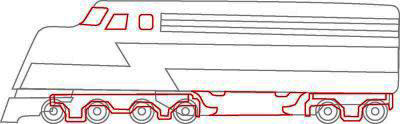
- First, you need to draw a long, rounded shape for the train body. At the bottom of the sheet, you need to draw 6 train wheels, 4 of which should be located in the front (closer to the nose), and the rest - in the back.
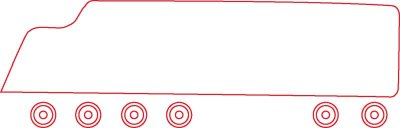
- Using geometric shapes, you need to draw a protective mechanism on the front of the train. It is a device that protects the wheels from damage.
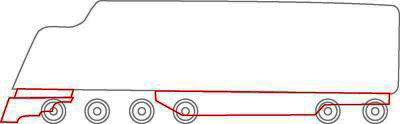
- On the surface of the previously drawn body, it is necessary to depict a large lightning bolt and thin rectangles on the side of the train.
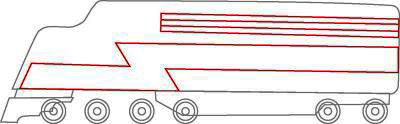
- Using square shapes, you need to draw the windows for the driver's cabin. At the bottom of the train, you need to draw the bottom edge of the cabin - as shown in the picture.
- In the middle of the side part of the train, you need to draw a tall rectangle - the train door. On both sides of the door (inside the previously drawn lightning) you need to draw 2 round windows.
- On the hood of the train you need to draw a round spotlight for light, and on the cabin - several small rectangular hatches.
- On the area of thin rectangles it is necessary to draw small windows. In the center of the door it is necessary to depict a ladder, and on the front part of the train add several lines. At the back of the train, not far from the wheels it is necessary to draw a connecting hook.
Using a sharp pencil, you need to outline the main elements of the drawing for convenience.
Using gouache, previously diluted in a small amount of water to a creamy consistency, you can paint the drawing:
- First, you need to mix green and white paint. Use the resulting shade to fill the lightning on the train body and the thin rectangles where the windows are located.
- The rest of the body, as well as the protective mechanisms, must be drawn in green.
- By mixing green and blue paints in different proportions, you need to paint over the additional elements at the bottom of the train.
- When the bulk of the elements are prepared, you can begin detailing. You need to use a thin brush.
- The bluish tint should be used to fill the inside of the wheels, as well as the train windows and the spotlight for light.
- The ladder located on the door needs to be painted red.
- The round and rectangular window frames should be outlined with a yellowish tint.
- Using black paint and a thin brush, outline all the elements of the train on the already dried drawing.
To make the finished drawing more accurate, you can use felt-tip pens at the final stage. It is important to wait until the paint is completely dry so as not to smear it.
Watercolor
The train (a drawing for children can be colored with watercolors), made with watercolors, will turn out rich. Watercolors are especially easy to work with.
Pencils, paper and supplies
Accessories:
- brushes and additional drawing tools;
- a thick sheet of white paper;
- ruler;
- eraser;
- sharpener;
- simple pencil;
- watercolor.
During the work process, it is important to remember the rules and recommendations for using watercolor paints.
Step by step process of execution
Step-by-step process of completing the work:
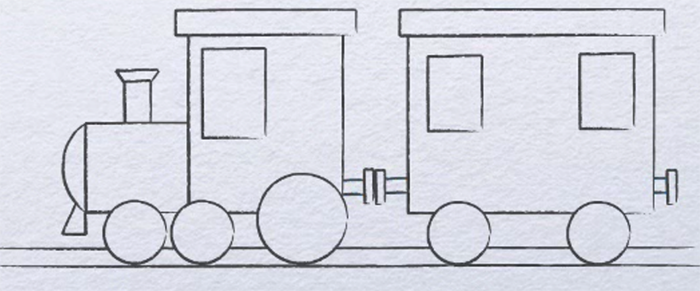
- First, you need to prepare rectangular blanks for the locomotive. Visually, you need to draw a line on which you need to place a small square. Next to it, you need to draw a rectangle (2 times larger). Having retreated a small distance, you need to depict the largest rectangle.
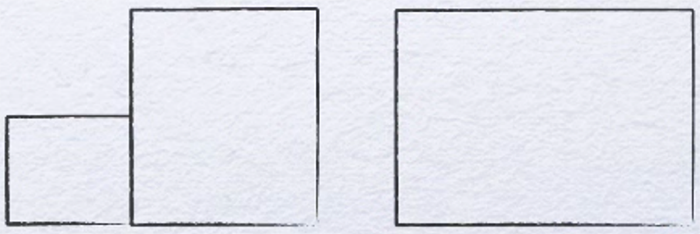
- Under the prepared figures, it is necessary to draw 2 vertical lines that will depict the railway.
- Wheels of different sizes need to be placed on the prepared road.
- To do this, you need to draw 2 small circles in the front of the train and 1 large one, as shown in the picture.
- The carriage also needs to be placed on a pair of wheels.
- Inside the driver's cabin and the carriage, it is necessary to draw windows in the form of small rectangles, and on the upper part of each rectangle, depict a roof.
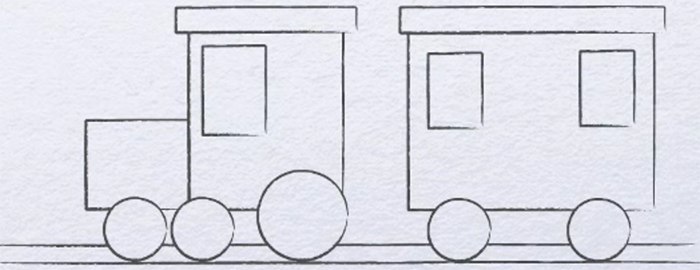
- Using geometric shapes, you need to finish drawing the locomotive pipe and the connecting couplings of the cars.
- If desired, you can add smoke and a picture of the driver in the window. You also need to draw a door between the windows in the carriage.
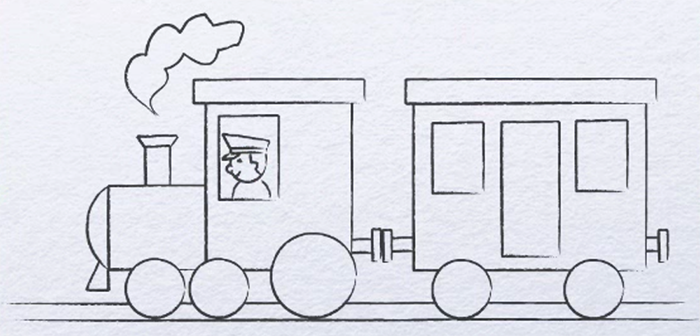
Drawing for children train can be drawn with geometric shapes - Using watercolor paints, you need to fill the driver's cabin and the body of the carriage with blue.
- When the paint has dried slightly, you can paint the windows with a bluish tint.
- The wheels, carriage couplings, door and roof of the train must be painted with grey paint.
- The bow and steam pipe can be highlighted with a bright accent - apply bright red paint to these parts.
- The railroad must be filled with black color.
- The smoke coming out of the pipe needs to be painted with a grayish tint.
The free space around the train can be painted as desired.
A train is a rather complex device that will be difficult for a child to draw. To simplify the task, you can use only paints, without preliminary sketching. For children, working with paint is an exciting work that is based not on straight lines and geometric figures, but on their own imagination and understanding of the world.
Video about drawing
Master class on drawing a train with children from 4 years old: