Glitter foamiran has already gained wide popularity among needlewomen, although it appeared relatively recently. Various crafts are made from it: flowers, New Year's toys, and other decorative items.
What is foamiran
Foamiran is a decorative, universal material similar to rubber suede. It has a foamy, flexible, elastic structure. It is used for various types of handicrafts. For example, floristry, scrapbooking, children's creativity.
This material is called by different names:
- fom;
- velours;
- EVA;
- revelour;
- foam rubber;
- plastic suede.
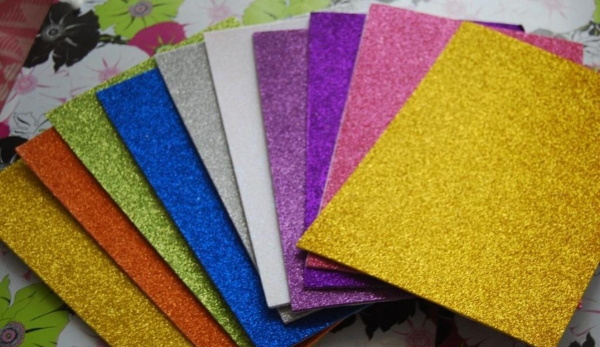
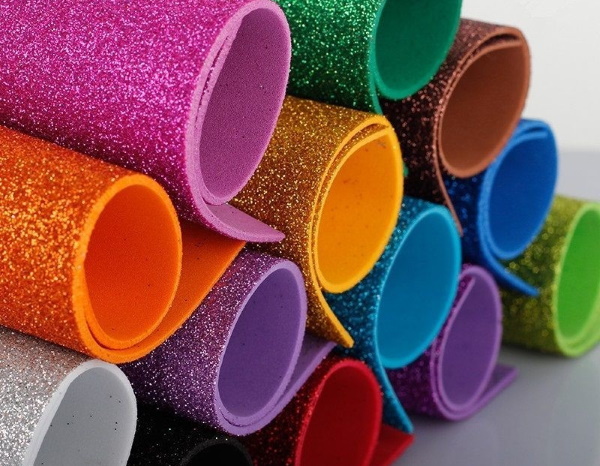
Foamiran is very soft to the touch, it resembles foam or a sponge that has been rolled out in a thin layer. It is easy to cut with scissors and a model knife. It becomes very pliable even from slight heating (contact with hands). Therefore, foam stretches well, but you should work with it carefully. It can tear from strong stretching. It is produced in thin sheets from 0.5 to 2 mm thick. They are soft, flexible, and have a fairly wide color palette.
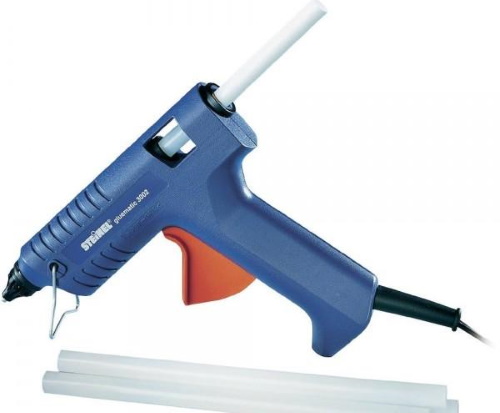
They are painted with acrylic and oil paints, tinted with watercolors, pastel chalks and even eye shadows. Blush and powder are also used. Plastic rubber parts are fastened with a glue gun, Moment, and super glue.
However, you should not use water-based or long-hardening fixing agents. More products are made from thinner fabrics. It got its name from a combination of the English word "foam" and the country of Iran, where it was first manufactured. Foamiran of Iranian production is considered the highest quality material.
This product is environmentally friendly and safe. It is made of a special polymer - ethylene vinyl acetate or EVA. It does not emit toxic substances. And finished foamiran products can be washed with water. Now it is also made in China, Korea, and other countries.
Advantages of glitter foamiran
The brilliant foam has a number of advantages:
- crafts made from glitter foamiran turn out very elegant;
- This type of reverb is relatively inexpensive;
- the sheets are small in size, somewhere around 40X40, 50X50 cm;
- glitter does not fall off when working with such flexible suede, and only a small amount is lost during further use;
- sparkling velour fabrics are produced in a wide range of colors (up to 30 colors);
- This type of material is suitable for creating flowers, New Year decorations, and children's crafts.
Features of working with the material
When creating various products from shiny velour, it is necessary to take into account some of its features:
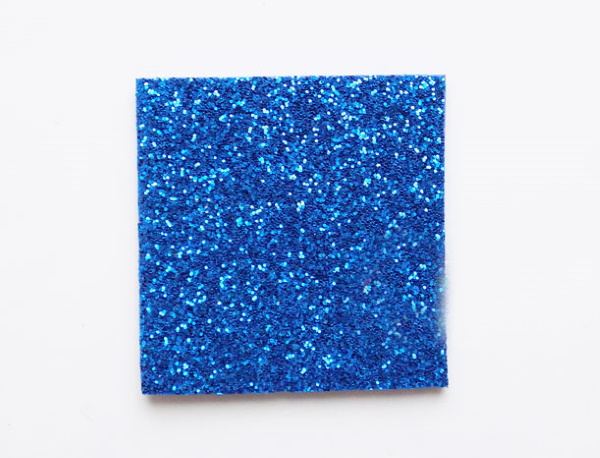
- The sheets have glitter only on one side. This should be taken into account when choosing a shape, flower or bow.
- Parts should only be heated where there is no glitter.
- Such material cannot be tinted or painted. Therefore, it is better to immediately buy canvases of the required shades.
- This type of foamiran with glitter has very thick sheets, it is less elastic. It is quite difficult to give it the necessary shape. Therefore, the flowers look a little rough. But such products turn out incredibly beautiful, festive.
What do you need to make crafts with your own hands?
Necessary materials and tools for creating original crafts.
You will need:
| Name | Description |
| gun/glue second, Moment | The products help to fasten various elements of products. |
| scissors / stationery knife | They are used for cutting out parts. |
| templates / patterns / stencils | They are used to cut out blanks of flowers and toys. You can print them yourself. |
| figured hole punch | They make small parts for them. |
| iron | It is used to form petals and other elements. |
| schemes | Products are created based on them. |
| molds, stencils, toothpicks | They are used to make various embossings. For example, veins on leaves. |
| various decorative elements | Beads, stamens, ribbons and other decorative details. |
| foamiran | |
| stacks or toothpicks, needles | Used to give shape. |
| other tools | Bulks, empty rods from ballpoint pens, tape. You will need wire, a pencil. And also a lighter, a stapler, other devices |
Master classes on creating beautiful things from foamiran with glitter. Patterns, templates
Glitter foamiran makes incredibly beautiful, spectacular crafts. Before you start creating original items, you need to study master classes that will help both beginners and experienced craftsmen to realize their creative ideas.
Flowers
Flowers of varying complexity are made from shiny foam.
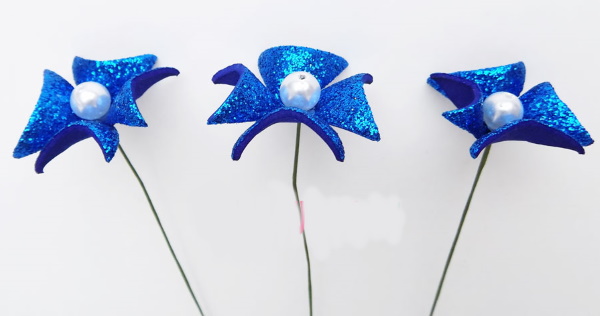
The simplest flowers
Step by step instructions:
- First, you need to make squares. They are cut out from glitter sheet measuring 3X3 cm.
- Then, 1 cut is made on the blanks from each corner.
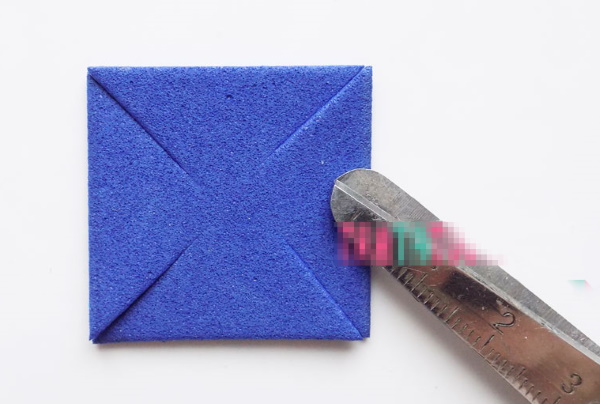
- They should not reach the middle of the square leaf.
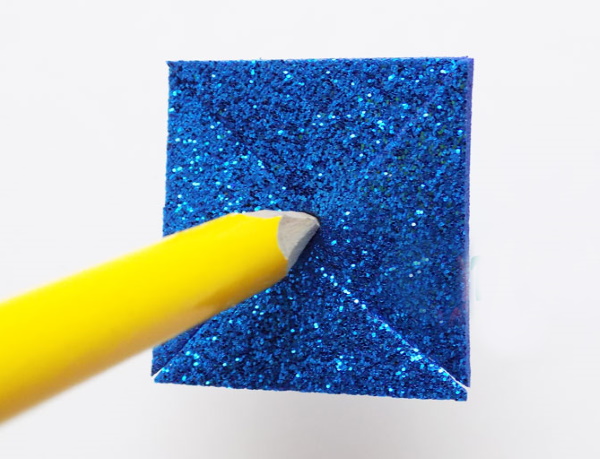
- Next, the center of the workpiece is pierced from the shiny side. You can use a simple pencil or a pen rod.
- Then the iron should be heated. The part is carefully applied to it, holding it on a pencil.
- Then you need to wait until the edges of the square curl up.
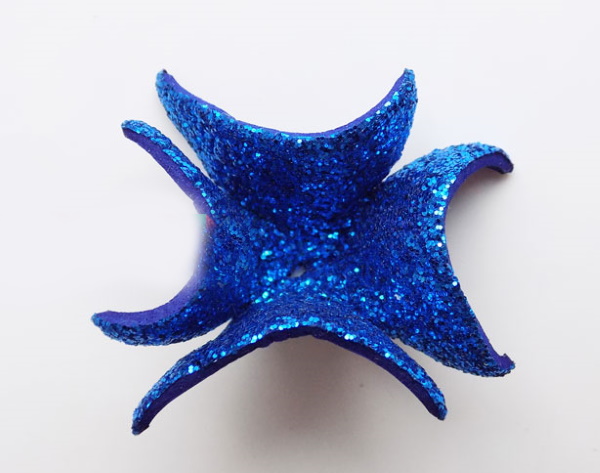
- Next, the workpiece is removed from the pencil.
- The petals are carefully straightened with your fingers and at the same time a small indentation is made in the center.
- It is necessary to make several of these elements, which will be needed for future flowers.
- Then the long floral wire should be cut into 3 pieces.
- Next, 1 wire rod is inserted into the middle of the flower.
- A bead is placed on its end, securing it with hot glue.
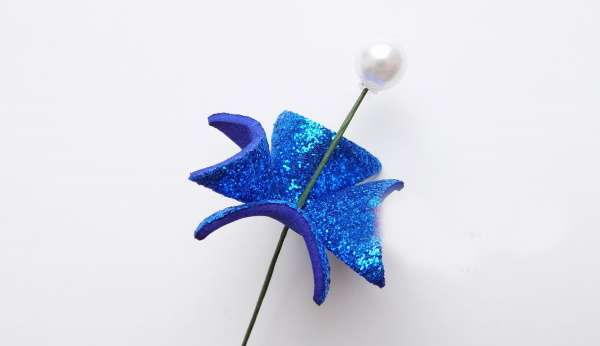
- Next, the bead is moved forward and secured again using a glue gun.
- Similar actions are repeated with the remaining blanks.
- Then the stems are wrapped with tape.
Advice! Thicker velour, such as glitter, needs to be heated longer to give it the desired shape.
Another option for creating simple flowers
This is a pretty quick way:
- First, squares with a 9 cm edge are cut out of the fabric.
- It is marked on the back side. Use a toothpick and a ruler. Then cut out with scissors.
- Next, take a stapler. Fold the square in half, leaving the shiny side outside.
- Then the part is fastened at the fold point on the sides.
- Then the workpiece is folded in half again in the other direction, and the folds are also fixed, excluding the center. The glitter side should be facing out.
- Next, the piece is carefully straightened, pressing through the middle. It is as if turned inside out with the shiny side.
- Then the lower part of the corner of the workpiece, where there is no glitter, is carefully heated over the flame of a lighter.
- After which its tip is flattened with fingers.
- The entire procedure is repeated with the remaining parts.
- Next, the prepared stamens are folded in half, fastened with hot glue, and shortened if necessary.
- Then they are glued into the center of the workpiece.
Tip: The material should be ironed again if it does not take the desired shape.
Rose
Crafts from glitter foamiran are created in the form of roses. For the leaves, take green canvas. For the bud, choose any shade of velour.
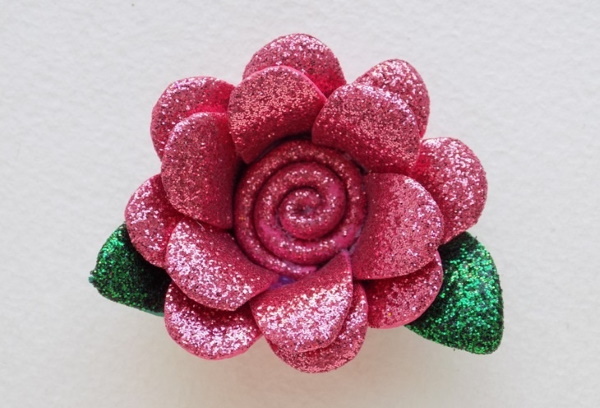
Manufacturing technique:
- First of all, cut out a strip 20 cm long and 3 cm wide.
- Next, take a ruler with a toothpick. Using them, mark 2 parallel lines on the plain side
- Leave a distance of 1 cm between them.
- Then, cuts are made along the markings, leaving about 1 cm from the edge.
- Next, from these 3 strips, a braid is woven along the entire length.
- Its ends are fixed with a glue gun.
- Once they are secured, they are trimmed with scissors.
- Then the rose begins to form from the beginning of the strip.
- One of the corners is folded over and secured with hot glue.
- Next, the braided spikelet is rolled up, periodically dripping glue. The result is a rose.
- Then cut out 2 green leaves.
- They are glued to the underside of the bud.
- A flower like this can be used to create various decorations.
Advice! It is quite difficult to cut out the details by eye, especially for beginners. Therefore, it is better to do this using a template. The stencil is applied to the sheet and traced with a toothpick. Also, well-sharpened sharp scissors with thin blades will simplify the whole work.
Hairpins
Plastic sparkling rubber makes elegant hairpins. Such accessories are worn at weddings, graduations, and other special occasions.
Simple hairpin decoration
Step by step instructions:
- The first thing you need to do is prepare the patterns.
- They cut out petal circles with a diameter of approximately 2.5 - 4.5 cm. Sepals and leaves are also made. Foam is taken in any desired shades.
- Then the petals are ironed at maximum temperature.
- Each part of the circle is heated separately.
- When it is well heated, it is shaped using a bun.
- Next, 3 small petals are processed with a boulder from the back side.
- Then the leaves are heated on an iron in the same way.
- They are heated one by one and then pressed into the mold.
- Next, the entire procedure is repeated with the sepals, heating and processing each element separately.
- Then, from foil measuring 5x5 cm, form a base in the shape of a drop.
- This part is glued to the wire.
- Then the small petal circle is wrapped around the foil piece.
- It is well covered with petals, placing them every other one, so that the base is not visible. In this case, the glitter side should be on the outside.
- The following elements are turned with the shiny side up.
- Then attach another petal circle, gluing it to the base of the bud.
- Next, the remaining parts are attached.
- The elements are arranged in a checkerboard pattern.
- The desired number of buds is made using the same principle.
- Next, the collected flowers are attached to the hairpin.
- Then they are glued onto the sepals and leaf.
- Crafts made from glitter foamiran are “put” on a comb, hair clip or headband.
Tip! Small details, such as flowers and snowflakes, can be made using a figured hole punch.
Rose from shiny velour for elastic
Step by step manufacturing process:
- First of all, you need to print out the patterns or templates of three-petal circles for the rose. All the details are cut out according to them.
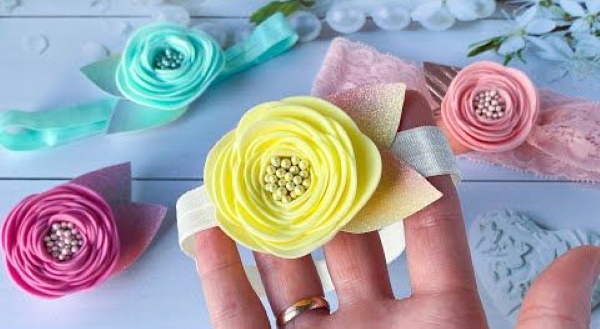
- Their sizes are selected depending on where the flower will be used later.
- For this product, blanks with a diameter of approximately 3.5, 4.5 and 6 cm are taken.
- Each of these parts must be cut out in 2 pieces.
- Foamiran can be chosen in any color.
- Next, the leaves and sepals are cut out of green velour. Or foam of a different shade is used, as your imagination suggests.
- Notches are made on these blanks.
- Then all the petal parts are processed in turn on the iron. The temperature is set to the maximum.
- Attention! They are applied with the matte side.
- The petals are slightly stretched, the centers are deepened, and the edges are curled.
- For small parts, the middle is pressed with a sponge.
- Then all actions are repeated with the sepals and leaves.
- Next, these hot elements are placed shiny side down on the mold, pressing with a sponge. They are held until they cool down.
- Then the flower is assembled. The center of the bud is formed from small circles.
- Each petal is raised vertically, then twisted and glued.
- They are folded with the wrong side inside.
- Circles of the following sizes are attached to the closed bud, placing them with the glitter facing up in a checkerboard pattern.
- The petals are adjusted, the edges are curled outward using a toothpick as needed.
- Then the sepal is glued to the flower.
- Next, the elastic band is attached to the base of the rose with hot glue.
- Then it is secured with leaves, attaching them one by one.
Advice! You can skip the sepals for this accessory so that the decoration doesn't look too heavy. And 3 leaves will be enough. They will cover the place where the elastic band and flower are attached.
You can make several similar roses and then "plant" them on the stems. You will get a bouquet that will decorate any interior.
Headbands
A simple headband is decorated with glitter foamiran, creating a very elegant accessory for a children's New Year's party.
Headband with flowers
Beautiful headband.
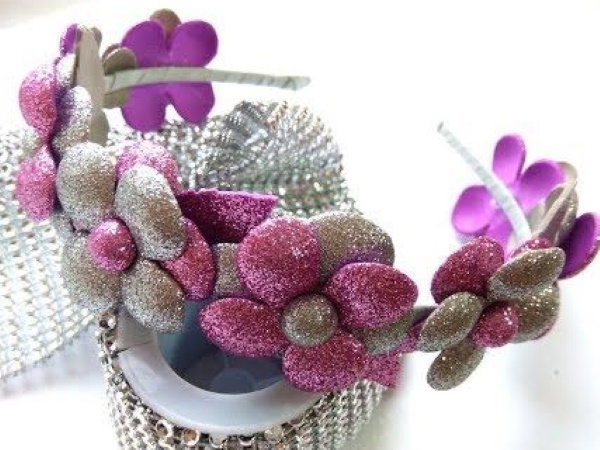
Master class:
- First, 4x4 cm squares are cut out of silver and pink foam.
- Then each piece is folded in half. Then it is turned over and folded again.
- Next, cuts are made on the blanks along the marked contours on all 4 sides.
- They are not cut all the way through.
- Then each edge is rounded with scissors, giving it the shape of a petal.
- This is how you get blanks with 4 petals, similar to clover leaves.
- Next, they are processed with an iron, pressing each petal to it in turn.
- Then they are pressed with a bun from the inside.
- Then the piece is turned over and the middle is pressed in a little.
- Next, cut out pink and silver squares measuring 2x2 cm.
- Circles are cut out of them.
- Then this round blank is heated on an iron.
- Then it is processed with a bobbin from the reverse side, giving it the shape of a half-bead.
- Next, from the same velour fabrics, cut out several leaves of approximately 2.5 cm in size. They are not heated with an iron.
- Then they cut a long narrow ribbon of silver shade. They wrap it around the headband, periodically gluing it in several places.
- Then flowers are made by placing petal circles on top of each other. They are distributed in a checkerboard pattern.
- One element consists of 2 parts. A half-bead made of foamiran is glued to the center.
- Next, the flowers are attached to the headband with a glue gun, and then small leaves are glued between them.
Headband with stars
You need to take blue and silver glitter foamiran.
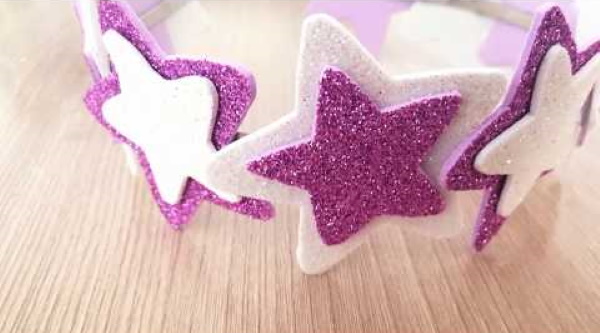
Instructions:
- First, the sheets of plastic rubber are turned over with the matte side facing up.
- Then, star shapes are pressed onto them using a metal cookie cutter.
- Then all the details are cut out with scissors.
- Next, the elements are glued onto the rim with an overlap.
- The ends of the accessory are covered with textile rubber to make it more comfortable for the head.
Advice! The stars can be made double or triple by cutting out slightly smaller pieces. They are simply glued together, alternating colors.
Valentine hearts
Souvenirs in the form of hearts look very impressive.
Valentine on a stand
Step-by-step master class:
- To begin, cut out a heart from cardboard and red foamiran using a template.
- Then the middles of these blanks need to be cut out.
- Next, make a slightly smaller cardboard heart. Use it to make parts from white sparkling foam.
- The result is something like frames and solid figures.
- Then all the cardboard parts are covered with velour blanks on both sides.
- Then, 1 small red heart is glued onto the snow-white piece on each side.
- Next, the prepared elements are edged with beads or braid on the outside and inside.
- Then a pair of butterflies are cut out according to the pattern. The red part is glued to the white part.
- Then cut 2 thin strips from the velour. These will be the antennae. Twist their ends. Glue beads or pieces of foam to them, as desired.
- Next, make a cardboard stand. Cover it with plastic suede.
- Then the hearts are attached to the stand. The souvenir is decorated to your taste.
Valentine on a stick
These hearts are used to decorate gifts, bouquets, and as bookmarks.
Manufacturing stages:
- Two identical heart parts of arbitrary sizes are cut out of foam.
- They are first drawn by hand or using a pattern.
- Next, each piece is pressed with fingers, making a small indentation on the plain side.
- The edges of the blanks are not completely coated with glue.
- They are then fastened together, leaving a small hole.
- Next, the hollow heart is stuffed with synthetic padding.
- Its edges are sealed, but a small hole is left.
- A wooden skewer is inserted into it.
- Next, small satin bows are attached to the bases of the hearts.
- Then the edges of the heart are cut with decorative scissors, creating a zigzag relief.
Christmas tree decorations
Crafts made from glitter foamiran with a New Year theme are very festive and elegant. You can make a whole collection of balls, icicles, and cones.
Christmas tree balls
Step by step instructions:
- First of all, you need to cut out 8 circles from lilac and silver glitter velour. The diameter of the blanks is 6 cm.
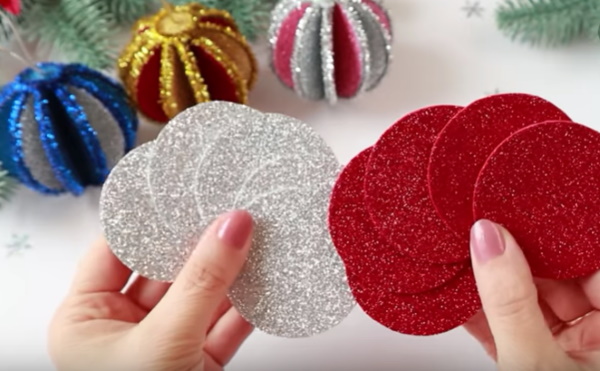
- Then they are folded in half and cut.
- The cuts are coated with hot glue from the edge to the center of the semicircle.
- Then they need to be folded in half, gluing them with the shiny side inside.
- The resulting blanks resemble “cones”.
- Next, 1 element is made from 2 such parts of the same shade.
- They are smeared with hot glue along the fold line and then fastened together.
- You get 4 semicircles with multi-colored “pockets”.
- Then each semicircle is coated with hot glue along the fold line, and the pieces are connected together, alternating tones.
- Then the part is stretched like an accordion. This is one half of the ball.
- The other part is done in a similar way.
- Then both assembled parts are glued together. The "pockets" are straightened out.
- Then, a rectangular strip is cut out of plastic rubber in the color of one of the elements of the ball.
- A decorative thread is glued to this tape, and the strip is twisted like a “snail” with the sequins facing outward.
- Next, the edge of the rolled part is coated with glue.
- Then it is attached to one side of the toy.
- Then they make another similar detail, but without a thread. It is glued to the other end of the ball. It is decorated with beads, braid, lace.
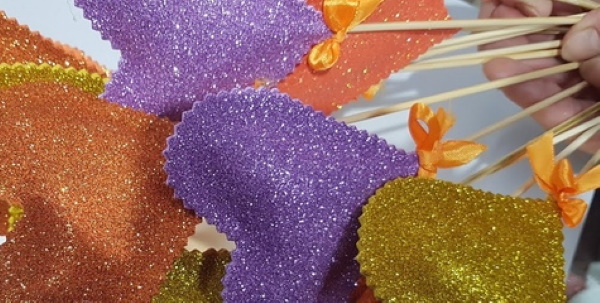
Icicle on the Christmas tree
This elegant Christmas tree decoration is easy to make with your own hands.
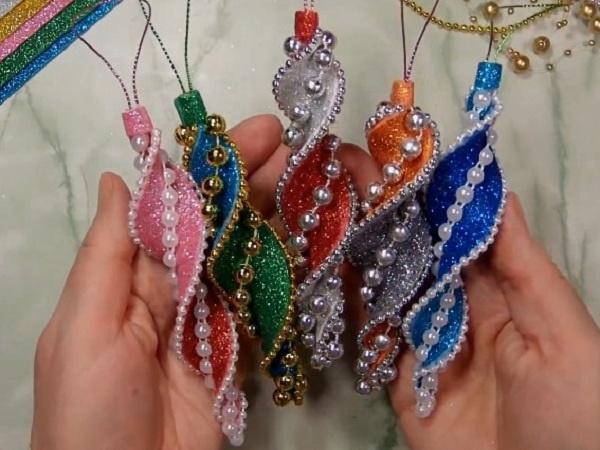
Progress of work:
- First, strips 2 cm wide and 10 cm long are cut from shiny plastic rubber. Sheets of two shades are taken. For example, orange and gold.
- Then each strip is folded in half lengthwise. The ends are cut off, rounding them with scissors.
- Next, the prepared element is attached to a strip of a different tone.
- Then a bamboo stick is inserted between them.
- Then the excess foam is cut off along the contour of the rounded part.
- The workpiece is twisted using an inserted stick until it takes on a spiral shape.
- Next, the protruding end of the skewer is cut off, leaving 1 cm.
- A decorative thread is glued to it. Then it can be wrapped with a small piece of foamiran.
- Then the edges of the icicle are coated with glue and decorated with small beads.
Other ideas and instructions
Glitter foamiran allows you to create various crafts.
Bow
Step by step instructions:
- First of all, you should cut out strips of 18X4 cm, 3X1.5 cm, and 2 squares of 6X6 cm from the sheet.
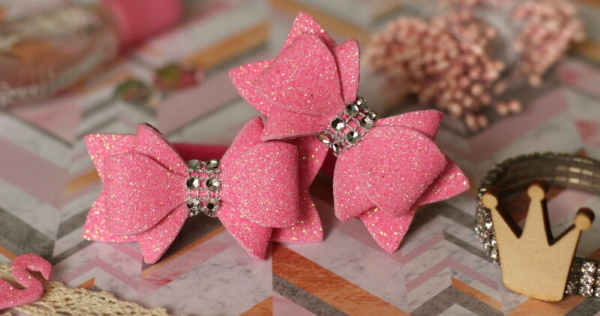
- Then the square pieces need to be cut diagonally.
- Next, the long ends of the triangles are folded to their short tops and glued.
- Then the wide strip is folded in half and glued at the joint.
- Then the ends of the folded triangles are cut off.
- They are attached to a wide strip, placed at the same distance from the joint.
- Next, the outline of the glued triangles is cut out on this strip.
- Then a narrow strip is glued across between them.
- You can attach an elastic band or a clip-on hair clip to this bow.
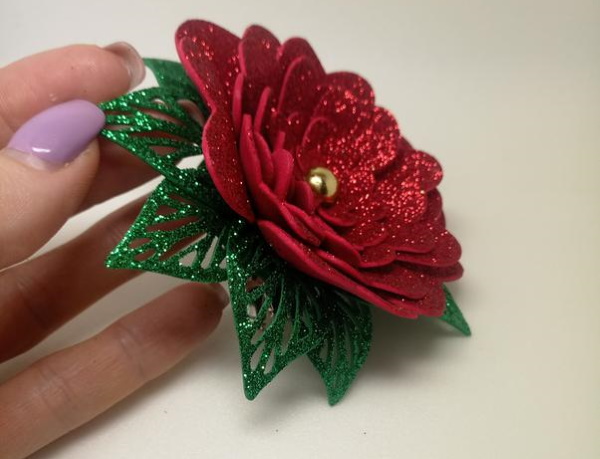
Christmas flowers
Poinsettia made of glitter foamiran will decorate your home for New Year and Christmas.
Step-by-step master class:
- To begin, the flower pattern and 5 petals must be printed on a printer.
- Then all the details are cut out using these paper templates.
- The material can be chosen in gold, red or other shades.
- Next, the petals of the large flower are slightly curled upward.
- Then the same thing is done with the remaining elements, and their ends are glued together.
- Then individual petals are glued onto the flower, placing them in a checkerboard pattern.
- Next, cut out a small flower with a diameter of approximately 1 – 1.5 cm and glue it in the center.
- Small petals are attached on top of it to create volume.
- On the back of the decoration, a thin loop made of the same velour is attached. The accessory is hung by it.
Glitter foamiran is a versatile material that is easy to use in creativity. It makes very effective and beautiful crafts.
Video about crafts from glitter foamiran
Making flowers from glitter foamiran: