Paper vine is considered a new type of handicraft that appeared as a result of mixing Korean weaving and wickerwork from paper strips. The main tool is a thin, elongated and flattened tube, which is rolled from a rectangular sheet of newspaper, magazine or notebook paper.
From such blanks, with the help of step-by-step master classes with photos, any crafts are successfully made: a magazine rack, a stand for dishes, a bread box, a bag, a basket and various animal figures.
Preparing the tubes
Crafts made from paper vines should remain durable for a long period of time after assembly. Therefore, before starting work, it is necessary to prepare the material by twisting tubes from magazine or newspaper sheets.
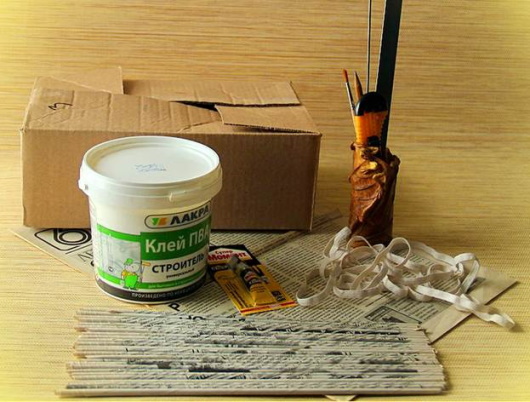
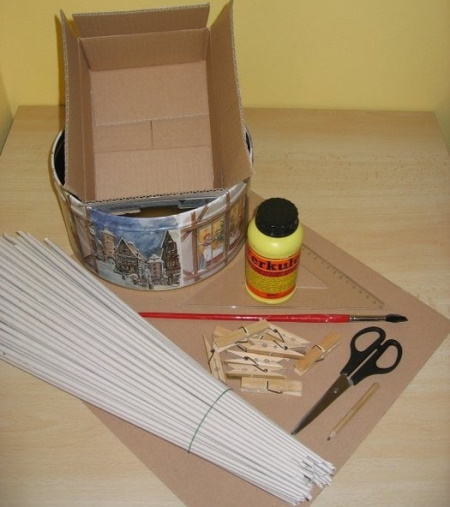
This requires paper sheets, PVA glue and a stiff wire or an elongated thin knitting needle. The diameter of the wire with the knitting needle should be approximately 2 mm.
Twisting
To roll paper tubes, you need to do the following:
- Cut the sheets into pieces of the required size. Cut the spreads into several parts.
- The aspect ratio should be 1:3 or 1:4 respectively. Divide the page into several parts corresponding to the specified aspect ratio.
- Take a strip of paper and a knitting needle. Twist the corner of the sheet around the knitting needle, rolling it into a tube. Fix the end of the strip with a drop of glue.
- Place the paper at a 45 degree angle relative to the knitting needle. This is necessary so that the workpiece is sufficiently dense and bends well.
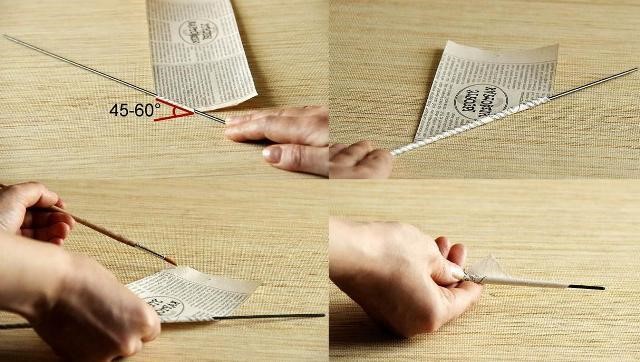
After the twisting is complete, the spoke must be removed. The result should be a not very long tube, which must be spliced with the rest of the blanks at the work stage.
When twisted correctly, one end of the workpiece should be thin, the other thick and hollow inside. To connect the two tubes, you need to add a few drops of glue to the thickened part, inserting the other tube with the thin end.
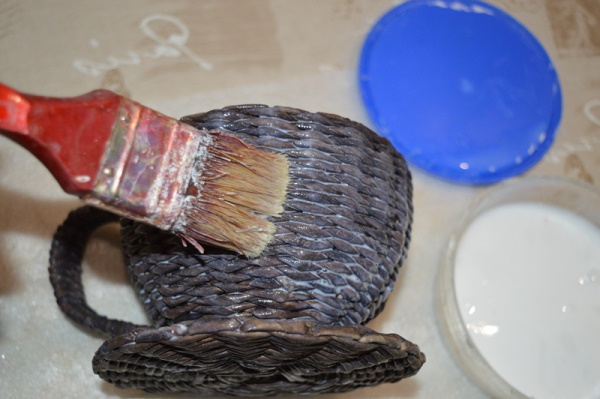
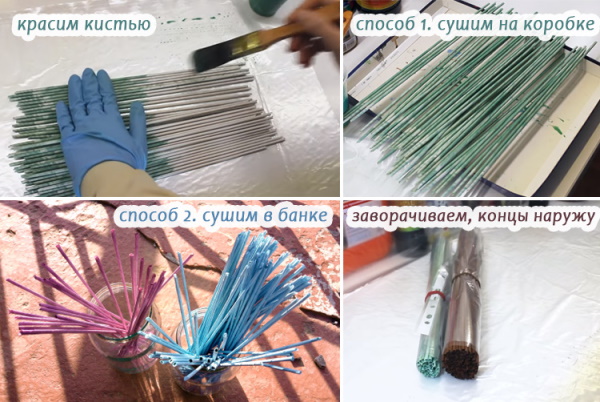
Processing methods
To make the work easier, the tubes can be woven using a rolling pin. In this case, they will be flat, which makes it easier to pull them between the rows. To improve the appearance of the twisted blanks, they can be painted.


For these purposes, it is recommended to use acrylic paint, because it is dense, dries quickly, has no smell and does not spread. You can also use water-based moisture-resistant stain.
Acrylic varnish, to which you can add coloring pigment, goes well with paper. Thanks to this, the workpieces will be less sensitive to moisture.
It takes a long time and is not very convenient to paint thin tubes with a brush, so it is advisable to use a long tray where you can place all the blanks. You need to pour paint into the prepared container beforehand, lowering the twisted tubes into it.
To dry, the surface of the table must be covered with polyethylene. Before weaving, the paper vine can be sprayed with water from a spray bottle so that it bends better.
Weaving technique
To create unusual patterns, ready-made newspaper tubes can be crossed and twisted in various ways.
All options are used in regular wickerwork, and the selection of instructions is carried out depending on the type of craft. Thanks to some methods, you can make a small napkin holder, a pencil holder, a decorative mill, a brownie for the front door, or an owl figurine.
Other options include weaving a coffee table, a deep fruit basket, and a container for shoes or things.
The main advantages of newspaper vines are considered to be the following factors:
| Advantages | Brief description |
| Ease of preparation | Compared to willow vines, which must be peeled, boiled and soaked before storage and use, paper tubes do not require much time to prepare, and they are very easy to roll. |
| Ease of painting | Paper can easily be painted in any shade. |
| Easy to purchase | If you don't have special paper for handicrafts, you can use regular newspaper sheets to create a box or basket. |
| Ease of weaving | Real vine is very hard, unlike newspaper twists. Because of this, it is much more difficult to work with. If you handle the elastic and flexible branches incorrectly, they can cause damage to the skin. Paper blanks do not create discomfort when working. |
| Price of material | Paper sheets, unlike wood, are considered the cheapest material. At the same time, it can be taken for free by preparing several newspaper advertisements. |
Straight weave
Crafts from paper vines can be decorated with direct weaving. This technique is considered the simplest and is suitable for beginners.
To do this, an odd number of blanks are laid out on the table surface and one additional one is used. The wide side of the tube is fixed by the edge and they begin to interlace vertically. One strip should be on the outside, the other on the inside. In this case, it is necessary to build up the working part as needed.
When making a tray, after completing a row, the workpiece needs to be wrapped and go in the opposite direction. When creating round baskets or a flowerpot, you need to move clockwise, all the time increasing the tube.
In layers
With layered weaving, the structure is much denser and more stable. This technique involves using an odd number of rigid blanks, one of which needs to be traced around 4 posts on the left side, bringing it up.
Each subsequent blank should be braided around 4 posts, moving the beginning 1 post to the right. The ends of the blanks that stick out must be cut off, braiding the structure with a pigtail.
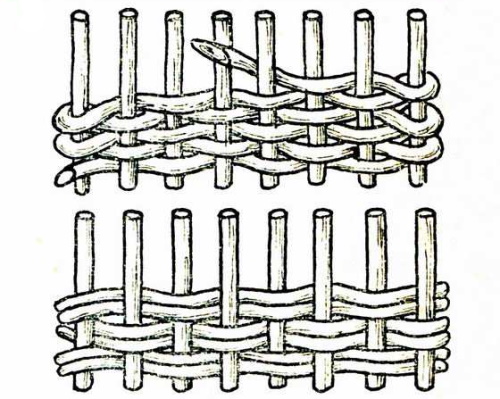
In rows
The paper craft, woven in rows, resembles the direct technique of weaving vines, but it is decorated with various blanks. Initially, the first tube should be woven around the posts, as with direct weaving.
When the workpiece is finished, it is not built up, but another one is used. All the parts are braided with it, starting with the second one. The third tube is used to braid starting from the 3rd workpiece. The procedure continues until a certain height is reached.
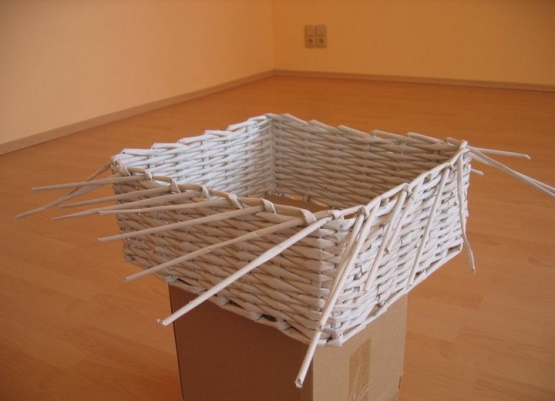
Square
Crafts made from paper vines, decorated with square weaving, are created as follows:
- Place the required number of guide blanks at a distance of 1.5 cm from each other.
- Fix the working piece with the wide edge at the bottom on the right side, and weave through 1 piece to the end of the row.
- Go back and weave the posts in a checkerboard pattern. Once the weaving is complete, braid the structure using rope technique for better strength.
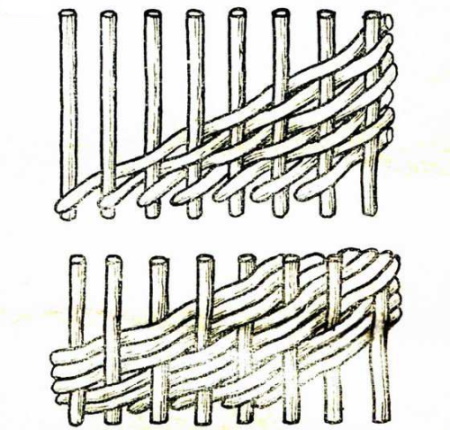
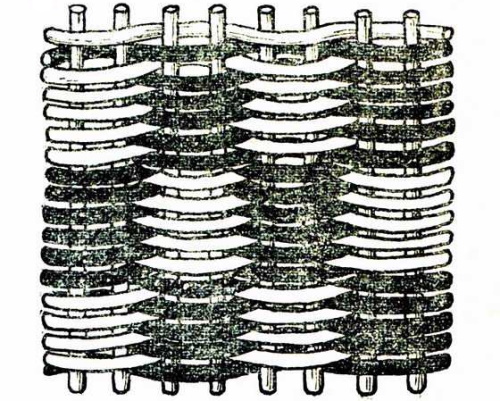
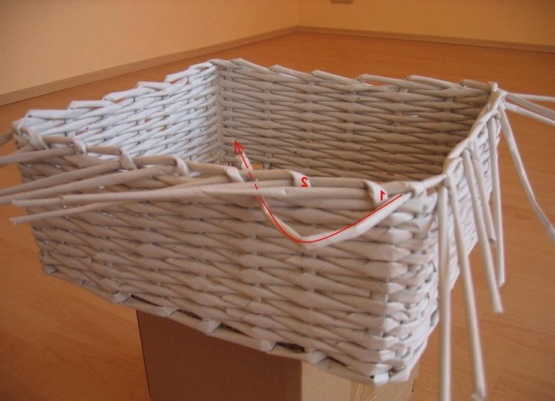
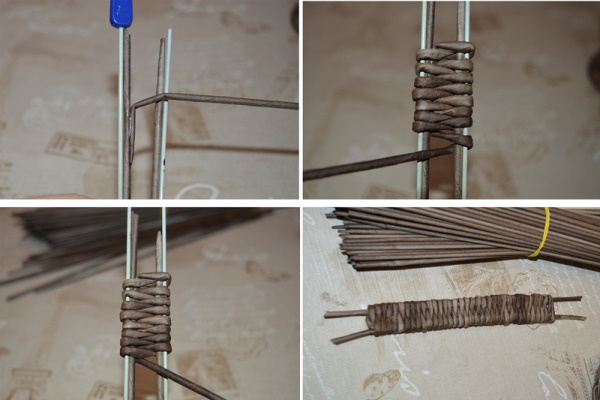
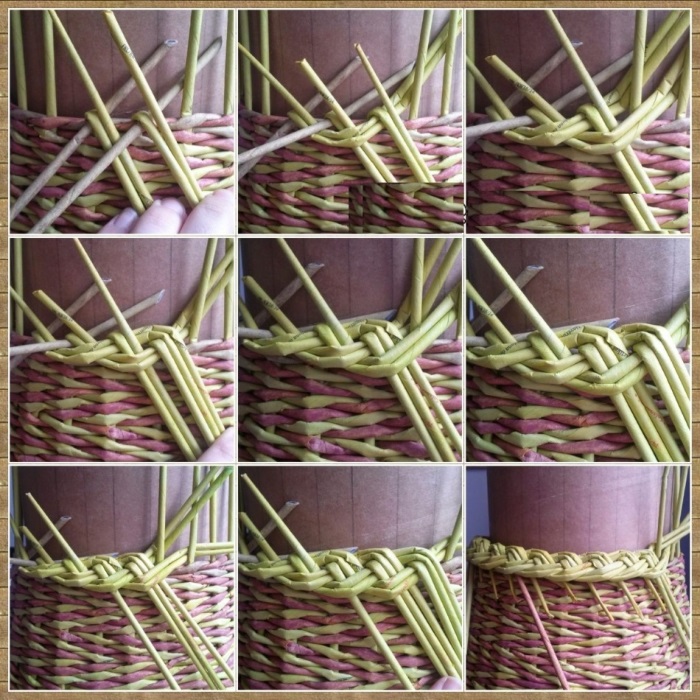
With a rope
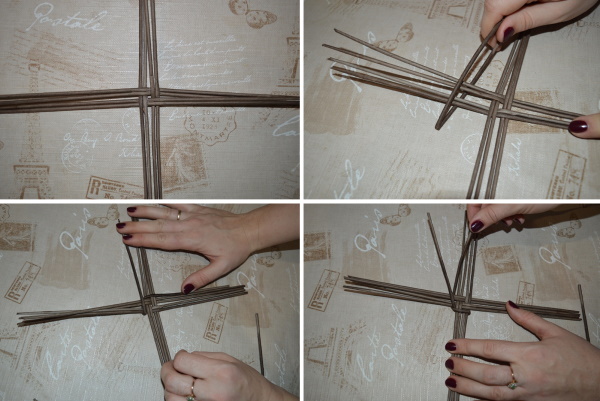
Crafts from paper vines can be woven using the rope technique. This will require about 5 or 7 racks. Initially, you can fix several pieces of thick wire on a piece of thick foam.
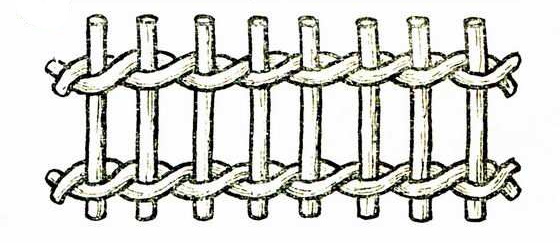
The technique of rope weaving is as follows:
- Take 2 pieces and place them crosswise between the two outer posts. One piece should be in front of the work, the other behind.
- Fixing the workpieces in the intersection area with one hand, bend them with the other, going around the next stand. The part that was in front should be behind and vice versa.
- Repeat the fold, going around the next post until the row is complete.
Thanks to this weaving technique, the structure will be strong and dense. To give the ornament a normal appearance, it is necessary to take an odd number of posts.
To complicate the work, you can use 2 parts at once, bending around 2 posts. However, you will have to count the number of posts so that the second row remains offset. Due to this, the drawing will be more interesting. Also, 2 ropes that are directed towards each other, and not intertwined in one direction, look beautiful.
How to weave different products
Crafts from paper vines can be made using both simple and more complex weaving techniques.
Beginner craftsmen are advised to first familiarize themselves with simple master classes, which describe step-by-step instructions for creating products. This is required in order to avoid mistakes and not deform the paper tube.
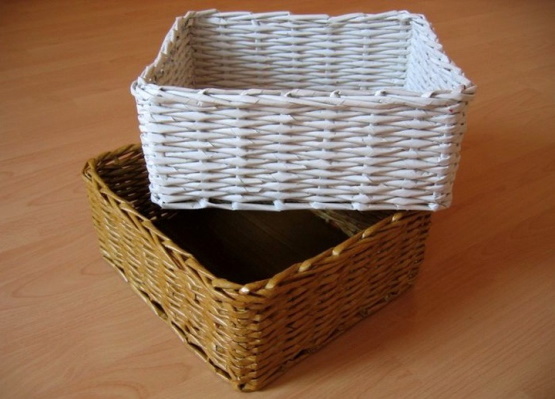
Basket
A simplified craft that beginners can handle is a small round or square basket. It can be used to store fruits, various small items, or as a vase for plants. The vine must first be rolled up and treated with paint or stain.
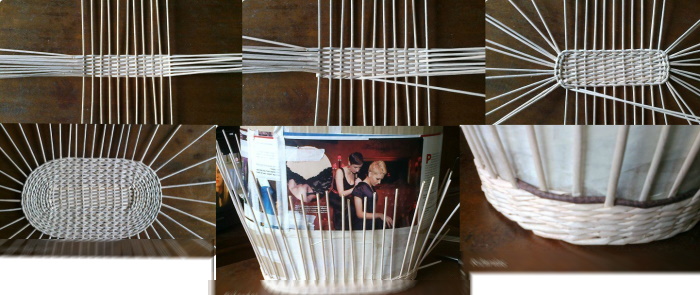
Step-by-step instructions for creating the craft:
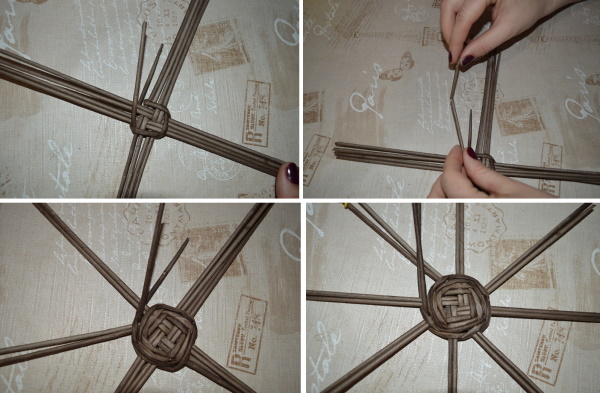
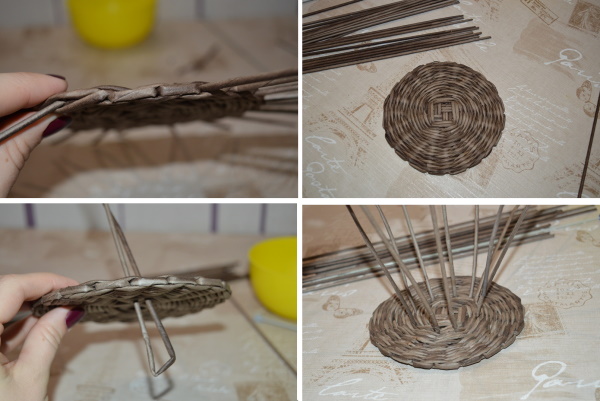
- Cross 10 elongated blanks. Lay 4 vertically, 3 horizontally. Weave the blanks in a circle with 11 pieces. Fold the last tube in half, passing one edge above the stand and the other under it. Weave 2 rows, bending the edges of the stands to the middle.

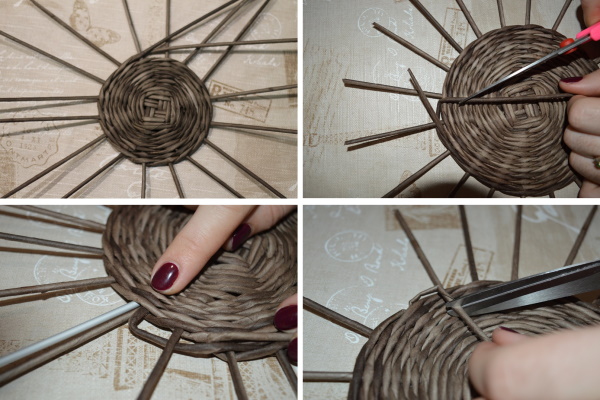
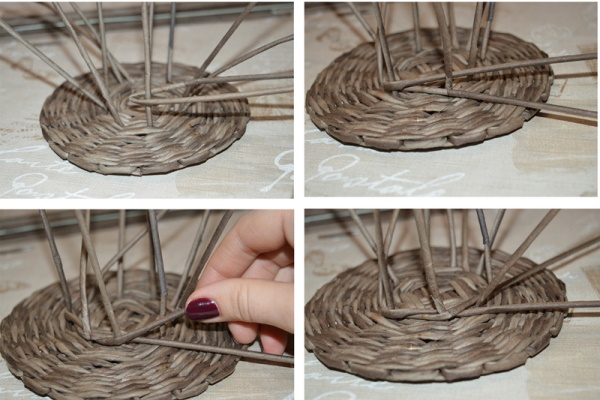
- Braid the bent tubes with the chosen pattern. Shorten the remaining edges of the work pieces and stands and tuck them inside with an elongated stick, creating an edging.
To create handles, you do not need to pre-cut the ends of the parts. You need to save 3 pieces from each side, combining them and intertwining them with 2 parts. The surface of the structure can be varnished or painted.
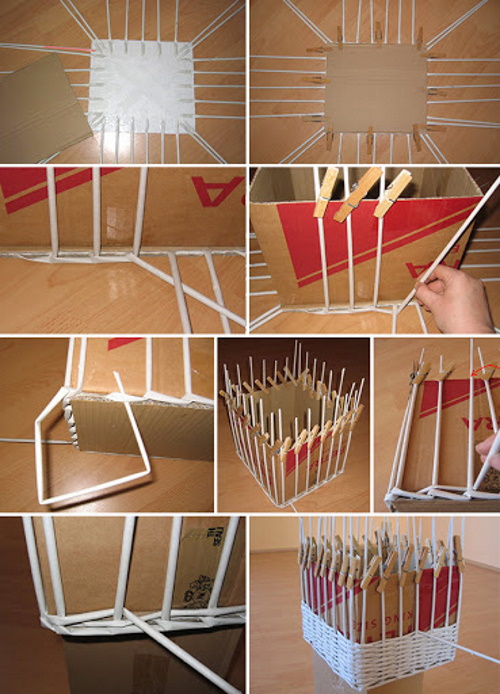
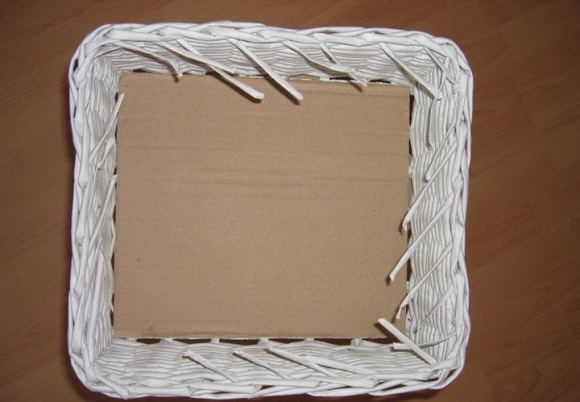
Bag
You can create a bag with an oval base from paper tubes. It is recommended to make a blank from a cardboard sheet in advance, which will make it easier to check the parameters.
Step-by-step description of weaving the product:
- To create the base, lay 8 strong blanks horizontally and interlace with 12 parts vertically. Weave the prepared rectangle, smoothing the corners using the rope technique. Thanks to this, the product will be much stronger.
- To decorate the walls on the sides, bend the parts upwards and evenly weave with the prepared pattern. To maintain the required shape, place liter glass containers or other weighting containers of the required size on the bottom of the product. Weave the walls from 45 - 60 rows.
- Make handles from several posts.
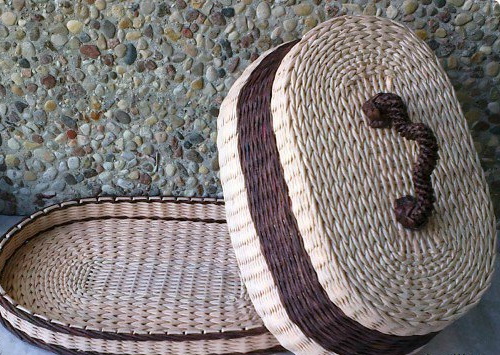
Breadbox
Without a lid, a bread bin is woven like a regular square or round basket. To make a more complex design, you will need to twist about 500 parts, making a base with a lid that will look like a hemisphere.
Instructions for creating a decorative product:
- To make the frame, cross 16 tubes together.
- Braid 16 posts in 3 rows using straight weaving. Decorate the remaining volume using rope technique.
- Weave the bottom on 16 base blanks and walls from 5 rows using the rope technique.
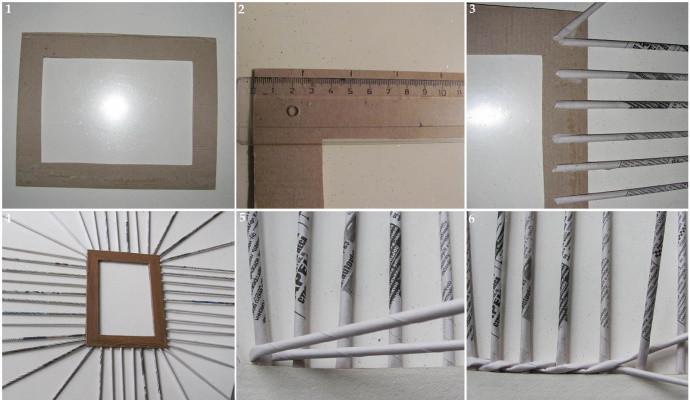
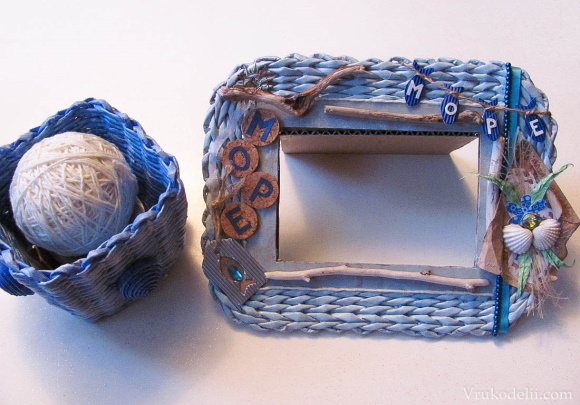
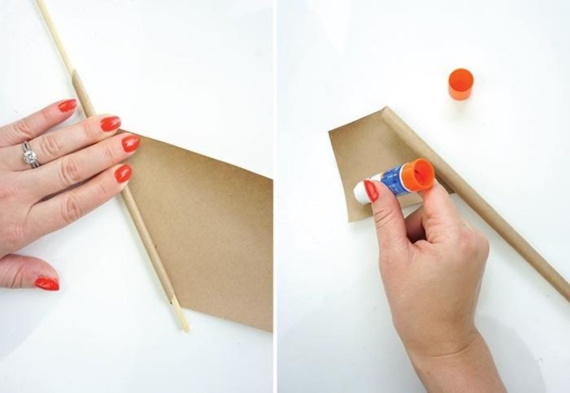
Photo frame
A plastic or wooden photo frame can be decorated with paper vines.
 To do this, you need to adhere to the following algorithm of actions:
- On the back side of the frame, make markings every 2.5 cm.
- Fix a stand to each individual mark.
- Decorate the corners of the photo frame with vines at a 45 degree angle using glue and leave to dry.
- Fold the working paper blank in half, placing it behind one of the tubes.
- Weave the halves of the racks together, wrapping them around the second tube.
The weaving should be continued and each of the two edges of the stand should be extended as needed. Once the decoration is complete, the photo frame can be varnished.
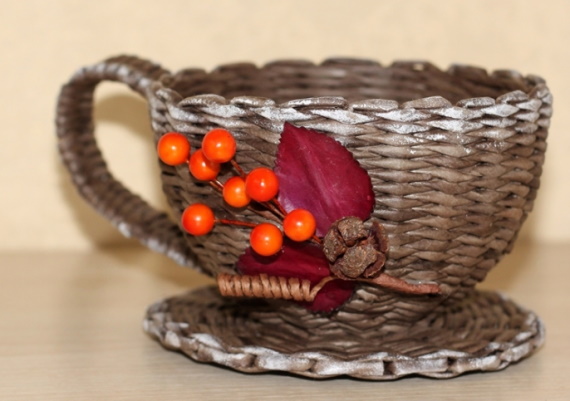
Cup and saucer
To decorate the interior of the kitchen, you can make a wicker cup and saucer.
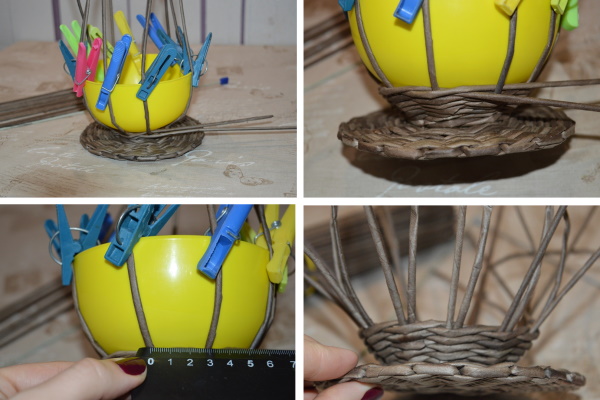
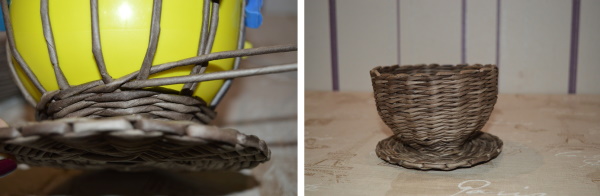
To do this, you need to follow these step-by-step steps:
- Place 6 tubes on the table. Place 6 additional blanks perpendicularly on top.
- Fix the parts together with glue, placing the cup on top.
- Moving in a circle, weave the working pieces around the tubes.
- Once you reach the top of the cup, trim the protruding edges.
- To create a handle, weave a braid from 3 blanks and glue it to the base.
- To decorate the saucer, place 4 tubes crosswise, fastening them together with glue. Place the saucer on top.
- Weave the first 3 rows with the working piece, through 2 posts. Then start weaving through 1 piece.
To make the edges of the cup and saucer more durable, they can be decorated using the rope weaving technique.
Dish stand
A coaster for dishes can be made by both an adult and a child. This will require no more than 50 pieces of blanks. It can be used as a kitchen tool or an original souvenir.
The method of weaving a coaster for dishes is described below:
- Lay out 12 blanks crosswise. Braid the tubes in a circle, starting from the base of the intersection. The rows should go in a spiral, gradually increasing the radius.
- Divide the parts according to the degree of increase in the circle of the product. At the end, braid 1 base stand with row blanks.
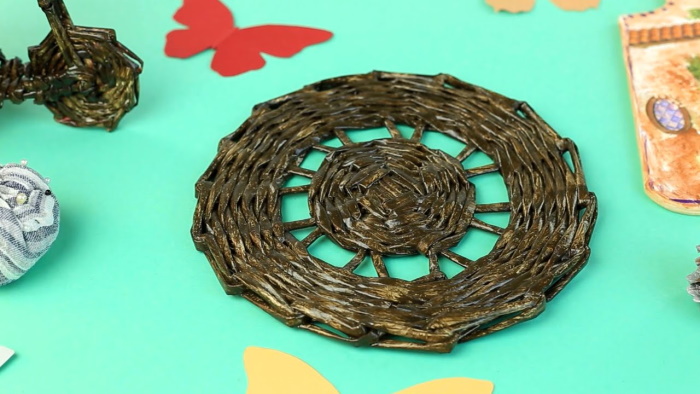
- When the required diameter is reached, shorten the tubes, hide the edge of the rows, having initially soaked the cut areas with glue.
- At the end of the work, paint the surface of the structure.
If the stand is to be used for a hot dish, it is not recommended to varnish it.
Tips and tricks
Almost every master has his own secrets of creating the ideal weaving technique. Their number is directly proportional to the experience of the specialist and the number of decorated products.
General tips and recommendations that will be useful for beginners when mastering weaving techniques:
- The distance between the posts should be no more than 2 cm. If you do not observe the specified distance, the weaving will not be very strong and will be loose.
- You need to work with the racks carefully, without bending or pressing them during the work stage, because the appearance of the structure will depend on this.
- To avoid gaps or holes in the pattern, after each row it is recommended to straighten the posts and press the woven rows tightly against each other.
- It is advisable to hide the areas where the blanks are joined in the weaving. The ideal place is considered to be in the center between the posts.
- If the paper vines are not too flexible and are compacted enough, they can be sprayed with liquid from a spray bottle, keeping them in a plastic bag for about 20 minutes. Thanks to this, the newspaper tube will be more obedient and will not leave creases. When it dries completely, the workpiece will be strong again.
- If you over-moisten the tubes, they will become shaggy at the weaving stage. To prevent this problem, the blanks should dry out slightly. Then you can return to work.
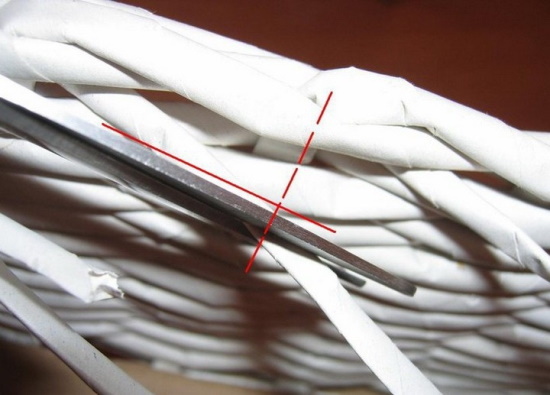
- It is advisable to shorten the edges of the bent tubes inside the structure.
- The stump that remains from the cut tube can be painted with the solution used to coat the paper blank. You can use stain or colorant. In this regard, it is recommended to leave a small amount of coloring composition so that you can hide small errors in the work.
- The bends must be made with freshly extended tubes, which will give the finished structure a neat appearance. After weaving is complete, the old posts must be cut off, inserting wet fresh blanks and bending them. They will lie down normally and not bend.
- If the old tubes have a normal appearance after weaving, it is recommended to spray them with water to moisten them, so that it is easier to bend them.
- In rare cases, the area where the racks are glued may remain unpainted. This is because PVA glue does not allow the coloring pigment to penetrate into the layers of paper.
To prevent the problem, it is advisable to glue the twist with a glue stick. If there are unpainted edges of the parts, they must be shortened during further extension.
- When making your first craft, it is advisable to strictly follow the step-by-step instructions, taking into account all the nuances.
Weaving is a modern type of handicraft that has its roots in the distant past. Women and men who lived in the tribes of Europe, Asia, Australia, have been fond of this craft since ancient times.
Today, paper vine weaving is widely used. The advantage of this type of handicraft is the low cost of materials and ease of work. The crafts are quite beautiful, durable and practical.
Video about weaving
Paper vine crafts: