Papertole is an ancient art form believed to have originated in Venice in the 18th century, where three-dimensional figures were created and placed under glass to decorate tabletops.
In recent times, this craft has been refined to a remarkable level of art using advanced techniques of shaping and creating sculptures. Today we describe step-by-step master classes in this technique., allowing everyone to touch the world of art.
What is papertole technique?
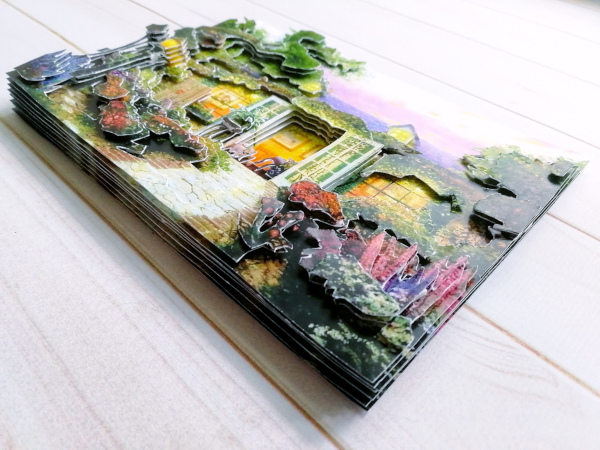
Unlike lightboxes, where three-dimensional images are placed at a distance from each other to create shadows and quality lighting, papertole is a technique of assembling and connecting paper shapes to recreate the depth of an image.
There are many theories about the origins of the craft of Paper-Tole or 3-D decoupage:
- The Japanese have been shaping and folding paper into beautiful patterns for centuries, turning a two-dimensional sheet of paper into a three-dimensional creation.
- The French and Venetians refined these techniques into an art form called "Vue d'Optique," which many consider to be the equivalent of the modern method of using paper sculpture to create three-dimensional or paper-and-roof paintings.
- Later in the United States, papertole became a major commercial craft. Developed in the 1930s, craftsmen had to be as inventive as possible and use the resources that were at hand.
At that time, it was common for families to receive several Christmas cards with the same picture from charities.
After the holiday season, many of these cards remained unused, providing an ideal opportunity during the cold winter months to create 3D paper paintings using the resource of multiple copies of the same image.
The craft quickly evolved from layering techniques to true paper sculpture:
- Initially, 3-4 copies of identical prints were used.
- Later, this direction began to develop and began to include a larger number of copies, which made it possible to increase the detail of the finished paper “roofing felt”.
- 3-D Paper Tole has become an exciting art and craft of depth, contour and perception.
- Then they began to use five or six copies (and in some cases much more, depending on the complexity) of the same print.
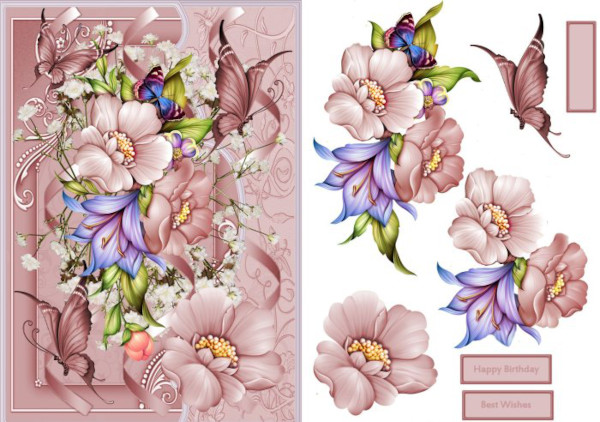
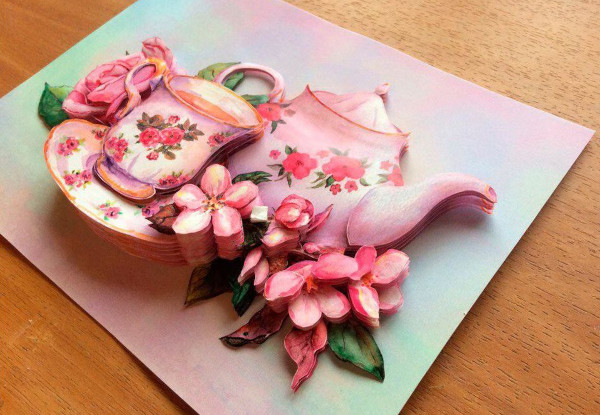
A three-dimensional or paper painting is created by cutting out certain parts of different prints of an identical image.
The three-dimensional effect is then created by shaping, layering and gluing the parts to the main print using neutral-curing silicone. To highlight this, varnish or glaze can be applied to individual sections of the paper web.
There are 3 main areas in paper that an artist must visualize when looking at a 2D image:
| Background | The background needs to be thought out first, as it is the basis for creating the picture. | Natural perspective is achieved by correctly and skillfully shaping each cut piece before gluing. |
| Medium shot | Intermediate layers of paper that emphasize the depth of the drawing. | There is a big difference between "layering" and "shaping or sculpting," with the latter two categories being the same technique for adding realism to a painting. |
| Foreground | Outlines the shadows of the intermediate layers between the background and the middle ground. | Once the papertol painting is composed, certain areas that the artist has determined can be selectively coated with a finishing varnish or water-based varnish. This is to highlight these areas and provide a light source that tricks the human eye, emphasizing the 3-D effect in paper perspective. |
Papertol (the step-by-step master class will be described in the article below) technique can also be used without using varnish. If finishing of the finished product is not required, it can be left as is to obtain an antique effect.
Subtleties of papertole technique
As with any technique, when working with paper, you need to follow the basic principles. Papertol requires knowledge of the features and practice.
- To work using the papertole technique, you need to choose thick paper that will not deform from moisture.
- Spray varnish is sometimes applied to the back of each layer of paper. The spray should be applied in a thin layer to only one side of the sheet.
- Small paintings can be done without a frame. It is enough to glue the basic drawing to the cardboard. Large works should be initially attached to the frame in a stretcher so that the entire work is securely fastened.
- In addition to graphic illustrations, techniques for cutting, gluing, shaping, coloring, glazing, using a paper former, and framing and display tips should be learned.
One of the most common problems that craftsmen face is choosing the right designs for their project. There are prints and there are "tar paper designs" and there is a big difference between the two.
As a general rule, you should look for prints with clearly defined images that can be cut out. Complex backgrounds such as trees should be avoided, especially if they are detailed.
Also, when cutting out hairstyles, there is a difficult problem associated with trying to make them look realistic. Such small details, made on thin paper, even if cut with a special knife, can tear when applying glue.
Necessary materials and tools for work
Since the main task in this technique is to mount a 3D image by gluing together pieces of paper, It is important to choose high-quality glue:
- The best choice is a silicone adhesive with neutral curing.
- If the glue contains acetic acid, the paper may turn yellow over time.
- PVA glue or water-based glue is not suitable due to poor adhesion to the surface and too high fluidity.
- Silicone adhesive bases with polymerization are suitable for thick types of paper, such as watercolor.
- Mounting adhesive for glazing is only suitable if it contains acid.
Absolutely any glue should be checked for the presence of an oil layer after drying. This applies to color drawings, where the paint in printed illustrations has the property of "leaking" when moisture gets on it.
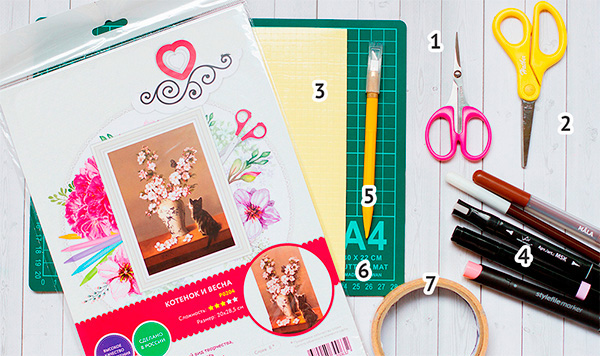
You will also need other tools for the job:
- scissors for cutting small parts;
- office scissors;
- adhesive pads or double-sided tape 3 mm thick or more;
- felt-tip pens or paints;
- model scalpel for complex designs;
- knife for cutting fine lines;
- self-healing mat or plastic backing.
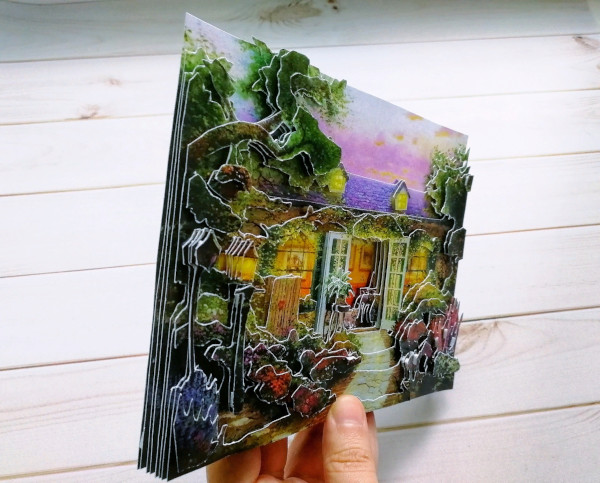
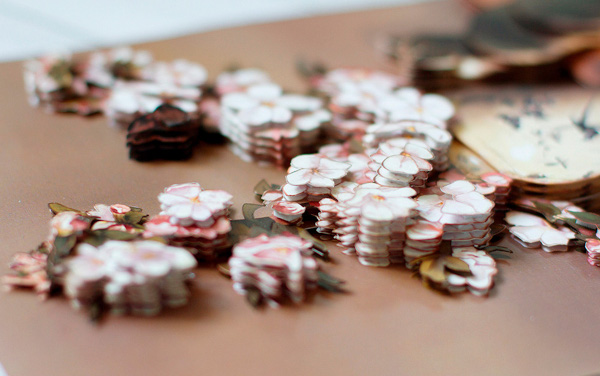
Master classes in the papertole technique are performed step by step in the sequence in which the picture is assembled. Initially, all the parts must be prepared for gluing, cut out and distributed so that the assembly process is simple and convenient. It is advisable to distribute all copies of the parts in order, separating the layers between themselves.
Paper requirements
Since papertole cards can be assembled using either glue or adhesive pads, the paper should be selected based on the assembly technique. Silicone glue requires the use of thick paper that will not become soggy from moisture.
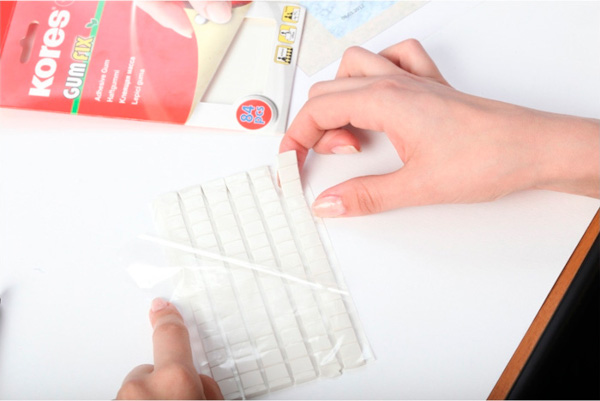
Glue pads are useful for beginners, but they are more difficult to work with, since it is not so easy to glue a layer of paper web evenly to double-sided tape. The paper should have a higher density so that the pattern is not distorted during the gluing of layers.
Each sheet must have a serial number in the part where the copies of the images are repeated.
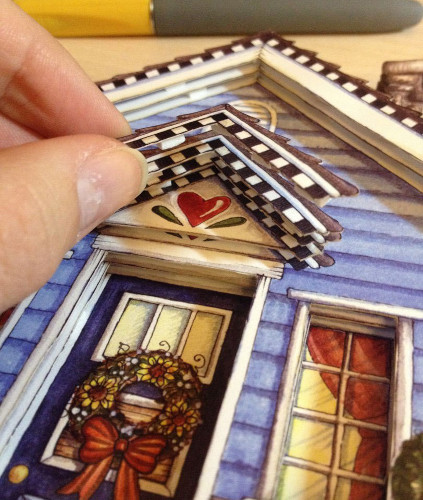
It is also important that the painting has visual depth where it is needed. Do not highlight all the details by increasing their projections to the same height. As a rule, in the papertole technique, all the details in the foreground should be more voluminous, in the background - half of the highest point of ascent from the base image.
The ready-made sets include high-quality paper that has graphic cuts, smooth edges, and can withstand liquid glass coating.
Liquid glass for coating the finished composition
All paintings made in the papertole technique are covered with liquid glass. As a rule, all accessories for working with a ready-made set must be purchased separately, including the finishing coating. It is not recommended to coat the finished work with PVA glue or leave it without a fixing layer.
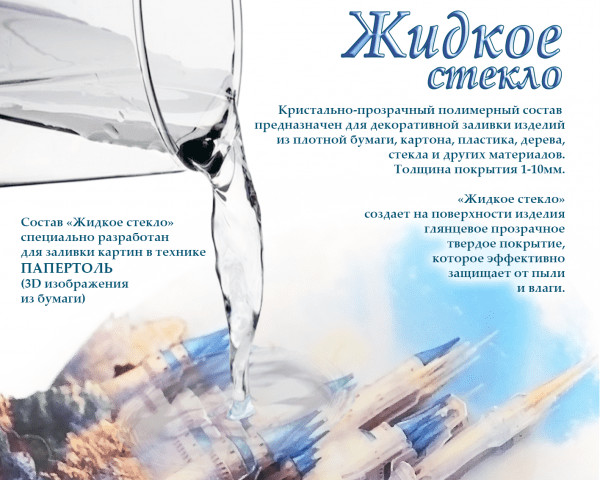
Liquid glass has a number of advantages:
- gives the painting a porcelain look;
- emphasizes the volume and depth of details;
- transforms the plot;
- maintains the coating for a long time;
- replaces glass frame;
- gives more brightness to the colors.
The liquid glass already contains acrylic varnish, which is used by professional artists to preserve the canvas of the painting. There is also a two-component composition, which is already mixed in the correct proportions - a hardener and a protective film.

The painting is as hard as glass due to the dense glossy film that forms on the surface of the canvas.
If liquid glass is supplied as two unmixed components, you should make the composition for covering the painting yourself:
- The bottle with the main component A (100 ml) must be mixed with hardener B (50 ml) in the ratio 2A + 1B.
- The mixture should be stirred with a wooden spoon or stick.
- For mixing, you should use a silicone or plastic cup.
- The mixing process takes place with rubber gloves.
- If you do not need the entire composition, you need to leave a mark on the glass. This will be the level for component A.
- Component B must be poured in very slowly, stirring the solution.
- The mixture should be stirred for 3-4 minutes.
- The finished mixture must be poured into a clean glass and stirred for another 2 minutes.
To create a thin layer of coating, you can use a flat brush. For a thicker coating, it is recommended to pour liquid glass in two stages - first cover with a thin layer, and then after 2 minutes pour the second layer, having previously treated the surface with a gas burner to remove bubbles.
Important! Component A thickens at temperatures below 20C, white streaks and cloudy spots may appear. Crystallization occurs when 10C is reached, so to restore the state of component A, it is recommended to heat it up to 40-50C.
Complete solidification of liquid glass occurs at a temperature of 22-25C for 24 hours without the additional use of heaters (may turn yellow).
How are volumetric paintings made?
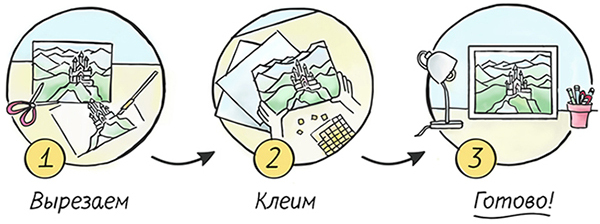
Papertol (the master class is carried out step by step according to the instructions from the ready-made set) the paintings should be assembled in stages:
- Papertole cards and tools must be prepared for work in advance.
- The first layer is the base design, which should be glued to a thick backing. If necessary, the design should be cut out and fixed.
- Subsequent layers and details need to be cut out.
- The second layer and its additional parts also need to be cut out from the general sheet, without touching the contours.
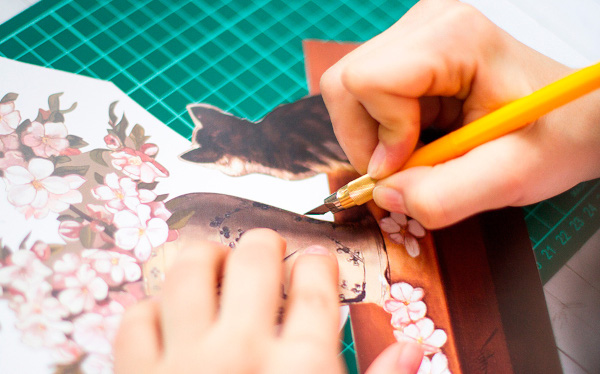
- Using a scalpel or art knife, you need to work out all the contours and small lines.
- Small details should be cut from the inner contour, moving towards the outer one.
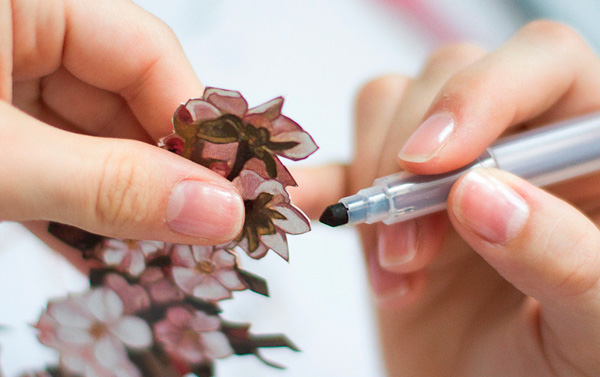
- The cuts need to be painted. Felt-tip pens and acrylic paints (not for beginners) will do. The color should match the overall background of the painting as much as possible. Painting is done in the air or on a sheet of white paper.
- Apply tape or silicone glue to the back of the layer. The materials should be distributed evenly. If using double-sided tape, cut out "cushions" and distribute them over the entire sheet, but no more than 5 mm from the edge.

- The next layer must be glued onto the previous one, folding the contours of the new part with the contours of the previous one.
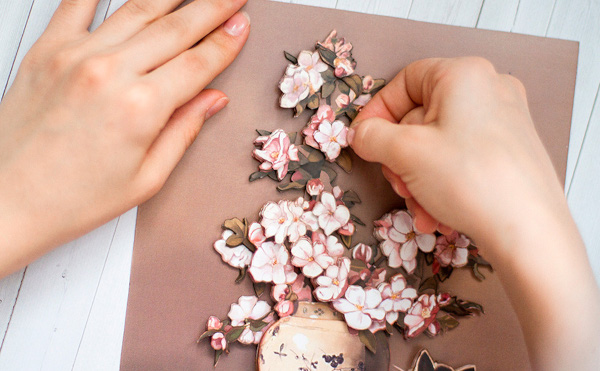
- All steps must be repeated for each layer.
If you don’t manage to glue it evenly the first time, you can carefully remove the part and glue it again.
Master classes for beginners
When choosing ready-made kits for beginners, you should pay attention to the number of stars. The maximum indicates high complexity, the optimal choice would be a kit with 3 stars. This means that there are not so many small parts, and the work will take up to 8 hours. You can also print the picture yourself and assemble it using the papertole technique.
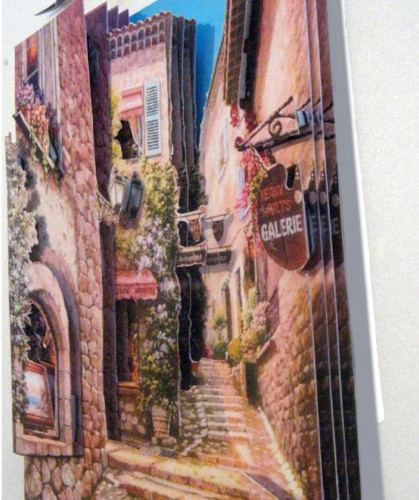
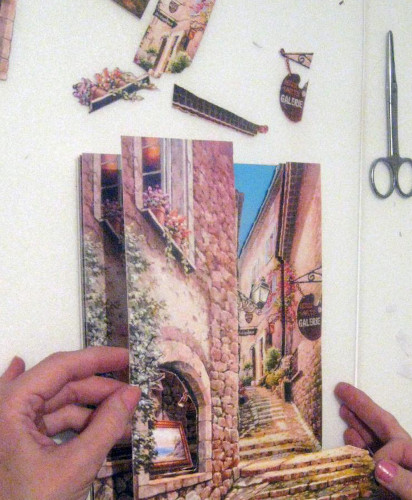
Italian courtyard
Papertol (the step-by-step master class is presented not from a ready-made purchased set, but in the form of homemade selections of graphic illustrations) blanks for this master class can be made independently.
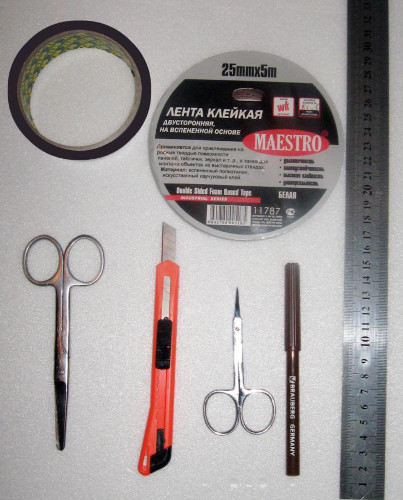
The tools you will need are:
- printed sheets with images – 6 pcs.;
- stationery and art knives;
- double-sided tape 3 mm thick;
- glue or flat double-sided tape;
- felt-tip pens;
- scissors;
- frame or thick cardboard;
- liquid glass;
- plastic cup – 3 pcs.;
- wooden stick.
Images can be printed on A4 sheets or you can choose a smaller size to make the work less labor-intensive.
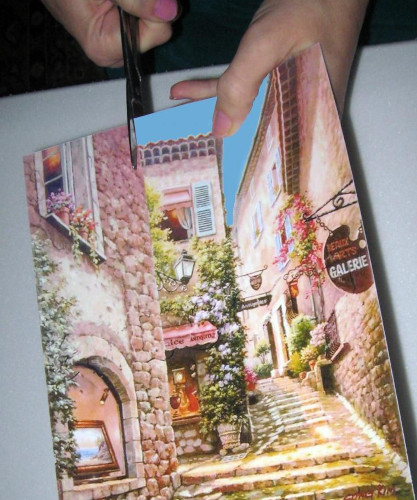
- Place the base painting on a thick sheet of cardboard or a stretcher, then glue it with glue or thin double-sided tape.
- The second layer will be the next image, from which you need to cut out a small detail in the background. This can be part of the sky or the tops of the trees. These cut out parts are unnecessary, they should be put aside.
- The third layer should repeat the image of the second layer, but one more detail should be cut out and put aside. Let it be the right side of the building in the background.
- The fourth layer can only contain the half of the image that is closest to the viewer. The outer part of the image that is closest to the viewer can be cut out from the left part of the image. The two parts will form the fourth layer.
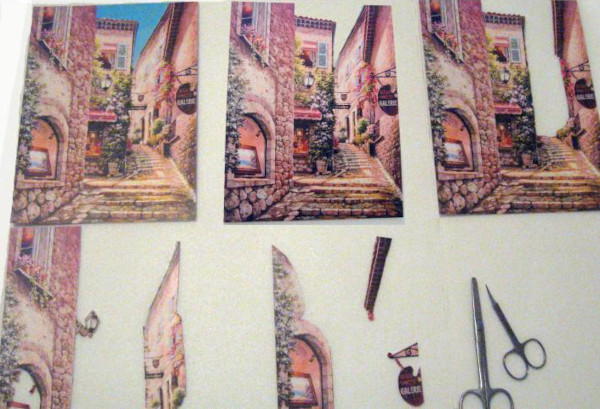
- The fifth layer should contain the layers closest to the observer. Let it be one of the two parts of the previous layer. Additionally, you can cut out two small parts from the sheet, located on the right.
- The final layer should only contain small details that are repeated in the previous fifth layer.
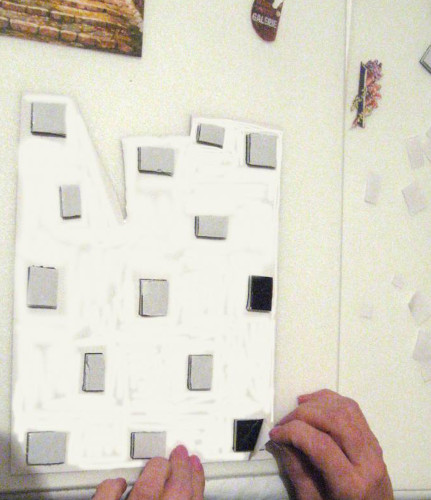
- When all the parts are cut out, you can start gluing. You need to glue pieces of tape to the back of the parts, and paint the edges with a felt-tip pen.
- The details of each layer must be glued to the image of the same detail from the previous layer.
- Finally, you need to cover the painting with liquid glass.
Such a picture can be framed in a deep glass frame. Also, pictures in this technique can be installed on other surfaces.
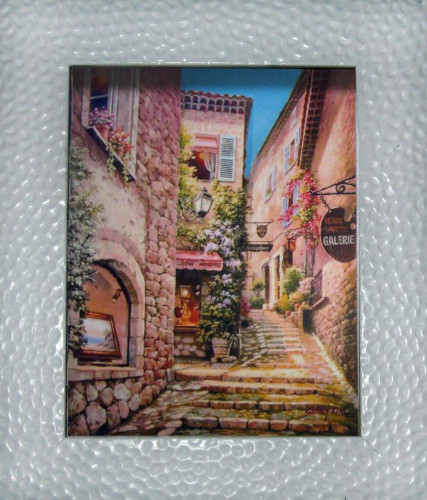
With the help of a realistic painting, it is permissible to decorate vases, decorative plates, refrigerator magnets. Paintings without a stretcher can be turned into Christmas tree decorations, decorations for a holiday bottle or crafts for the garden and school.
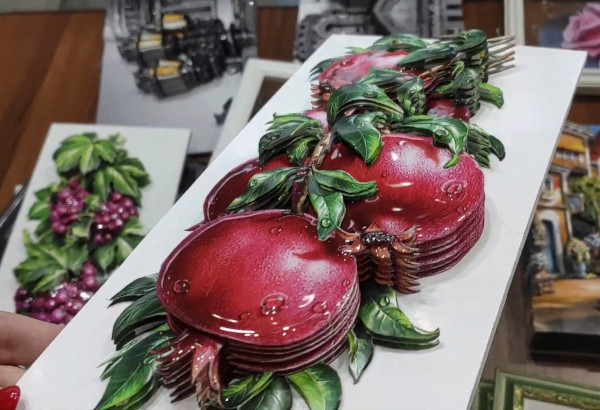
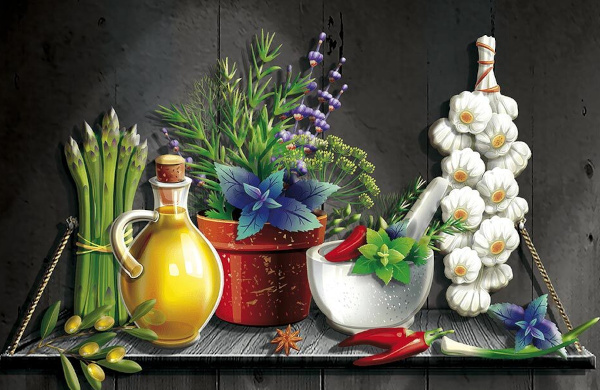
Still life
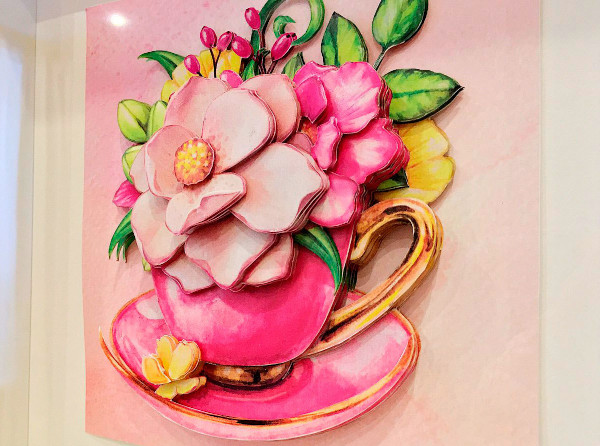
Papertol (the master class is presented step by step as an instruction) paintings can be done in the genre of still lifes, flower arrangements, city landscapes, postcards and images of animals. Portraits do not always turn out well in this technique, so a correctly selected illustration is already half the successful completion of the task.
The still life will look beautiful both in a regular frame and in a frame with a transparent bottom. For decoration, you can use deep frames with thick walls. Papertol compositions are suitable for decorating ready-made photo frames, boxes, scrapbooking crafts and interiors.
To work you will need:
- printed sheets with images - 12 pcs. on paper with a density of 250 mg/m2;
- stationery and art knives;
- double-sided tape 1.5 mm thick;
- glue or flat double-sided tape;
- felt-tip pens;
- scissors;
- frame or solid base;
- liquid glass for filling the painting;
- plastic cup – 3 pcs.;
- wooden stick.
Since there are more layers in this master class, the fastenings between them should be thinner. The best option would be silicone glue, which will not be visible at an angle.
The sheets also need to be prepared in advance:
- The still life against the landscape in the first layer does not need to be cut out. This is the basic image.
- All cuts of the parts should be colored with felt-tip pens. They should be glued with double-sided tape 1.5 mm thick.
- The second layer will be the middle and foreground. From the background part of the image, you need to cut out only small details, such as poles, lamps or tree foliage, if any.
- In the third layer, you need to leave the same foreground and middle ground, and cut out fewer details from the background than in the previous layer. At this stage, you need to glue the three layers of paper.
- In the fourth layer, only the middle and foreground should be left.
- In the fifth layer, it is necessary to cut out only large and small details, removing the middle background from the image. It is located between the background and the closest details for the observer.
- In the sixth layer, you need to duplicate all the large details of the middle background and leave the small details on the side closest to the observer.
- In the seventh layer you need to repeat all the steps of the previous step.
- The eighth background should contain only the foreground - these are the parts of the drawing closest to the observer, which usually occupy the middle and lower part of the sheet.
- In the ninth layer, repeat the steps of the previous stage.
- The tenth layer should contain several details located in the foreground.
- The eleventh layer includes 2-3 small details, which are considered the smallest and most noticeable to the observer.
- In the twelfth layer, you should repeat the steps of the previous stage.
- All layers need to be glued together.
- The final stage will be filling with liquid glass.
This composition will look good in a regular frame or a frame with a transparent bottom. The glass effect allows you to place the painting in the interior of any style.
If you want to decorate a piece of furniture or a box, you should not glue the base image to the base. You can pour it, placing a film underneath, or stick it, for example, to the bottom of a plate, and pour it after the glue hardens.
Master classes in the papertole technique are step-by-step described and ready to use. More complex projects can be done after completing easier compositions, but larger images will require more detail and time. Labor-intensive processes can be done over several days, adding new fragments to the paintings.
Video about papertol technique
Creating a three-dimensional painting using the papertole technique: