Forming objects of different sizes and shapes from paper using adhesives is called papier-mâché. A master class for beginners will help you learn how to make crafts using this technique.
Selecting Materials for Crafts
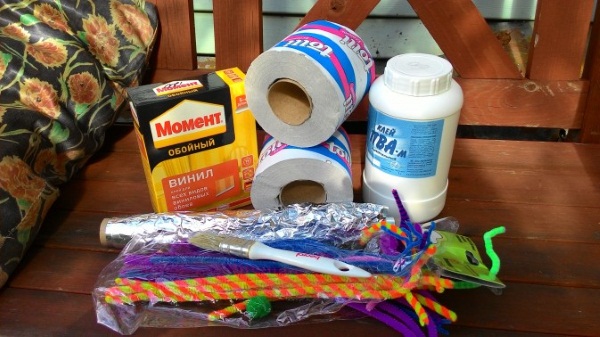
To make any item using papier-mâché technique, you need to prepare:
- newspapers, napkins, toilet paper, cardboard, egg trays;
- adhesive base – PVA glue, paste;
- brushes for applying glue and decorating;
- paints for decorating crafts;
- vegetable oil to lubricate the surface from which the impression will be made;
- stationary blender;
- oilcloth on the table.
Technique options
Papier-mâché is made in two ways: by gluing pieces of paper in layers step by step and by molding figures from wet paper dough. The art of making such figures requires attention and patience, the material dries for 2-3 days, and finishing takes up to 2 days.
Step-by-step gluing of pieces, in layers (mashing)
When mashing, the prepared form is pasted over with pieces of paper.
- You need to prepare soft paper, you can use newspaper.
- Tear the paper into small pieces with your hands.
- It is not recommended to use scissors, as the dense edges of the paper in the dried product will not be aligned.
- The first layer of paper is applied and glue is spread on top.
- It is necessary to complete about 10 layers.
- After applying 2 layers, let the previous ones dry.
- The pieces should overlap each other at the edges, repeat the surface, and not form any irregularities.

There are internal and external masching. With external masching, the model is pasted on the outside, with internal masching - on the inside. If the mold for the cast is supposed to be left inside the finished craft, it is covered with glue, if not, then with Vaseline.
Small parts of the craft are made from a mixture of glue and paper, after drying, they shrink in size. To achieve the desired size, it is necessary to glue the required number of layers to the parts.
It is necessary to dry the figures for 2 days at an air temperature of no more than 22-25 degrees. The product will crack if it is dried near the switched on heating devices. The last layer is made of scraps of white paper.
Modeling from wet paper pulp
The peculiarity of production is that the crafts are molded, without using models and forms. Any type of paper or cardboard can be used for preparation, since the material softens during the cooking process, it becomes homogeneous.
The quality and durability of the finished product depend on the stickiness of the paper pulp, so when preparing it, you need to check the mass for stickiness. Elasticity and stickiness are achieved by adding glue and paste. Chalk and alabaster in the mixture will make it smooth and durable, but such mixtures must be used immediately.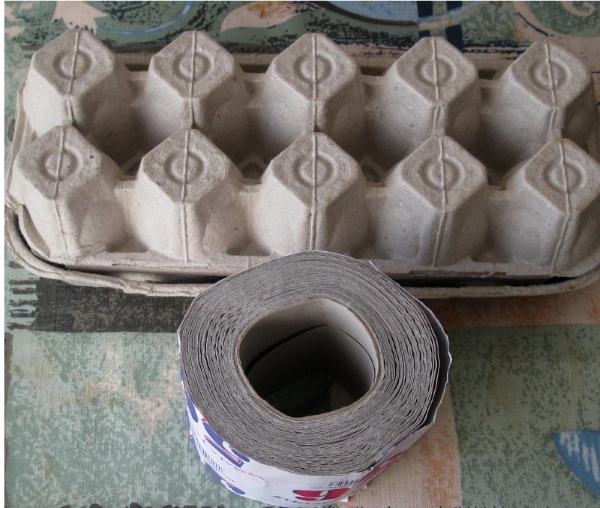
There are three types of crafts that can be made from paper pulp:
- the crafts are empty inside;
- products having a frame;
- frameless.
In order to make a hollow figure inside, sample models are used, onto which the mass is glued or laid out, then the sample and the craft are separated.
When making the second type of crafts, they take the bases that remain inside the papier-mâché figures, and use plastic bottles, cardboard, and wire as frames. Frameless figures are made using the principle of modeling from plasticine, there are no voids in the craft, and the frame is the paper pulp itself.
The figures need to be dried for several days at a constant air temperature and humidity.
Methods of preparation of mass
The master class for preparing papier-mâché mass recommends that beginners use a mixture of glue and paste. The adhesive mass cannot be frozen, but can be stored for several days. If the mass releases liquid, you need to squeeze it out and add glue.
Newspapers, toilet paper, and all types of paper that are easily soaked in water are suitable for preparing the mass. The paste can be stored in the refrigerator, and the container can be covered with cellophane.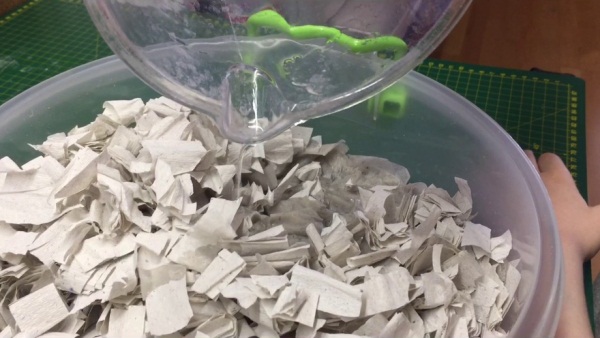
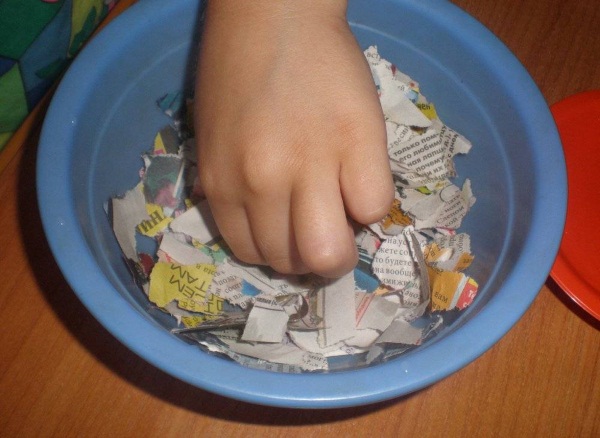
| Preparation of the mass | 1. Tear the sheets of paper, put them in a small container, and fill with water. 2. Mix the paper and water thoroughly by hand or with a stationary blender, as it will not be possible to mix evenly with an immersion blender. If you knead by hand, you need to pour hot water over it and leave it to soften for 3-4 hours. 3. Take a sieve (colander) and drain the water through it. 4. Mix the adhesive composition (a mixture of glue and paste) into the resulting mass. 5. Finish cooking when the mixture starts to stick to your fingers and becomes like plasticine.
|
| Preparation of paste | 1. Pour 2 tablespoons of flour and starch into water (for 1 part flour take 3 parts water), mix in a glass.
2. Bring water to a boil, pour in the resulting mixture. If lumps form, crush them. Wait until it thickens. The density of the paste depends on the amount of flour and starch. 3. Use the mixture when it has cooled to room temperature. |
Technique for making papier-mâché from paper and newspaper
Papier-mâché (a master class for beginners recommends following a number of rules) requires the following recommendations to be followed when making crafts:
- It is more convenient to work on a large table covered with oilcloth. Since all work with adhesives is done by hand, you need to prepare a dry cloth to wipe them off.
- Stick the pieces onto the surface of the mold, lubricating the first layer, put the next one. To separate the first and subsequent layers, you can use paper of a different color, so you will not make gaps, the layers will be uniform.

- There are 2 options for applying glue: on layers or by lowering pieces of paper into a container with glue. The second method is considered more effective, since the glue soaks the paper better, leaving no untreated areas.
- As models, choose objects similar in shape to the intended crafts (balloon, mug, plate). The shape can also be molded from plasticine. If the surface of the craft is uneven, it must be treated with water-based putty. When this layer of primer dries, it must be sanded with sandpaper.
- The final stage is decoration. For this, decoupage, acrylic or oil paints are used. If watercolor or gouache is used, they need to be varnished. You can decorate the surface with beads, fabric (organza, chintz, guipure) or paper applique using PVA glue. Crafts are decorated with pasta in the form of butterflies, spirals, which are painted and varnished. When decorating, cereals are used, laying out drawings.
Papier-mâché from egg cartons
To make crafts from cardboard egg boxes, you need:
- Prepare a sticky mass.
- The trays are torn into small pieces and placed in a deep container.
- You need to pour boiling water over the paper and leave it for 24 hours. Make sure that all pieces are soaked.
- The paper is ready for use when it becomes flexible.
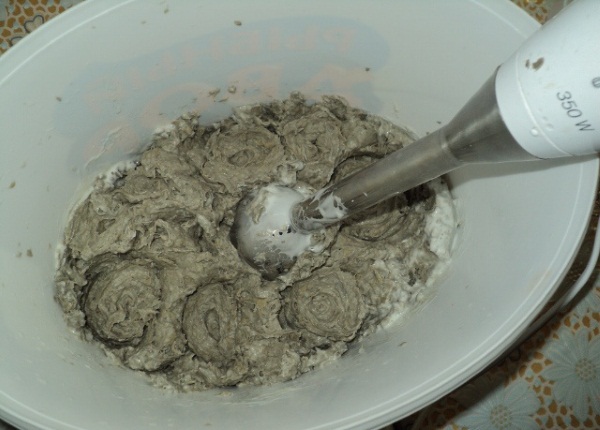
- Grind the swollen paper with a blender until you get a homogeneous mass.
- Add 2-3 spoons of PVA to the mixture.
- Drain excess water through a sieve with gauze.
- Wrap in cheesecloth and place under a press until all the water has drained.
- Store the material in the refrigerator, tightly packed.
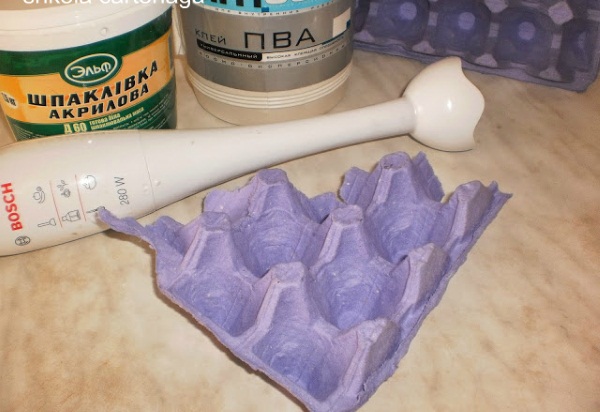
- Make a craft using either the machining technique or sculpt it. Craftsmen prefer to sculpt from the mass obtained from egg trays, it turns out elastic like plasticine, but the increased density in comparison with mixtures from paper or napkins makes it heavy. Such a mass is suitable for the production of volumetric and large figures for the garden and for the interior.
- Decorate crafts, having previously treated it with putty. For this, use paints and varnish.
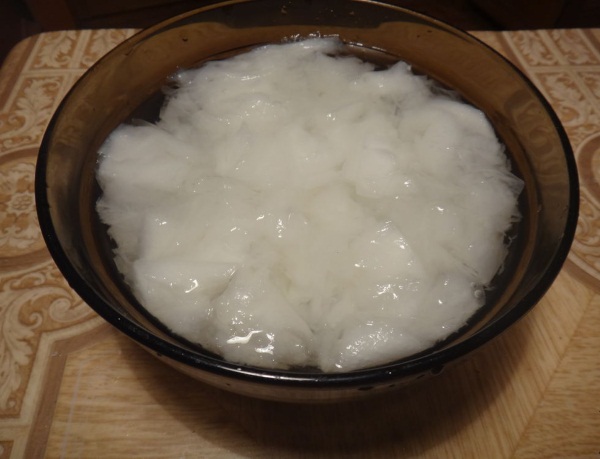
From napkins
Napkin figures are made using the technique of mashing and modeling, so depending on the method, either dough is made or the napkins are torn into small pieces.
Technology of modeling from napkins:
- Preparing the dough.
- Prepare 2-3 packs of white napkins.
- Place them in a deep bowl and pour water over them. The water should be at least room temperature.
- The wipes absorb moisture within 5-10 minutes.
- Squeeze out the mass and add the mixture of glue and paste, stir.
- Knead like regular dough until the mixture is smooth.
- Modeling of products.
- The product can be made with or without a frame. For the napkin dough, cotton wool or wire is used as a frame. The frame is pre-treated with glue, the mass is applied in layers, allowing it to dry. Each layer is treated with glue.
- The surface of the products made using the papier-mâché technique from napkins is smooth, even, the figures dry within 4-6 hours. The mass is not dense, but elastic, so the crafts are light.
- Decorate the figures After the gouache or acrylic has completely dried in several layers, treat with varnish.
Egg Carton Craft Ideas for Home
By following the step-by-step guide, you can make beautiful items for your own use or to give to friends.
Frame made from egg trays
To make the craft, use a mass made from cardboard egg cartons; it must be fresh.
- Take a cutting board and wrap it in cellophane. This is necessary to separate the craft from the board without damaging it.
- Roll out the wet cardboard mass with a rolling pin to a thickness of 1 to 2 cm, the mass must be prepared in advance. Cut out a rectangle with a width of 15 cm, a length of 21 cm.
- You can form a recess for a photo in a frame using a smaller box. Insert the box into the center of the mass, outline it with a plasticine knife. Press along the outlined perimeter to make a recess.
- If you don’t have a box, you can use a ruler and pencil: draw a smaller rectangle inside and deepen it around the perimeter.
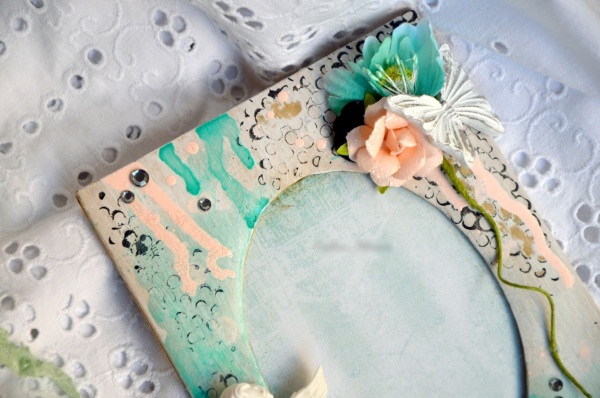
- When decorating, use the pressing method, for example, a cord. Place the cord on the surface of the frame in the form of a pattern, press it, remove it. You can use a knife for shallow patterns.
- The product should be dried at natural temperature; paints and varnish can be applied to a dry frame.
- To insert a photo, you can use double-sided tape.
Christmas wreath of flowers
Papier-mâché (a master class for beginners will help you make a craft using the methods of mache and modeling from wet paper pulp) is suitable for making a Christmas wreath. The wreath will consist of flowers and spruce branches, which will be attached to a ring-shaped base, hollow inside.
Ring molding:
- Mix small pieces of cardboard boxes and boiling water, leave for 24 hours.
- Blend in a blender, drain excess liquid and add a spoonful of PVA glue.
- Roll out the resulting mass on a cutting board.
- Take a round tray or plate with a diameter of at least 30 cm, place it on the mass and draw around it, cut out a circle with a kitchen knife.
- Using a plate no more than 23 cm in diameter, make an imprint of a circle and cut it out.
- Leave until completely dry.
Making flowers:
- Prepare small pieces of paper, tear them with your hands.
- The adhesive base is paste, cook it like this: dilute 2 tbsp. flour in a glass of water, pour into boiling water (2 l), bring to a boil, breaking up small lumps with a spoon.
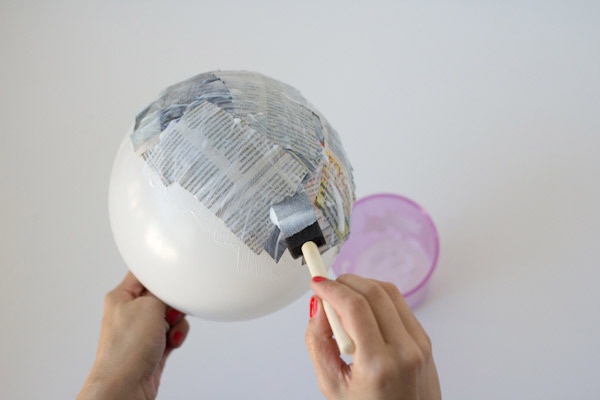
- Inflate a balloon to a diameter of 15 cm.
- Dip each piece of paper into the paste and cover the entire surface of the ball in 5 even layers.
- After drying, cut the ball lengthwise into 2 equal parts, paint it red, blue, yellow. This is what flower petals look like.
- Cut a circle with a diameter of 10 cm out of cardboard and paint it in the desired color.
- Glue the petals to the circle with PVA glue and add the same paint that the circle is painted with.
The assembly begins with attaching spruce branches to the ring - artificial or real, then flowers and ribbons are attached.
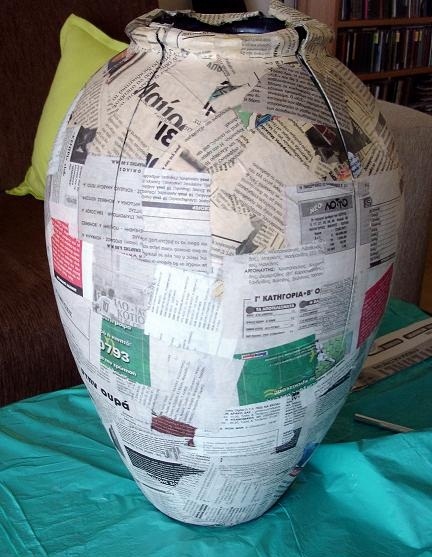
Papier-mache vase
Papier-mâché (the master class for beginners recommends starting with choosing a method: machirovanie or sculpting) is used to make a vase. If the vase is hollow inside, then you need to choose machirovanie. If you need to make a vase without space inside it, turn to the sculpting technique.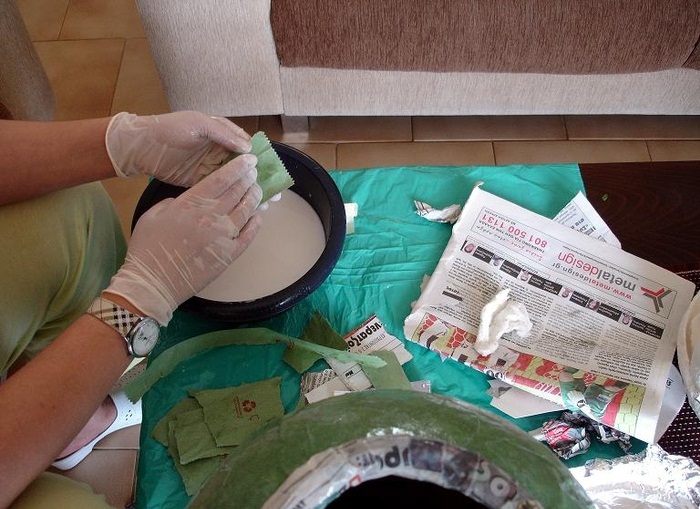
To make a vase:
- Make a wet mass from egg trays: soak the trays, squeeze them out and add 1 teaspoon of glue and 7-10 tablespoons of paste.
- Make 2 balls of different diameters, one at least 3 times larger than the other. From one ball, mold the neck of the vase, from the other, the base. Connect the parts, adding more mass so that the lines are smooth.
- Apply a layer of putty, dry. Decorate to taste.
Making a vase using the machirovanie technique:
- Prepare the object that will be used as a base. The shape of the dish should not be complicated, since after the work is done, the papier-mâché must be removed from the object.
- To avoid damaging the surface of the mold, wrap it in cling film.
- Place the base upside down and apply Vaseline to the cling film.
- Pour white PVA (good quality) into a small container.
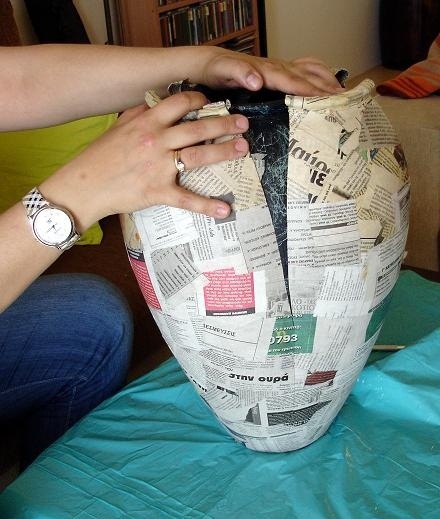
- Wet the pieces of cardboard in glue and put them on the food film in layers, 10 layers, dry each well. After finishing the work, dry the craft for a day.
- If the sample vase has a complex shape, cut the cardboard layer along the product.
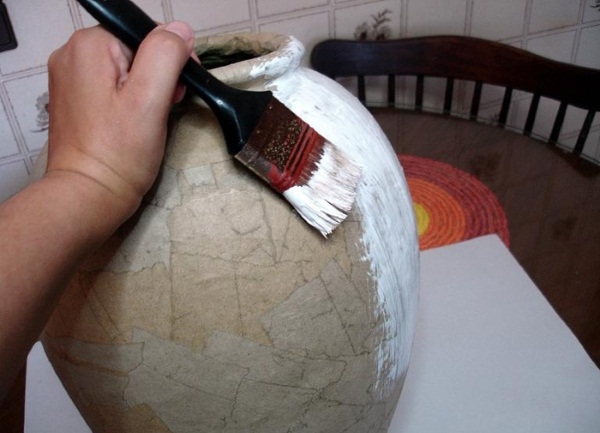
- Glue the resulting halves together with several layers of paper, and after drying, apply a layer of putty.
Garden Crafts from Egg Trays
The technique is popular for making items that decorate the garden area.
Decorative figures for the garden
For decorating a garden, sculpted figures made using the papier-mâché technique are suitable: these can be fairy-tale characters, stones, watering cans, flowers, fountains.
Manufacturing stages:
- Since the garden figures are significant in size and weight, it is necessary to make a frame (wire, cardboard, bottles). The frame should resemble the outlines of the future product.
- Prepare the adhesive composition: glue and paste.
- Tear the trays into small pieces and, dipping them into the adhesive base, apply them in 8-10 layers to the frame. Dry the product after every 3 layers.
- Make small parts of the figure from pieces of toilet paper soaked in glue, this way it becomes more elastic.
- At the end of the work, cover the entire craft with toilet paper.
- Paint with gouache, apply a layer of PVA glue, cover with varnish.
Garland
To make lampshades for garlands, machining is used:
- Inflate balloons of appropriate size. Attach the balloon string to the table. Grease the balloon with cream.
- Tear the cardboard trays into small pieces.
- Cook the paste: 2 tbsp flour per 1 liter of water. Boil until it reaches the consistency of jelly. Add the contents of one jar of gouache of the color you want for the lampshades to the jelly.
- Dip pieces of cardboard into the cooled paste and lay them in layers on the ball, make 3-4 layers. Dry each layer. If the cardboard is very dense, it must be soaked in water for several hours.
- After the papier-mâché has dried, deflate the balloon and remove it.
- At the bottom of the craft, where the tail of the ball was, cut a hole with a diameter of up to 1 cm.
Wind music
The wind chime is a structure made of a ring made using the papier-mâché technique and ringing elements suspended from the ring:
- The ring is made using the mashing method.
- Finely chop the trays, pour hot water over them, and leave for 3-4 hours.
- Place a layer of cardboard on a baking sheet and coat with PVA glue on top.
- Apply 5 layers, letting each one dry well.
- Cut the craft into 2 equal parts and glue them together to form a ring.
- Seal the joints with toilet paper and apply putty to the product.
- When the craft is dry, make holes at a distance of at least 9 cm, thread and secure the threads with bells.
- Apply putty to the holes with thread, dry, and start decorating.
Crafts with children for the garden, school from egg trays
Simple products made using this technique are suitable for joint creation with children.
Panel with tulips
Step by step process:
- Prepare a sheet of plywood, egg trays, PVA glue, paste, a thick-rodded pencil, and a plasticine knife.
- Tear the cardboard trays into small pieces and soak them in hot water for 2 hours. Divide the resulting mixture into 3 parts.
- Add 3 tbsp. PVA to the paste.
- Glue the soaked cardboard trays to the plywood surface, 1/3 of the amount of prepared paper. Apply 3-4 layers, before applying a new layer, pre-dry the previous one.
- Use a pencil to draw the outline of the design on the panel.
- Mix the remaining 2/3 of the cardboard mixture with 7-8 tbsp of adhesive. Knead the mass.
- Place the mass in thin layers inside the drawing, dry each layer. Remove excess paper mass along the edges of the outline with a plasticine knife.
Crocodile
To make a crocodile, you need to perform the following steps in order:
- Prepare a wet mass from egg trays using paste.
- Make a frame from the mass: roll a rope, make a ball at one end (the future head), and an elongated point at the other end – the tail, dry.
- Separately make paws, a comb for the back, the upper part of the mouth and a pyramid with a smoothed top for the head from paper dough. Glue each part in turn with PVA glue.
- Dry the craft for 2 days. Glue 2 layers of paper onto the entire figure. Dry. Decorate with green gouache.
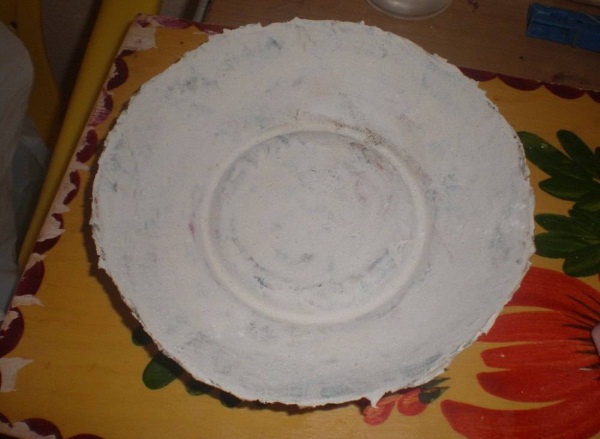
Papier-mache plate
To make it you will need newspaper, white paper, water, glue, a dinner plate, gouache, and varnish:
- Tear the newspaper into small pieces and leave to soak in a container of water.
- Apply Vaseline to a plate and lay out a layer of wet paper pieces.
- Apply glue to the entire surface. Lay out the second layer of paper. Make 10-12 layers.
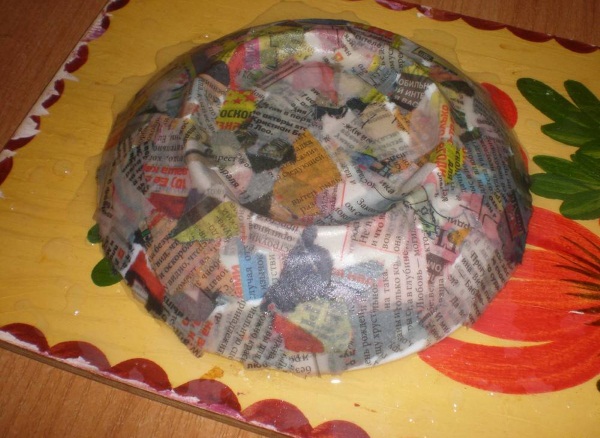
- Dry for 24 hours.
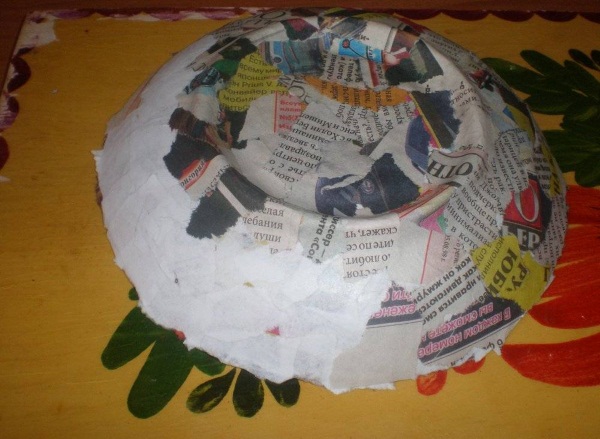
- Tear sheets of white paper into small pieces and soak in water.
- Separate the product from the plate and apply glue to the inside of the craft.
- Place a layer of wet paper on the glue, you need to make 2-3 layers, each one treated with glue. Dry.
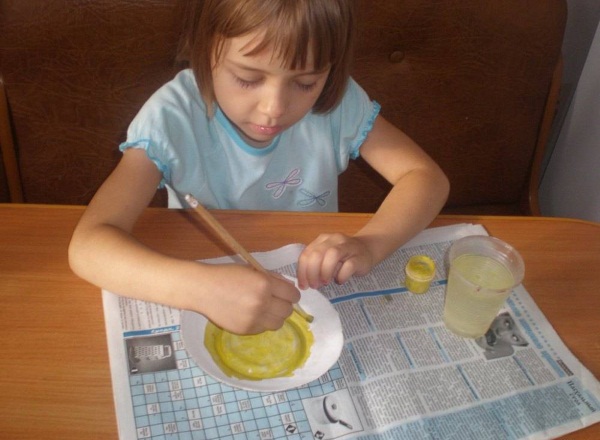
- Also treat the outer side of the product. Decorate after drying the product.
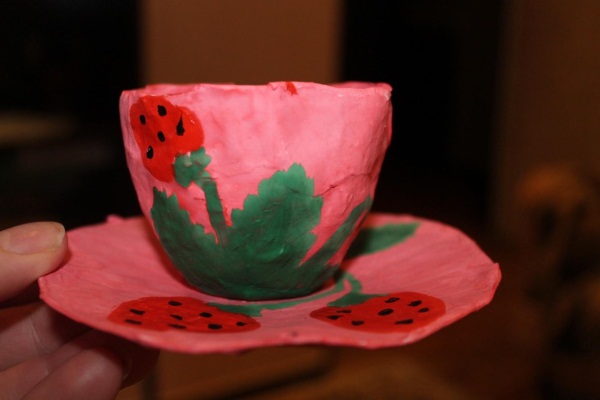
Cup
To make a cup using the papier-mâché technique, you will need paper, paste, and non-relief dishes of the desired shape:
- Tear the paper into small pieces and soak in water in a shallow container.
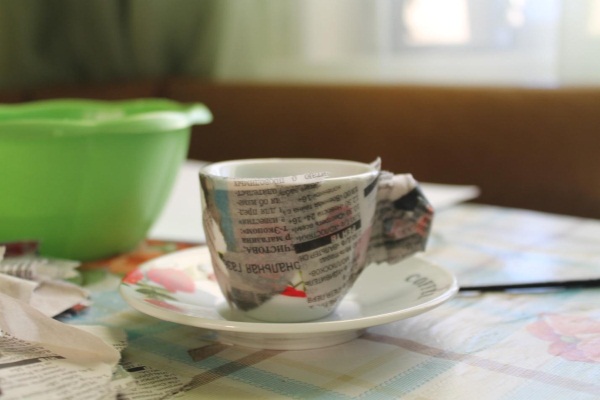
- Lubricate the product model (for example, with hand cream).
- Apply a layer of damp paper and coat it with paste.
- It is necessary to make at least 8 layers, each one treated with glue.
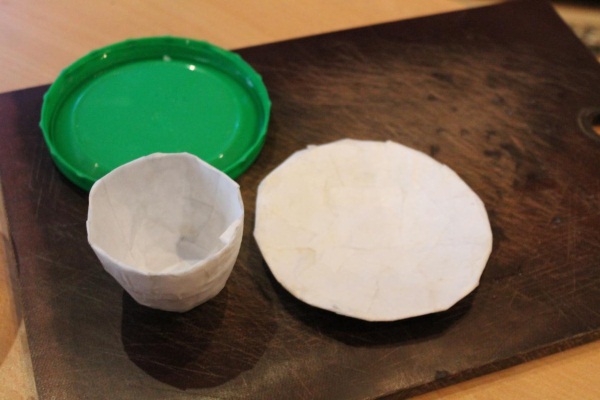
- Dry the craft for at least 24 hours.
Papier-mâché (the master class for beginners recommends paying attention to the complexity of the form) in its finished state is problematic to extract from complex forms.
Vase
To make a vase you will need:
- Dilute PVA with water in equal parts.
- Prepare the vase from which the cast will be made, apply Vaseline to it.
- Tear the newspaper into pieces, put on gloves, dip each piece of paper into the adhesive and stick it evenly over the entire surface of the vase. Make at least 7 layers.
- Dry the product for 4-5 days in a well-ventilated room.
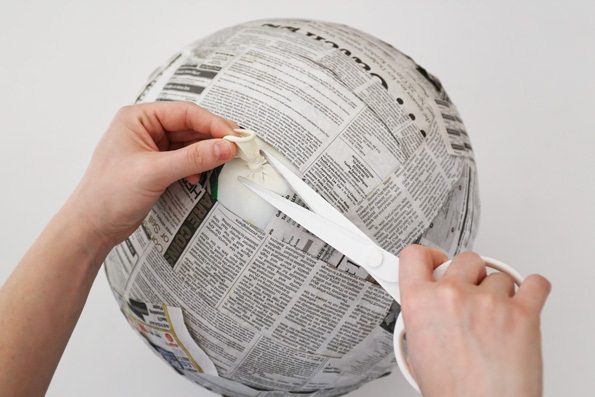
- Using a stationery knife, cut the product lengthwise and remove the model.
- Cover the cut line with 3-4 layers of newspaper, after drying you can decorate.
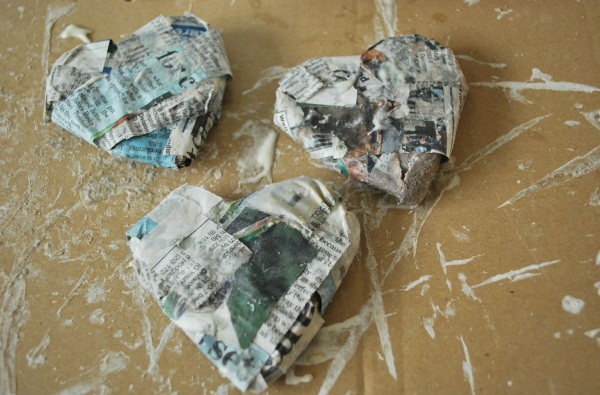
Heart
The heart can be made using paper-pulp or paper-masking techniques.
Mashing involves the following steps:
- Make a heart of the required size from plasticine.
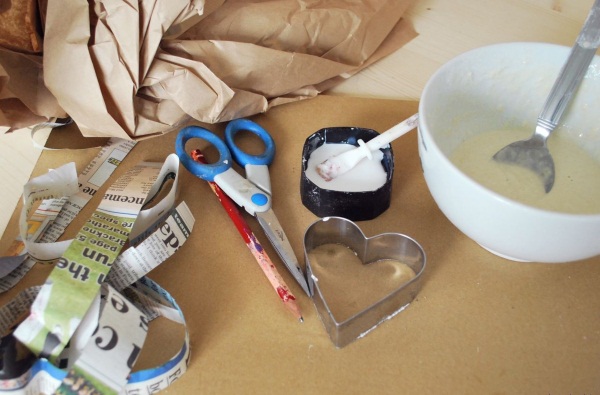
- Soak pieces of toilet paper measuring 2 cm by 2 cm in warm water for 5-10 minutes.
- Prepare the glue.
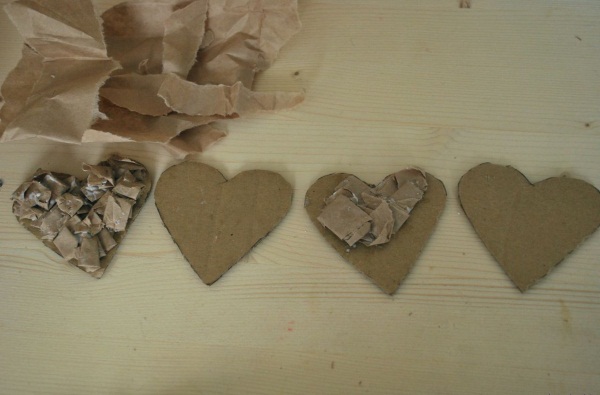
According to this tutorial, a papier mache heart shape can be cut out of thick cardboard. - If the plasticine form is supposed to be removed, then wrap it with cellophane film. Lay out 7-8 layers of paper on the form, each one coated with glue.
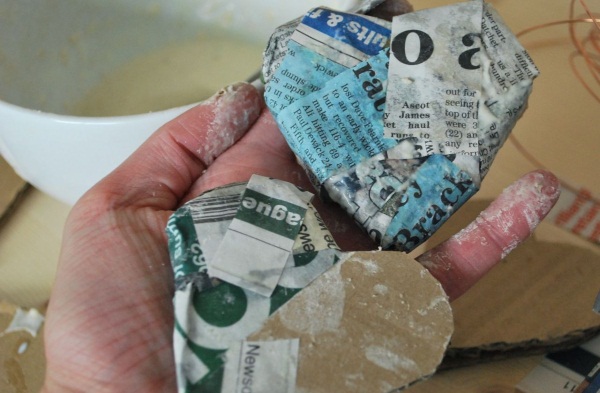
- Dry for about a day, then prime. If the plasticine needs to be removed, make a cut along the craft with a stationery knife before priming. Remove the mold, tightly connect the cut lines and glue.
- Decorate the dried product with acrylic paints and varnish.
Houses
Step-by-step process of making products:
- To prepare paper pulp, take cardboard egg trays, soak them in hot water for 4-5 hours, and squeeze out excess water.
- Add 4-5 tbsp. of PVA glue, mix well, form a dense flexible dough.
- When making the walls of the house, use juice boxes and large plastic bottles as a frame.
- Place paper pulp in thin layers up to 2 mm on the prepared frame, each layer needs to be dried. For the strength of the structure, make 5-6 layers, dry.
- Sculpt the roof without a frame according to the shape of the resulting walls from paper dough, connect the parts.
- Treat with putty after the craft has completely dried, decorate with paints and varnish.
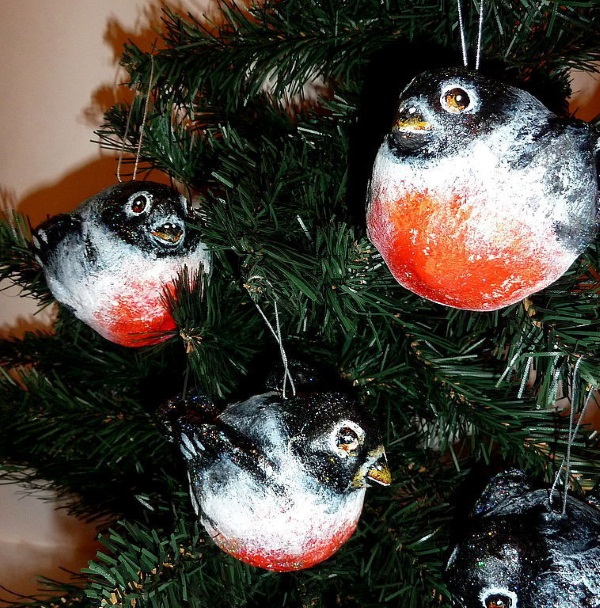
New Year's toys
The choice of papier-mâché technique when creating New Year's toys depends on how heavy they should ultimately be.
If you need to make an airy, light Christmas tree ball, it is better to use the mashing technique.
- Select a model of the appropriate shape and size, lubricate it with Vaseline or cover it with cling film.
- Tear the paper into small pieces and place it in a small container with water.
- Cook the paste: 2 tbsp. flour per 1 liter of water.
- Place damp paper on the model in layers, coat each layer with glue, and let dry.
- Make 8-9 layers, dry. Apply putty, decorate to taste.
Flowers
Flowers in papier-mâché technique are made by the method of maching:
- Prepare a sample of the required shape (you can use objects in the form of a ball, oval, cone, trapezoid).
- Tear paper napkins into pieces and soak them in water in a bowl for 10-15 minutes.
- Apply layers of napkins, drying every second one and lubricating with PVA.
- The dry craft must be cut lengthwise, giving the parts of the craft the shape of petals: either cut out the petal entirely, or not reaching the base, so that the petals remain at the core.
- If you cut out each petal, you need to make the core (pistil) of the flower. To do this, take one napkin and soak it in water with glue for 1 hour. Mold a flattened oval.
- Glue the petals to the pistil.
- You can decorate the parts individually or in the finished product.
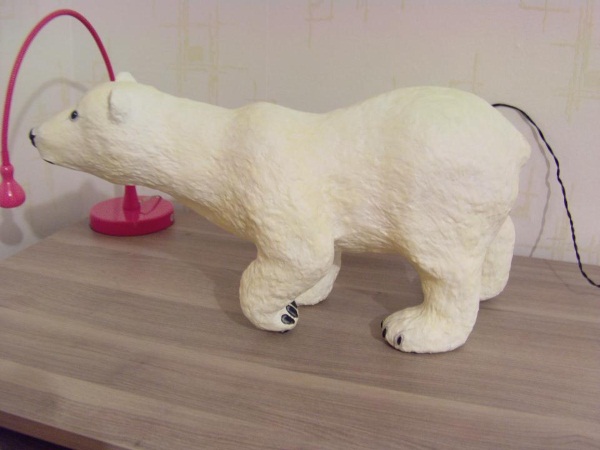
Animals
Stages of animal production:
- The animals are made using the machicolation method.
- Prepare toy samples of the animals that need to be made.
- Tear the newsprint into pieces measuring 1.5 cm by 2 cm and soak in water.
- Place the soaked paper in 7-8 layers on the toy, coat the layers with glue and dry.
- Using a stationery knife, cut the craft in half lengthwise and remove from the mold.
- Glue the product together with several layers of scraps of paper.
- Apply a layer of primer and start decorating.
Fruits, vegetables
Fruits and vegetables are made either by molding them from paper pulp or by pasting pieces of paper onto a mold. When modeling, the crafts turn out dense and less susceptible to deformation.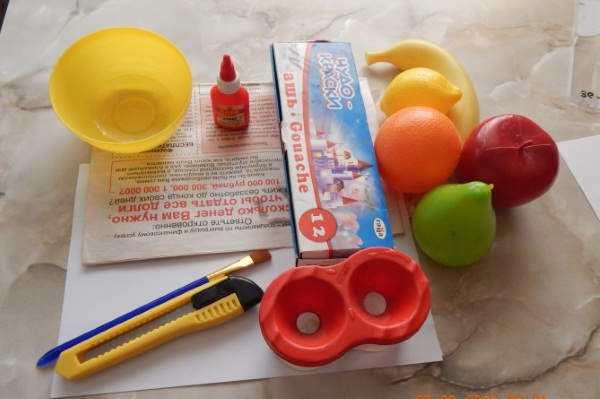
- Prepare a paper mass: tear toilet paper into pieces, put in hot water, add glue, leave for 2-3 hours.
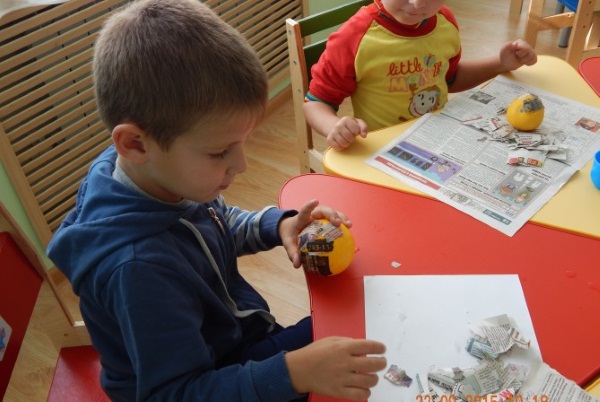
- Drain off excess water and form an elastic dough.

- Use your hands to shape the dough into an apple, lemon, orange, or tangerine.
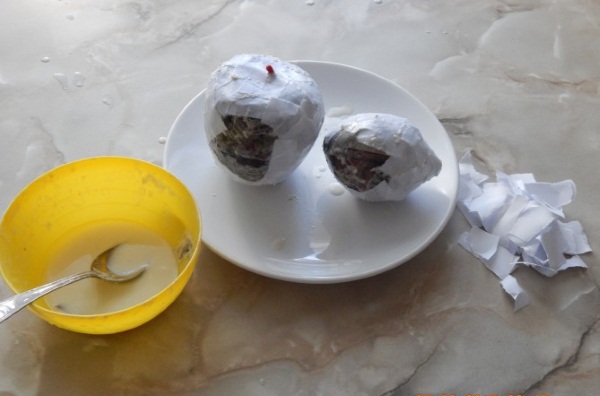

- Add texture using a plasticine knife, spoon, or fork.
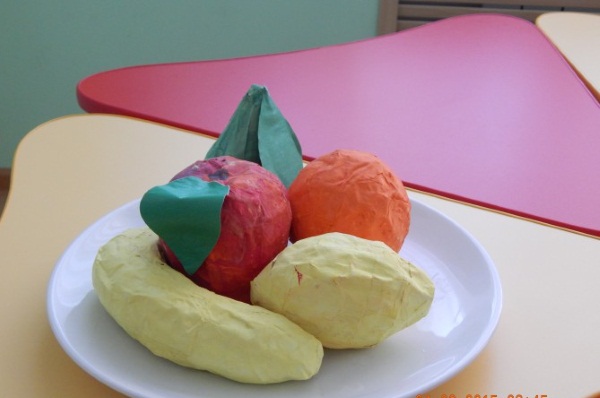
- After drying, cover with primer, decorate with paint and varnish.
Airplane
To make it, prepare a plastic bottle, 3-4 sheets of thick cardboard, newspaper, sheets of white paper, paste, PVA, a glue brush, and masking tape.
- Cut out the airplane wings and tail from cardboard.
- Place the plastic bottle on the table and make cuts for the intended wings and tail, insert the cardboard parts into the cuts.
- Use masking tape to cover the joints between the bottle and the cardboard and seal tightly.
- Tear the newspaper into pieces, glue the first layer of paper to the model with PVA.
- Soak pieces of paper in paste, apply to the model in even layers, drying each one beforehand.
- Apply putty to the dried craft, paint and varnish.
Mushrooms
To make mushrooms you will need pieces of newspaper, paste, super glue, 2-3 napkins.
Then you need to do the following:
- Soak the paper in water, add paste (3-4 tbsp. per 1 liter of water), prepare an elastic paper mass.
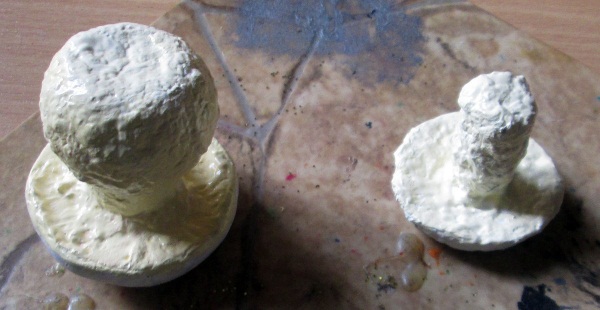
- Sculpt the stem and cap of the mushroom, sculpt the chanterelles whole.
- Dry for at least 24 hours. Use glue to glue overlapping paper napkins to the entire surface of the mushroom, do not tear the napkins. Use your fingers to go over the entire surface of the product, removing air.
- Dry, connect the stem and cap with super glue.
- Cover with primer, dry, varnish, paint.
Ball
The ball must be made using the mashing technique:
- Tear the napkins into small pieces and place them in a container with water.
- Inflate a balloon and coat it with Vaseline.
- Make at least 10 layers of napkins, each one go through PVA, dry. Dry the craft.
- Make a hole in the balloon, remove it from the craft, seal the resulting hole, and cover with varnish.
- To apply patterns, use a pencil and paint.
Detailed master classes will help you make various crafts using the papier-mâché technique. Beginners should start with easy options and then move on to more complex ones.
Article formatting: Vladimir the Great
Video about papier mache
Master class on making a cat from papier mache:
Everything is cool and awesome!)