Autumn drawings are recommended to be created with a pencil. Knowing that, if necessary, you can adjust the resulting landscape with the help of an eraser, children will be more relaxed during the creative process. Such activities contribute to the development of imagination, psychological relaxation of a small person, as well as improvement of his fine motor skills.
Autumn themed pencil drawing ideas for kids 3-4, 5-6 years old
Autumn drawings (a child can be taught to use a pencil from the age of 3-4) for copying should be selected taking into account the age characteristics of children, their skills and interests.
| Age of children | Autumn themed pencil drawing ideas |
| 3-4 years | At 3-4 years old, children will be interested in drawing:
The child, having examined them in detail and having felt the relief of the surface, will be able to complete the task set by the adult in 10-15 minutes:
To make the forest drawn with a pencil look like autumn, it is recommended that children be asked to color the drawing after creating the outline:
|
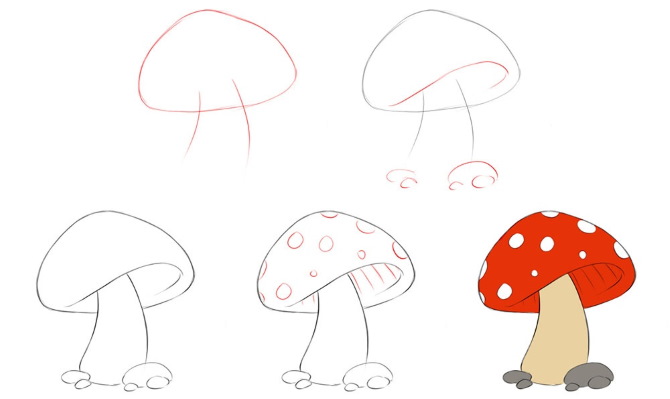
| 5-6 years | It is recommended to teach older children to draw:
One of the options for this type of image could be a drawing of a river, a meadow and trees:
To emphasize that the depicted object relates to the autumn theme, it is recommended to draw a fallen leaf on its cap, and after creating the sketches, color the picture:
|
Master class of copying for schoolchildren: easy autumn landscape with a pencil step by step
Autumn pencil drawings should be depicted in stages, carefully drawing not only the main objects, but also the background and foreground.
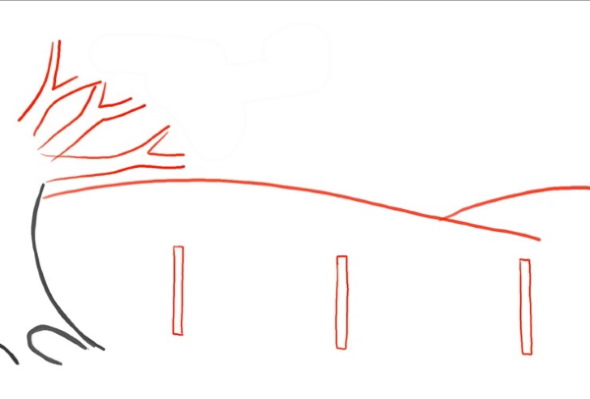
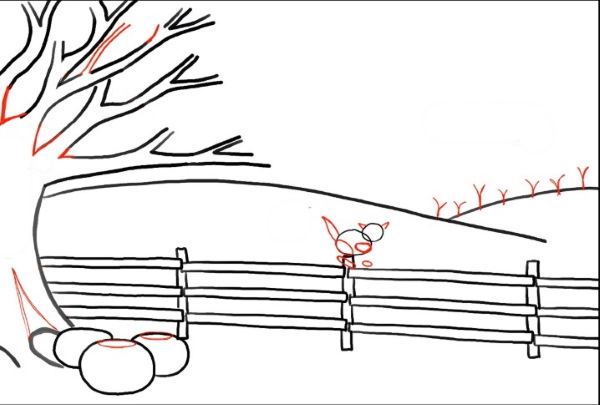
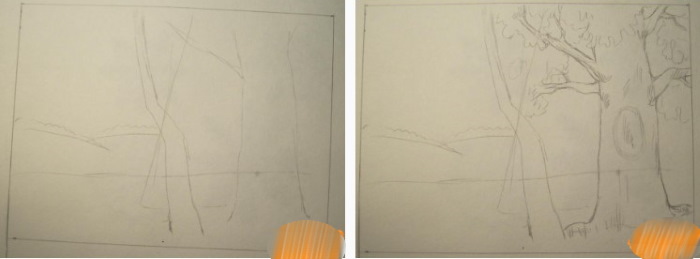
Foreground
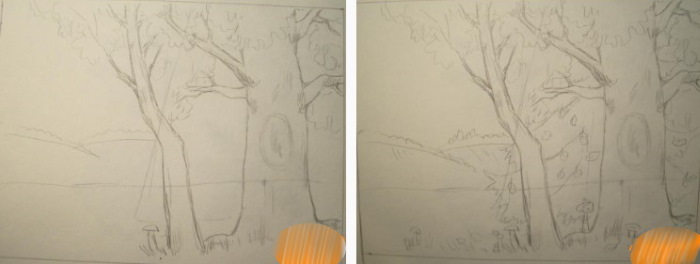
To determine which objects to draw in the foreground and which in the background, you need to determine the horizon line on the work plane. To do this, draw a horizontal line running approximately through the middle of the sheet. What is drawn below this line will be in the foreground, and those above will be in the background.
A fence can be depicted in front:
- From the bottom edge of the sheet of paper used, draw vertical lines at a distance of 3-4 cm from each other.
- Connect the extreme points of the verticals with triangles.
Background
In the background, you can draw a river or outlines of trees. If the child chooses the second option, then a schematic drawing of zigzags located above the horizon line at a distance of 3 cm from each other will be enough.
If a young artist decides to draw a river, he should use the algorithm below:
- From the horizon line upwards, draw a wavy line with rare smooth bends.
- Stepping back 2-3 cm to the right from the starting point, draw another wavy line, directing it in the same direction as the first. The closer to the upper boundary of the working plane, the smaller the distance should be between the lines.
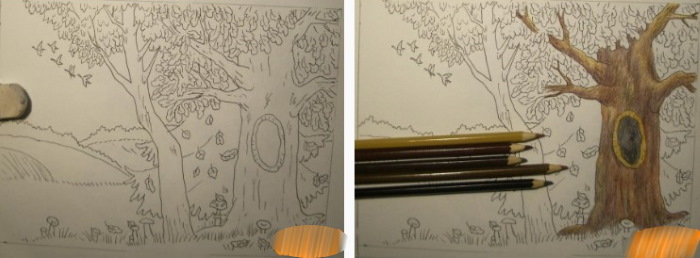
Tree
To draw a tree, a child needs:
- From the border of the working plane or the horizon line, draw 2 parallel lines upward. The distance between them should be at least 4 cm.
- Adjust the tree trunk by adding smooth small bends in different directions to the lines. The bends should not be frequent so that the tree trunk is realistic.
Main branches
To draw the main branches you should:
- Along the entire length of the trunk, draw smoothly curved lines directed towards the upper right corner (when drawing branches on the right side) and the upper left corner (when drawing branches on the left side of the trunk).
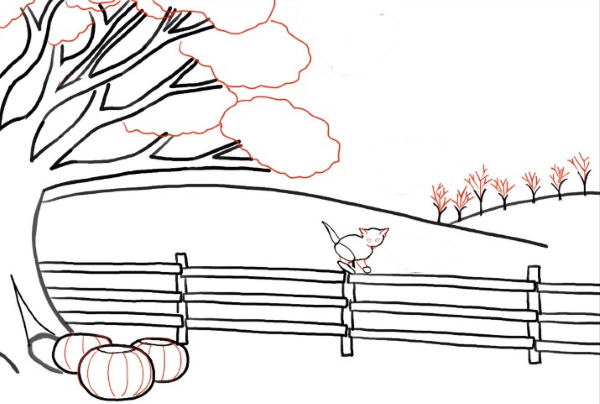
- At the extreme points, the lines must be connected with a smoothly curved semicircle or brought together at one point, thus creating an acute angle.
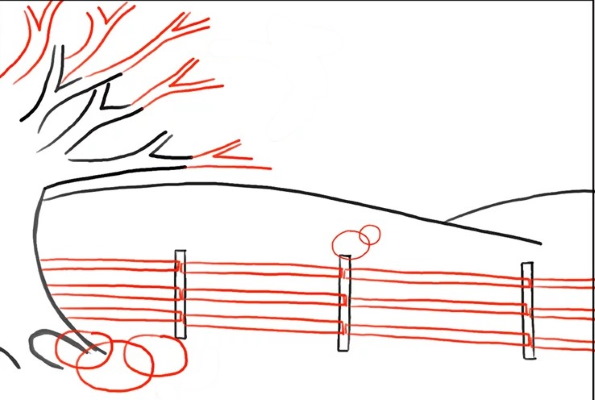
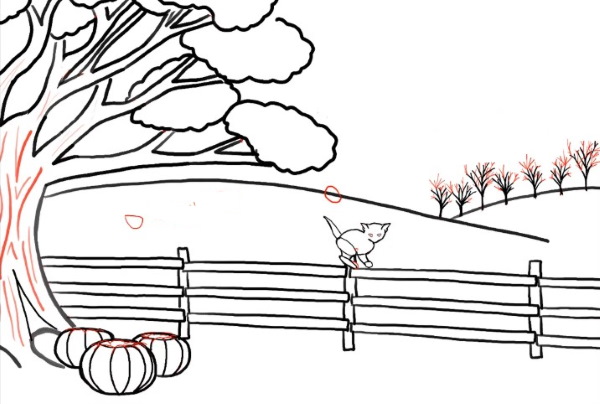
Small branches
To add realism to the picture, it is recommended to draw small branches.
To do this you need:
- From the lines that form the main branches, draw several more, smaller ones, grouping them into 2.
- Connect the extreme points with a smoothly curved semicircle or triangle.
The number of small branches should be no more than 3 on one main branch.
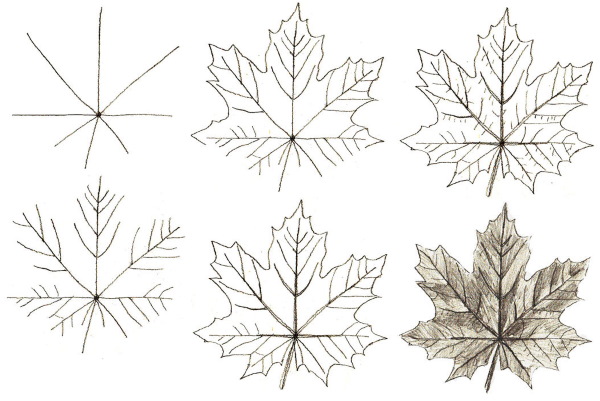
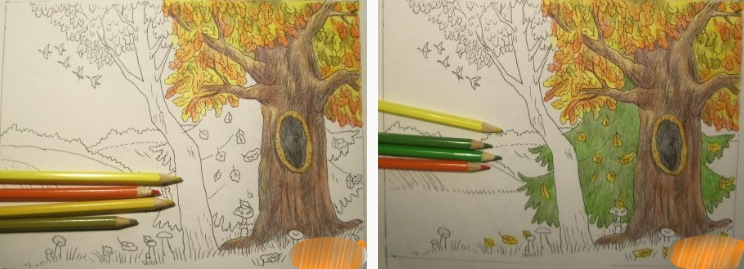
Leaves
There are 2 ways to draw leaves. The easiest way is to draw a curved upward semicircle from approximately the middle of the lines that form the tree trunk.
The second, more complex option is to draw each sheet separately:
- From small and large branches, draw several thin lines, placing them in a chaotic order.
- Using 2 curved lines, connecting at the lower points with a semicircle, and at the upper points with a triangle, depict the outline of the leaves.
- Detail the inside of the leaves by drawing the veins of the plant.
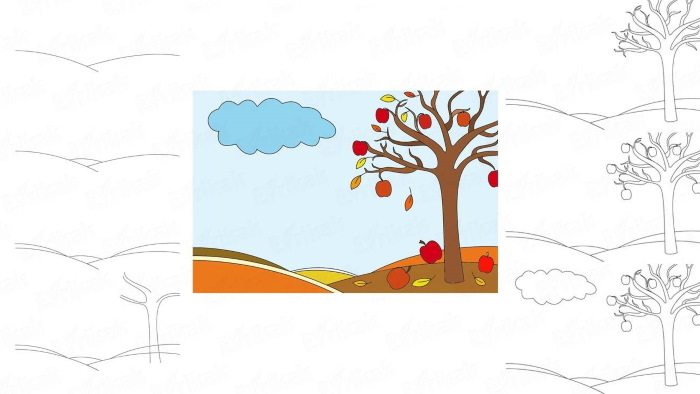
Apples
The method of drawing apples depends on how the child previously drew the tree crown. If the crown was drawn in a simple semicircle, the apples on the tree should be arranged randomly.
If the tree has detailed branches, it is advisable to draw the fruits near the leaves, but no more than 1-2 large apples on the main branch. Apples should be drawn using a circle, the upper border of which is slightly curved downwards.
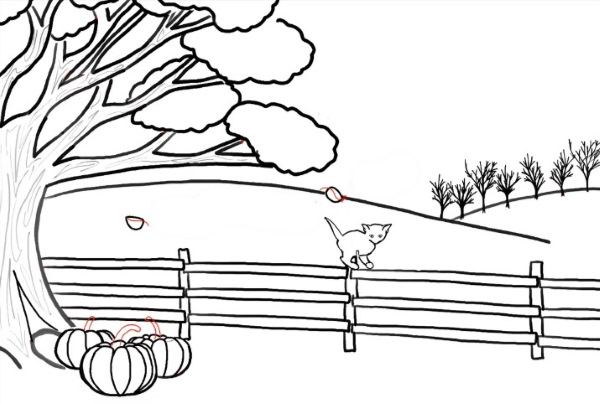
Cloud
Children usually draw clouds separately, in the upper part of the working plane. Their outline is created by smoothly curved upward lines. It is recommended to make bending sections every 3-4 cm. Otherwise, the drawing will be unrealistic.
Coloring
When coloring an autumn landscape, it is recommended not to strictly limit the child in the choice of colors of pencils or paints.
It is only important to clarify that the final image should be similar to the autumn picture. Having received such a task, the child can immediately use the main shades (red, yellow, orange, green) or get them by mixing paints.
Step by step beautiful drawing of autumn bouquet
Autumn drawings, drawn with a pencil, should not be limited to images of forests, fields and rivers. Keeping to the given theme, you can also draw a beautiful bouquet.
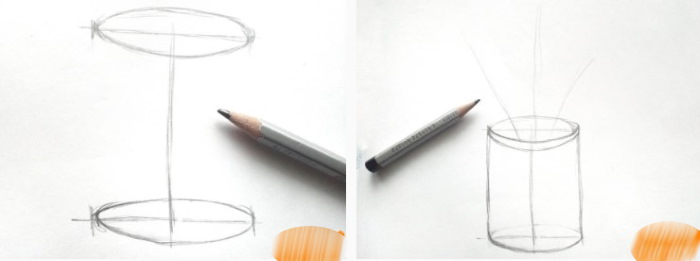
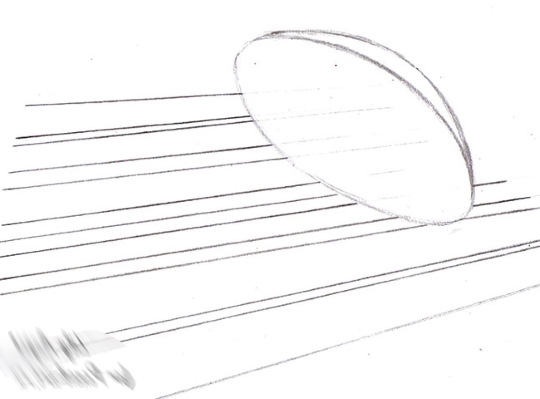
Vase
To draw a vase in which the bouquet will stand, you need to:
- Use a horizontal line to mark the horizon line, shifting it 3-5 cm upwards.
- Step back 3 cm from the lower border of the working plane, draw 2 vertical lines, placing them at a distance of 5-7 cm from each other.
- Connect the lower extreme points of the lines with a semicircle curved downwards.
- Also connect the upper extreme currents by depicting 2 semicircles - with a downward bend and with an upward bend (the neck of the vase).
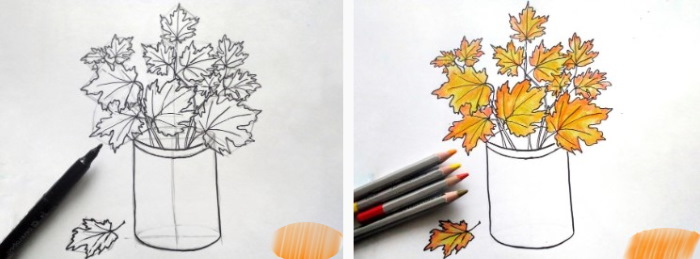
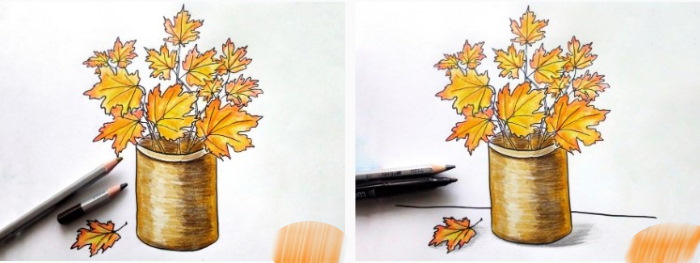
- Fill the interior of the depicted object with shadows, half-shadows and shading, giving the picture realism.
- To the right or left, at the base of the vase, shade a small area, placing it diagonally (the shadow from the vase).
Leaves
Inside the vase, you can draw maple leaves (a symbol of autumn) or a bouquet of flowers, which will later need to be painted over using the main shades of the season in question (yellow, red, orange).
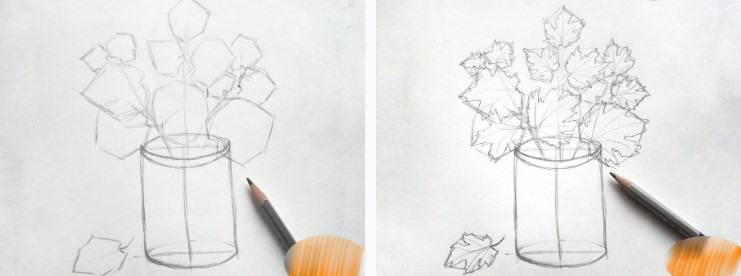
Most often, children choose to draw leaves:
- Fill the space between the 2 semicircles (the visible part of the vase cavity) with vertical lines of varying length (the lower the image, the larger it is). It is acceptable to draw lines with slight bends (leaf stems). The leaf stems should be located at a distance of 2-4 cm from each other. If you draw them closer, it will be more difficult to draw the leaf itself well.
- Taking the extreme point of the line as the center, draw a semicircle curved downwards.
- From the extreme points of the semicircle, draw a line upwards, with 2-3 sharp protrusions. Connect the lines at the top.
- Adjust the lines to make them zigzag.
- Divide the inner part of the resulting sheet into 2 equal halves using a vertical line.
- From the vertical line, draw shorter straight lines, directing them to the upper right corner (if the lines are drawn to the right of the vertical) and the upper left corner (if the lines are drawn to the left of the dividing line).
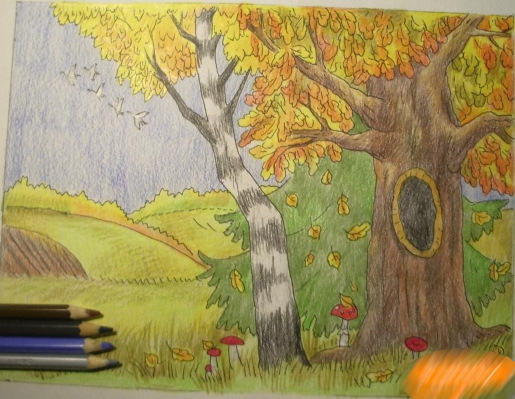
Step by step drawing of autumn forest
The main objects of the autumn forest drawing are trees, landscape and the sun.
Trees
To make the drawing realistic, it is recommended to depict different trees - birch, poplar, aspen, etc. To indicate the type of tree, the trunks should be painted in accordance with the real color of the plants.

The outlines of trees are created using a standard algorithm:
- Once you have determined the horizon line, you can figure out which trees to draw large and which small.
- Draw tree trunks in a chaotic manner using vertical, slightly curved lines.
- From both lines that form the drawn trunk, draw 4-6 more diagonals, grouping them into 2 (branches).
- Draw a schematic representation of the crown or outline the leaves.
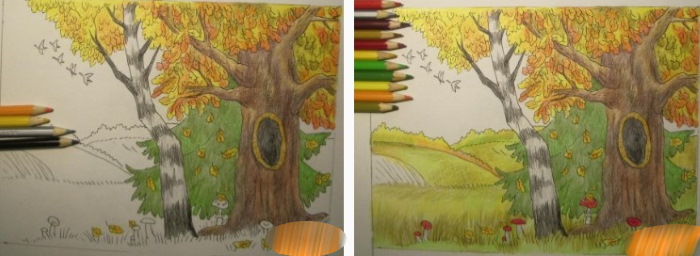
Landscape
To indicate unevenness of the earth's relief, it is recommended to draw semicircles curved upwards or downwards in several places on the working plane. The semicircles should not be large or strongly curved, as this will negatively affect the overall appearance of the final image. The areas under or above the semicircles should be shaded, indicating shadows.
Sun
The easiest way to draw the sun is like this:
- In the upper right corner of the working plane, taking into account the horizon line and the size of the trees depicted in this area, draw an even circle.
- Along the entire length of the circle, draw straight lines directed from the center of the figure. It is recommended to draw lines of different lengths to give volume to the image.
- If desired, color the sun, applying shadows to individual areas.
Step by step drawing of autumn leaves
Autumn leaf fall can be depicted with a pencil in several ways. One of the simplest is a drawing of a tree with yellowed leaves on the branches and also lying on the ground.
Tree
The best way to convey the atmosphere of autumn is with the help of an image of a birch tree with yellowed leaves:
- From the lower boundary of the working plane, draw 2 parallel lines with slight bends.
- As you approach the top edge of the sheet, the distance between the lines should decrease.
- Connect the lines at the top at a common point.
- On both sides of the trunk, draw semicircles curved upwards (main branches).
- From the ends of the semicircles, draw a few more curved lines (small branches).
- Shade or fill the lower part of the trunk with shading.
- Fill the inside of the trunk with short horizontal lines, drawn alternately on the right and left sides of the tree borders.
- Draw the branches again, making them more pronounced.
- Schematically mark with a semicircle the area under the tree that will be occupied by fallen leaves and the shadow from the plant itself.
Leaves
The easiest way to draw leaves, in this case, is to depict ovals, approximately the same size, placing them randomly along the entire length of the main and small branches.
To illustrate fallen branches, it is recommended to fill the space under the tree (semicircle) with ovals of the same size, drawing them as close to each other as possible. To make the image realistic, it should be painted in shades corresponding to autumn.
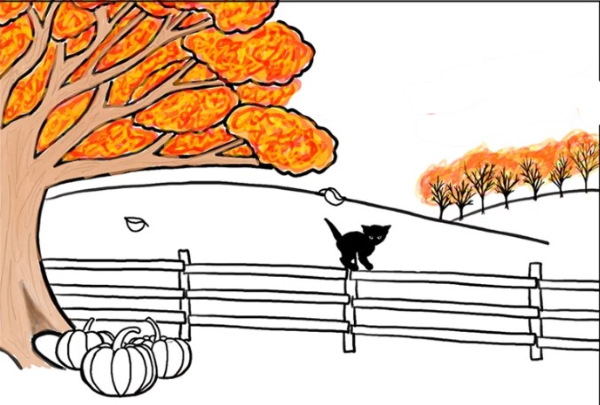
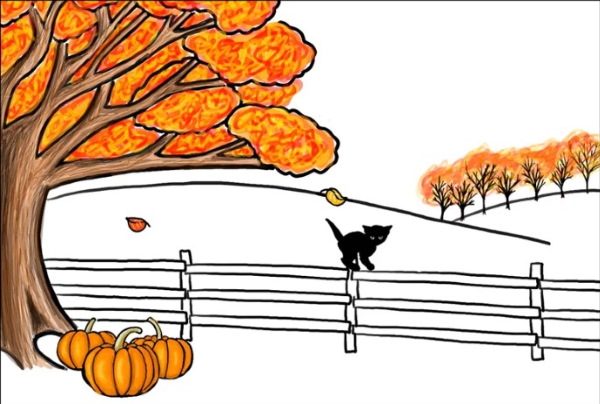
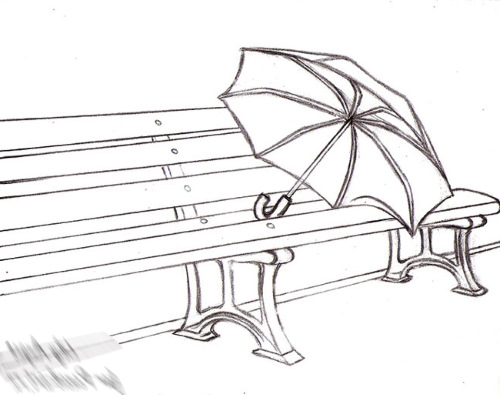
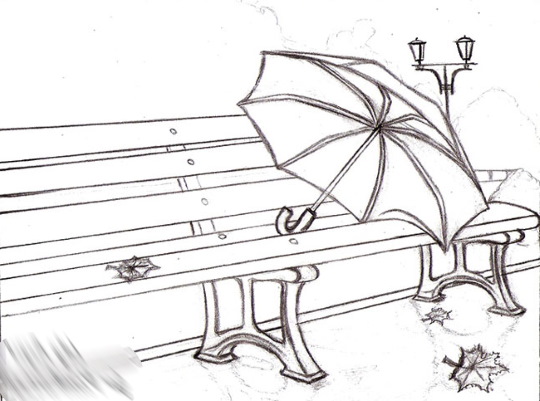
Step by step drawing of rainy autumn
It is best to color the drawing of a rainy autumn after the outline of the main objects of the composition has been drawn with a simple pencil. With the help of correctly selected shades, the young artist will be able to more clearly emphasize the atmosphere of nature of the season in question.
Landscape
It is recommended to draw the landscape of the image using three horizontal lines with randomly located upward bends.
The topmost line should be located approximately 5-7 cm below the border of the working plane, between the second and third it is necessary to maintain 3-5 cm, and the third should be placed diagonally, retreating 5-7 cm from the bottom edge (the hill on which the tree stands).
Tree
To draw a tree as part of an autumn landscape, draw 2 vertical lines (no more than 5 cm long) from the lower border of the working plane. Continue drawing the tree trunk, depicting 3 branches directed upwards using six smoothly curved straight lines.
Along the entire length of the main branches, draw short lines (small branches), placing them in a chaotic order. On one of the main branches, draw a small number of leaves (using an oval, sharpened in the narrowing areas). In front of the depicted tree, draw the outlines of fallen leaves.
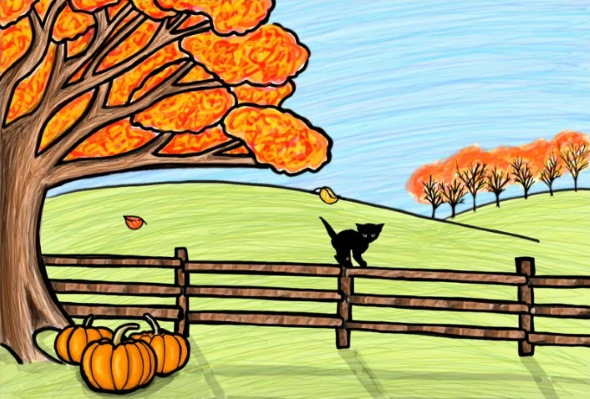
Coloring the picture
To convey the atmosphere of rainy autumn, the child should be asked to use:
- gray-blue color (3 upper areas);
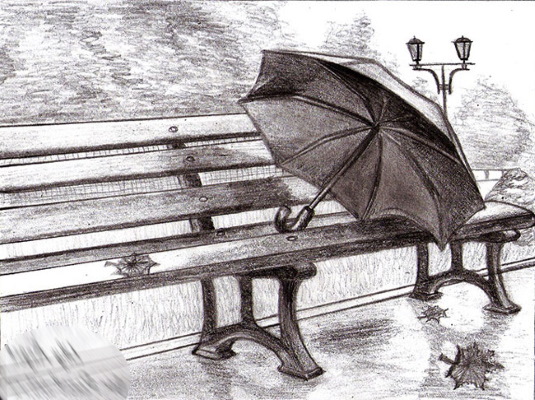
- green color (the lower part from which the tree trunk emerges);
- brown color (fallen leaves);
- light blue (vertical strokes, randomly arranged, illustrating rain).
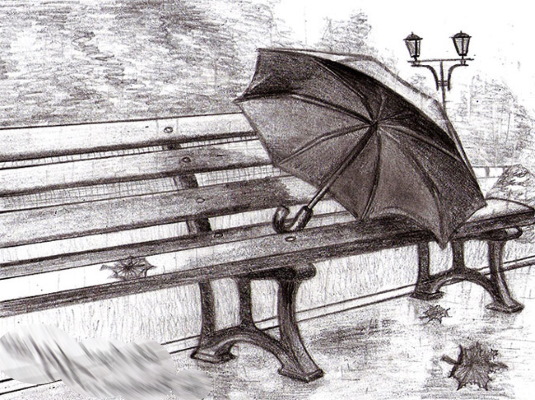
Drawings made with a simple pencil on the autumn theme can be done in both color and black and white. If a child is working on creating such images, adults should not limit him with strict tasks, as this can provoke the emergence of a negative attitude towards creativity.
In order for a young artist to be able to carry out the formulated instruction, it is enough to go for a walk with him in the fall, discussing the objects he sees around him (their shapes, colors, relief, sizes, and so on).
Video about painting autumn landscapes
Autumn pencil drawings:
Thank you