Drawing for children is not only a way to develop fine motor skills, but also an opportunity to express individuality. In the process, children develop their imagination and also spend time away from technology. To begin with, you can try simple elements in drawing: vegetables (tomatoes, cucumbers, onions), fruits (bananas, apples, pears) or leaves.
Simple drawing
A cucumber (a drawing for children can be done with a simple pencil) is quite easy to depict, since the work does not use complex elements. You can color the resulting drawing with colored pencils, or mark the shadow with a simple pencil.
Pencils, paper and supplies
Tools and equipment you will need for drawing:
- sharpener;
- eraser;
- simple pencil;
- sheet of paper.
You will need colored pencils for coloring.
Step by step process of execution
To make the drawing correct, you need to use the picture as a guide.
Step-by-step process of completing the work:
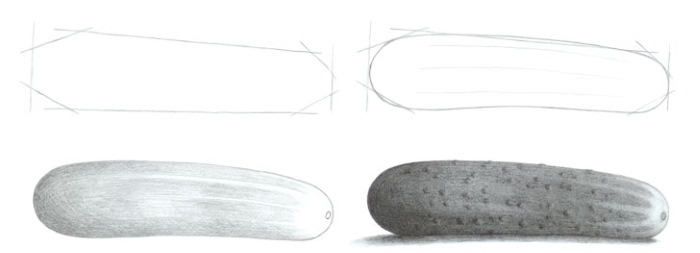
- On a clean sheet of paper, you need to draw a flattened wide oval. You don't need to press hard on the pencil to create light lines.
- The outline of the cucumber can be different. To make it more "ideal", it is necessary to draw a certain groove on one side.
- When the outline is ready, it is necessary to depict the tail of the vegetable. At the thinner end of the oval, it is necessary to visually mark the middle and draw a small rectangle located at an angle of 45-60 degrees.
- On the thicker end, also in the center area, you need to mark a small dot, as shown on the template.
- Over the entire surface of the cucumber, it is necessary to draw oblong lines of different lengths, which will indicate grooves, since the vegetable is not smooth, but has a certain relief. It is important not to press hard on the pencil.
- You also need to draw small circles over the entire area - the pimples of the cucumber.
- Once the basic elements are ready, you can start detailing.
- First, you need to make the previously marked tail more correct. From the rectangle you should make a smoother, slightly curled tail, tapering at the beginning of the vegetable.
- The circles located throughout the area can also be slightly detailed. To make it clear that the elements are textured and convex, you can leave a small circle inside unpainted, and darken the rest.
- The main lines need to be made more active. You can go over the outline of the cucumber, the tail with a simple sharpened pencil again.
- The final element is the grooves. They can be shaded slightly to create a light shadow effect. This should be done with sweeping movements.
The finished drawing can be supplemented with new elements or made brighter using different colors.
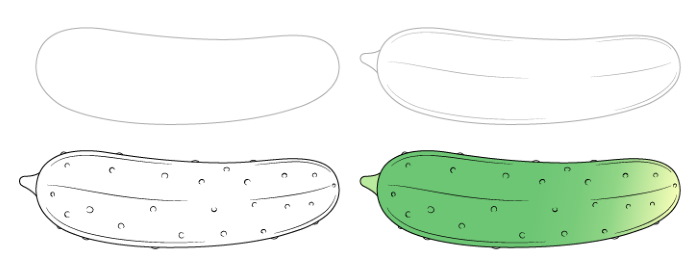
A cucumber (a drawing for children can be colored with colored pencils) is easy to depict:
- The main elements of the drawing must be drawn in accordance with the instructions.
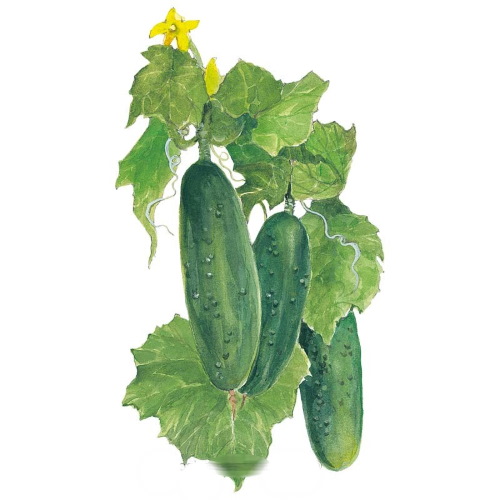
- For coloring you will need green and yellow pencils. Despite the small number of shades, the vegetable turns out quite colorful due to the correction of light and shadow.
- First, you need to work with a yellow pencil. You need to paint the wide part of the cucumber, at the bottom.
- You need to go over the remaining part with green. You can slightly go over the yellow area with ragged movements to make the transition more natural.
- The tail must be applied in a thick layer so that it is dark green in color.
- You also need to go over the long furrows with a green pencil, pressing lightly on the paper. It is better to apply the shade using the hatching technique.
Finally, you can go over the main elements with a black or green marker to highlight the outline.
How to draw a cucumber with a leaf
You can draw a cucumber with leaves. The drawing is not complicated, so it is suitable for children.
Pencils, paper and supplies
Tools that will be needed in the process:
- Sheet of paper;
- Compass;
- Eraser;
- Sharpener;
- A simple pencil.
If desired, you can color the finished drawing with paints or pencils.
Step by step process of execution
Step-by-step process of completing the work:
| Stage name | Description of the stage | Template image |
| Upper part | Using a compass, draw a small circle on a clean sheet of paper. Do not press down on the compass so that the figure is barely visible. |  |
| Bottom part | To the side, you need to draw another circle, larger or smaller. The figure should be placed not under the upper circle, but to the side, below. | 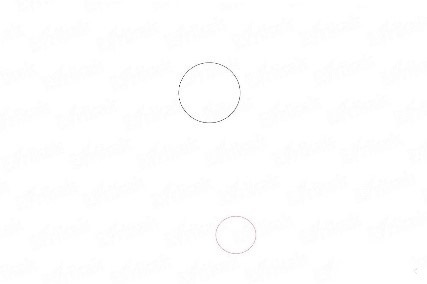 |
| Main part | Using 2 arched lines, you need to connect both figures. | 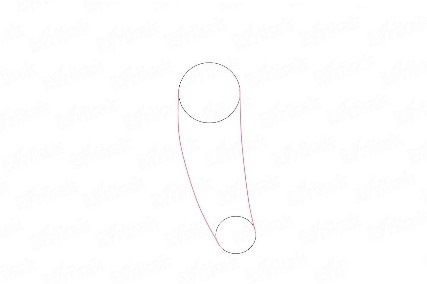 |
| Cleaning | To make the drawing look cleaner and easier to work on, you need to remove unnecessary details. Use an eraser to remove the arched lines that are inside the main elements. | 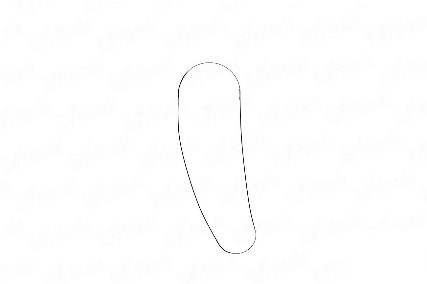 |
| Tail | On the top of the cucumber, you need to draw a curved line. On the side, you need to duplicate it, and then connect them at the top with a small circle. | 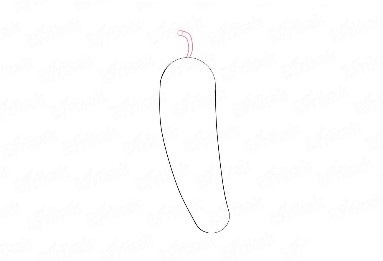 |
| Sheet | On the side of the tail, you need to draw a leaf. It looks like a maple leaf, which is connected not at the base, but much further. You can also try drawing an inverted heart, and then using lines to create a leaf. | 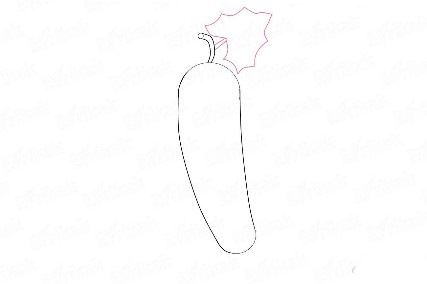 |
| Pimples | The cucumber is covered with pimples all over. They are oval in shape and vary in size. | 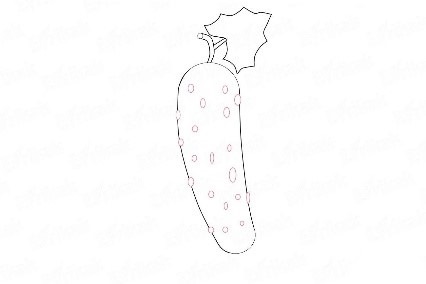 |
| Sheet detailing | There are veins on the sheet. First, you need to draw the central vein with an arched line. From the center, you need to draw short curved lines. | 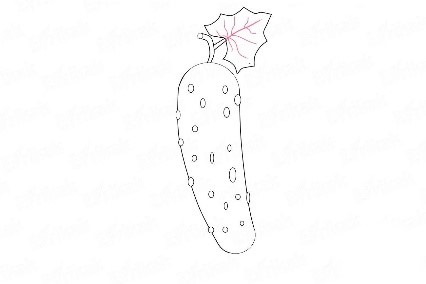 |
| Detailing of pimples | Inside the pimples, you need to draw spikes. They can be depicted as small dots or circles. | 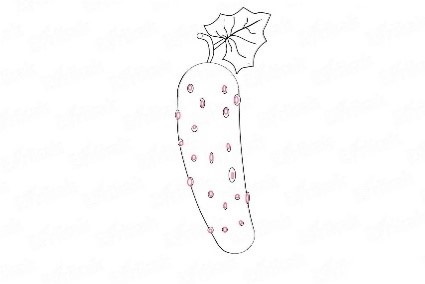 |
| Texture of cucumber | Using short curved lines, you need to give the cucumber surface volume. Such lines cover the entire cucumber. | 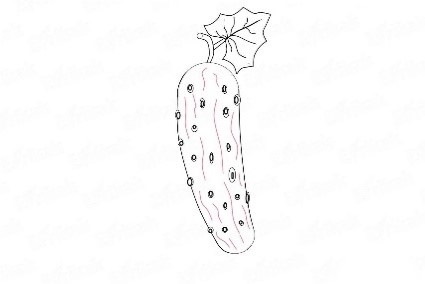 |

Using paints or colored pencils, you need to color the finished drawing. You can achieve this result using 1 color. It is important to regulate the intensity of the shade.
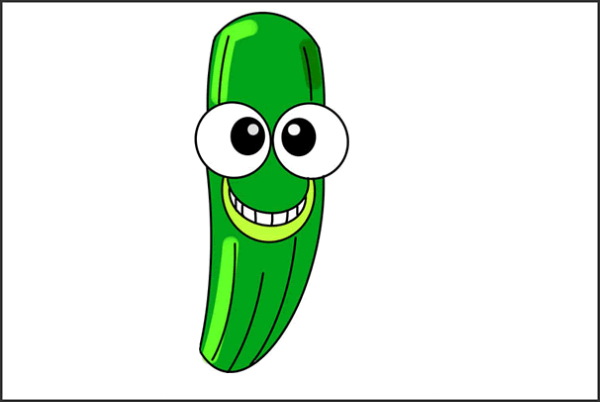
With eyes
Cucumber (a drawing for children with eyes) can be a cartoon character. The finished vegetable turns out very funny. You can color the finished drawing with paints.
Pencils, paper and supplies
Tools that will be needed in the process:
- pencil;
- eraser;
- thick paper;
- green gouache;
- yellow paint;
- a glass of water;
- black and white gouache;
- brushes.
You can also use watercolors or colored pencils.
Step by step process of execution
This template should be used as a guide.
Step by step process:
- First, you need to draw a thick, elongated oval - the base of the cucumber.
- Approximately 1/3 of the overall figure should be separated by an arched line. Using smooth lines, connect the arch and the base of the cucumber to make the drawing more accurate.
- Using an eraser, you need to remove the extra line.
- On the top part it is necessary to mark a small "barrel". From it it is necessary to draw torn figures similar to tongues of flame.
- Visually, it is necessary to mark the middle of the resulting cucumber. A little lower, you need to draw a steep arc, the convex side of which will look down.
It needs to be connected to an even steeper arc located below. A dim line should be used to slightly shade the upper part of the resulting element.
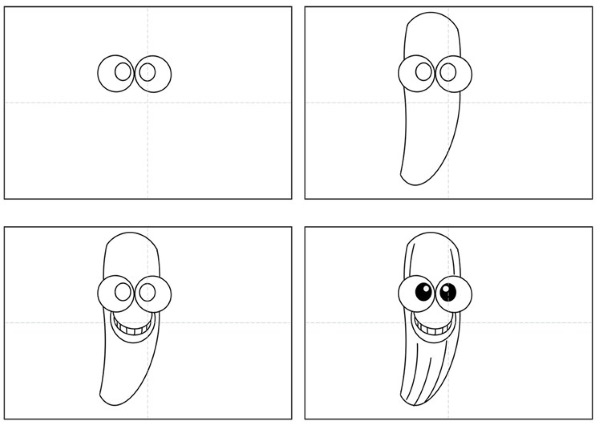
- Above the previously outlined visual line, you need to draw 2 circles. Inside, you need to depict 2 more smaller circles, located closer to one of the sides. You need to immediately shade them slightly.
- It is necessary to draw small arcs over the entire surface of the cucumber, which will indicate voluminous pimples.
- Just below the mouth, you need to draw raised sticks, from each of which 4 short lines should come out.
- From the base of the vegetable, you need to draw the legs. They can be straight or bent, as on the template. You also need to draw the "boots" - oblong ovals.
- When the frame of the drawing is ready, you can start coloring. It is necessary to prepare water, paints and brushes in advance.
- First, you need to dilute the gouache to a creamy consistency. Fill the inside of the cucumber with green paint, not including the eyes and mouth.
- While the paint is drying, you need to mix a little green and black paint in the palette to make the color more active. Work with gouache using clean tools.
- When the paint dries, you need to draw the upper part of the mouth, stretching the color downwards.
- The cucumber's arms and legs also need to be drawn in a dark green shade.
- Green paint should be mixed in small quantities with white to paint the lower part of the mouth.
- While the paint is drying, you need to paint the top element yellow with a clean brush.
- Using a thin brush, draw the pupils.
- The boots can be painted in any color of your choice.
- The final step will be to draw a glare in the eyes with white, as well as highlight the lower part of the mouth with a lighter green shade.
If desired, you can draw a shadow using black paint diluted in water.
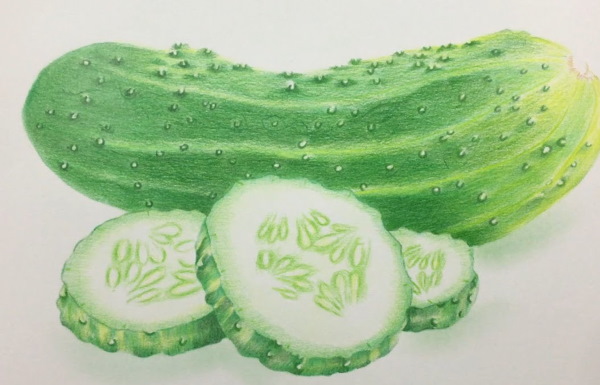
In the garden bed
A cucumber (the drawing for children can be varied) can be drawn on a garden bed. The process is quite labor-intensive, so it is suitable for older children.
Pencils, paper and supplies
For the drawing you will need:
- thick paper;
- brushes and water;
- watercolor;
- eraser;
- simple pencil;
- sharpener.
You can also color the finished drawing with other paints or colored pencils.
Step by step process of execution
Step-by-step process of completing the work:
- To begin, on a clean sheet of paper, you need to mark the boundaries of the cucumber by drawing 4 short parallel lines.
- The prepared borders must be connected with uneven lines that taper slightly to one side. The remaining pieces of the designated border must be erased with an eraser.
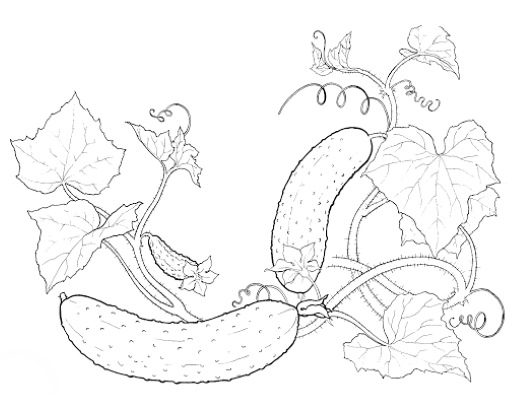
- On the wider side, you need to draw a flower. It consists of 5 petals and a small core. From the flower, you need to draw a long spiral whisker, directed in any direction.
You need to draw it quite actively, pressing on the pencil, since there is no need to color it.
- In the background, you need to draw the leaves. They look like graphic hearts. To begin with, you can draw the leaves completely (for convenience), pressing lightly on the pencil. Using an eraser, you need to remove unnecessary elements that come to the foreground.
- On the resulting sheets you also need to draw veins.
- Using circular movements, you need to mark the pimples. In the middle of the resulting circle, you need to draw a thin short line - a spike.
- It is also necessary to indicate the light texture of the flower - draw long longitudinal lines.
- The finished drawing can be shaded, if desired.
- Using watercolors, you can add bright accents to your finished drawing.
- Using a large brush, you need to pick up some green watercolor, having previously followed all the rules for working with paint. You need to use a minimum amount of color so that it acts as a base.
- The cucumber and cucumber leaves need to be painted green. There shouldn't be much water, otherwise the paint won't dry.
- Having collected a larger amount of paint, it is necessary to paint the places close to the veins in the leaf, the veins themselves.
- It is also necessary to highlight some areas of the cucumber, creating dark green streaks. The bulges can be slightly darkened.
- While the main part is drying, you can apply the base to the flower. The pale yellow shade should be placed on the entire area of the flower, and then go over the designated veins with bright yellow.
- A slightly grayish shade can be used under the cucumber and flower to create a light shadow. The thorns need to be highlighted with black, and the deepest veins can be marked.
You can also work with light - create highlights on the surface of the cucumber to create a glossy effect.
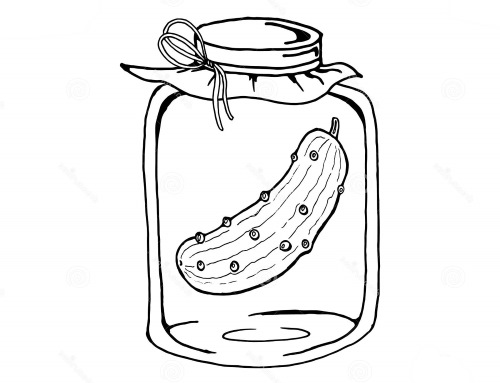
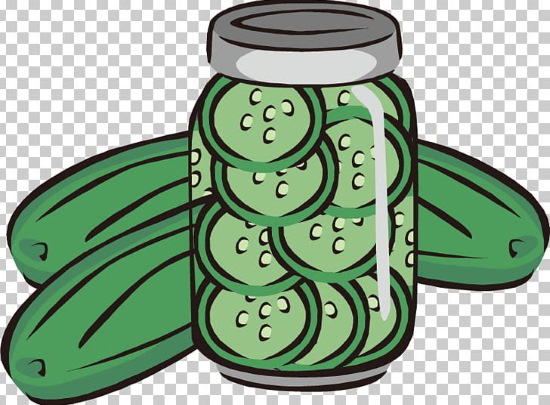
At the bank
You can also draw cucumbers in a jar. Pickled cucumbers are a fairly common product on the table, which also cannot be left unnoticed.
Pencils, paper and supplies
To work you will need:
- simple pencil;
- ruler;
- eraser;
- sharpener.
You can also color the finished drawing with paints or pencils.
Step by step process of execution
During the work process, it is necessary to be guided by this image.
 Step by step process:
- First, you need to draw a jar. The jar will limit the products, set boundaries.
- To make the container even, it is necessary to use geometric shapes.
- Using a ruler, draw a tall rectangle that will be the base of the can. The bottom must be depicted using an oval. Half of the oval must go inside the rectangle. The details that are inside the "can" must be erased.
- The neck of the jar should be only slightly smaller than the overall volume, so the transition should be smooth and small.
- The lid should go over the neck from above. Its edges should be drawn with a ruler, and the lower edge should be depicted with an arc. The flat oval on top should be the top of the lid.
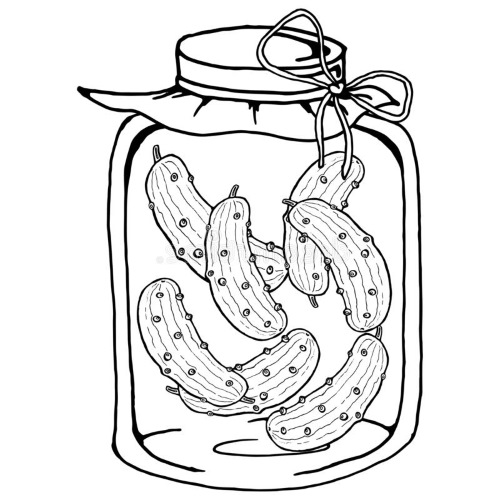
- Inside the jar, you need to draw the outlines of cucumbers - uneven, arched ovals. The cucumbers should be at different heights, and also create a sense of volume.
- If desired, you can add some detail to the cucumbers by drawing small arched lines - pimples.
- When the drawing is ready, you can start coloring.
- Prepared paints need to be moistened with water. The lower parts of the cucumbers need to be coated with a yellow, barely noticeable color.
- When the paint dries, you need to take a little green and, starting from the top, paint the cucumbers. Closer to the yellow paint, you need to slightly stir the paint to get a light gradient.

- The lid of the jar can be painted in any color of your choice.
- The free space around the cucumbers - the brine - needs to be painted slightly yellow.
- Dried cucumbers need to be painted brighter. The tops of the cucumbers need to be painted with a dark green shade, and the outline of each vegetable needs to be outlined with a thin brush.
- When the paint dries, you need to add a highlight characteristic of the can. With transparent blue, you need to draw an uneven strip on one side (depending on the location of the light and shadow). On the same side, you need to install a white highlight on the lid with white.
If desired, you can also make barely noticeable white highlights on each cucumber. Cucumbers are very popular in all countries of the world. It is believed that the vegetable's homeland is India (some areas) and China.
In the Soviet Union, there was even a cartoon film called "The Adventures of Cucumber". The main character was kind and brave. The vegetable is also often found in books. N. N. Nosov wrote the work "Cucumbers" - a book with pictures for children.
Video about drawing
Cucumber drawing for kids: