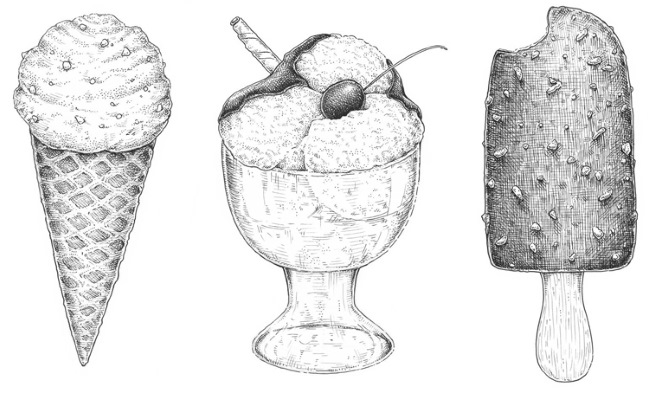
Adults and children love ice cream, especially when it's hot outside. The process of drawing it is simple and accessible to most fans of the dessert. Such pictures can be used to decorate an album, a diary or a gift card.
How to draw ice cream with pencil
The process of creating a pencil drawing of ice cream begins with choosing:
- pencil;
- sheet of paper;
- sketch.
Detailed instructions for work will allow you to learn how to create images without any difficulties. Even a child will understand how to act. The step-by-step scheme of drawing ice cream does not require much knowledge in this type of art.
Ice cream (a drawing for children can be made in different versions) in the simplest version is made in the following stages:
- Prepare a sheet of thick paper or a drawing album.
- Choose a pencil and a marker to highlight details (preferably black).
- Place the sheet comfortably and start working from the bottom segment by creating a base for the treat. This will be a triangle, pointed downwards and slightly elongated. To make the triangle a perfectly even shape, you can use a ruler.
- Add a semicircle or oval to the triangle on top. This is the visible part of the ice cream that sticks out of the cup. The so-called cap will be adjusted later.
- Using a regular eraser, correct the image by erasing all unnecessary parts.
- Make a grid on the cup to make it look like a waffle texture. The image should be realistic.
- Make small peaks at the top of the oval and round its sides a little.
- Decorate the top of the airy treat with a cherry or other decoration.
- Draw a cone-shaped form at the top of the image and round it off.
- Add stripes of jam, preserves, and candied fruit to the image.
- Once the outline is created, color the drawing.
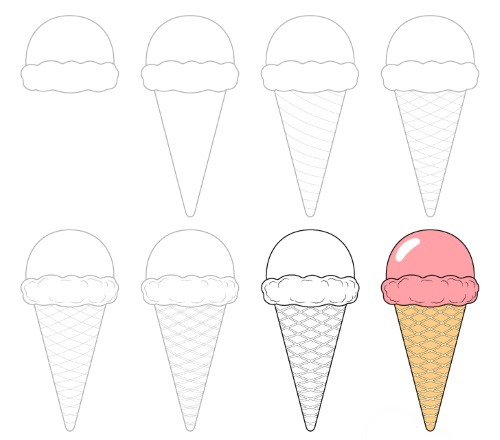
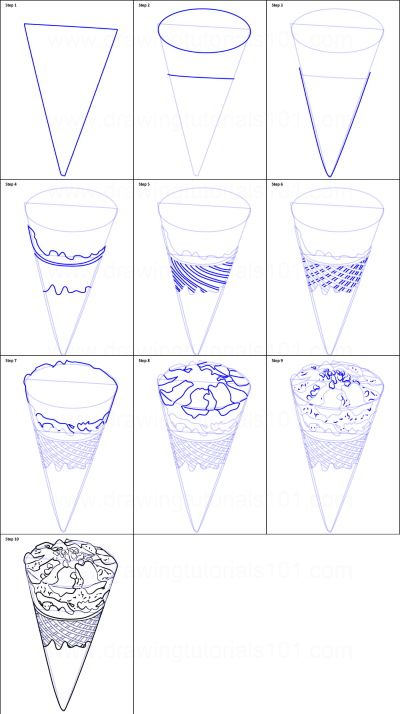
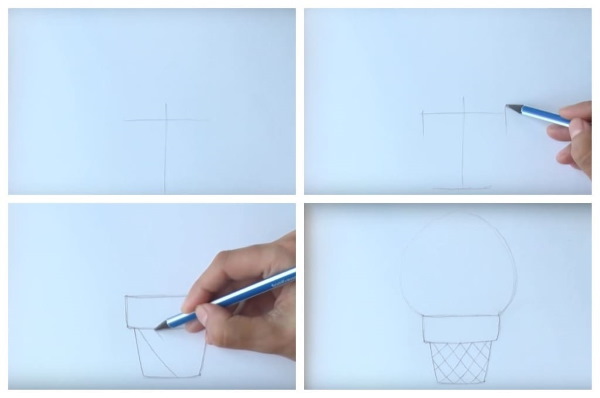
Ice cream cone
Having learned how to draw regular ice cream, you can complicate the task and draw a picture of the treat in a cone.
To create an image step by step, you need to prepare the tools, take a sheet of paper and do the following:
- In the center of the sheet, draw a rhombus, which is divided into equal segments.
- The sketch is divided into a lower and upper part. The lower part will be the cone itself, and the upper part will become the basis of the visible part of the ice cream.
- From the top part, make a soft and smooth texture of the sweetness, rounding its sides with a pencil.
- Trace everything, making an outline and slightly correcting the inner lines to make the drawing more natural.
- Use an eraser to remove the original lines of the diamond and other unnecessary details.
- Sketch the resulting design, add shadows in the right places and emphasize the texture of the soft cream.
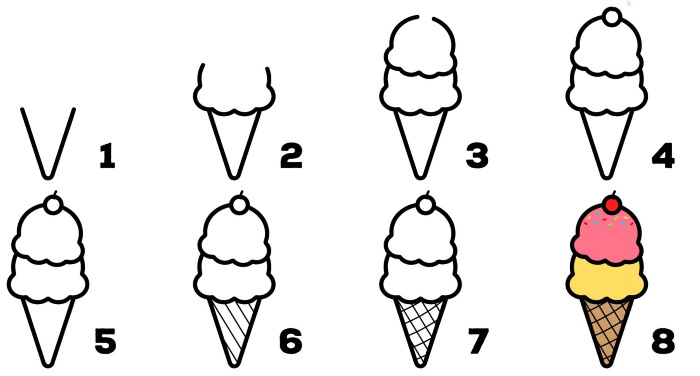
Ice cream (a drawing for children of this dessert can be in a cup or without it) cone is convenient to draw for artists who do not have much experience.
The stages of its creation are as follows:
- Draw an irregular line that resembles the letter G. This will be the beginning of the filling design.
- Emphasize the layers of ice cream by making them different in length and thickness. The top one should be the smallest.
- Move on to the 2nd side of the yogurt cream, showing how beautiful its structure looks when frozen.
- Use strokes to correct the image, making the image of the cream uniform.
- Proceed to creating the cone itself. To do this, draw a cone at the bottom, depicting the crispy wafer base of the tube.
- Make a mesh pattern on the surface of the tube. It should repeat the square texture of the form on which the dough was baked. The squares will be yellowish inside, and the cells themselves can be highlighted with a light brown line.
- The finished sketch is outlined with a sharp pencil or black felt-tip pen. The filling can be made in a shade that is pleasing to the artist. It is best to choose pink: it will look more natural.
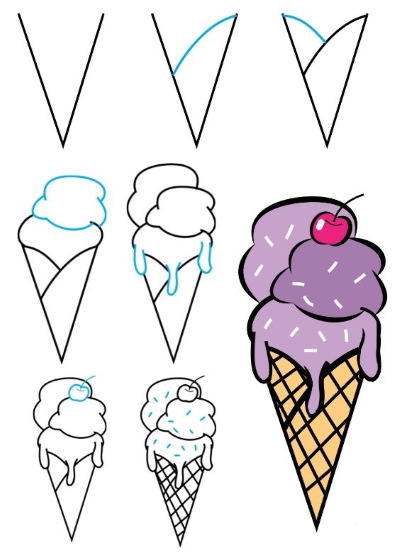
Horn with colored balls
A picture of ice cream in a cone, sprinkled with colorful balls, will appeal to children.
To work on it, you need to prepare:
- pencil (preferably soft);
- felt-tip pen (brown or black);
- marker (if not, you can use a gel pen).

The work will be short and simple.
The creation of a drawing consists of the following stages:
- Draw the outline of the ice cream, which will serve as a guide for the entire process. This is done with a pencil, without pressing too hard on the lead. The lines should be noticeable, but not too prominent.
To create a sketch, you can use the drawing scheme described above. It is suitable for creating a new version of the ice cream drawing.
- Use a marker (pen) to outline the outline of the drawing. The main thing is not to stray from the lines.
- Create a decoration on the drawing. This will make it different from other images of horns.
- Draw all the decorations so that they look like a single picture.
- Color the drawing. To do this, use the technique of creating chiaroscuro. You can make the drawing bright with paints. Just keep in mind that you need to apply the color in one direction so that stripes or poorly painted areas are not visible on the picture.
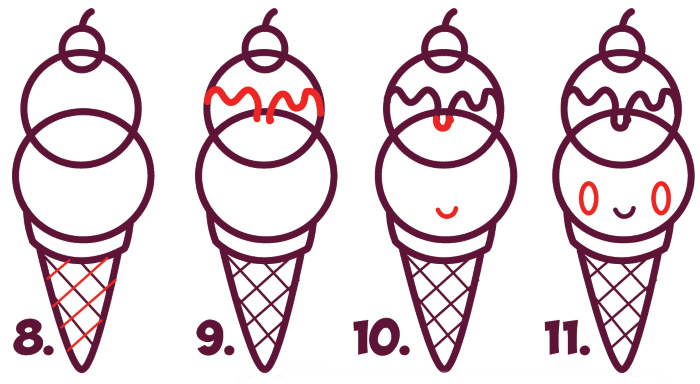
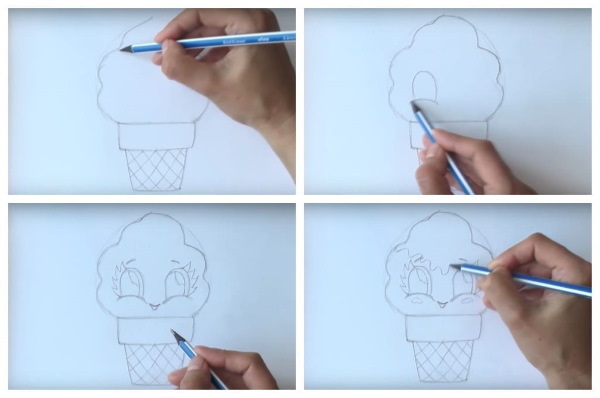
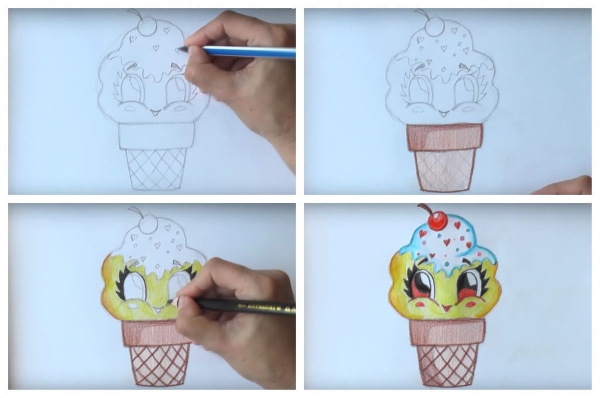
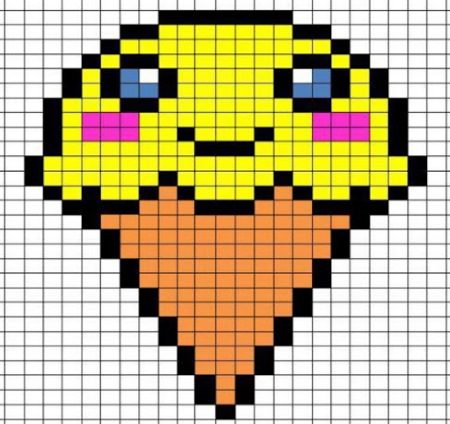
Ice cream with eyes
After mastering drawing simple images, you can move on to more complex pictures.
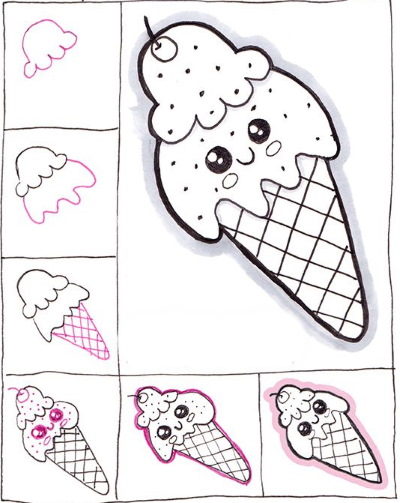
They can also be done using a simple pencil following detailed step-by-step instructions:
| No. | Stage | Sequence of actions |
| 1 | Creating the foundation |
|
| 2 | Adding details |
|
| 3 | Coloring the image |
|
Ice cream in a cup
Ice cream (a drawing for children of a dessert containing ice cream or creme brulee is more convenient to do on a sheet of checkered paper) will look more attractive on paper if symmetry is observed.
The procedure for drawing ice cream in a cup is as follows:
- In the center of the sheet with the drawn cell, draw a vertical stripe.
- Draw lines at the bottom and top that will be the bottom and edges of the cup. They will indicate the size and height of the drawing.
- Draw 2 lines on the sides, first parallel to the vertical, then slightly at an angle, trying to connect at infinity. This will be the main outline of the future cup.
- Work on the resulting drawing. A grid of cells is created, like that of waffle dough.
- Half-arcs go from bottom to top, connecting the side parts with smooth lines. Visually, you will get the shape of a cup.
- The dashed lines that made the mesh pattern in the drawing are outlined with thicker lines that highlight the structure of the drawing. Do the same with other details that are already fully drawn.
- Paint the cup with pencils or gouache. It is recommended to make highlights where the top of the ice cream is located to give relief and shape to the drawing.
Eskimo
The favorite delicacy for many is Eskimo ice cream, so in class children and adults strive to create this image. It brings back pleasant memories of summer, vacation, childhood.
The practical lesson of creating such a drawing is not difficult, even if you have no drawing skills. It contains several important stages that must be followed.
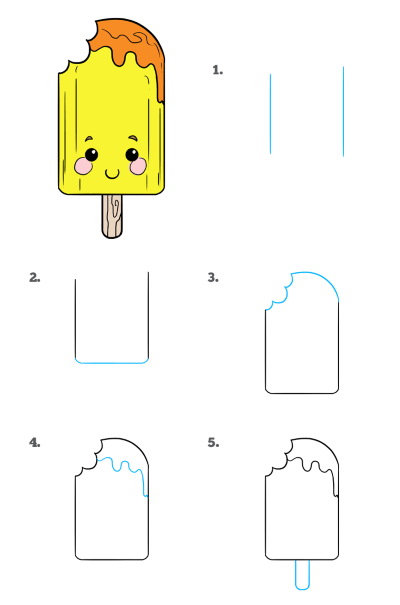
The step-by-step instructions are as follows:
- Prepare pencils, paper and paints.
- To quickly and effortlessly draw an ice cream on a stick, make a thin and long rectangle in the center of the sheet. It is better to make its corners slightly rounded. This will simplify the task later.
When talking about shape and size, every artist must understand that proportions must be observed. A contour that is too long and thin will look incomprehensible. However, the same goes for a thick and short one.

- Draw the chocolate layer that covers the ice cream on top. To do this, just make a couple of strokes and everything will be fine. It is better to use a brown pencil.
- At the end, draw all the main lines along the outline with a pencil and draw a stick at the bottom, by which the treat is taken.
- Color the finished drawing.
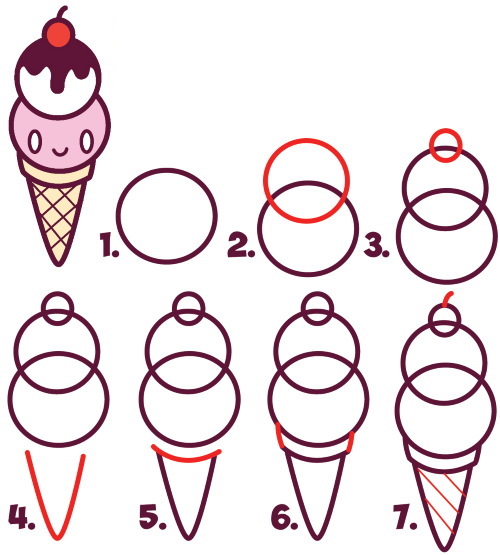
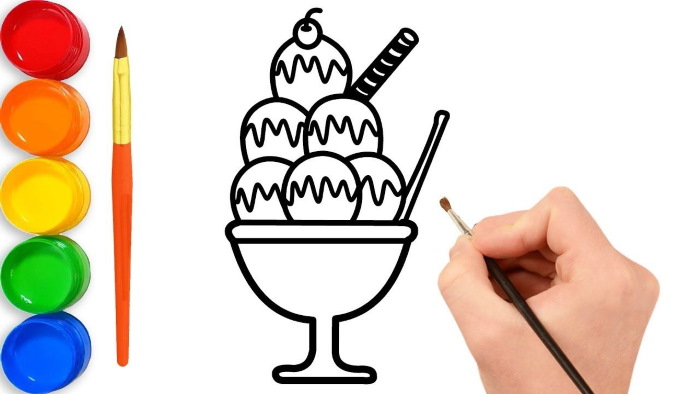
In a bowl
Ice cream containers can be of different shapes and volumes. The artist will choose what he finds interesting and transfer it to paper. For example, it is interesting to see what ice cream will look like in a bowl. From a technical point of view, drawing it is no more difficult than other drawings, the main thing is to work strictly according to the instructions.
This ice cream in a beautiful cup on a stem is usually served in the form of balls and it looks beautiful both in life and in the picture.
The steps to create such a drawing are as follows:
- Using a simple pencil, without pressing too hard, draw a circle, slightly flattened at the top and bottom. At the bottom, it is crossed by a straight line.
- Draw the base of the bowl (cream bowl) from the oval. Its edges are slightly curved upwards, and the bottom runs strictly along the lower level of the circle. The line divides the bowl in half, allowing you to maintain the necessary balance of the design.
- Draw a leg to the bottom of the bowl. This is done with smooth lines that make the drawing attractive.
- Draw an attractive face on the front of the bowl. It smiles happily, inviting you to taste the contents. The eyes, mouth, cheeks and nose should be raised.
- Draw a few balls inside the bowl that will entice you with their cool texture.
- Trace all lines along the contour with a pencil, remove the excess with an eraser.
- Color the image. If the bowl can remain transparent and pale, then it is better to make the balls multi-colored. This will create a joyful mood when looking at the picture.
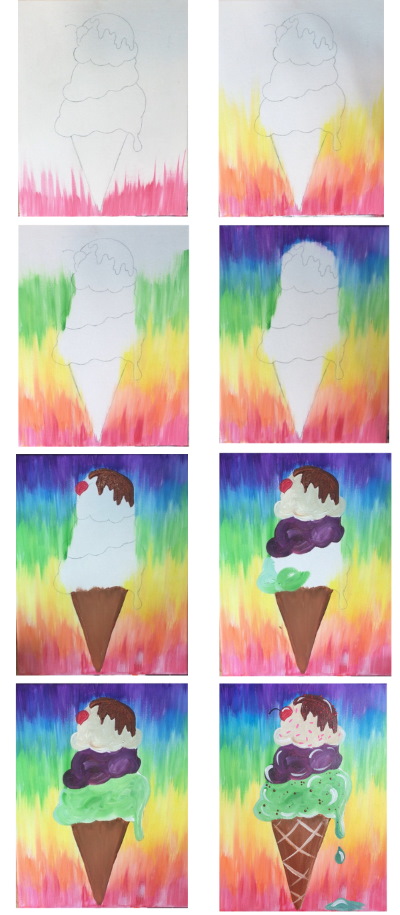
Drawing with paints
Ice cream (a drawing of a dessert for children can be done with paints, felt-tip pens, pencils or pastels) is easy to do with paints.
To work you need to prepare the following:
- a sheet of test Whatman paper. It won't get soggy from water and will preserve the image until the paint layer dries;
- paints. You can choose simple and inexpensive watercolors;
- a comfortable board;
- pencil for creating contour. Preferably medium soft;
- Scotch tape (masking tape). It will help preserve the contours;
- a towel or hard napkins for blotting and cleaning brushes;
- plain water;
- brush;
- a little salt.
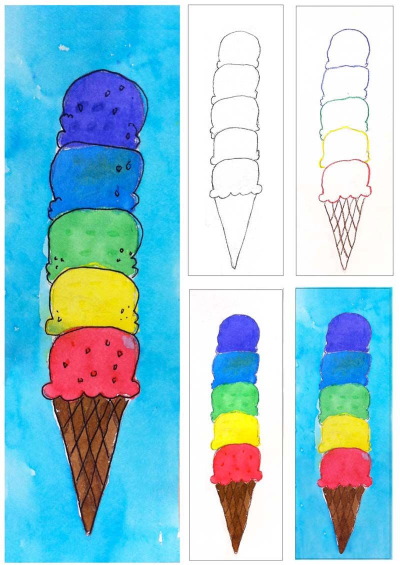
The stages of drawing are as follows:
- Secure the paper to the plank surface using regular masking tape.
- Draw ice cream using one of the rules described above.
- To understand what colors to use, it is better to try them on the palette in advance. To do this, take a little paint on a brush, which is pre-wetted with water. Let the artist not be afraid of the resulting motley range. Only the necessary tones are used for the drawing.
- It is better to start applying paint with brighter tones - red or violet. First, the main range is applied, and then shades of color are created. For example, the tone on the top is paler than in the center.
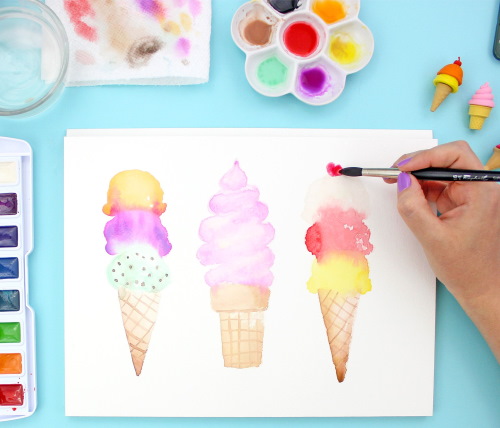
- Use another color, such as green. It should not be mixed with white and it is necessary to wash and blot the brush before applying it so that the shades do not mix on the paper. This is how the eyes or the decor of the ice cream pattern are created. Small contrasting dots will emphasize the details.
- Dilute the green color with water, which will create the impression that there is green ice in the picture. It is transparent and not too aggressive in color.
- The stick or base of the table is highlighted in yellow. Brown pigment is used for realism.
- If necessary, continue the experiments further by drawing fruits and dessert nearby.
Those who picked up paints for the first time should take into account the texture of the paints and the frost effect. To do this, sprinkle individual fragments with salt while the paint is not wet, but not yet completely dry. After drying, the grains should be carefully removed.
Drawing by cells
Those who hesitate to create their masterpieces on regular paper can be advised to use sheets with cells. They will simplify the process and make it no less exciting than assembling a multi-colored cube, while the pictures are colorful and similar to the original. Small children especially like this type of creativity.
The step-by-step method of drawing is as follows:
- On a sheet of paper, paint 1 square at the bottom. From it, paint 2 more squares up along a vertical line on different sides. Then go up another 3 squares and add 5 similar segments. This will be the base of the cup.
- To create the top of the cup, paint 2 squares from the middle of the vertical structure in the horizontal plane. Then, moving diagonally, paint 2 more cells, and then go down 1 cell, creating an angle. On the other side, the actions are performed in mirror image.
- To get a slide, measure 3 cells horizontally and draw a strip.
- To make the ice cream visible, rise vertically from the middle of the line several times by 2 squares.
- Diagonal lines are made from chains of 2 and 7 cells. Thus, the outline is drawn. All that remains is to color the picture.
Creating a sketch of an ice cream drawing will appeal to adults and children. This fun and creative work will give a lot of positive emotions.
Video about drawing
Ice cream drawing for kids: