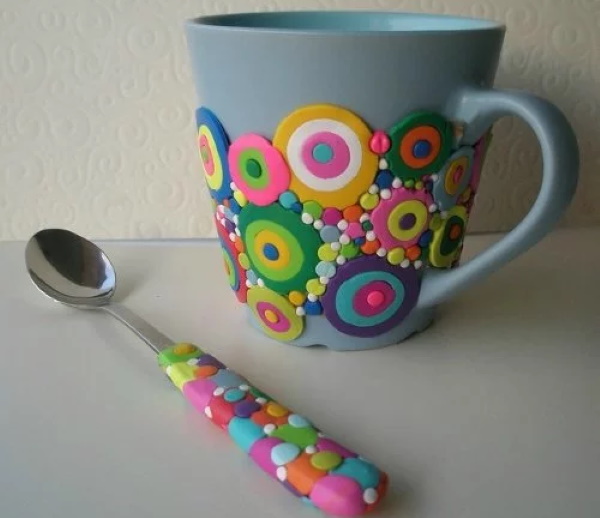
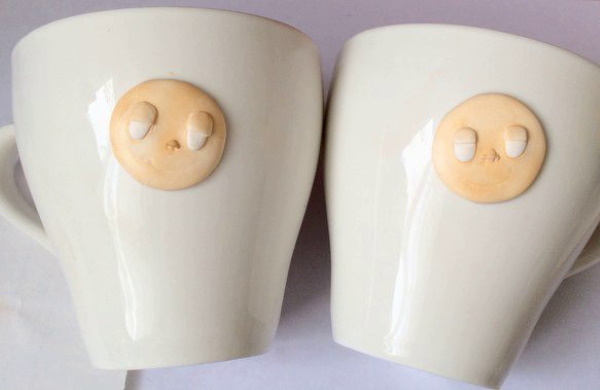
Polymer clay is a magical material that allows you to create amazing decorative ornaments. With these products, you can create gift sets, decorate simple mugs and turn a souvenir into a real handicraft.
When working with polymer clay You need to consider the same principles of work as with plasticine. However, some features of the modeling process differ not only in technology, but also in the choice of tools.
Tools and materials
The most popular material is cheap and accessible clay made in China. It is suitable for beginners, but for masters it is better to choose a higher quality and more expensive analogue. Chinese clay is baked at a temperature of 130 degrees without changing color or losing its properties. After baking, transparent colors become more cloudy, and white turns gray.
The composition contains a plasticizer, thanks to which the clay remains soft and flexible.
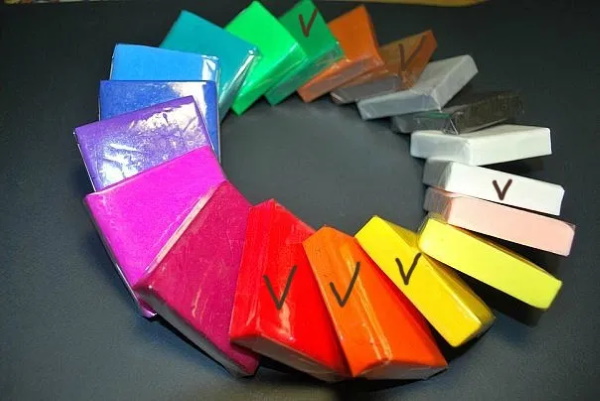
The flexibility is maintained even after hardening, so it is very easy to work with the material. It is better to make polymer clay mugs from Fimo brand clay. It is characterized by a high degree of flexibility. For small parts, such properties can be a failure, since where plasticity is needed, it is not there.
In other cases, excessive flexibility causes a lot of inconvenience:
- The clay should hold its shape well, especially in areas where there are fragile areas.
- Excessive softness sometimes does not allow creating a streamlined shape, although the Fimo brand is in great demand among professional craftsmen.
- To avoid the negative effect of softness, the clay should be kept in the open air for 2-3 days before sculpting. It is important to place a piece of material on a white sheet of paper so that the clay does not absorb excess pigment.
- The same method should be used to soften the polymer composition of this manufacturer.
The polymer material is suitable for molding small flowers, decorations and other decor. It will not be possible to create a full-fledged cup from clay of this brand. Plastic of the Tsvetik brand is considered more expensive, but its texture allows you to create flowers, large beads and various products for attachment to a relief surface.
The texture also allows you to create complex products that require skill and precision. The sets contain 6-12 different colors that match the color palette. This means that after baking, the shades practically do not change, the composition remains the same due to the properties.
Foreign analogues of this brand are:
- PREMO;
- Sculpey;
- Kato;
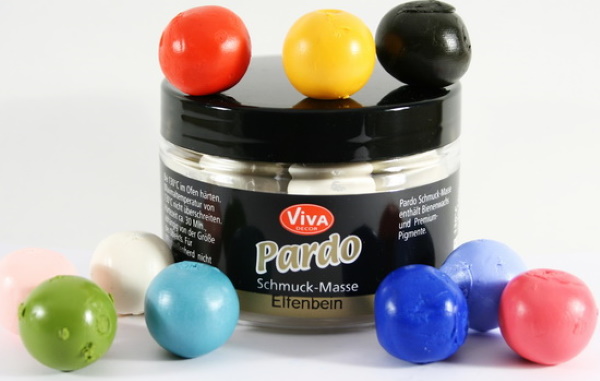
- Pardo.
Domestic clay is made from readily available raw materials, which is why it exhibits more brittle properties after drying. When using a rolling machine, the material may look like soft, hot cake mastic. Finished decorative items literally crumble and fall apart, especially old clays that have been lying around for 3-4 months.
Polish polymer clay has excellent properties, which is considered the most accessible, strong and versatile. It can be boiled, baked - suitable for creating flowers, petals, sculptural design and creating "sausages".
Foreign clays also differ from each other:
| Name | Characteristic |
| "Fimo" | The brand presented 3 different types of clay – Professional, Soft and Effect. The second type is the softest. It is also considered the most universal for any modeling, and after drying the color does not change. Translucent shades become brighter, and white remains the same snow-white. If the translucent white color has a thick layer, after drying it will remain with a gray tint. You can also create additional effects by adding sparkles, glitter, pearlescent particles from mica. |
| Premo | The clay has a pleasant surface and soft texture. After drying, it creates the effect of a wax film. It is best suited for creating "sausages". |
| Studio | Sculpey brand plastic has a velvet texture, which differs from other analogues. The color range is the most diverse. Juicy colors are distinguished by restraint and nobility. |
| Cernit | Dense polymer clay that needs to be kneaded well in advance. In the package, the material is similar to wax - soft, dense and translucent.
After baking, the color changes significantly, and the transparent texture appears. The clay is suitable for modeling dolls, faces, and imitation marble. Natural textures from it are the most realistic. |
| "KATO" | This plastic requires higher temperatures for baking. The consistency is harder, it should be kneaded with a special hammer. Due to its strong properties, clay is rarely found in Russia, the demand for it is very small. In artistic modeling, you can use clay of this brand for "sausages", small details and thin layers. |
For beginners, it is necessary to purchase several basic colors that can be mixed together due to the small consumption of each of them.
Namely:
- blue;
- yellow;
- red;
- white.
The latter can only be purchased with sufficient transparency if it is necessary for the implementation of any complex parts.
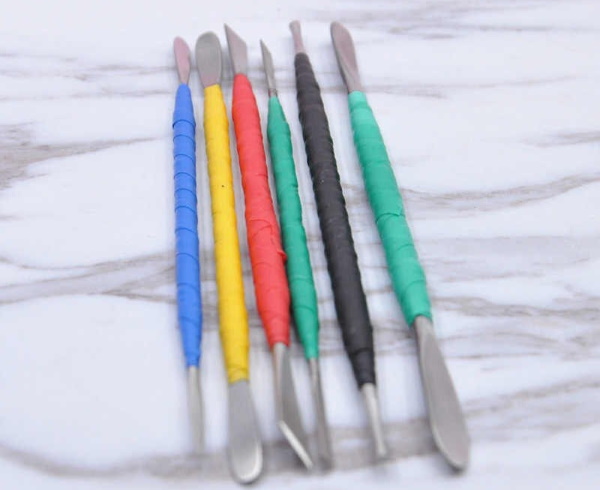
You will also need the following tools for sculpting:
| Name | Characteristic |
| Knife | It should be sharp, it is advisable to buy not a stationery knife, but one that is designed for cutting paper and cardboard. Dull knives will smear the drawing during cutting - it is better to exclude Japanese accessories, since they have thick knives. Cheap analogues will quickly become dull, so the selection range should be in the range of 200-400 rubles. |
| Rolling pin | Even a beginner should have one. If you don't have a special rolling machine, a rolling pin will help you if you need to create a thin layer of material. A pasta maker can also replace a pasta machine. Plastic rolling pins are not suitable, as they stick to the clay. An acrylic roller is considered more versatile. A metal analogue that does not transfer materials to the surface of the clay is also suitable. Suitable improvised means include hairspray bottles, tubes, uncut glasses, glass bottles and smooth, even packaging from round things. |
| Toothpicks | They will be needed to create small depressions to imitate the nose, mouth and other facial features. They can be used horizontally to roll the cuts on sausages. After baking, they can be used to make holes if their diameter does not exceed 1-2 mm. |
| Non plastic stacks | These materials are needed for figurative, sculptural and artistic modeling. |
| Metal forms | This is a part of decorative art, without which it is impossible to create quick and easy decorations. Textured sheets of rubber and silicone are also easier to cut with metal cutters. |
| Decor | For decoration you can use buttons, metal caps, pendants and chains. |
| Pastel, skeleton leaves, shadows and glitter | These materials may be needed for various decorations. |
| Foil | Typically, it should be used to form a frame when making mugs or dolls. To avoid the weight being increased by the clay, wooden beads can also be used as a base. |
Polymer clay mugs sometimes require a bright white color, which is difficult to achieve. When working with "pure" color, you need to use gloves and a white sheet of paper. Periodically, your hands need to be wiped with wet wipes. Then the fluff of the particles will not get on the white mass of clay. Also, an important point is the process of obtaining clay that is comfortable in softness for modeling.
To prevent it from drying out, you need to use the following materials:
- cream, vaseline – for heating polymer clay;
- softeners – chemical components to replace Vaseline if the clay is fragile;
- water and paints – to obtain solid material.
If you add Vaseline to a dense layer of material, the molding will not bake. To do this, you need to add softeners that promote uniform softening of the material before drying. It is best to use Moldmaker - a plasticizer for making clay and polymerizing finished raw materials.
To test new materials, the following quality control method should be used:
- The clay needs to be softened. If it "flows" in your hands, you should mix it with a hard type of clay.
- To obtain a homogeneous mass, you need to leave the clay on a white sheet for 2-3 hours.
- If the paper is soaked with fat, the clay is ready for use.
- If, when mixing the clay with paint before starting to sculpt, it becomes soft and sticky, it can no longer be worked with.
By following simple recommendations, you can learn how to make beautiful things, decorate mugs and create unusual decorative items.
Master classes
A plastic mug can be created using stencils, or simply decorated with polymer clay. It allows you to create unusually shaped decorations that are heat-resistant and adhere to the surfaces of different mug materials.
Making Mug Decor - Ruffles and Frills
Any decorations can include decorative items that are prepared in several stages. Almost everywhere and in all products there are wavy fragments, ruffles and frills.
To make them you will need:
- polymer clay "Fimo" or an inexpensive analogue;
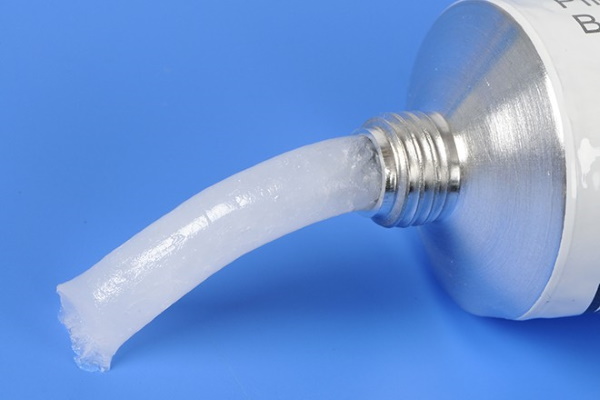
- Scalpi gel for whitening all shades;
- Vaseline after baking;
- acrylic or artistic varnish to cover the color;
- glue for polymer clay;
- air grill or oven;
- acrylic or stained glass paint;
- sandpaper for grinding;
- glitter and decorative elements – optional.
Liquid plastic "Scalpi" is needed for mixing with polymer clay. It allows you to whiten some colors, giving them richness and brightness.
To make a frill, follow these steps:
- Polymer clay requires warming up. It is enough to leave the part to work at room temperature for 2 hours.
- Using a rolling pin, roll out a portion of the clay to a thickness of 0.1-0.2 mm.
- On one side, the clay needs to be "rubbed" using a stack with a round nozzle. When pressed, the clay will curl into a wavy detail.
- For decoration, you can use water-based paints, but with the addition of acrylic.
- First, you need to dry the part, and then duplicate the painting with paints, if any.
You can use an air grill or oven to dry. The clay should be dried for 20-40 minutes at 110 degrees. The finished pattern can be glued to attach it to the cup.
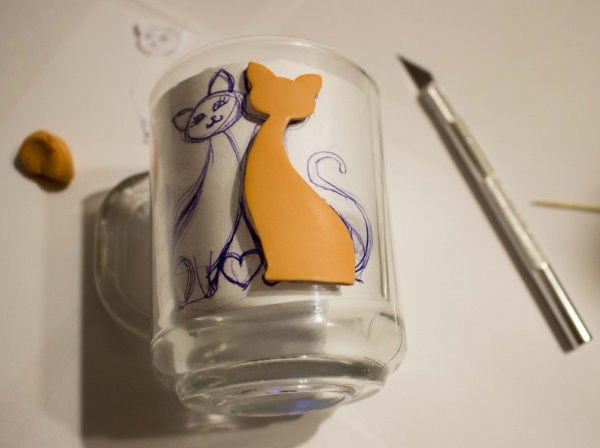
Polymer Clay Decorating - Cats
Polymer clay is a very beautiful and unique material, however, it still remains dangerous for humans, so it is not necessary to create personal items from it. The raw material is best suited for decoration.
To create the decoration you will need:
- polymer clay in different colors;
- a blank or printed sketch;
- cup;
- nail polish remover;
- rolling pin or a special clay roller;
- stacks and toothpicks;
- mock-up knife;
- epoxy glue or one that is not afraid of water when diluted.
The first step is to create a sketch. You need to draw it by hand or print out the finished version.
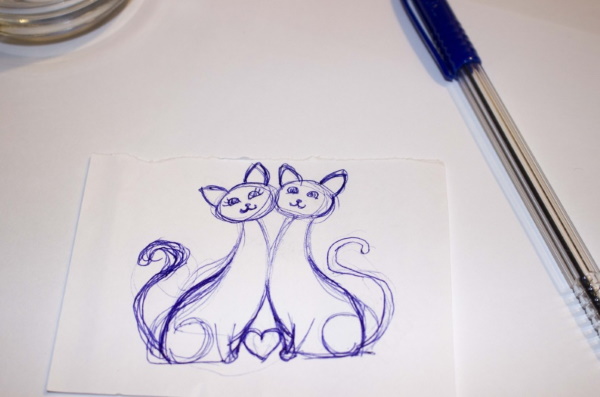
The finished version needs to be attached to the mug, and it should be noted where exactly the drawing will be located.
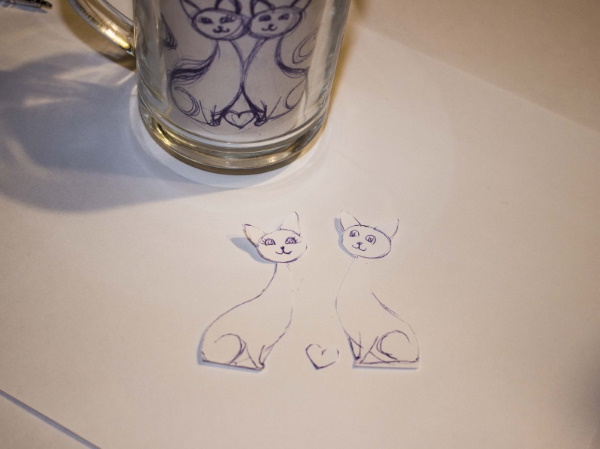
Then you need to cut out the pattern:
- Using a rolling pin, roll out the polymer clay pieces. You can take different shades.
- Using a knife, you need to cut out figures from polymer clay, placing the sketch on top of the raw material.
- The finished clay parts need to be placed on the mug to understand the approximate arrangement of the items.
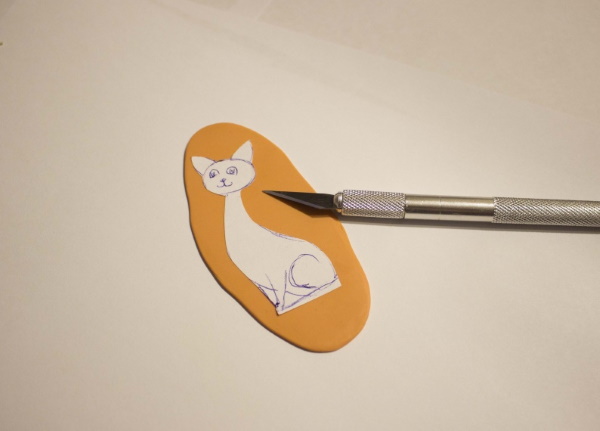
- Next, you need to create a decorative sketch for future cats.
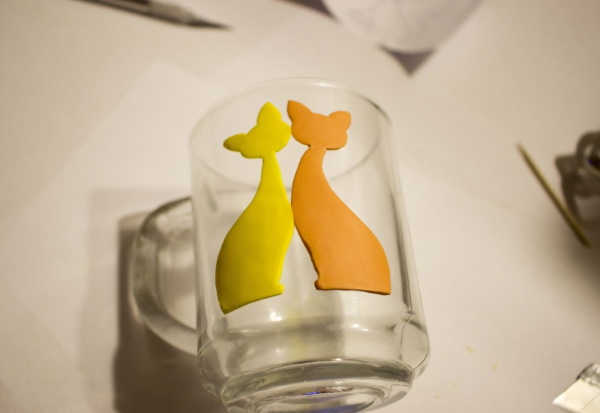
To work with polymer clay you need:
- Using a stack with a ball-shaped head, you need to make indentations under the eyes and ears.
- Using a scalpel or toothpicks, you need to press out indentations according to the sketch to form the paws and tail.
- Separately, from white clay, you need to cut out parts of the "half sun" to create the eyes. Small parts need to be applied to the colored base of the body. Using the same principle, you need to make the iris so that the eyes turn out colored.
- The nose should be made from a small ball, squeezed at the base, where the nostrils will later be.
- The muzzle should be decorated with black "threads". They should be created from thin round stripes.
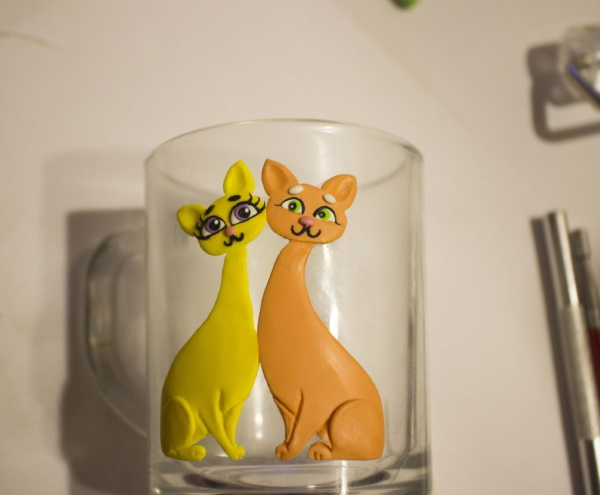
To create decorations, you can use different colors and forms of decor. The final stage will be the process of imitation of wool. To do this, you need to draw a toothpick from top to bottom, creating stripes with indentations. Visually, the wool will look the same as imitation tree bark. Dry the polymer clay according to the instructions indicated on the packaging by the manufacturer.
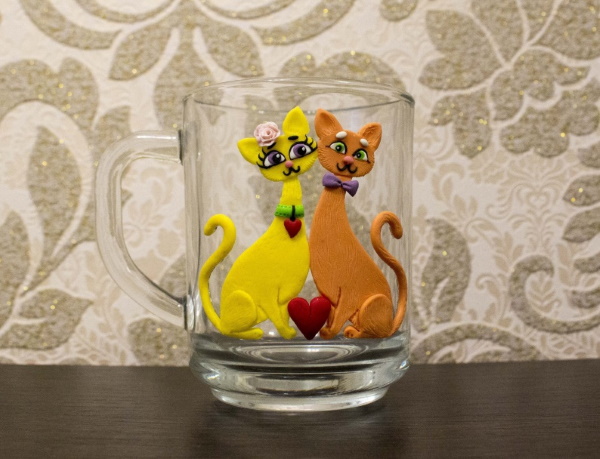
Polymer clay mugs need to be cooled before removing the decorative pieces. The surface needs to be wiped with alcohol or nail polish remover. Epoxy glue needs to be applied to the back of the decor, and the figures need to be put back on the cup to secure them. The product can be washed 24 hours after the glue has set.
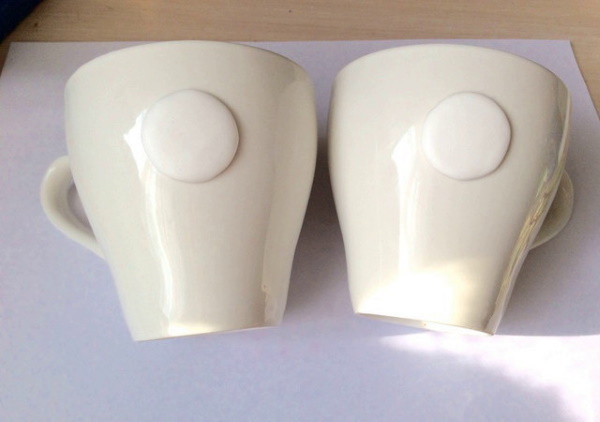
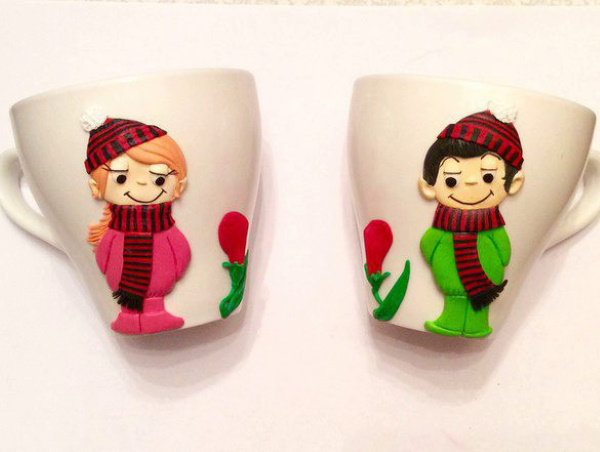
Decorating a mug with characters from the "Love it`s" series
This is what the workpiece will look like.
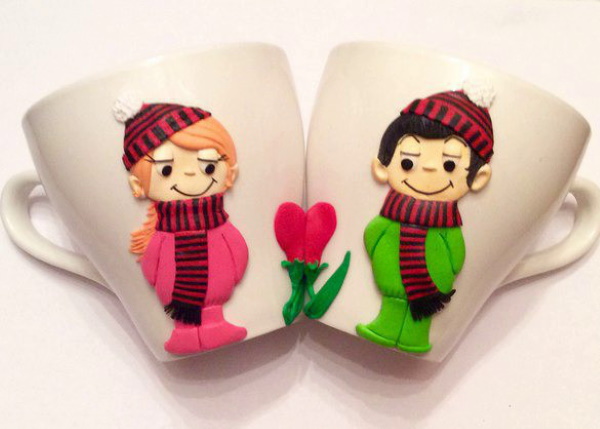
To create this decor you will need the following materials:
- pastel beige and flesh tones for the process of toning details;
- polymer material of red, black, green and white colors;
- stacks with spherical attachments;
- circle shape with a diameter of up to 2 cm;
- knife;
- needle;
- glossy varnish;
- rolling pin or roller for rolling out clay;
- white cups.
First, you need to treat your hands with an antiseptic and warm up the clay at room temperature.
The work first involves a process using white clay:
- You need to roll out a layer with a diameter of 2-2.5 cm - 2 pcs.
- Next, you need to put the layers on the cups. These will be the characters' faces.
- Using pastel, you need to tone the faces with a beige shade so that they turn out natural. To do this, you need to scrape off the pigment with a knife, then sprinkle it on the finished circles.
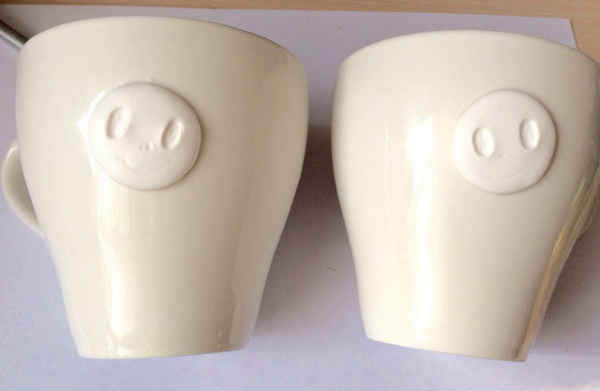
- Using a knife, you need to make indentations for the eyes and eyebrows.
Using a stack, you need to form noses; make nostrils with toothpicks or a needle.
For the girl you need to make hair:
- Orange polymer clay will serve as future hair. You need to make 2 drops, then flatten them and form side parts to imitate bangs.
- You need to create ears from balls of white clay. To make the hair textured, you need to draw a needle along the texture of the clay.
For a boy:
- You need to make black hair - the bangs will also have a relief, the thickness of which will be 0.1-0.2 mm.
- The hair should be placed on top of the head and the fingers should be used to smooth out the structure area at the points of the overlay.
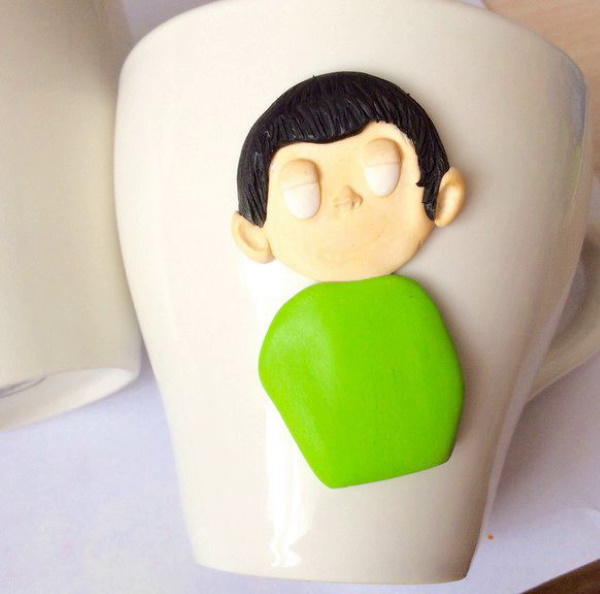
The boy's body can be made from green clay. Using your fingers, you can form a finished figure of irregular arbitrary shape. Using a knife, you can draw the torso, arms, and legs.
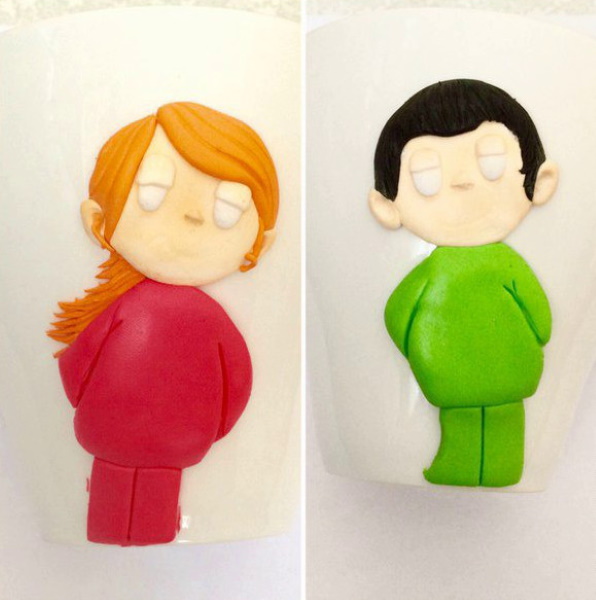
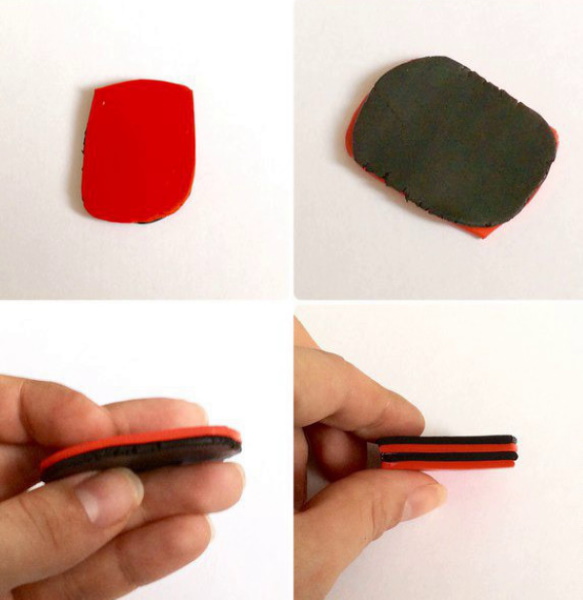
The next step is to create a scarf:
- You need to roll out red and black clay, connecting the colors, alternating tiers.
- The resulting pattern must be divided into several parts along the direction of the flower lines.
- Each piece should be placed around the neck and along the body, simulating a falling scarf.
The hats need to be made in the same way. Pompoms can be made from white polymer clay, having previously given them the shape of a cone.

You can use black clay to decorate the face. Roll out a thin sausage and outline all the nuances of the facial features. For a girl, you can make eyelashes separately, and for a boy, the smile area.

The finished plastic craft must be dried for 35 minutes at a temperature of 110 degrees. You can also additionally make flowers from red clay, which are present on the manufacturer's chewing gum label.
After baking and cooling, you need to detach the decor from the cup. The area where the patterns were located needs to be disinfected and degreased. You need to glue the decorative elements on jewelry epoxy glue. The result should be fixed with glossy varnish. The product needs to be painted with a thin layer.
Making an owl-shaped decoration
This is what the finished version will look like.
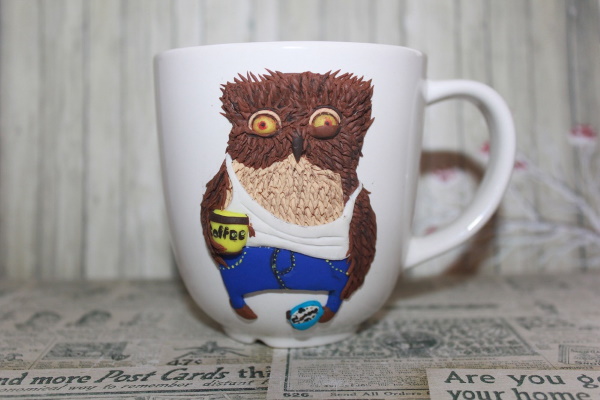
To work on this master class you will need the following elements:
- roller or rolling pin;
- stationery knife;
- clay varnish;
- acrylic pigments of black, yellow, red colors;
- jewelry glue;
- scissors;
- clay of blue, light blue and white colors;
- clay of brown shades;
- stationery knife;
- cup;
- needle;
- alcohol or antiseptic;
- sketch.
Polymer clay mugs should be pre-treated with alcohol to ensure the surface is clean and degreased. A sketch should be printed or drawn by hand on a sheet of paper. The decoration should be 3-4 cm below the edge to avoid contact with the skin of the lips and drinks. The sketch should be cut out and its edges should be marked on the mug using a CD marker or pencil.
Next you need to create the body of the future owl:
- Roll out a layer of blue polymer clay to 3 cm.
- From the beige color you need to create a layer with a diameter of 2-2.5 cm.
- From the light brown color you need to make a layer up to 3 cm in diameter.
- In the order of "brown top, light brown middle and blue bottom" you need to lay out all the clay parts.
- All the details need to be outlined with a toothpick and cut out with a knife, separating off the excess material.
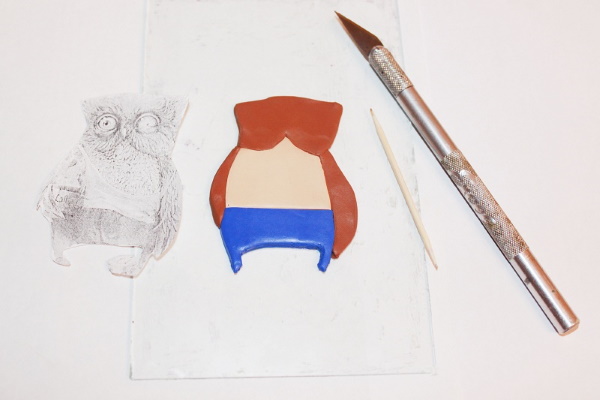
Similarly, you need to cut out the remaining parts and fragments of the future owl. For this, you need to use beige and light brown clay.
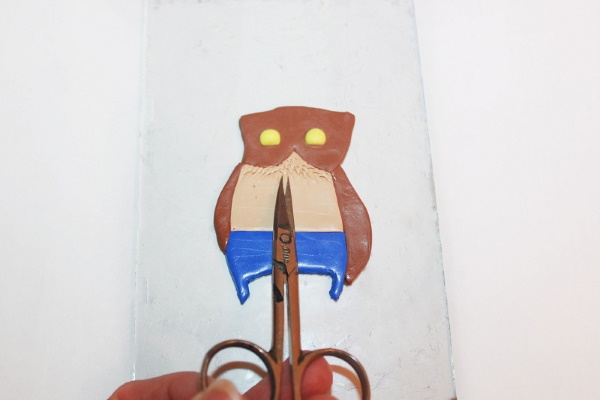
From yellow clay you need to make round eyes, press a depression with a stack, and insert the eye into the center of the niche. Using scissors, you can give the owl relief in the neck area.
In the structure, the cuts made with scissors will look like natural wool, imitating owl feathers. The same should be done with the head made of brown clay. The resulting workpiece should be put in the refrigerator for 1-2 hours.
Next, to decorate, you need to complete the following steps:
- From black clay you should roll threads, creating eyelids from them.
- From a thin layer of white clay, you need to cut out a T-shirt for the future animal using the same principle (based on the sketch).
- The white blank should be placed directly on top of the relief pattern.
- To make the T-shirt look real, use a toothpick to make folds.

Roll a flattened ball out of brown clay to represent the owl's beak.
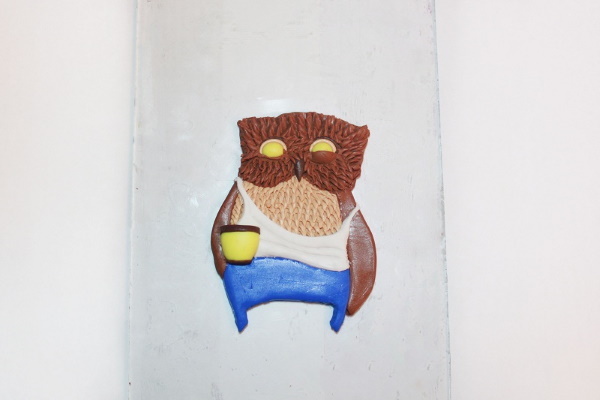
To create a cup, you need to mold a ball from yellow clay, make a hemisphere by separating half of the material. You can decorate the edges of the cup with stripes of brown clay.
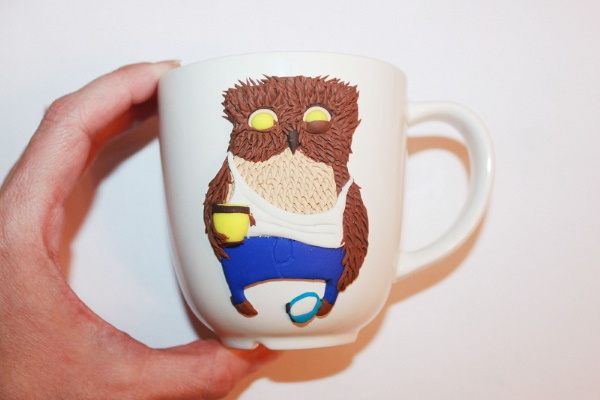
Slippers can be made from blue clay by creating a sphere and placing the white part of the raw material in the center. The finished product should be put in the freezer for 20 minutes. When the material warms up to room temperature, you need to bake the bowl with the decor at a temperature of 120 degrees for 30 minutes. After cooling, the clay becomes more fragile. It should be separated from the bowl to perform detailing with paints.
Based on the sketch, you can draw inscriptions and other small elements, such as eyes, eyelids and stitching lines on jeans. The finished model should be glued using epoxy glue.
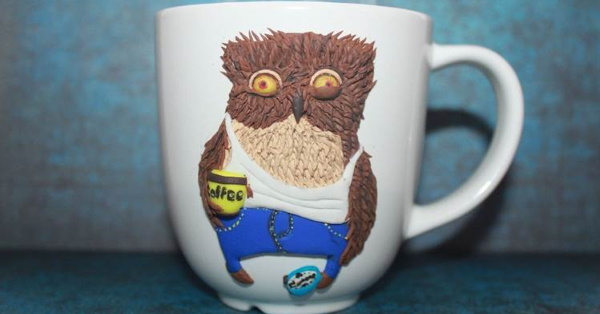
To make the work look natural and beautiful, you need to use a matte varnish to cover the shades. And after a day, the mug can be used. It is worth remembering that such dishes cannot be washed in a dishwasher. It is advisable to avoid contact with detergents and abrasive sponges. For tea, you can pour boiling water inside such a mug, but do not heat it in a microwave oven.
In the process of making decor for mugs, it is worth considering the peculiarity of using raw materials based on polymer material. It is not recommended to clean and wash clay that was painted after drying. In order for the drawing and decor to last longer, it is necessary to consider the properties of dry clay - it "does not like" temperature changes, rough materials and exposure to chemical compounds.
Video about making polymer clay mugs
One of the options for decorating a mug with polymer clay: