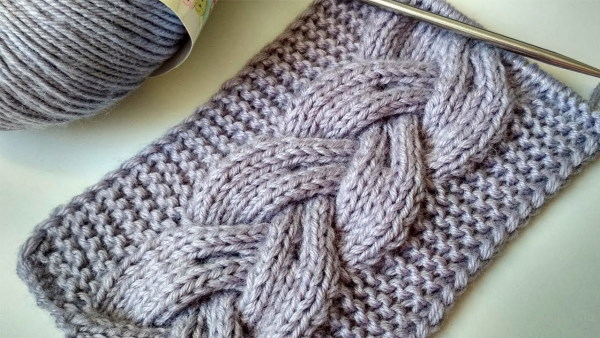
At the initial mastering the art of knitting You can try to work on the technique of creating a braid pattern using knitting needles. Below you can see simple, detailed diagrams and descriptions of how to make a pattern on any clothing step by step.
Necessary tools and materials
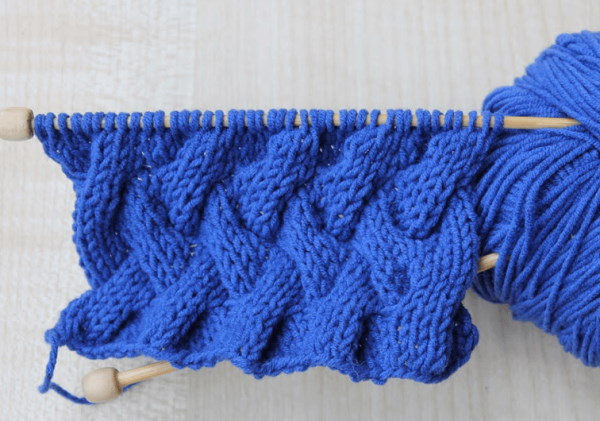
A braid with knitting needles (not only experienced but also beginner craftswomen can knit) can be created from 2, 3, 6 or more loops. In this case, each pattern will be different, which allows you to create different patterns on knitted items.
To create the ornament, you will need additional knitting needles, pins, and thread material. These tools and materials include the following:
| What you will need | Peculiarities |
| Special knitting needle | The tool in the center should be slightly curved. With such a knitting needle, it is permissible to easily knit a braid and strands. However, the additional tool, unlike the main one, should be smaller in size so that the pattern has a neat appearance. In the absence of a special knitting needle, it is permissible to use a pin intended for knitting. |
| Yarn | The thread material can be of any shade. The main thing is that the yarn is of high quality and durable. |
Schemes with description of works for beginners
The braid with knitting needles (it is recommended to knit the pattern with strict adherence to the diagrams) is considered a universal pattern, the use of which is possible in the creation of the following adult and children's clothing:
- jumper, pullover, sweater;
- coat, jacket, vest;
- dress, cardigan, sweater;
- bedspread, blanket;
- snood, scarf, hat.
 When creating a pattern, it is necessary to move the loops to the right or left side, in rare cases directly from the middle to the side. Braids knitted with a knitting needle will be obtained by alternately placing the elements in one and the other direction. However, it is also permissible only in one. Knitting using complex weaves is called creating harnesses, but the principle of work will be similar.
Knitting a braid with knitting needles is considered a painstaking process that requires accuracy and attention, but does not require the use of complex technological techniques. The patterns will be one-sided, so they are easy to knit in a circle and with a turn of the product.
To knit a pattern using knitting needles, you can choose the following types of braids:
- with openwork;
- with division in the center of the pattern by purl elements;
- with complex interlacing of some groups of holes in the form of a "basket" pattern;
- wide or narrow from the front elements on the outside.
It is permissible to knit the products completely with a braid pattern. For this, the patterns must be placed on the purl surface so that the knitting has a more pronounced relief.
Knitting a braid pattern goes well with the following types of knitting:
- with stripes of elongated front elements on a reverse background, arranged vertically;
- with a diamond;
- with other braids of varying complexity;
- with small uniform ornaments in the form of confusion.
The work on the design of the braids will be carried out equally easily from the bottom up and from the neck down. At the same time, there are no restrictions that concern the thread material and its shade.
Simple braid
Beginners are advised to first familiarize themselves with the technique of creating a simple braid. For this pattern, it is recommended to replace the auxiliary knitting needles with a regular pin to make it easier to work.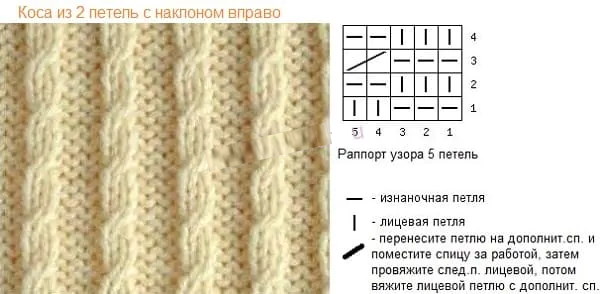
Step by step instructions:
- Make a pattern of 8 elements. For the sample, dial 14 holes, where 12 elements will be for the braid and frame, 2 - edge.
- For 1 row, cast on 2 purl, 8 knit and 2 purl elements.
- Rows 2-4 knit as the knitting looks. Knit the front loops over the front loops, and the back loops over the back loops.
- For the 5th row, cast on 2 purl holes, transfer 4 elements without knitting to an auxiliary knitting needle, leaving them in front of the fabric. Make the next 4 face holes. During knitting, there should not be a large drawthrough between the loops. Transfer 4 elements from the auxiliary tool to the left knitting needle, knitting them as faces. As a result, the loops should cross with a slope to the left side.
- Do similar manipulations for the remaining rows.
From 6 loops
A braid with knitting needles (the ornament must be knitted on a stocking stitch, so that it has a brighter appearance) can be created from 6 elements. This pattern is also called 3 by 3. It must be knitted as a pattern of 4 holes, but it is necessary to shift not 2, but 3 loops.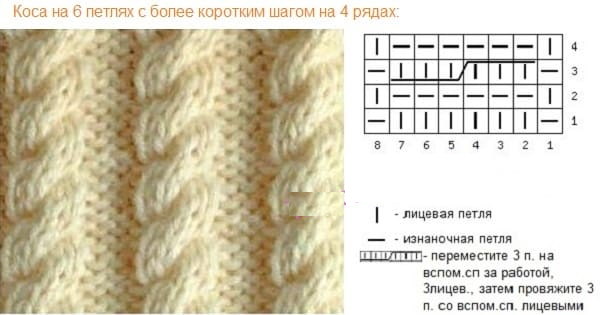
Step by step instructions:
- For the sample, make a number of holes that will equal 6. Make several elements on the sides of the pattern so that it is easier to see.
- Knit rows 1 and 3 with knit stitches.
- 2, 4 and 6 rows are created from purl holes.
- For row 5, slip 3 element onto an additional knitting needle in front of the fabric. Make 3 front holes by knitting 3 front elements from the additional tool.
Volumetric pattern
A voluminous pattern of braids knitted with knitting needles will look impressive and beautiful on any clothes.
Scheme with description of work:
- Cross 4 elements to the left side, removing 3 holes on an additional tool and leaving in front of the fabric, make 1 element purl. After with an additional knitting needle make 3 loops front.
- Cross 4 holes to the right side, removing 1 element to an additional tool and leaving behind the canvas, make 3 parts as front ones. Make 1 element from the auxiliary tool as purl.
- To the right side, cross 5 loops, removing them to an additional tool and leaving 2 holes behind the fabric, 3 - make them face. After 2 elements with an additional knitting needle, knit them with purl stitches.
- Cross 5 holes to the left. To do this, remove 3 elements onto an additional knitting needle, leaving them in front of the product, purl 2 elements. Knit 3 holes from the additional tool as faces.
- To cross to the left, remove 5 elements to an additional tool, leaving 3 holes in front of the fabric, 2 - make them face. Knit 3 elements face from an additional knitting tool.
- To cross 5 front elements to the right, leave 2 holes behind the fabric on an additional tool, knit 3 as front ones. Make 2 parts front ones from an additional knitting needle.
- Cross 4 parts to the left. To do this, remove the additional tool and leave 2 holes behind the fabric, make 2 front ones. After 2 elements with an additional knitting needle, knit.
- Cross 4 parts to the right side. To do this, remove to an additional needle and leave 2 holes behind the work, make 2 front ones. Then make 2 elements front ones with an additional tool.
- To cross 4 elements to the left, remove them to an additional tool and leave 2 holes in front of the fabric, make the next 2 purl. Knit 2 parts from the additional needle as faces.
- To the right side, cross 4 elements, removing to an additional tool and leaving 2 holes behind the work, making the next 2 front ones. From an additional needle, knit 2 holes with purl.
- For crossing to the left, remove 5 pieces onto an additional needle and leave 2 holes in front of the product, make 3 as front ones. Knit 2 pieces from the additional tool as front ones.
- To cross 5 front elements to the right, leave 3 holes on the additional tool behind the fabric, knitting the next 2 elements as front ones. The 3 elements from the additional needle must be front ones.
Double braid
Women's scarves are considered a fashionable, practical detail of the wardrobe and image. Soft products made of cashmere threads perfectly harmonize with an elongated down jacket and coat.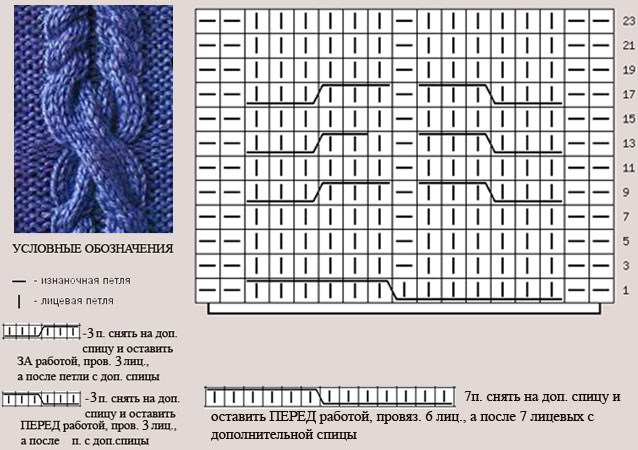
You can knit a double braid using knitting needles by following the following pattern:
- Cast on 36 stitches using the main knitting needle in the usual way.
- For rows 1 and 5, cast on 3 knit holes and 3 purl holes, continuing similar manipulations to the outer 3 holes. Knit the last ones together with one yarn.
- Row 2 should be done with stocking stitch.
- For the 3rd row, knit 3 front elements and 3 back ones. Remove the next 3 holes on an additional knitting needle, knit 3 back holes again, returning the removed parts. Knit the last ones using the front method.
- Knit the next row in the same way as the previous one, but remove the pattern loops to the right.
- Continue working according to the pattern until the canvas is finished.
Round drawing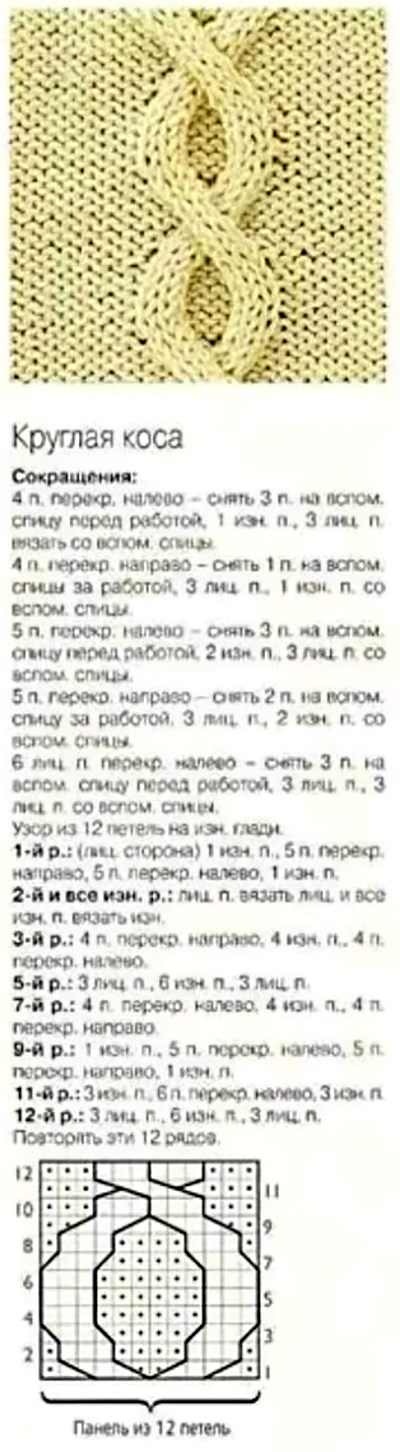
To create a round braid pattern, it is recommended to adhere to the following scheme, consisting of: 12 pieces on the back surface:
- 1 row should be the front side. To do this, knit 1 purl element, cross 5 holes on the right side, the next 5 on the left side. Then make 1 purl element.
- For the 2nd and all purl rows, knit the front loops as front loops, and purl the back loops as purl.
- For the 3rd row, cross 4 elements to the right side, make 4 purl holes, crossing 4 parts to the left side.
- For the 5th row, make 3 front, 6 back and 3 front holes.
- For the 7th row, cross 4 holes on the left side, make 4 purl elements, crossing 4 loops on the right side.
- Row 9 consists of 1 purl hole, 5 elements crossed on the left side, 5 elements crossed on the right side and 1 purl loop.
- For row 11, knit 3 purl holes, cross 6 elements to the left side. Make 3 purl parts.
- Row 12 consists of 3 front holes, 6 back holes and 3 front elements.
- Repeat all rows again.
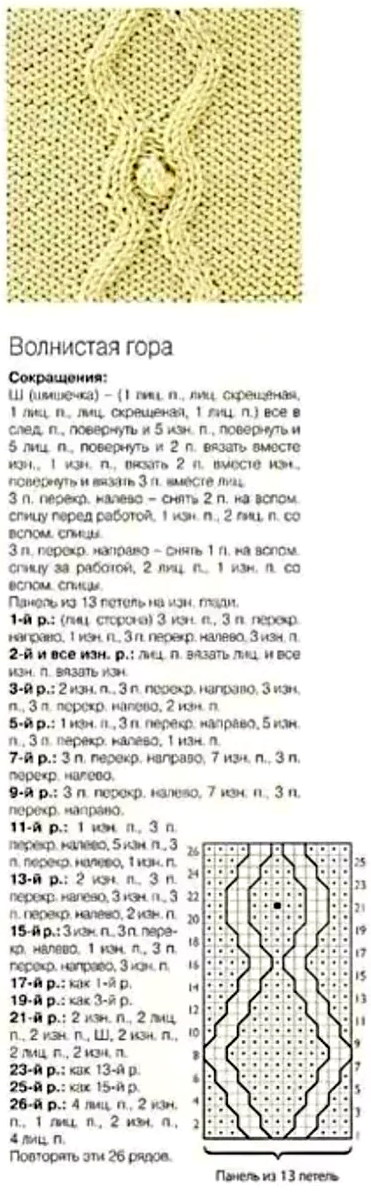
Wavy Mountain
A braid with knitting needles (it is better to knit the pattern on warm clothes in the form of a sweater or vest) can be designed in the form of a wavy mountain.
To create a panel of 13 elements on the purl stitch, you need to do the following:
- For 1 row of the front side, make 3 purl holes, crossing 3 parts to the right side. Make 1 purl element, cross 3 loops to the left side and make 3 purl holes.
- For the 2nd and all purl rows, knit the front elements as front elements, and purl the back elements as purl.
- Row 3 consists of 2 purl holes, 3 elements crossed to the right side, 3 purl holes, 3 loops crossed to the left side and 2 purl elements.
- For the 5th row, knit 1 purl element, cross 3 pieces to the right side, make 5 purl holes. Cross 3 loops to the left side, making 1 purl element.
- For row 7, cross 3 pieces to the right side. Make 7 purl holes, crossing 3 pieces to the left side.
- For row 9, cross 3 holes to the left side. Make 7 purl elements, crossing 3 parts to the right side.
- For row 11, knit 1 purl element, crossing 3 elements to the left side. Make 5 purl holes, cross 3 parts to the left side and make 1 purl element.
- For row 13, make 2 purl holes, crossing 3 pieces to the left side. Knit 3 purl loops, cross 3 holes to the left side and make 2 purl elements.
- Row 15 consists of 3 purl loops, 3 holes crossed on the left side, 1 purl element, 3 loops crossed on the right side and 3 purl parts.
- Row 17 corresponds to row 1.
- Row 19 corresponds to row 3.
- For row 21, make 2 purl holes, 2 front holes, 2 purl holes, a bobble, 2 purl, 2 front and 2 purl elements. To create a bobble, make 1 front, crossed front, 1 front, crossed front and 1 front element, knitting into the following holes. Turn, make 5 purl elements, turn again, make 5 front holes and turn. Knit together purlwise 2 holes, make 1 purl loop, knit the next 2 holes together purlwise, turn and knit together 3 front elements.
- Row 23 corresponds to row 13.
- Row 25 will be similar to row 15.
- For row 26, knit 4 front, 2 back, 1 front, 2 back and 4 front elements.
- Repeat all rows again.
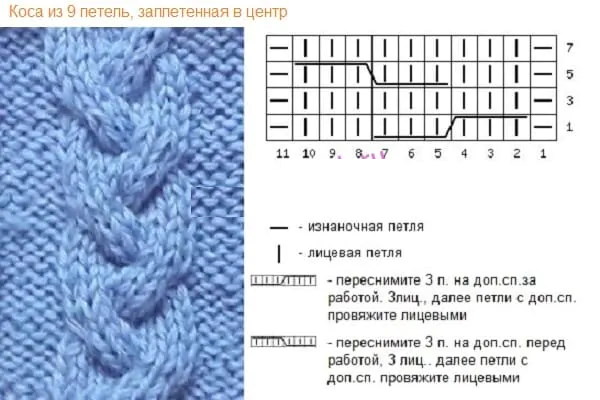
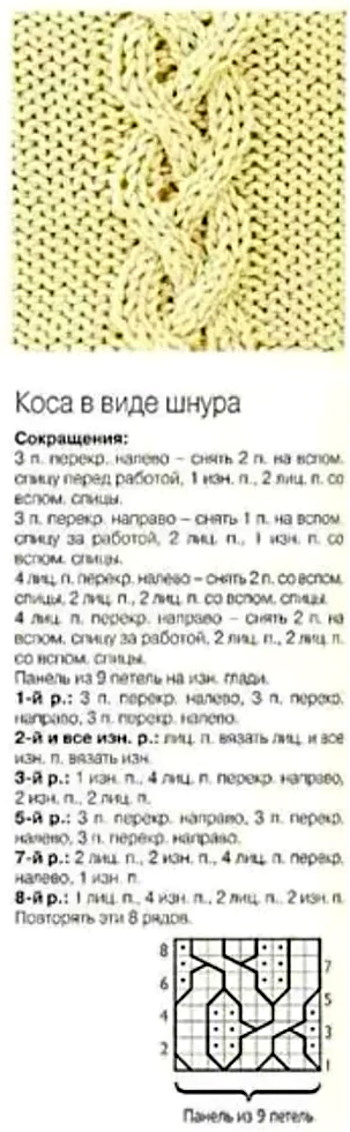
Cord-shaped braid
To create a cord braid pattern, you need to create a panel of 9 holes on the back surface.
To do this you will need:
- 1 row consists of 3 holes crossed on the left side, 3 elements crossed on the right side and 3 loops crossed on the left side.
- For the 2nd row and all other purl stitches, make the face holes face-on, and the purl stitches purl-on.
- For the 3rd row, knit 1 purl element and cross 4 front holes to the right side. Make 2 purl loops and 2 front elements.
- For the 5th row, cross 3 elements on the right side, cross the same number of loops on the left side. Cross 3 parts on the right side.
- For the 7th row, make 2 front holes and 2 back holes, crossing 4 front elements on the left side. Then make 1 back loop.
- Row 8 consists of 1 front, 4 back, 2 front and 2 back holes.
- Repeat all the listed rows.
Braid with interception
To create a braid with an interception, it is recommended to adhere to the following diagram with a description:
- Row 1 is considered the front side, therefore it consists of 8 front holes.
- Row 2 consists of 8 purl elements.
- For the 3rd row, initially cross 4 loops on the right side, then cross 4 parts on the left side.
- Row 4 consists of 8 purl holes.
- Knit rows 5-8 similarly to the first four rows.
- For row 9, knit 8 front holes.
- Row 10 consists of 8 purl elements.
- For row 11, cross 4 elements to the left side and cross the same number of loops to the right side.
- Row 12 consists of 8 purl holes.
- Rows 13-16 will be similar to rows 9-12.
- Knit 16 rows again.
Secrets for Beginners
Secrets of knitting for beginners:
- To create a certain width of the braid, it is recommended to select yarn that will match the selected parameters of the pattern. For example, if the pattern is wide, the thread material should be thick and fluffy. To create a thinner pattern, it is preferable to choose cotton yarn.
- When knitting such a pattern, it should be taken into account that the product will narrow upon completion of the work. In this regard, this feature must be taken into account when purchasing yarn and counting loops.
- The pattern will always have only 2 directions. The auxiliary knitting tool is used to correct this pattern. If the braid is placed at the back, the tool should be directed to the right. If the pattern is at the front, then the knitting needle should be directed to the left.
- Sometimes it is not possible to purchase the exact thread model that was used in the pattern, but the length of the yarn should always correspond to the size of the thread material that was indicated in the instructions.
- It is recommended to initially knit a sample measuring 10x10 cm. On a cardboard template in the center, it is necessary to make a square window measuring 10x10 cm. After 2 parts can be connected together to make it easier to count the number of rows and loops.
The braid is considered a good idea for any knitted clothing. This pattern is universal, so it is suitable for women, men and children. At the same time, there are many varieties of the pattern, which allows you to choose the ornament that you like best. The braid with harnesses is ideal for knitted models in the form of pants, vests, booties, dresses, sweaters, mittens, cardigans, scarves, sweaters and hats.
Video about knitting braids with knitting needles
Knitting a braid with knitting needles: